Lesson Info
4. Advanced Creative Editing in Photoshop
Lessons
Lesson Info
Advanced Creative Editing in Photoshop
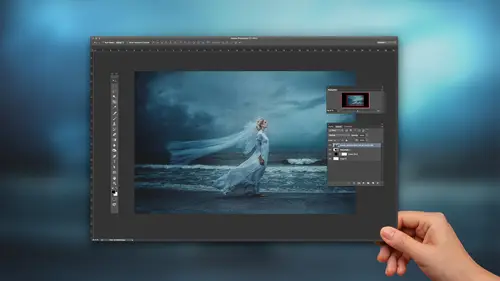
Let's actually do a black and white picture. Show you guys my process for that. For this picture, we're gonna really try to make it have like a film quality look. So, old school. Alright. So first things first. I messed up when shooting this. I really don't like this, this corner here. So I'm just going to crop this, here. I'm gonna close the crop tool, and I'm just going to rotate, right there, just so that it, you know, lines the picture nice. And I think Photoshop is default set to delete the crop pixels, but I turned that off, because I want to show you here, when I click enter it makes it a layer so if I click this is still the dimension of the picture. If I want to move this picture over a little bit, I can. Of course we have the background there, but let me show you. If I were to do that same thing go to crop, and then delete crop pixels. I don't have the ability to move the picture anymore. It is what it is. So, let me go back do that the way I like to. So, I really want this p...
icture to be centered. A little bit more centered than that, so of course, if I do that, I'm gonna start getting some of that transparent background in the back, so let me show you a way I use to fix that. Just go into duplicate the layer, itself. I'm gonna go down to the bottom layer. And this wall isn't too hard to duplicate. So now it's gonna start nudging over with the arrow keys on your keyboard. So if I were to hide this layer, you would see that it's further over. When I bring it back, it's how I want it. So, and I'll make a mask here, on the top layer, go to my brush and erase that layer itself just a little bit, and wah lah. Looks like nothing ever happened to the a, the picture was centered all along. Alright. So that's a good position for the picture, I'd say, so let's continue. For my black and white conversions, if anybody's used color filters for black and white, like there's blue filters, there's infrared filters, and I think yellow and green for black and white, this effect is kind of what I do to, instead of actually using and spending lots of money, for those filters, I'm gonna show you what you can do, because each one has it's own effect. If you think about infrared, like if you take a picture of a landscape and trees and everything, the leaves will become white, and the grass white, they sky potentially black, and everything like that. So each filter has it's own effect, so let me go to my hue in saturation, here. We're gonna pretend that I shot with a infrared filter. I'm gonna bring the saturation up a whole bunch. Cool. And now, I'm going to use the channel mixer, here, and this is generally what I use for my black and white conversion, because yes, you have a lot of freedom in the black and white, but I kind of like the effect more in the channel mixer here. So let me click monochrome. I'm gonna bring down the reds that we just, play it here just a little bit, bring them up just a tad. Bring out the blues, and let's see what happens here. Obviously we have that red channel underneath, but if I start to if I bring down the capacity, you can see that the effect that we have is kind of lost. I kind of like that contrasty look, so let's see if we actually change the color. You can see the varying effects that that has so, we're gonna keep this red for now. Very cool. Alright, so it's early in the game here, but I'm still, I'm gonna make a stamp visible layer already. And what I did was I just hit the top layer because I'm gonna make another black and white layer here, so this time, let's actually use the black and white adjustment tool. And we'll keep it just like that. That's the basic black and white there, but what I want to do is bring down the tones here. Just make it a little bit darker, and you'll see what I'll be doing here. Alright, so let me actually add one more curve layer. So let me do a stamp visible layer of that. And delete these. And now with the top layer here, I'm gonna make a mask, and just start erasing the area that I don't want, so I can have some more, maybe some more detail and shadow. Let's change the path of the brush so the effect isn't as severe. I'm just going into areas that I want to have a little bit more shadow. Let's effect the wall behind her, here. Let's see what that looks like. So, again, that's the layer underneath, and this with the layer on top, with just some portions of it erased. So then add a little more. Alright, so I want this picture to have a film-like quality, so when you think film, especially like old school, you think like grain and whatnot, and so, let's add some of that. Alright, so, I have some textures here. Let's see, let's use this one. This was taken, like, in my garage . I think it looks like a dirty, like dusty rug that I just put up against the wall and then just took a picture of it, and then wah lah. Alright, so let's open that. Lot's of folders open. Alright. And then we're gonna drop that onto this layer here, and let's change the blend load. We'll change the soft light. See? Just like that, we add it like that. That grainy texture. And, let me show you again. On that texture, there's light spots, and there's dark spots, but I kind of want the light spots to be on her face. So I can kind of move it, like here. There you go. So this is relatively grainy, but what if I want to add more grain? So let me merge these two layers together, really cool, and I kinda like to have the, always have the original, just in case. So, I'm gonna duplicate this again, but this time, I'm gonna add a noise layer. And if it's a black and white picture, I generally just check that to a monochromatic. If you turn that off, you'll start to see all sorts of different colors within that sylis, have monochromatic. So now we can see a little bit more grain in there, but I don't want it 100%. That's a good amount. Cool, so this looks cool, but it still could use a little bit more attention, in my opinion. So also, when you think about like old school pictures, especially if they're like really old, you've got like blurry parts of the picture, especially if it's like a faded, like photograph. You've got blurry portions, so let's add some different effects here. I'm satisfied with this, let me flatten that, this entire picture here. Alright, so let me duplicate and make a blur layer. We'll do 9%, there, and then let's invert, and we're gonna start to bring that back. And yes, we're losing some grain quality, but the last step I always do is I'm gonna add another grain layer. So let's blur the background a little. Not on her hair. Cool. It's really subtle, but I makes me feel a little bit better, when I do little things like that. Alright, so now, let's add a little more brightness to her face. So, I'm gonna use the marque tool again. Kind of like just drag that here. And we'll go, we'll use the exposure, add a little bit more. Really cool, alright. So, let me flatten this again. I'm gonna duplicate it, then add one more light grain layer here. So this time, not as severe, I'll go down to I'll say like 8%, so that it's really subtle. Alright. And last step, let's make one more vignette, around the image. We'll make this kind of cool, though. So, we're going to invert it. And let's go back to black and white, but let's tint it, so that we can add sort of like a gradual like sepia hue to the photo. Let's change the tint just a little bit. So it's real subtle. It's black and white within this region, but since we just created that additional layer on top, it's just like seeping into the picture, which I really like. So, usually, like I'll save like multiple versions of the picture, so I'd save this one, and then I'd save the black and white version, and then I kind of just debate with myself as to which one I'll actually want to share, because it's never bad to have enough, you have to have options. So, that looks pretty good. Okay. So, I'm gonna flatten this, and then this one would be ready for posting. Okay, so now, what I want to do is start from scratch, oh, go ahead. T.J., it's such a beautiful image, can we see the before and after, from where you started? <v T.J.>Okay, sure, so we'll get it roughly where it is. And that would be before and after, essentially. Beautiful, thank you. Oh, we have a question in the studio audience. So I'm just curious why you flatten your image throughout this process, just cause I always like to keep my layers just in case if I decide later that I don't like it? Yeah, I mean, again, if it's a picture that I'm not too sure about, I'll definitely save the PSD version. But if it's something that I'm really gelling with the entire time, how I kind of was with this photo, I don't necessarily want to question myself and go back and change things. You know what I mean? I don't want to give myself the option. I'm like, "I like this as it is now, so let me just flatten it and just continue." But again, like I said, if I'm not too sure, usually I'll just save the PSD and then just move on to another photo. You know, then I'll come back to the PSD on a later date and play with it a little more. But then probably flatten it at some point, once I'm comfortable.
Ratings and Reviews
Michael Halloran
Well, this dude is awesome, he knows too much! What I saw when I first watched this instruction is his manipulation of light, and he knows light and color. If you don't know Photoshop, and Adobe Camera Raw --- you will need to learn many of those functions first to follow along. TJ isn't showing you why he does certain things step by step, he is creating, and you're watching him do it. He does tell you the reason for Camera Raw is to get as much detail out of the Raw file before taking it into Photoshop, but then he does it all by eye, no histogram help, no clipping help, no sharpening reasoning ---it's all on the fly. He's a brilliant young man -- he isn't an instructor yet, because he doesn't know that he knows more than all of us already ---because it comes so easy for him. If you want to see how to create light in your landscapes and colors TJ style --- watch and learn ---more than once---if you don't know the basics of all the layers and functions ---you'll be watching this class many times. For TJ doing this live -- with no experience teaching -- that's tough --but he showed you -- and he wasn't showing off, he kept it basic mostly ---till the end. I would recommend this class, yes, with a caveat, don't think you're going to edit like TJ right away ---he's moving fast, that's why the class is fairly short. My .02 cents --