Lesson Info
3. Basic Creative Editing in Photoshop
Lessons
Lesson Info
Basic Creative Editing in Photoshop
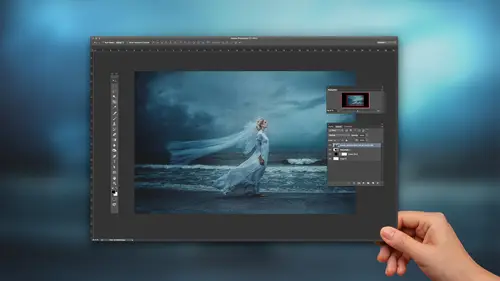
Let's start with this photo here. All right, so now I have as much information as I want, we have a lot of detail in her hair here. Let me hide these Actions. We have a lot of detail in her hair, we can see the waves pretty well, some seaweed in there. The sky is pretty well detailed. But now that we have all that information available I'm not afraid to like darken some areas of the picture and just make it a little bit more dramatic. So first things first, let's add some more light to this picture. You can tell that it's sunset for sure, but what I wanna do is mimic sunlight. 'Cause we can tell that the sun is probably like around this area. It's like the brightest point of the picture, so I wanna add some light in and make it seem like it's just a little bit brighter and have like an actual like lens flare, OK. So let's do that first. So what I'm gonna do is we're gonna make a new Curves layer here. All right. So now when I do this I'm not paying attention to the overall picture. I'm...
paying attention to the area that I'm working on. So when I bring this up we can see that the whole picture is going to be affected, but I'm only looking here. All right. And then I'm gonna change the drop-down here for the RGB, we're gonna go to the Red channel and just add a little bit more red. Mimic sunlight. And then with the Blue channel we're gonna drag down to add a little bit more yellow to that there. Perfect. Let me go back to the RGB, make it a little brighter. All right, so this picture's super washed out, but now we're going to just invert the mask here and then with my Brush, make sure it's visible, I'm gonna start painting that back. I'm just adding some of that back into her hair here, so it looks like a flare. There we go, all right. So there are some areas that I don't like, so it's a mask, so I can always erase. So let me click, for down here I'm just gonna click X, so that I can go back to the black mask, so that I can erase. I'm gonna lower the Opacity just a little bit, because I want this effect to be really gradual. And then even in her hair just a little bit. Perfect. And if I want to add a little bit more yellow or red to the picture I still can, because it's still readily available. So that's a little bit too much. Very cool. So let's look at a before and after. And that's before, there's after. We just added a little bit more sunlight into this photo. And again, I'm not sure I want it to the full 100%, I'm just gonna bring it down just a little bit just to make myself feel a little bit better. All right, there we go. OK, so now let's make another layer here. We're gonna go to the Elliptical Marquee. Again, I have it feathered to 1,000 pixels, because I want this effect to be gradual. Let me show you what would happen if I put it on zero. All right, so I'm gonna make this mask and I'm going to invert it. That's gonna be Control + Shift + I. And let's just say I wanna make a Curve layer here, so I'll click that. And you can see now that it's a pretty harsh vignette there. It looks like a frame. So that's not the effect that I want. So let's delete that and let's make this again. I inverted it, but now I'm gonna put the Feather to 1,000 pixels. So actually let's undo that, sorry. Control + D to deselect, and now we'll do that again, so that it's feathered. When it's feathered you'll see that the marquee becomes a lot smaller. All right, and now we'll invert. All right. So let's zoom in a little bit and I'm going to this time use the Exposure tool. And now we can see that the effect's a lot more gradual. I love how that looks. All right, now here's another cool thing. What if I wanna duplicate that same vignette that we just made, but use something else? So let me just, I'm gonna add the mask to selection, so what I did was, I'll do that again, I'm gonna right-click on the mask, click that, and now we have this whole thing selected again. And let's just say I want to make the outside of this image a little bit more colorful, so let's choose the Color Balance tool. Same mask was just made for a Color Balance. Adds a nice look. Very cool. All right. So when you think about a sunset, sunsets have many colors, but the primarily ones that we see are orange and purples and there's just many, so let's add some different colors into this sky, OK. So I'm gonna go back to the Color Balance tool and I'm gonna add some magentas here. I just made a new layer. And again, I'm just paying attention to the areas that I want to affect. I'm not necessarily paying attention to the entire image. All right, so let's invert that. And with our Brush, I'm gonna keep it on, eh, we'll go like 45% Opacity, just because I don't want the effect to be too harsh. I kind of just like to gradually just put the effect in. So we'll be on white for our mask. And then we're just gonna start painting some of these colors back. So I like to kind of just like go over the whole sky and then just take a step back and just take a look at what I just did and then I'll just start erasing areas that I don't necessarily want. So I'm gonna bring the Opacity down again, because I still wanna retain like that purple hue, but gradually just get rid of it in areas where I don't think it's as necessary. All right, so let's look at a before and after. Let me just actually get this out, there we go. So it's very subtle, but subtle things are what make the picture stand out a little bit more sometimes. OK, so I'm gonna finish off this picture with making a nice mat over the photo. So again, this is one of my favorite tools, the Exposure Adjustment layer. I'm just gonna darken the picture just a little bit, just make it a little bit more dramatic. And then just make like a nice matted texture here. And again, I don't want it affecting the entire photo, so I can with my mask just erase certain areas of the picture that I wanna retain, real gradually. Especially like in the sun here, or our fake sun. Very cool. So let's make a stamp visible layer. And let's get rid of all of these. Oops. And let's look at our before and after. So just in a few simple steps we created a really dramatic photo. All right, so we're gonna leave this one open, we'll come back to it a little bit later. Let's open up another photo. All right. So this time, actually we're just gonna do the, we're gonna start the same way, but we're going to actually use some overlays for this picture. But let's start the same way we started before. I'm going to make a, use the Marquee tool again, oh yes. TJ, before you start with this image can you just tell us what it is, that sort of your objective is when you look at this photo. Like what is it that you're saying, ah, I wanna change X? I'll be perfectly honest it's honestly just a feeling, like I'd say. For me, every picture is different. You know, I don't wanna get, like when I first started photography, like a lot of people like you have your awesome picture in front of you and you're automatically just like, wow, I have this, I can do this to it, I can do that to it, and I did that all the time, but then as I started to grow as a photographer I would just try to like just appreciate each picture for itself. So when I see this one I'm looking at it and obviously she stands out in the frame, like a lot, but is it enough? What I wanna do is draw my attention to like what I want them to pay attention to. Here there's beautiful foliage around her, but I think she's pretty beautiful herself. So I want people to actually see that, but still appreciate like the nature and like the scene around them. But a little bit more, just like a little more subtle. Like I'd say, so no problem. OK, so we have our Marquee tool selected. So instead of inverting it this time what we're gonna do is make a, we're just gonna leave it as-is, so that what's affected is inside this circle here. So let's make a, we're gonna use the Hue and Saturation tool, we're gonna Colorize this, and we're gonna change the color to, eh, yellow's fine. Bring the Saturation up. That's more green. And then we're gonna bring up the Brightness just a bit. Perfect. All right, so now we should be able to freely move about this sun ray or sun flare about the image. And I did that by clicking on the layer itself. And make sure you have Show Transformation tools and Auto Select selected, because if its not it's gonna be clicking in other areas that you don't want. So as long as you have this layer on top and you click on the adjustment itself you should be able to move the picture about the image freely. So for me this is a good spot, but it's not as bright as I want it to be, so I'm gonna change the blend mode. So I do that by going to Normal and I'm gonna change it to Screen, just so it's a little bit brighter and it mimics sunlight a little bit better. All right. And I think that's a good spot. But let me actually change the Saturation just a little bit and the Hue just a little. All right, so this is our before, this is our after. Just adding a little bit more sunlight into the picture. OK, so now before we continue let me grab another picture here. Oops. I'm gonna use an overlay. Now I kind of came across this by accident. I can imagine it was probably like, who knows, like a late night, probably like four o'clock in the morning, I was just editing away and I got bored. So I like to take a lot of like nature photos. So I was just like maybe it'd be cool if I just put like a nature photo into one of my portraits and change the blend modes and see what kind of effect this could have. So let me show you what we can do here. Because when you think about, this is a blurry picture that I took, when you think about like forests and like nature and trees and all that stuff, like when you look nothing is, like you've got tons of colors, you've got light areas, dark areas, and when you apply that to a picture. Let's make this a little bit wider. We're gonna change the size. You might see some distortion there, but that's not gonna really show through once we actually change the blend mode here. So let's see. So I'm gonna click Soft Light. And now the entire dynamic of the picture is gonna change. And we still have it looks like more sunlight coming into the picture. So let's see what that looks like without it. This adds a lot more drama, like I'd say. Um hm. So let's move it over to her face just a little bit more, so it makes, it flows nicely. And that's before, and after there. Very cool. All right, so I have the ability to change the Opacity if I'd like. So let's hide this one and let's see what another picture would look like, just so I can show you the different effects that nature pictures can have. Let's use, let's go with this one. Yes? Just a couple of basic questions. Fleur le Compte, what is stamp visible? What does that do? Stamp visible is going to create a duplicate of all of the, like of what you just made essentially. So if you see, I'll go back to this picture, and I'll undo. All of the adjustments that we made in this picture, Exposure, Color Balance, Curves, all of that, the stamp visible is going to basically replicate all of that, but then put it into one layer that you can like adjust essentially. Great, and one more. When you add an adjustment layer does it automatic, when you add an adjustment does it automatically make a layer? Yep, if you click it, if you add the adjustment up here it will, but if you try to, if you use the adjustment drop-down menu up here it's going to become specific to that layer that you're on. Thank you. No problem. All right. Let's see if I can find that picture. There it is. So let's throw this photo in. And obviously this one is a portrait format, the picture we're working with is landscape, so let me just rotate it. Move it over just a little. Then we'll change the blend mode of this one as well. So this is what this one looks like, adding a little bit more different feel, and then this one here. So imagine if it's like a fall, it's autumn and you take a picture of like the leaves, imagine what that effect would have on your photo itself. It's pretty cool. So I personally like this one a little bit better. So let's change, I'm gonna change the color of this adjustment here, so that was actually perfect, because I don't wanna add another layer, I'm just going to affect this layer itself independently. So let's do, add an adjustment, I'm gonna go to the Hue and Saturation. And let me actually Colorize this too. Now that just automatically changed the feel of the photo. So let's make it a little bit more warm. I'll bring up the Saturation just a little bit. Maybe bring the Brightness down just a tad. And perfect. Very cool. So I'm loving how that's looking. So let me get rid of this layer here. And now what I wanna do is add a Black & White layer and what I wanna do is add a little bit more contrast into the photo, but to do that I'm gonna change the blend mode to Soft Light. OK. And I'm gonna tint it just a little bit just to add a little bit more of a yellow hue to the photo. Looks pretty cool already. And of course, originally I wanted her to stand out, but I still want this foliage to come out just like a little bit more. So let me go to the Selective Color adjustment tool here and I'm going to find the Yellows. I'm just gonna bring them up just a bit. And also change the color. And again, I'm just focusing on the foliage, I'm not paying attention to her skin tone changing or anything like that. All right, so let's Invert. And now with the Brush let's start to bring some of that back. I can bring up the Opacity just a little bit. Just in specific areas that I think require a little bit more attention. Very cool. All right, so now let's add a little bit more of a glowy like feel to this picture. So I'm going to duplicate the layer, I'm going to blur it, Gaussian Blur. I made a shortcut for myself, it's simple, just Control + B, just to save myself time just of going up there and everything. So let's click OK. And let's click Soft Light. All right, so now again this looks cool, but it could be better. So I'm going to independently add an adjustment layer to the glow layer we just made. Let's use the Curves. All right. So let me just brighten this just a little bit. I'm gonna pull down on the highlights just a little bit, so it's not as severe. And then I also wanna change the toning just a bit. I'm gonna drag down on the Red channel just to make it a little more of a somewhat cool like hue. Very cool. And again, I'm going to lower the Opacity just a bit. Looks good. And then let's also add one more kind of like vignette around this photo. So I'm going to invert it. And let's actually get fancy, let's use the Black & White tool. All right, so obviously it's black and white, but I'm gonna change the blend mode, just add a little bit more of a, add some muted tones to the outside of the photo. It adds some contrast, but also kind of like mutes the colors just a little bit. And I have the option to tint it if I'd like, just to add more of a warmer hue, or if you're feeling crazy you can add some purple to it. It looks pretty cool actually, but we won't do that. So let's just keep it somewhat of a tan. That looks pretty good. So we'll keep it right about there. All right. And let's make another stamp visible layer, just so we can see everything that we just did. All right, and this is the after, there's the before. So we've drastically changed the feel of this image and it looks a lot more artsy now I'd say. So that's this photo. So what if we wanted to apply that same glow that we just made for this picture here. So we're going to blur that duplicate layer that I just made. Actually, hold on, yep. But let's make this pretty severe this time. Oops, nevermind, not the stamp visible layer up there. So let me actually just flatten this. All right, so I'm gonna duplicate that. Control + B for me for the blur. And if you don't have that, Command, then just drop down, and then Blur, and then Gaussian Blur. And this time let's actually instead of using the Soft Light adjustment, let's make it a Screen. All right. So now that's super, super dreamy. But let's tone that down just a little bit. So again, let's go to the Adjustments, and Curves, and let's pull down just a little bit, so that effect isn't as severe. And I'm adding a little bit more toning into it, a little more warmth. All right. You can see itself, like if you just had it just the layer itself there it's pretty interesting. But with it mixed with this layer it still adds a really nice glowy feel. And again, let's just say you don't want that effect for the entire photo itself, you can just add it back with the mask and just add the glow back into specific areas of the photo. Like the sun, just to make it look a little bit brighter. Or her dress just to make it seem like she's more of an angel or something like that. So yeah, that's a nice little trick I learned. Okay, yes? I have a couple of questions from online. One is from pure emotions who says, can you have TJ explain the custom brush that he was using to paint on the last image. This isn't necessarily really a custom brush. This is just the basic brush in Photoshop. I just have the Hardness down all the way, just so that it's really soft and like gradual when it comes to the effect that you add. This is just the basic brush within Photoshop. Thank you for clarifying for pure emotions. And then the other question from Richard W. was can you say again how you created your nature overlays? I would actually, I should have gotten into that a little bit more, so I still to this day, now that I've kind of like learned that effect, I go out into like, I have like a boardwalk in my neighborhood, and I live in Florida, so the trees are green like all year long pretty much, so I'll go back there and I'll just take intentionally blurry pictures of the foliage of the trees. And I usually go out in the morning, so that the sun is kind of like filtering through, so that I can kind of get that, like that flare like kind of in the pictures itself. And when the picture is blurry like that intentionally once you overlay it into the picture that you're working on those leaves and whatnot won't be as visible, it just kind of just overlays the picture really nice and gradually. Thank you. Yep.
Ratings and Reviews
Michael Halloran
Well, this dude is awesome, he knows too much! What I saw when I first watched this instruction is his manipulation of light, and he knows light and color. If you don't know Photoshop, and Adobe Camera Raw --- you will need to learn many of those functions first to follow along. TJ isn't showing you why he does certain things step by step, he is creating, and you're watching him do it. He does tell you the reason for Camera Raw is to get as much detail out of the Raw file before taking it into Photoshop, but then he does it all by eye, no histogram help, no clipping help, no sharpening reasoning ---it's all on the fly. He's a brilliant young man -- he isn't an instructor yet, because he doesn't know that he knows more than all of us already ---because it comes so easy for him. If you want to see how to create light in your landscapes and colors TJ style --- watch and learn ---more than once---if you don't know the basics of all the layers and functions ---you'll be watching this class many times. For TJ doing this live -- with no experience teaching -- that's tough --but he showed you -- and he wasn't showing off, he kept it basic mostly ---till the end. I would recommend this class, yes, with a caveat, don't think you're going to edit like TJ right away ---he's moving fast, that's why the class is fairly short. My .02 cents --