Lessons
Lesson Info
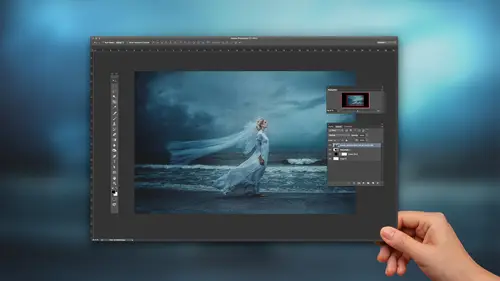
Raw Conversion in Photoshop
So here we have three pictures in Adobe Camera Raw and a lot of people like to use Lightroom for Raw conversion but just my personal preference is ah is ah is Photoshop. So, we have three different pictures. All have very different looks and today I'm just going to show you some of the tools that I use to convert my pictures. Okay, so, over here on the right, we can see that we have our basic set of controls. You've got the temperature which if you shoot in Raw this is beautiful because if you want the image to have a cool tone, you can. If you want to add some warmth to the picture, you can. You can tint it, whenever you want. We have the exposure, contrast, shadows, whites, blacks and clarity. And then we have some sharpening tools. You can sharpen you can increase the radius so it's a little bit more crisp. So we'll play with that a little bit. We'll also play with the HSL scale but we'll get to that in a second. Split toning is a fun one, and... we have lens correction you know the...
re's lots of stuff but we're just gonna focus on what we're gonna use today and then also we have the brush adjustment which is also in it's own right because I'll click that again cause you can see when I click it here, it has it's own set of controls. You can, use the exposure basically the same exact tools that we saw within the basic set of commands so it's, it's pretty awesome. And then we also have the target adjustment tool which we're gonna use a lot where if you right click, the first option is gonna be the parametric curve in which you can just drag up or down in specific areas. So, I say you wanna change like the highlights, you can. The mid tones, we could. We also have the hue. So if you wanted to change the color of the sky, you could. Or the water, will look pretty funky. The saturation you can increase or decrease and the luminesce which is one of my favorites. Alright so let's reset this to default so that we can actually get back to the basics here. Okay so when I open a photo inna, in Raw, although we have all of these, these options here, what I really wanna do is just get the most detail out of a photo that I possibly can. So, I essentially think that's what Raw is, is for. I mean all that information in the photo is retained so why not get the most out of it because if we lets just say you wanted to bring out just all the blacks in this photo here. Alright that, once we go into Photoshop, and its a JPEG we can't necessarily get that those blacks back you know so that's why I like to, I'll show you here what I like to do is, I'll bring up the shadows lets bring the blacks back to where they're supposed to be. I generally like my pictures to be somewhat, have like a low contrast. Bring up the exposure just a little bit and I'll bring the blacks down just a bit just so we have some contrast. I don't want it too too washed out. Alright, very cool and what I want to do is add a little bit more light to her head here it's a little bit dark for me so lets bring in the we'll use the brush tool and to make that smaller I'm just holding the pressing down on the right click and just dragging in to make it smaller and dragging out to make it bigger. So I wanna make this kinda big just so that the effect is a little bit more gradual. Alright so let me just click here. We can see that we have our pen now. Let me zoom in a little bit for you guys and lets make this a little bit brighter. Very cool. Let's zoom out a little bit. Very good and now I just wanna bring out a little bit more color in the sky so let me go back to the target adjustment tool and when you think sunsets you think vibrant colors so lets bring out these oranges a little bit so again I just went to the saturation and I'm just going to drag up with the colors just a little just to add a little bit more color into the photo. Very good and for me personally this would be pretty much complete. Let's move onto the next photo here and Imma generally apply the same effects that you saw with the first photo so I'm gonna go back to the basic adjustment tools here so let's lower the contrast just a little bit and bring out the shadows and I'd say we can bring up the exposure just a little but maybe tone down the highlights because this area in her hair there but I still think her face is kind of dull so let me add this brush. So Imma just brighten her face just a little bit. Just brightening it just a little bit. I'm also going to increase the shadow just a little bit so I have a little bit more detail. Alright cool. Alright so now let me go back to the target adjustment tool and what I wanna do now is bring down the luminesce just a bit like in this foliage here. Just to draw a little bit more attention to her. I'll also adjust the curve just a little bit just add a little bit more contrast and why not let's use all every tool and let's just change the hue just a little bit just add a little bit more of a little bit more green into the photo. So... with the hue tool or the target adjustment it's basically just effecting like what I have this hovered over so with the hue that you just saw me do like this is the green that it's effecting. So if I wanted to change the color of her skin she's got a horrible sunburn or make her look like a smurf or something like you could, you could do that. Alright so but I like how this looks and you know I'd be satisfied with that and now let's move onto the next photo. And I can already look at this and see that the highlights are a little bit too blown out in her hair. So let me go fix that. So Imma bring down the highlights just a bit. The exposure just a tad or actually a lot and I'll bring it down a lot and Imma bring some back bring back some light in a second here but I'm definitely going to bring the shadows up just so I have a little bit more detail to play with and I think this picture will look a little bit better with a more like warm hue. Alright. So what I'm gonna do now is add some more light to her face with using the brush tool. So let's click right about here. Alright so that's way too yellow so let's bring this down the temperature there. Bring up the exposure just a tad. Very good. And last thing, let me actually go to the curves here. I'm gonna go to the point curves so that I can make my own. I'm gonna bring up the mid tones just a little bit and then bring down the highlights just a little bit more and that looks pretty good to me. Alright so now, all three of these to me are ready to go for Photoshop but a lot of people like open the image straight from Photoshop and then or straight from Raw and then start editing immediately but me, I like to save this version just in case I want to go back and you know, touch it up again. So let's select all of these and we're gonna click save images. Alright, and I'm just gonna save em in the same location but Imma, actually we'll do a new location. We'll make a new folder for it. (Ahem) Oops and we're gonna name this folder RC for Raw Converted. And I like to save to the maximum quality because why not. (Ahem) So then once this is done saving we will we'll just start one at a time with each photo. TJ, Yeah? I know you mentioned it in your other class Mhmm Umm but (coughs) there's some folks at home who just use who use Lightroom a lot could they do the same type of things you just did in Camera Raw Yeah and then take them into Photoshop? For sure and like I said before like it's just ah for me Adobe Camera Raw is just a personal preference. For Raw you can do the same thing essentially in Lightroom but you know I'd just rather just work in the same program. Right. Mhmm. Thank You. Yea.
Ratings and Reviews
Michael Halloran
Well, this dude is awesome, he knows too much! What I saw when I first watched this instruction is his manipulation of light, and he knows light and color. If you don't know Photoshop, and Adobe Camera Raw --- you will need to learn many of those functions first to follow along. TJ isn't showing you why he does certain things step by step, he is creating, and you're watching him do it. He does tell you the reason for Camera Raw is to get as much detail out of the Raw file before taking it into Photoshop, but then he does it all by eye, no histogram help, no clipping help, no sharpening reasoning ---it's all on the fly. He's a brilliant young man -- he isn't an instructor yet, because he doesn't know that he knows more than all of us already ---because it comes so easy for him. If you want to see how to create light in your landscapes and colors TJ style --- watch and learn ---more than once---if you don't know the basics of all the layers and functions ---you'll be watching this class many times. For TJ doing this live -- with no experience teaching -- that's tough --but he showed you -- and he wasn't showing off, he kept it basic mostly ---till the end. I would recommend this class, yes, with a caveat, don't think you're going to edit like TJ right away ---he's moving fast, that's why the class is fairly short. My .02 cents --