Three Reasons to Shoot for Photoshop
Lesson 2 from: From Shoot Through Photo Editing: Fashion RetouchLindsay Adler
Three Reasons to Shoot for Photoshop
Lesson 2 from: From Shoot Through Photo Editing: Fashion RetouchLindsay Adler
Lesson Info
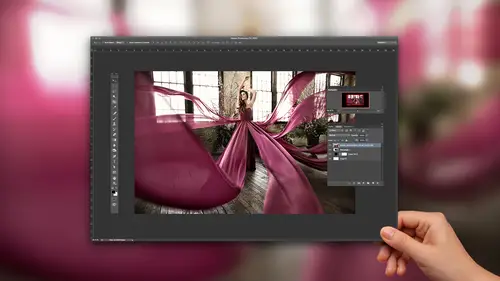
2. Three Reasons to Shoot for Photoshop
Lessons
Class Introduction
03:14 2Three Reasons to Shoot for Photoshop
16:00 3Shoot: Working with Dress Length and Color
12:53 4Shoot: High Key Image with Flowers
28:01 5Shoot: Dance Pose with Water Splash
27:51 6Creating and Installing Brush Presets
12:36 7Compositing Dance Image with Water Brushes
27:46 8Toning and Retouching High Key Image
12:02Lesson Info
Three Reasons to Shoot for Photoshop
So let's take a look at some of the ideas behind it. It's not an after thought to save an image. It is really part of the concept for me. And there are three main reasons that I Photoshop. I mean, obviously there's retouching, but I'm talking about the creative Photoshop part. So, retouching aside. Let's talk about the concepts. So these are the three main reasons that I incorporate Photoshop from the outset of my concept. The very first one is budget and convenience, and I will be shooting on a budget today. So everything that I'm doing is very inexpensive. Shoestring budget, 10, $15 at most to put it together. The next thing would be impact. That is probably the biggest thing that I see for those photographers that are good but not quite great. They're well executed, well lit, but there's just that extra oomph. There's something else, and sometimes, Photoshop can kinda tip the scales into giving you that extra impact. And so, I'll talk about that. And then of course, creative techniq...
ues. Cool things that just you cannot do in reality. It's just not something that you can create in front of you and Photoshop has so many amazing things, whether it's creative brushes and compositing and all of that stuff. So I'm just gonna show you a couple examples from my work and then we'll get right into it, because I have to make three photos from start to finish, and I want to walk you through why I did the posing or the lighting or what I'm thinking. So, got a lot to cover there. All right, so that first one. Budget and convenience. A lot of photographers ask me often, okay, so you have these fashion images. They look great. How much did that cost to put together? And I didn't start anywhere different than anyone else. I now am in New York City. I have a studio in Chelsea. But I started in Upstate New York. I went to Syracuse University. That's where I started building my fashion portfolio. And Syracuse would not be considered a fashion capital or having a lot of models or particularly amazing clothing. Most of what I did was go to H&M. Buy and return things. And then Photoshop a basic dress, but make it look really cool, because I can Photoshop it to make it look long and have a lot of fabric to it. Or I'd go to JOANN Fabrics and buy cheap fabric to extend the length of a dress. Or I did a lot of barter and trade. Or when I started doing my own makeup for models, I am terrible at that, so there was a lot of Photoshop makeup. So a lot of times, I mean, Photoshop was for budget to get me started. So now the images that I have, yeah, I work with professional hair, makeup, wardrobe, all that, but I had to start somewhere and on a budget, and so, whatever was convenient, if that was Photoshop, so be it. It is what it is to build your portfolio. So to give you an idea. This could be building sets, or it could be props, which I'll show you some examples. It could be the improved wardrobe, make it more interesting than it is in reality, or to composite things. I will say that when I talk about compositing, I am not, some of my best friends, Brooke Shaden, she does these elaborate composites, or my friend Joel Grimes. Compositing is their thing. It's not my thing. Compositing for me is usually because I didn't have enough of a prop or I needed to stick something in there because I didn't have it. It's more of a convenience thing. It's not my style. But some people make it their style. So it is an option that you have there. So let's take a look at some photos. This is one of my more popular fashion editorials I did. It was called Golden Goddess. And I put this girl in a room and it's all gold and shiny and my budget was nothing, because it was for a magazine that had no budget. And we wanted to do a gold room. Sounds kind of expensive. But what we did is I got scrap v-flats, the big pieces of foam core, ones that were falling apart and on their last leg, and then I went to a craft shop, like Michaels, and I got silver poster board. And then we glued it onto the v-flats. And then, so if you look at it, there's little seams. Little seams on the photos. And all these bumps and it's, it was a lot cheaper than having a gold room. So, I was working with what I knew, and the gold part of it is I warmed up the white balance in Photoshop. Because why not? It makes it look gold. I didn't have to build a gold room. I didn't have gold poster board. So this is all about convenience and budget. The entire set, I think, was about, it was, if you actually bought the v-flats, might be 70, $80 to put the whole thing together. But you can definitely do this really inexpensively. Or another example is after a wedding, we wanted to do this shot from above. I wanted to shoot down and I wanted to surround the model, the subject with flowers. And so, we took every single flower that was left from the event and surrounded her, but it didn't quite fill around. It wasn't quite as full as I wanted. So, cut and paste, right? But I already knew that when I was shooting. I'm like, no problem. Whatever I got, it's perfect. I'll copy it, paste it around. That'll fill it in. So it's budget and convenience. I could've started with 10 flowers and filled the entire room, filled an entire space. And it helps my concept. So this is a shot that I particularly like. It's very dreamy, it's very whimsical, and I did actually start with a dress that had multiple trains. But you absolutely 100% could do this with one piece of fabric, right? So what you could do is you could shoot on a tripod. You have a piece of fabric, attach it to the dress. Floof in one place. Take a few shots. Move around. Floof the fabric in another place and do that in a circle. And if you're on a tripod in post, all you do is layer them up in a raise. You can just combine them. It's just a cut and a paste. So in this particular one, we just did, I mean I shot 100 photos. And I just click, click, click and we were floofing it in the air as much as possible. But there would be no way that I'd be able to get all that movement just perfect like the photo I have on the right. Not only is it budget if you did it with scrap pieces of fabric, but convenience. There's no way you would actually get that to happen. I knew that when I was shooting on a tripod. Had the model stay in the same place and had everyone moving and I was shooting continuously. Keeping the lighting the same. So, Photoshop for all of these was from the very beginning. But the next piece of the equation is that impact. And I think impact is that wow factor, that thing that makes you look twice. And I read a study that said something like, the average person sees about 5000 images a day. And that's people that aren't actively looking through 5000 pictures on Instagram. That's just 5000 images that are in our face every day. And as a fashion and advertising commercial photographer, I'm competing with thousands of images a day to stand out, and then how about all the art directors or all those people that are already looking at good images? And then I need to stand out among the good, it's like, that's a lot. So, a pretty subject with pretty light and a pretty pose isn't even enough anymore to actually have that impact to stand out. There's gotta be something extra. And I have a presentation that I do that is about what impact can be. Impact can be movement. You could have impact with lightning. It could be unusual subject matter. There's all these pieces. But Photoshop can help you in that extra bit of impact, because it can help with a lot of things. And some of the things it can help with are both color and light. It can make a scene more dramatic than it is in reality. To give you that boom. You gotta look at it twice. Or unifying color. Color for me in my portfolio is probably one of the highest impact elements. If I have color in a shot, it is on purpose. It is absolutely on purpose. Whether it's to direct your eye, to make you feel something, just to have that initial impact. And so, a lot of times, that color's in post. I mean, a lot of times I've done something to either bump up the color or to unify the color or to add color in the shadows. I take control of color, and so, if I could say anything that would be a good starting place for anybody who kinda wants to get into Photoshop a little bit more, wants higher impact, it's to take control of your color. Color is impact and emotion. So to give you an idea. This is a family portrait that I did for my friend Jessica. And there was a scene, Game of Thrones. Her family is the Lark family, so we did a Stark family portrait for the Game of Thrones nerds out there. Okay so, anyway. This is not a composite. I'm not a composite guru. I don't even feel really that comfortable to composite scenes together. But the color grading, the coloration, and the lighting, which changed a lot in post. So, this is actually exactly what they do in the movies. In the movies, a lot of times, if you look at the original footage, it's super flat. There's no color, there's no contrast. A lot of times, shooting night scenes during the day and then they colored it to have that dark contrast and to have the blues to look like it's at night. So, I shot this knowing, this is the Stark family. This is Game of Thrones and there's all this drama. I already know that I don't want happy, bright color. That's not what I want. I knew that I was going to do something in post to darken it down, to make it grittier. And this is actually using a couple presets in Alien Skin Exposure. And the sky actually was there. That's bringing it down. I did two raw processes on the file. So one of the times, I dragged the exposure way, way, way down, so I could see the clouds. And then I just masked to put them together. So I think, if we're talking about impact, there's a lot more impact on the picture on the right. Or for this shot. So my concept was pretty, beautiful, pink cherry blossoms. And then I want pink makeup. And I want a pink dress. And so, for me to have impact, let's just make the whole thing pink. It's all about the color. And so, the original photo looks like you have green grass. And it's still pretty, but I think the picture on the right feels more unified. It has more impact. And I knew I was going to do that when I shot it. I had that concept. So for me, all the time, I'm thinking, what am I going to do in Photoshop? And granted, sometimes it's in front of me and I have an idea and I go with it, but most of the time I'm thinking about it beforehand. In this shot, there's green trees behind her. None of these butterflies are there. I cut them out of the headpiece and then blurred them and put them around. This is not usually as extreme as I go. I usually don't do that much. And so, the last part is creative techniques. And so, this is probably more what I'll be focused on today. And what I'm actually going to do is I'm going to take you through three different fashion shots. It will show you the concepts I'm talking about here. And then what we're going to do is I'm gonna show you how I would retouch them or do the creative Photoshop parts. So, I'll tell you what I'm thinking I'll do, and you'll see how probably isn't totally what I'll do, but at least I had some idea to direct the shoot. So we'll just see everything from start to finish. So, creative techniques. We are gonna play with Photoshop brushes for sure. So, I will introduce you to how to use brushes and I think I should mention too, I don't have an art background of any sort. I can't draw. I can't paint. Those aren't skills that I inherently have. So when I talk about brushes, I'm not creating something out of nothing. I'm using what's already there and then enhancing it, because that's all my brain has. That's what I've got to work with. So, Photoshop has Photoshop brushes. You could also do graphic elements. My work is very graphic, so I'll use that in Photoshop as well. And then just other creative tools. So, this is what I'm not going to do, because my brain doesn't work like that. This was actually a creative collaboration with another artist. But I shot it, knowing that this would be the end result. So, notice how I had her hands posed. I actually wanted it to look like paint is pouring, and have that kind of general movement, and I knew it was going to be black and white, so all of the clothing was selected to be black and white and I wanted black and white paint. But I didn't do this painting. I'm not that good, okay? I do have other skills. But this was a concept that I had. I knew what I wanted was I wanted to show off clothing. I wanted the clothing to sparkle or to stand out. And I shot it like the picture on the left, which I personally think does not have impact. It doesn't look polished, right? I think it looks accidental. The light isn't super contrast. It's not super dramatic. The whole scene is kind of messy. But I knew I was going to end up with the picture on the right. That is exactly why I shot it. So the reason I shot it so flat, like the one on the left, is because I, in Lightroom, opened the file twice. Once so that the dress was correctly exposed and sparkly. And then a second time, so that she was in silhouette. So I increased the contrast and dragged down the blacks, and then I just put them together in Photoshop and erased. To combine one where she's in silhouette and one where the dress was sparkly. So, the picture on the right I think has so much more impact and I knew that I had to shoot it that way to end up with that photo. So again, this is just showing you the way that I shoot. Photoshop is not an after thought. It is absolutely part of how I'm shooting. And this poor girl, she was super cute, adorable, and then when I told her that you would never see her actual face in the shoot, it's like, she was sad. But it worked out. She liked the photos anyway. Compositing for putting someone in a scene multiple times. So, shooting on a tripod. My idea was I had her in one outfit. She'd switch into another. I'd shoot my frame, have her in one outfit. She'd switch into another, I'd shoot another frame, and then again, line them up in Photoshop and erase. So she's in the scene twice. But obviously, I had to know that in order to shoot it like that. And on and on and on. In this entire concept, I had her do graphic poses in high contrast black and white because in the end, I knew that I would layer it and do graphic elements over and over again. So I think the real point of this introduction was just to give you an idea of some of my work and the fact that Photoshop is an important part, but it's an important part not because I'm drawing or compositing or painting, it's because it either saves me money or it makes the impossible possible or it gives me some little extra creative flair to it. So that's why I think it's fantastic that you're watching Photoshop Week, because it's one more thing to add to your creative arsenal. And it absolutely changes the way that I see the world around me. There might be an environment that just doesn't turn me on. It's just not that exciting because maybe it was the color or maybe there's one element off and then I'm like, oh wait, Photoshop. I can bring that environment to life.
Class Materials
Bonus Materials with Purchase
Ratings and Reviews
Avril McPherson
Yet another fantastic course from Lindsay. She is by far my favourite photographer as well as a brilliant teacher. We are so lucky she is willing to share her brilliance )
Phyo wai Moe
Lindsay is awesome as always . I should have bought this course long ago . Its well worth of money and i recommend to people who like to start fashion shoot with cheaper option . Thank you Lindsay . As for Creative Live group , please fix the " Purple Skirt Picture " as crush or corrupted . Thanks .
user-f37802
I love Lindsay's tutorials. She speaks "our" language. She has very simple, but highly effective approach to studio set ups as well as post-processing. She is very (very) creative photographer. Highly recommend.