Lessons
Lesson Info
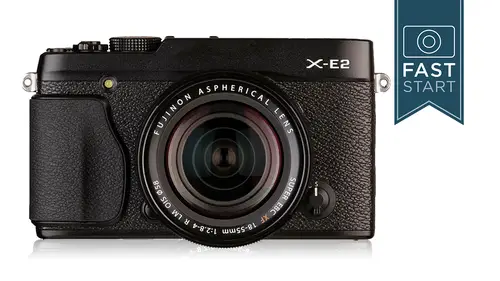
Setup and Custom Menus
To get out of this mode, you got to dive back into the drive button get out of the video mode which would be still continuous or something else but probably still shot and then hit the menu button again and jump back into the set up section and so obviously dayton time you'll set it up for the appropriate numbers there there is a time difference where you get to have a home and a local time so if you travel a lot you can leave your home time alone and just change your travel time to the appropriate time zone that you're in of course adjusting it for the language you speak and if you totally haven't been paying attention for the last half an hour you can reset your camera and it resets everything back to the factory defaults on the camera and here is the silent mode and while I like the concept of the silent mode, it does lock you out of a variety of things. For instance, if you would like to just pop the flash up for one certain shot and so I tend to want to leave the silent mode off a...
nd go into these individual things and turn him off as needed. For instance, when I played back movies I often want to hear the sound that I'm playing back on those movies, but most everything else I will go in and individually turnoff you can do some of that in the sound set up also called the operation volume for those with the x e one and as you can see, if you have an xy one, you'll find these in a different location, but here you can control the sound of the camera. What sounds it makes is, for instance, as you go up and down in the menu system, does it be? But you are make no sound at all, and of course, the playback sound when you are playing back movies, but that could be controlled on the outside of the camera as well, using the set button when you're playing back movies as the movie is playing, hit the ok button and go up and down with the controller in the back of the camera. The screen set up mode on this, this dives into a whole another set of operations, and so when you dive in here, this is something else that has changed quite a bit from earlier firmware versions on your camera. So you're not going to see all of this if you don't have the latest firmware, so this is going to be setting up the screen a lot of different options in here image display? How long do you want an image displayed on the back of the camera when you're taking or after you've taken a picture now, traditionally in digital photography, I like the image displayed for a couple of seconds from the back of the camera. I have found going to a merrill a system like the fuji that is not really necessary anymore because you're getting a great preview in the elektronik viewfinder. So if you have the white balance that kind of funny, you're going to see that right in the viewfinder, and so to save a little bit of time and camera switching modes back and forth between playback and shooting, you can completely turn this off and they're pretty confident as you go from shot to shot. Now, as you first start to learn the camera, you may want to have it displayed for one point five seconds justice, a confirmation that you got the shot, but once you get used to that, I think you may like just turning this off and not worrying about what you already shot because you already know it comes out so it's part of the work flow of a merrill, a system that is a little bit faster than with a dslr. The preview in the in the manual mode what this does is it shows you in the viewfinder and on the back of the camera the best estimation it can get. With what the final exposure is going to look like. I like this so that it gives me a good idea if I'm over exposing or under exposing on the image, and so I like to leave this turn on how bright is the viewfinder? Well, you can go in and adjust both e e v f and the lcd is to the brightness to start with, you should probably leave these at zero and only adjust as necessary, and the times I found needing to adjust this is if you're working outside on a bright, sunny day and you're trying to show somebody the photographs or just look at him yourself, you might need toe a bump up the lcd on the back of the camera does something in the plus two to plus five range and next up we have there it is are framing guidelines and so you can choose nine or twenty four or an hd grid frame, and this is slightly confusing folks, and this is what's confusing let's say you like the rule of thirds grid and you come here and you selected you look at your camera and it's not showing it's because when you selected it here, you said if I use a grid, this is the grid that I would like to have what you need to do then after setting this to one of the grids is you need to go into the custom display mode if we talked about which was in the shooting section and add the grid lines to what your custom display is going to show you and so it's a little confusing on fugees part and it seems like if you turn it on here it should be just turned on but I guess there's arguments the other way around obviously okay next up is something called auto rotate playback that's what the p b stands for so here's the difference between on and off I like off because it displays the image bigger yes I have to turn the camera vertically but chances are I just shot a vertical image if it's vertical and so this is going to allow you to have the largest image on the back of the camera possible so I highly recommend leaving that turned off the main reason to leave it turned on is if you were going to playback from your camera through a traditional tv set and do a slide show the background color what color is on in your menu when you choose an item feel free to choose whatever you want folks no big deal here and as a cz we go through this xy one users you are noticing that a lot of your stuff is in slightly different areas what they've done when they went to the xy two is they kind of consolidated all these features and brought him into one area area so focused check remember how I told you a couple of times now when you press that control dial in the back of the camera it magnifies the image and by turning it it allows you to magnifying in closer and this is what's called focus check and I love it I think it's a great thing and so I think most of you are going to want to turn it on unless you got fumble fingers and you bounce around on that you don't want to zoom in on your images but I think for most people they're going to want to leave it turned on next up is the focusing scale units come on there we go focusing scale units and so you get to choose either meters or feet and I like meter so I'm going to go with meters and one of the things to notice in my recommendations on this you'll notice that there's a lot of recommendations in black and those are my general recommendations if you see a recommendation in red it means it's maybe for a slightly higher end or slightly more advanced user and that advanced user could be anybody he could very well be you and so it's hard always just to pick one setting and so if you think you're on the lower end of the higher end you might go with the black for standard or basic the red for the higher end users, and so that is all within screen set up so there's a lot of little general set ups to the way the cameras done buried in there, and this was very different in the xy one, and I think it was all so different on earlier firmware versions in the x c two, they've added some items in there, so moving on to the second page in the setup mode, the focus ring, which direction do you want to turn in order to reach infinity? And so the arrows in this case are pointing towards infinity. Now, if you don't know about the world of focusing there's, everybody, and then there's, nikon and nikon has reversed, focusing on their lenses, which is kind of odd. So you're going to think that I would recommend standard focusing, but on the fuji, the way that the display system works, and it shows you which direction on the linear graph, in the viewfinder and on the back of the camera, the nikon is going to seem more logical to you. And so, if you don't mind, I think choosing the nikon system for focusing as far as which direction it turns is going to be a little bit easier to work with in the fuji system, but if you are a diehard cannon fan or pentax or sony or pretty much any other camera in the market you may be interested in going with the standard so that you're focusing is always the same the function setting this is one of those great ones where you get to go in and customize all the function buttons on your camera on your xy one you're going tohave the button on the top and the down arrow on the backto too program on the xy two you're going to have four different buttons that you can re program with your favorite function button and so once you get in there you'll be able to see the options that you have for going to each one of those buttons the different menu items that you can have a shortcut to great options in their next up and there's all of our options real quickly okay, so power management auto power off how quickly does the camera power dam and a little note on the power in system on the camera it goes into a nap mode which just by pressing lightly on the shutter release it'll wake it up from it goes into serious nap mode where you have to hold down on the shutter release for a couple of seconds and it will come back away and then it can go into deep sleep mode and the only way to wake it up is to turn it off and turn it back on and so I realized that it can has incremental steps that it works in there now there is also something called high performance and I have tried to figure out as much information as I could on this and there's very little out there, but basically if you turn high performance on the start up time and the focusing will be a little bit quicker little bit snap here at the expense of a bit of battery power. And so if you are on a far flung expedition where there's no battery power, you might want to power this down, but I'm always trying to get as much performance out of these cameras as possible, so I'm going to leave it turned on sensor cleaning when do you want to have this done when it's turned on turned off and it doesn't really matter whatever you want to choose here, talk about cleaning the sensor if you want to clean the sensor there's a couple different steps the first step is pretty easy is to get a rocket blower and take the lens off and basically blow air knocking any sort of dust on the sensor off. The next step is a little bit more serious and not everyone feels comfortable doing that and that is using a swab and liquid system and what this does is you're going to put a couple of drops of alcohol onto the swab and you're going to sweep it across the sensor like the illustration shows you right here, and so we're going to sweep across the sensor and clean off any sort of dust on there. Now, you do need to be very careful about doing this on some people don't feel comfortable doing it, and so they can turn their cameron to some sort of manufacturer or repair facility in order to do that so everybody can you step one? I highly recommend one of those little rocket blowers great, great little accessory tohave next up is the frame number, and this controls how the camera gives a title to each image that you shoot and I would normally leave it in a continuous system you could set it to renew, which would start it back at zero again every time you put a new card in, but you're going to end up with a lot of images with the final number zero zero zero one and that could be a problem in the long term. Now, as a side note, you should be renaming your files when they get into your computer so that when you shoot one hundred thousand images, you don't have ten copies of every number in there because it has a bit of a y two k problem where it only counts up to ten thousand and then starts again and so that's a whole work flow issue we don't have time to cover in this class, but it's important to know next up is color space. This is the range of colors that you were recording when you shoot j peg it is in what's known as an s rgb mode. If you have very simple demands from your camera, you want to take basic pictures quickly downloaded to your computer and quickly throw it up on facebook and that's a cz much as you're going to do with it, the s r g b is fine. If you have higher ambitions like you want to print your pictures, then you're going to want a wider color. Gamut, which is adobe rgb when you shoot raw, you inherently get adobe rgb it's just that you get to choose in j peg, they're going to be the same file sizes amazingly okay, next up is something that was kind of new and buried in there for the exceed two, which is the dvf lcd setting and that is controlling which view finder is turned on the eye level one or the one in back. And when I was recently in cuba shooting with the exit to this was driving me nuts, I was going back and forth between the fbi sensor and just the ice sensor because I wasn't using the back of the camera very much because it was a very bright outdoors during the daytime while I was shooting, and I think what I came to like the most is the dvf plus the ice sensor so that it would only turn on when I was looking through the camera. It also seemed to be pretty good about conserving battery power when that was going on. Okay, time to move on to the third tab in the set up wireless setting. And so this is going to have some of the general set up functions for using a wireless system. If you're going to be hooking up that wireless system on your computer to wirelessly download your images, you can do that, you can give it a name and so forth. But we did have the other wireless setting, which was basically for hooking it up to our phone. This is more kind of the background settings that you have set pc auto safe settings this's partly connected to what I was just talking about. If you are going to be using the auto save with pc, you would go in here and and set this up, you could set up as a w p s push system or manually retrieving the images off camera. I highly recommend just taking the card out of the camera and plugging it into the computer or into the card reader. I think it just works faster and it's simpler, and I like fast and simple. We also have a geo tagging option with your phone. I didn't really get into that in my little phone demo, but you can also use your phone ad geo tag information to your pictures. It does tend to wear down the batteries of your phone quite quickly, so you do want to be careful and judicious about its use when you're in those far flung locations, the guidance display you can leave this turned on there's, a little icon in the back of the camera that turns on that lets you know when you're entering the macro mode or the silent mode. Normally, I like turning all this stuff off, but it's, so small and inconsequential I'd leave it turned on its next to nothing in importance. Next up is saving the original image, so one of the options in the camera is when you shoot red eyes to have the camera eliminate the red eye, and occasionally because it's doing it digitally, it might screw the photo op, and if you save the original image, you'll have the original image with red eye that you can fix in some other software as well as the potentially a botched version that was fixed by fuji and so I would definitely leave this turned on. I don't like throwing away high quality images simply because the camera was working on him and then kind of faith might fail doing it. So leave that turned on preview exposure in manual mode for the xy one I would leave this turned on so that it gives you a good, representative ready representative view of what the final image is going to be like. Next up, we can go in, and we can change the file name of our cameras pictures to potentially our initials. If you want to, you can change jay pegs, which have a four letter code, or you could change or excuse me, this is dependent upon whether you shoot s rgb or adobe rgb, whether you'll get four letters or three letters, but you could potentially put your name in, or at least the initials of your name for your file name, which is nice for getting your image is straight out of the camera, and you want to kind of identify him as your files as opposed to anyone else's. But for most people, it's not going to be a big deal because they're going to download to their computer at home, and hopefully if they followed my instructions in other classes, they're going to rename those files. Into something else that will not duplicate. And then the final setting under set up is to format. And what this is is it deletes the images on your memory card. It clears off ghost folders and directories and basically cleans the memory card so that you can go back to the very beginning and it's like shooting with a brand new memory card. In fact, when you get brand new memory cards, you should put him in your camera. And the first thing you should do is form at them. So any time I go out on an important shoot, basically, the first thing I do is I form at the memory card now. Secondly, first thing I do is I checked to make sure those pictures were downloaded and backed up. Then I form at the memory card so that I could get his many pictures as possible, and I cleaned off all the other stuff that might have been on the card.
Class Materials
bonus material with purchase
Ratings and Reviews
user-98587b
I found this course completely by accident. This class is not listed in Photography under "Fuji". Or under "Hardware", where many other camera courses are featured. This is a good course. I appreciated the thorough explanation of each dial, button, and menu item. I also liked that John described how he, as a professional, would set the camera for his own use. That helped me understand how the camera would likely be set up for use by a professional. I was disappointed, though, by John's dismissal of JPEGs output by the camera. As he notes, the only benefit he has of JPEGs is to check the results of the shot he just took. But the JPEGs that the X-series cameras produce are widely acknowledged to be excellent. John says he can always exceed this quality by working over RAWs in post production, and surely so. ...But he'll spend quite a lot of additional time doing that, and he likely owns the software needed to do so. It's just odd that he did not acknowledge that there are some benefits to the in-camera processing of JPEGs, and that it is due in part to Fuji's unusual sensor design. This was an issue only because there are a lot of settings that deal with JPEGs that received next to no attention in the course. I was also dismayed by his dismissive attitude regarding some of the camera's setting limitations. For instance, he was mystified and bummed out that the benefits of the Dynamic Range settings could only be realized by a requirement of minimum ISO settings of 400 and 800. But I easily found an explanation for that: DR reduces exposure to capture highlights that would otherwise be blown. Then it uses those extra stops of ISO headroom to enhance dark shadows and midtones. I don't believe there's another course like this one. It does present a lot of valuable information in a very easily digestible format. That xe2 is a lot more familiar to me now that I've taken the course!
a Creativelive Student
This course was outstanding! I recently acquired an X-E2. I am still an amateur, though I used a Nikon D-90, for the past few years. I was a bit confused on how to translate the dslr controls to my new Fuji. So, this class is exactly what I needed. The way the course is designed and the clear instructions were great. I love going back to see something over and over until I truly understand. This was my first CREATIVELIVE course and I know that I will take more. Thanks.
DMargulies
Nice one. Just an easy and refreshing way to review all the buttons and function for an east start. Built nice with extra tips and views comparing to reading the user manual.
Student Work
Related Classes
Camera Guides