Lessons
Class introduction
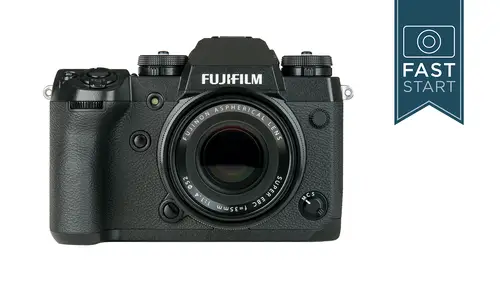
16:18 2Photo Basics
04:59 3Camera Controls: Basic Controls
04:22 4Exposure Controls: ISO & Shutter Speeds
10:32 5Exposure Controls: Aperture & Exposure Compensation
13:16 6Camera Controls: Top Deck
05:38 7Camera Controls: Drive Mode
19:00 8Back Side Controls: EVF & Screen
10:33Back Side Controls: Playback & Delete
07:51 10Back Side Controls: AE-L, AF-ON & Rear Command Dial
05:42 11Quick Menu: Top Row
11:59 12Quick Menu: 2nd Row
09:48 13Quick Menu: 3rd & 4th Rows
08:08 14Back Side Controls: Menu & Function Buttons
06:31 15Camera Controls: Left Side, Right Side & Bottom
09:38 16Camera Controls: Front & Lenses
12:58 17Menu Functions: Image Quality
15:19 18Menu Functions: Focus Settings
14:09 19Menu Functions: Shooting Setting Page 1
21:04 20Menu Functions: Shooting Setting Page 2
05:56 21Menu Functions: Flash Settings
05:55 22Menu Functions: Movie Settings
15:11 23Set Up: User & Sound Settings
04:23 24Set Up: Screen Settings
08:38 25Set Up: Button/Dial Settings
13:20 26Setup: Power Management & Save Data
04:38 27Setup: Connection Settings & My Menu
07:39 28Play Back Menu
08:21 29Camera Operation
12:56Lesson Info
Back Side Controls: EVF & Screen
It's time to continue our tour of the camera. We're gonna jump around to the backside of the camera now, which of course has the large LCD screen on here. This is a touch-sensitive screen, so that you can go in, you can change your focusing points, you can select items in the menu, in the quick menu, and so forth. So we'll talk a little bit about that touch screen as we go along the way. The electronic view finder on this is the best to date from Fuji, the highest resolution. It's a little bit lower magnification than some of their previous cameras, but it's not really even noticeable at all. It has a very fast refresh rate and a very short lag time. It's as good as they have these days for shooting any sort of action. So if you are shooting action, this is the best of the Fuji cameras for doing that, view finder-wise. There is a diopter on the left side, which adjusts the focus of the view finder. It has nothing to do with the focus of your photos, it's just what your eyes see through...
the view finder. Adjust it so that it is clear for you to see the numbers and information in the view finder. There is an eye cup on this that is removable and exchangeable. There's a couple of different eye cups that you can get from Fuji. I have noticed that on my little camera here, it's coming off just a little bit. I have a friend whose got the X-H and he was having problems with this rubber eye cup coming off, so that seems to be a little bit of a common theme on this camera. There are ways you can get in there with a screwdriver and fix it, but keep an eye on that one on yours as well. There is a View Mode button over on the side of the camera and what that's gonna control is which view finder, whether it's the LCD in the back of the camera or the EVF, which one is showing you the view of your subject. The eye sensor will allow the camera to switch back and forth. One option is the EVF/LCD with the sensor, which means the eye sensor detects if you, or something that's up close to the view finder, it switches over to the EVF. That's a good, general system to leave turned on. The next one is where you select only the EVF. You don't want to use the back of the camera, the EVF is on. The downside to this is that the EVF is on all the time, it doesn't shut off when you're not looking through the camera, it's just on all the time. Next is the LCD only, which is just on the back of the camera. Then we have EVF with eye sensor, which I think is a little bit better option than the EVF only. This way, when your eye is up to the view finder, it turns on, when your eye goes away from the view finder, it turns off. However, there is a downside to this to some people and some situations. If you have the camera on a shoulder strap, and you have the camera leaned up against you, that's gonna trigger the eye sensor to turn on. That's one of those reasons why you might want to leave the camera in the off position if you are just hanging it over your shoulder. So then you would quickly, as you grab the camera, turn it on and raise it up to your eyes so that it would be ready when it's up to your eyes and ready to shoot. By pressing the View Mode button, you just simply cycle through those different options on the camera. So decide which one you like and get it set. On the back of the camera is also a Display button. I'm gonna explain about this one a little more later, but this displays the type of content and the way the image looks in there and the amount of information that you're getting with it. There's a number of factors controlling the view finder in that case. Let's take a look at what you see in the view finder. And the frame on this, this is the first digital camera that I have seen that's not 100% accurate. So be aware that you get a little bit more than you see in here. So if you're lining something up on the very edge, you're likely to get a tad bit more in your final image. The focusing frame, which is moved around by the little joystick on the back of the camera. You can see that moving around in the frame quite easily. There are different gridlines that are available. These can be used for compositional reasons, or alignment reasons. These can be turned on and off in the menu system under the Screen Set-Up menu, under Framing Guideline. You can choose which one you want, and then under Display Custom Setting, you can choose which one is turned on and off. So there's actually two different controls to select which frameline, and then whether it's turned on or off. There's an electronic level that you can turn on. This is great for making sure that your horizons are level, and the water is not rolling out of the wrong side of the frame. This can be turned on and off, once again, in the Display Custom Setting in the Set-Up menu. Exposure information is gonna be right along the middle of the bottom. It's gonna be all your most important exposure information, shutter speeds, appertures, ISOs, and a few other things. Remember, the codes to the colors. Blue means you are manually changing it, white means it's automatically being set, and red is some sort of warning that you are out of range or you are likely to get an improper exposure. Along the left is an exposure indicator. This will be in third stops, five stops over, five stops under. We have a histogram that can be turned on, which is a great way for determining the proper exposure. You generally want a mountain of information in the middle. You don't want the histogram to be too much over to the right or over too much to the left. Unfortunately, it's right on top of the image area. That cannot be adjusted, but it is pretty small in size. The recording information as to what you're recording and to what cards will be seen in the upper right hand corner. One of the neatest things on the Fujis, I think, is the distance indicator. This will tell you where you are focused at, and the blue indicator will indicate how much you have in depth of field. This will adjust with focal length changes, with focus changes, and of course, aperture changes. It is a great indicator to see how much is gonna be in focus in a particular photograph. There are a bunch of other general settings, I'm not gonna go into each and every one of these. Most of these are pretty obvious. They're gonna be along the top and/or other areas of the frame that will tell you various settings that you may have set on the camera. Those are some of the many different controls for viewing through the camera. Here is a little trivia question for your friends who haven't seen this class. And that is, if you have a Fuji X-H1, where is the serial number on the camera? This actually took me quite some time, because I was looking at the bottom of the camera, and I looked on the left and the bottom and the right side, and I couldn't find it out. I looked on the hot shoe, because that's where it is on Leicas, kind of a strange place. It is actually on the flip out screen. Let me show you. If you take the camera and you flip out the screen, which of course has a very interesting flip out screen. See if I can turn this so you can see. Right inside there, is the serial number. I don't know, we're getting some lighting, there we go. Right in there is where your serial number is. It's kind of hidden in there. Now the screen on this is an awesome screen, I love the screen here. It's a flip out screen, that if I flip it out like this, I get a nice little waist-level view finder. You can of course get it so that you can hold it up over your eyes. If you press in on this button right here, let's get this back here so you can see it, you can flip it out like this. Now the idea, let me get it in the right position here, is so you can look at things vertically, down from a low angle. Landscape photographers love shooting vertical and close to the ground. Now you can flip it out in this direction as well. Very, very versatile screen. It's one of my favorite on the market. It's not the best for video, because some people who do blogging with video, they want to flip it around to themselves, and there's no way to flip it around forward. It just comes out to that 45 degree, and then it flips out, and it flips out like that. It's very good for many types of things. As I say, for video, it could be a little bit different, I think, to fit that crowd perfectly. But in general, it's gonna be very handy for a lot of photographers. As I mentioned, it is a touch screen, and it uses a lot of the standard touch gestures that we've all come to learn with phones and tablets and so forth. We can swipe, moving photos from side to side, we can zoom in by pinching in and out, and we can double tap to zoom in on subjects as well, in the playback option, for instance. There is also something known as a touch function. We're gonna talk a lot about the function buttons of this camera. These are buttons that you get to program to do whatever you want them to do. We also have that with the back screen as well. These are kind of interesting. In fact, let me show you on the back of the camera what that looks like. On the back of the camera, if I swipe up, let me turn this off here. If I swipe down, I get my horizon line. So I can see if I'm tilting the camera, and if I want to get rid of it, I swipe down again. If I swipe over to the right, I'm getting into my microphone level there, and I want to turn that off. I'll swipe to the left. That's just getting focusing. Let me swipe down. Actually, I need to turn off my focusing option here. Let me swipe to the left, and that turns the focusing back on, it looks like. And I swipe down, that gets the level. Did I swipe up? There we go, that's our histogram. If you don't want that, you just swipe up again. Now, you can re-program these swipes and these touch functions to do a variety of other things. We'll talk more about what those options are when we get into the menu system. So there is many different options, and that's one of the new and interesting ones that I haven't seen on any other cameras so far.
Class Materials
Bonus Materials with Purchase
Ratings and Reviews
Erik
I have been thinking about buying this camera. After watching this class I know that I have made the right decision. John is fantastic! Previously I have watched a random assortment of youtube videos by self-proclaimed experts. It turns out that many of the things that these so-called experts have said about this camera are simply wrong. John is the real deal. He goes in depth for every function and explains everything very clearly. His graphics are wonderful, he obviously spent a huge amount of time on preparation. If you have this camera and want to understand it better, or are thinking of buying it, I highly recommend this class which is taught by a true expert.
Mark Ballard
Well done! Worth every penny. Shined shoes too.
Mario Gravina
Student Work
Related Classes
Camera Guides