Lessons
Class Introduction
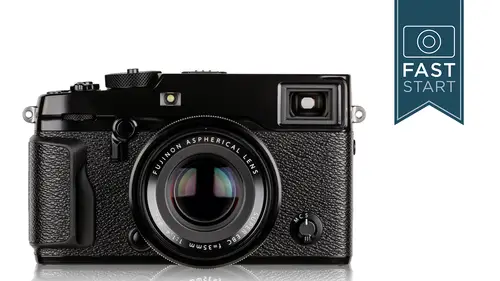
06:38 2Camera Overview
07:20 3Photo Basics
06:33 4Top Deck: Overview & ISO
07:37 5Top Deck: Exposure Control
18:50 6Top Deck: Overview
02:47 7Viewfinder Display
14:49 8Back Side: Buttons
12:32Back Side: Quick Menu
29:26 10Back Side: Play Back
06:30 11Back Side: Format Memory Card
03:29 12Back Side: Drive Mode
10:00 13Left & Right Side: Overview
06:22 14Bottom Side of Camera
05:01 15Front of Camera
05:35 16Fuji Lenses Overview
07:47 17Camera Menu Overview
03:01 18Image Quality Menu
14:14 19Autofocus & Manual Focus Menu
13:58 20Shooting Settings Menu
15:39 21Wi-Fi Settings Menu
06:07 22Flash & Movie Menus
04:23 23Set Up Menu
16:38 24Custom Display Settings Menu
18:50 25Play Back Menu
04:58 26Camera Operation Overview
16:24Lesson Info
Back Side: Buttons
So we're on the backside and let's take a look at some of the buttons on the back. So right top middle. There is your meat oring button so pressed down on that button, and you will have the option of selecting going up and down for selecting the multimedia ring, which is a multi segment metering system, which means it breaks the scene up into a whole bunch of different parts, analyzes it and gives you the best overall exposure and does an excellent job. Some people prefer a more traditional center weighted meter or a highly concentrated spot meter, and there is also an average which just looks at the entire scene. Foreign away. The best metering system for most people in most situations is going to be the multi meter. And so that's where a lot of people are gonna use the camera at the next. Most useful, when I would think, is the spot one, so that you could do an exact reading over a very small area, but your choice on where it is. But as I say, most people are gonna leave that in the ...
multi mode, but this button is something that is not used by a lot of people myself. I don't change the metering system very often. So this becomes the Function button, which allows you to go in and change and set that to one of the many different function settings that you'll be able to choose from in the set up men You. And so if you don't change the metering system on your camera very often, this is gonna be one of those great buttons to program into doing something that you find far more useful. Next up is our auto exposure lock button. And so let me just show you on my camera here a little bit about how that works. And so let's put my camera into a manual aperture mode. So I got manual aperture set here on the side of the lands, and I'm gonna let the camera figure out the shutter speed, so I'm gonna flip it into the A mode up on top. And so I have an aperture of 2.8. Let's go ahead and change that to maybe 5. right there. And so, as I moved the camera around, or perhaps as I zoom in you can see my shutter speed is fluctuating a little bit, depending on exactly what I pointed out. 20th of a second to 60th of a second or so. Well, if I have figured out exactly what I want the exposure to be, let's just say its 25th of a second. I can press in on this button. And so as I press in, you'll see over here on the left side exposure lock. And that's also in blue, which indicates I am manually doing something like I am manually setting my F stop, which is in blue cameras controlling the shutter speed. And so one of the things that I will talk about as we go in further into this class. But Fuji cameras do something different. That I haven't seen on other cameras is most cameras will work in third stop increments, but this camera will even break it up even further, which is why you'll notice this is jumping down to 28th of a second. And so for right now it's just doing third of 1/3 of a stop intervals from 15 20 25 30. But if I hold down the e. L If it needs 28 it'll actually go down to 28th of a second. And so throughout these various settings, the camera will get very, very precise in how to set the exposure on it. So if I want to lock in the exposure, I consist. Simply hold that button and then reposition that camera and it locks in that cheddar. Now an example is to where you might want to do. This is, let's say you're photographing the sunset. You point your camera at the sun. Son's pretty bright. It's gonna cause your aperture to close down or really fast shutter speeds to be used, and the picture might get darker than you want. And so what you would do is you point the camera off to the side, press down on that exposure lock button, recomposed the photo and then take the picture. It's just a way of locking in the exposure. There are multitudes of ways of doing things, and that is one way for controlling the exposures. Another way that you could use is with the exposure compensation dial on the top of the camera. Or you could simply set your camera in a manual exposure mode. And so there's three different ways for controlling that type of situation, and it just depends on how you want to work. Now with the exposure lock button, there's gonna be some customization that you can do so you can go into the button dial setting, and you can control the auto exposure lock and F lock button. So the next button we're going to talk about is the A F lock button, a little bit over to the right hand side. And if you want to switch those buttons, you would prefer this button. Do autofocus lock in the one over on the right side of the camera. Do auto exposure lock. You can kind of swap the functions of those two buttons. There'll be another option in there for the lock mode. And so the example that I was showing you just a moment ago is I had to leave my finger pressed down on the button, and so that's what they call pressing. You can also turn it into a switch, were simply pressing at once on the button, will lock it on, and so it stays locked on. So it's just simply a press on and oppress off. Or do you want to leave your finger pressing on it the whole day whole time. So it really depends on exactly how you like to interact with the buttons, and that is the way that you'll be able to customize the camera. Our rear command. I'll is used for a multitude of things, and I wanted to try to figure out everything that it does. So I got the full list here. And so it's a turning dial. So you're gonna do program shift. We saw that earlier. You can adjust the aperture that's with the X C lenses that don't have apertures themselves, the quick menu settings we're going to see in our in just a moment. The quick menu has a bunch of different features, and we can change those settings by turning the back dial focus frame adjustment we're gonna be playing with in just a moment. We can change the size of the focusing frame, and we're also going to be able to zoom in and out when we get to our playback modes. But as I mentioned at the top of the class, this is also a button, so if you press this, you'll be able to zoom in and out both in playback and in the shooting mode and in the manual focus. It's going to be able to change the way that it is the way that the images displayed for manual focusing, and it's not really the topic right now, but I think we got the time, so let's just do a little demo on that. So let me go ahead and turn my camera on. Let's go ahead and focus in on some subjects over here. I'm gonna zoom in a little bit so we can see what's going on. And so if I manually focus, I'm gonna foot my camera on manual focus. Right now, I can manually focus in and out like that. If I press in and hold in on this button, we can go to a digital split image I'm gonna see. And this is a little hard to see with this particular group of subjects here. I'm going to try doing something a little different and put in my water bottle right here in front, and I'm not sure if I can focus this close, and what it's doing is it's mimicking an old style of focusing where you are trying to line up vertical lines, and it's still not working real well on that one there. If I hold down on this, I can switch over to highlight where it's going to show us in a highlighted form where subjects are focused and so you can see those cameras in the background have a little bit of extra glimmer on them. I'm going to show you another video where that's a little bit more clear. I compressed down, hold on it again and it's standard. And so now it's just gonna be manual focusing like this. And if I want to zoom in, I can press in on that button and I can turn to change the magnification, the man. And now I can focus like that. And so this button in the back dial in the back is gonna be used for a wide variety of things, and we're going to see a little bit more of those controls as we go forward in the class. Next up is are focusing stick, and this is used for navigating with the focusing system on the camera. And so it is also a button which is gonna allow us to change the size of our focusing area. And so we're gonna have five different sizes, at least with our single point in the focusing system. And so let's do a little demo on this. Let me go ahead and throw my camera back into the single focusing mode. And so if I press in on this button, it activates are focusing system, and I can change the size of this through our five different sizes by either turning left or turning. Right now, I can also move this around anywhere I want within the frame. And if I go off too far to the left, it comes back to the right, and if I go off the bottom, it comes off the top. And if I want to get it back to the center, I can just simply press once in the middle and it gets back to the center. Now when I want to get right back to the shooting mode, I'll simply press halfway down on the shutter release here. And so now I can move this around anywhere I want now one of the other little secret functions of this camera is that by holding down on this button, you can reprogrammed the way the button works. So watch what happens is I hold down for about three seconds. And so now this focusing lever can be switched. Its currently on I can turn it off. They're gonna press in again. And so now this doesn't do anything. Even if I press in on the button, it doesn't do anything. But if I hold down on it for about 2.5 3 sec, two seconds, it turns on again. Now, the middle option here is it's pushed to unlock. So let me go ahead and set this up. So now, as I go left, right up and down, it doesn't work. But if I press in on it, it becomes active. And now I could move it. So if you found that you were bumping this button a little too easily, you can put it into this kind of semi lock state that requires you to push in before you move it around. And I found that it's pretty good just by itself. So I'm going to re program it toe leaving it turned on and So this is one of those unlabeled functions that you got A. You got to really get into learn about your camera to know that it does it because it's a nice little option that you can go in and quickly change that back and forth. So that's a little bit on how to change a single focusing point or even a group of focusing points around. And so once again, you need to press and hold to re program how that works. Now we do also have the option of zone focusing, which is a group of focusing points. That's either three by 35 by five or seven by seven, and they could be moved around the same way you can. The single points over on the right hand side of the camera is our autofocus lock button, and this is kind of similar to our auto exposure lock button. We're gonna have a number of different controls right now. It controls focusing, so it will lock the focusing in if you want to focus on something and recompose off to the side. But there are ways to customize the button. The first off is, do you want this to be a pressing button or a switch button that's turned on and off with the single press. You'll have another customization, which will switch its functions with the auto exposure lock. So if you don't like where those buttons are and you use one more than the other and you want it easier to access, you can switch them back and forth. And then another option for it is that you can combine autofocus lock with auto exposure lock. If you know you want to do both at the same time, and you only have one thumb to press those buttons, you can do both with just that one. But it also very customizable in the way that it works. So as we talk a little bit about the focusing system around the front side of the camera, is are focusing mode and will have different options, from manual to continuous to single focusing
Class Materials
Bonus Materials with Purchase
Ratings and Reviews
MInna
WOW how I wish I had this to begin with!!!! Between manual and smart tip overload via books and U Tube, as well as, class instructor snafus I pretty much felt like an idiot. After this class not so much. Great job .
a Creativelive Student
I have the X Pro 2 for over a year and I thought that I might get more information on how to use it more efficiently. Boy this is a great course! I learned a lot and I loved the hidden feature :) Highly appreciated John and CL!
mi no
it's a great course would have loved to get the same quality course for my Fujifilm X-Pro3
Student Work
Related Classes
Camera Guides