Lessons
Class Introduction
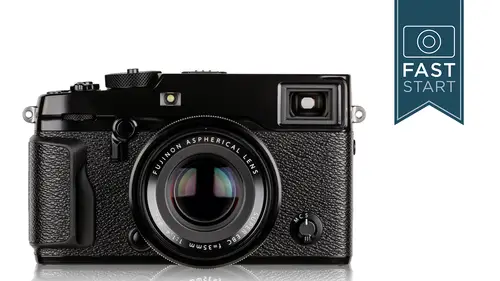
06:38 2Camera Overview
07:20 3Photo Basics
06:33 4Top Deck: Overview & ISO
07:37 5Top Deck: Exposure Control
18:50 6Top Deck: Overview
02:47 7Viewfinder Display
14:49 8Back Side: Buttons
12:32Back Side: Quick Menu
29:26 10Back Side: Play Back
06:30 11Back Side: Format Memory Card
03:29 12Back Side: Drive Mode
10:00 13Left & Right Side: Overview
06:22 14Bottom Side of Camera
05:01 15Front of Camera
05:35 16Fuji Lenses Overview
07:47 17Camera Menu Overview
03:01 18Image Quality Menu
14:14 19Autofocus & Manual Focus Menu
13:58 20Shooting Settings Menu
15:39 21Wi-Fi Settings Menu
06:07 22Flash & Movie Menus
04:23 23Set Up Menu
16:38 24Custom Display Settings Menu
18:50 25Play Back Menu
04:58 26Camera Operation Overview
16:24Lesson Info
Back Side: Drive Mode
all right. The back of the camera, the up, down, left and right have different controls. The top one in this case is labeled as the drive button and that kind of dives in tow, a whole set of different dr Options on the camera. So let's take a look at those First option is still image. This is pretty obvious when you fire the shutter release. Once it will take one photo, and this is how we're going to shoot most basic photos. If you want to take another photo, you can simply raise up halfway and come back down. And so one little quick tip for anyone who does focus, re focus, lock and re composing. And so, just as an example, it was just a handheld shot here, and so normally, if I'm going to focus on something, I'll press halfway down to focus, and then I might move it off to the side to recompose, and then I'll take the picture. And so if you want to take another photo, a lot of times people will go back over to their subject, lift their finger up, press halfway down and move back over ...
again, and that's not completely necessary on the camera. What you can do is get your focus in by pressing halfway down, re composing. Take your photo, but don't let your finger come completely off the shutter release. It's still halfway down, and I can continue to shoot photos with the focus locked on the original setting. So long as I don't leave my feet, let my finger come off the shutter. Release more than that halfway position. And so, if you want to do focus lock and you want to shoot multiple photos, you can do it very easily on the camera. Next up is the continuous mode, and this is obviously for shooting action or sports. The camera will, if you have the focusing system set to, it, will try to track the focusing. You can shoot at either three frames or eight frames per second, depending on if you haven't set to the low setting or the high setting. Now be reminded that if you are setting it to the high setting, it is limited to those focusing points in the middle. If you are using the continuous autofocus and the high speed motor drive mode and so you want to try to keep your action towards the centre at least away from the extreme edges of the frame. Next up, we have auto exposure bracketing and we talked about exposure compensation, where we're making photos lighter and darker and in auto exposure. Bracketing the camera will shoot a series of photos for you as quickly as possible that are both lighter and darker. And you're gonna be able to go in and make several tweaks to these adjustments as to how far apart these are. They could be one stop apart. They could be two stops apart, so it is limited. And I think this little frustrating is at its only three frames. But you can adjust it from minus or 1/3 stops all the way up to to stop exposures. And so Fuji has been getting better in recent years about expanding the capabilities. Maybe at some point in the future will be able to shoot five and seven frame brackets. But right now the limit is three frames. Next up is I s o bracketing where it varies the I s o in the three different shots. And you could do this in third stops. 2/3 or full stop increments. This does only work in J. Peg, and what it's doing is it's simply shooting at the original isso. And then it's basically pushing or pulling that information to make it brighter or darker to achieve those different I s O levels. It's not something that I know of a lot of people who want to do. But if you knew that you wanted to shoot with a specific shutter, speed and aperture, but you needed a variety of brightness is this is a way of controlling that film simulation bracket, and so this allows you to shoot with a variety of film styles. And so, if you like a number of different options, like you know, I like the Ville via I like the classic chrome I like the sea Pia. If you want to shoot with all three of them at the same time, you can shoot a bracketed Siri's that will give you all three. Once again, these air only in J Peg. They're not in raw, and you'll be able to go in to the camera will see later on in the menu system where you can select. Actually, it's right here the shooting setting film simulation bracket, and you can choose which three films you wanna have as part of your bracket. Siri's white balance bracketing will allow you to tweak with white balance, shoot a series of photos at different white balance settings. If you shoot in raw, you don't really need this because you can adjust it later. So it's mainly designed for shooting in JPEG if you're not sure what the right color is, or you want to get a variety of looks from the same image. The dynamic range is something we looked at earlier, and this is where we can go in and tweak the highlights a little bit. No. Once again, this works on Lee in Jae Pegs controls the highlights. You do need to be shooting at a higher I S O in order for this to work. So if you shoot it s 0 200 you cannot shoot it d r 200 or D r. 400 because each of those is changing it a stop and I don't know exactly how the cameras doing it. But what I believe is happening is that the camera is under exposing the images, and then it brings the exposure up in processing, but it protects the highlights from becoming too bright. We have multiple exposures, which is in camera compositing, where you can shoot multiple photos and combine them onto the frame and so you can shoot two photos combined, um, on the frame. This is something that would seem to be a little bit more normal to do in photo shop, but if you want to do it in the field in camera, this allows you to see and compose those images a little bit easier. The advanced filter allows us to shoot with some very strong filter looks. And so, if you're ah fan of instagram filters, you can go in and tweak with your JPEG images to give them a very, very different looks. So let's look at a few examples standard image versus our toy image, which gives us a little bit of unusual colors, and some have even getting the miniature effect blurs the top and bottom of the frame to try to make our image look like it's a miniature item. We have some really expanded colors and pop color. High key is designed for lighter subjects. Loki is designed for darker objects. Dramatic tone is increased. Contrast. Soft focus pretty clear what it's doing there. And then we have some black and white modes where it on Lee includes one color so the red color is visible here. But everything else has gone black and white, and depending on what colors are available in their, you'll see only those color. So the green trees are coming out. But everything else has been turned black and white blue colors. We're gonna bring out the sky's not. There's just nothing in their purple, unfortunately s. So there's a lot of different goofy looks that you can go get out of the camera. So this is just if you want to have a little bit of fun in a different look to your JPEG images once again not going to affect your raw images, so those images are always very pure in the way they're taken. And so those are your drive modes, lots of different options in there, and some things that are kind of beyond what most of us would think about just simply advancing the camera. But the very look of the images themselves So that's the drive mode. Access with the top part of the button talk part of the dialling back of the camera. Over on the left side is our function. Four button. This could be reprogrammed to be any one of the many different things that are available to you in there for right now. It is a short cut to your film simulation, and we've already taken a look at this, so we're not gonna take another look at it. But if you do want to directly access it, that's what the button is currently set for. The right side button is your function. Five. Once again, program it as you wish. Currently. Right now, it is set up to be your white balance button, which we have already talked about. And so auto is a good general setting. Adjust as necessary the bottom button dysfunction six, another button for you to re program. And this is currently set for changing the auto focus mode. So this is where we can change from single point to our zone two are wide and tracking mount. So this is something that I think is gonna be very useful and something that you're gonna be changing quite frequently. So this is something you'll probably wanna have as a quick button to be able to access the menu button will give us access to the entire menu, and we're gonna be going through that in the second half of this class will be giving you recommendations of how I would set them and what each of those different functions do. You know, if you hold that for three seconds, another little secret button, it locks the control for going up, down, left and right as well as the quick control. So if you find that you're bumping those buttons and it's making changes on the camera that you did not want, if you hold that button in for three seconds, you will get a lock and you can unlock it using the same system by holding that button down for three seconds. Yet another little hidden secret function of the Fuji camera. We have a little indicator lab that is going to give you information about what the camera is doing, whether it's focusing or if it's not been able to focus and also give you some information as to whether it's storing data to the memory card. If there's a problem with the flash or if there's any sort of error that's going on, and so if that is blinking or if it's red, you might want to check out, see what's going on with the camera and see if there's something that needs attention.
Class Materials
Bonus Materials with Purchase
Ratings and Reviews
MInna
WOW how I wish I had this to begin with!!!! Between manual and smart tip overload via books and U Tube, as well as, class instructor snafus I pretty much felt like an idiot. After this class not so much. Great job .
a Creativelive Student
I have the X Pro 2 for over a year and I thought that I might get more information on how to use it more efficiently. Boy this is a great course! I learned a lot and I loved the hidden feature :) Highly appreciated John and CL!
mi no
it's a great course would have loved to get the same quality course for my Fujifilm X-Pro3
Student Work
Related Classes
Camera Guides