Lesson Info
16. Function Button of Fuji X-T2
Lessons
Class Introduction
04:48 2Camera Overview
12:06 3Photo Basics
06:03 4Top Deck: Overview
04:23 5Top Deck: Exposure Control
27:35 6Top Deck: Metering
07:17 7Top Deck: Drive Mode
21:01 8Camera Controls: Viewfinder Display
09:26Backside: Playback
08:50 10Backside: Auto Exposure Lock and Focus
10:04 11Backside: Quick Menu Custom Settings
04:35 12Quick Menu: AF Mode
08:27 13Quick Menu: Dynamic Range & White Balance
04:35 14Quick Menu: Noise, Image Size, Film Sim & Color
13:49 15Quick Menu: Self Timer, Face Detection & Flash
05:21 16Function Button of Fuji X-T2
12:08 17Left & Right Side of Fuji X-T2
06:51 18Bottom of Fuji X-T2
09:40 19Front of Fuji X-T2
05:50 20Fuji Lenses
07:37 21Q&A
02:38 22Camera Menu Overview
02:56 23Image Quality Settings
18:04 24Auto Focus and Manual Focus Menus
20:50 25Shooting Settings
19:13 26Flash Mode
08:18 27Movie Mode
05:09 28Camera Menu Q&A
02:53 29Set-Up Menu: Basics
01:38 30Demo: Add Items to My Menu
03:26 31User Setting: Sensor Cleaning and Sounds
04:39 32Screen Set-Up
07:36 33Button Dial Setting & Power Management
12:06 34Save Data Set-Up & Connection Setting
07:59 35Playback Menu
08:52 36Camera Operation Overview
14:30 37Firmware Addendum
30:43Lesson Info
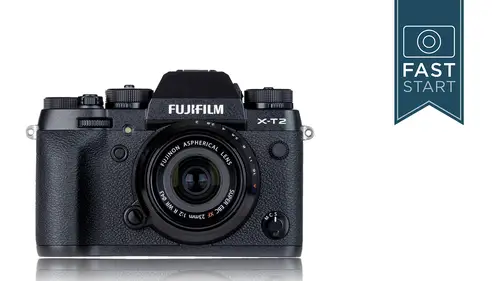
Function Button of Fuji X-T2
The focusing stick on the back of the camera, we have been using for a number of different things and so this is kind of a review section. And so, you're gonna be moving the focusing point, you're also gonna be navigating throughout the menu. If you like using that stick, you can use that to navigate through the entire menu system. Now, there is a neat little shortcut on this, is if you wanna activate your focusing point, you press in on that once to activate it. You can press in a second time to get it set in the center. You would change the focusing by turning the back dial. It's just kind of a little bit of a review section there for you. If you're in the Playback Mode and you press the focusing stick, it's gonna activate the Playback menu. And if you press in on that button, you can reprogram it. So, let's do a little demo here. I wanna show you how this works, so let's get our camera turned on. And so, it's really nice if you're in a focusing mode, and let's see, I got my focusing...
box, and I like being able just to hit this and move my focusing box from left to right. I think that's fantastic, but some people, they bump it a little too easily, and if you're the type of person that bumps it and that irritates you, you have two options. First off, if you hold down for two seconds, it brings up the option. One option is Off and they're gonna go up, press that, press in, and guess what? Now the focusing point doesn't move around at all, it is completely locked, it is turned off. Will it work in the menu system? It actually does work in the menu system, so it's only locked and turned off for moving the focusing point. So, I'm gonna press in and set it down to this next one, which is push to unlock, and I'm gonna press OK. And so now, if I bump the button, it doesn't turn, but if I press straight in on it, it activates it and now I can move it. And so, it's kind of a half lock position and so, does it move? Nope, doesn't move, I gotta press straight in on it, now I can activate it and move it around. I like being able to move the focusing point very easily, so I'm gonna leave mine on On, right there. And so, just press and hold in for two seconds. Very easy to switch that around. Press in on the middle Menu/OK button to activate the menu and we're not gonna get into this right now. We're gonna spend the whole second half of this class going through the menu section, but it's also our OK button anytime we wanna confirm one of our settings in the camera. Now, if you press in on the menu button for three seconds, you will do a Control Lock which locks a number of the major controls on the camera, not the focusing stick, but the other kind of function buttons on the camera that we have been talking about and we're talking more about. And so, if you accidentally hit these buttons, you don't want them to get pressed, you can hold in on that for three seconds and you'll see the little lock symbol come up. That will lock all of those and to unlock it, you do the same process. Press and hold in on the Menu button for three seconds. We've talked about using this little control panel for going up and down, left and right, so we do a lot of navigating with it, but each of them are also Function buttons, which means they can be programmed with many, many different options for us to work with. Now, if you wanna get in and program these buttons, you can go into the Setup menu under Button Dial Setting and the Function AE-L/AF-L button setting listing and you can reprogram any of these buttons, which you may want to do. To start with, though, the top button, the Fn 3 Button is our AF Mode/area button, and so, if we press that button, we're gonna have the option of changing between Single, Zone, and Wide/Tracking. Now, if this seems somewhat familiar, it's because in a previous section we were doing the same controls in the Quick Menu, and so this is an even shorter shortcut. You don't need to go to the Quick Menu and so you can either reprogram this button or you can reprogram that section in the Quick Menu. As I said, we're gonna be seeing things two or three times, depending on how many controls and Quick Menus and menus that it's located in. Next control over on the left is our Fn 4 Button and this is our Film Simulation Mode. Once again, we saw this and already talked about it in the Quick Menu system, so if you wanna quickly changed to different film styles, you can do that with the left button or you can reprogram that button to do something else. On the right-hand side, our Fn 5 Button is our White Balance. Once again, we talked about this in the Quick Menu. But one of the things I want you to note is the arrows to the right-hand side. They're gonna bring up some different options and you can go in and you can fine tune the white balance. You don't like Fluorescent number one, you wanna make it a little more green, a little more red, a little more blue, you can adjust to one of these other color blocks and adjust the color settings on your camera. Now, one of the things I wanted to show you in here, let me go ahead and, let me just move things around a little bit, is I wanted to show you how to do a Custom White Balance on the camera. So, let me go ahead and have my camera turned on. I'm just in an automatic mode, I'm not worried about too many things. I do need to go a little bit wider angle. We don't need that out in front. And so, I'm gonna go to the right to activate my different white balances. And so, you can immediately see the colors and if I'm not happy with one of the colors, let's say, Daylight. Well, let's see. What are these? Technically we have fluorescent lights in here and let's just say I choose Fluorescent Lights 1. I can go to the right and I can choose to warm it up, I can cool it, I can change the colors to get exactly the color that I want. Now, what I wanna do is, I wanna do a Custom White Balance. You'll notice that number two here does not look right. When I hold up a white sheet of paper, it looks very, very blue and so what I'm gonna do is, I am gonna custom set number two to the studios at CreativeLive. And so how I do that is, there's an arrow to the right, I'm gonna go to the right and down here it gives me some information, Shutter, New, White Balance. So, I'm gonna press down on the shutter and it's gonna take a new white balance reading off of this piece of paper. And so now it has corrected for that lighting in here and any time I come into the CreativeLive studios with the XT2, I can simply set, make sure I get this locked in with the OK setting here, I can come into Custom setting number, number one doesn't look very two, but number two is spot on with what we have in here. If I go to number one, we're getting some kinda funny colors and so, for the rest of my demos in here, I'm gonna use Custom 'cause it's perfectly set up for the environment that we're in, so it's very easy to set up. I encourage you to use that if the other white balance settings are not getting what you want. Okay, so that's a little bit more on the White Balance. Final button, Function Button six. Performance, this is kind of interesting. We haven't really had this on too many cameras before. And so, we have had this and it has adjusted various features in the camera. When they designed the camera, I'm sure there's a little bit of a battle between the people who are in charge of battery and efficiency and the other group that's in charge of performance, and they're like, give us more power from the battery and we can do more things with the camera, and they're giving you the choice now what you want. And so, let's take a look at what this actually means in shooting. So, we have a Normal and a Boost mode and what it's gonna change is the focusing and the electronic Viewfinder. And so, how fast can your camera react to focusing? And how many frames per second is the Viewfinder showing you? And so, for normal shooting, for basic photography where you're not doing a lot of high-action work, you could leave it in the Normal Mode. If you put it in the Boost Mode, the focus will be a little bit faster, the frame rate in the Viewfinder will be a little bit faster, so you're gonna get less blurring as you go from side to side. Now, the question is, how does this affect battery life? And so, with battery life, it's gonna shorten the 340 shots that you get down to 260 shots, and it's up to you to decide whether it's worth it or not. I can fully see some people putting their camera in the high Boost Mode and never changing it, and I can see the exact opposite as well. And so, if you are traveling, you're getting low on battery power, you might wanna turn off the Boost Mode and so, it is a way for you to conserve a little bit more battery power if you need to. Alright, so all four of these buttons have particular things that they do right now, but if you don't like those things and you don't use them very much, let's just say you're not planning on changing the performance of the camera very often and you wanna go in and you want to change the Fn 6 Button to do something else. You can dive into the Setup menu under the following settings there to go reprogram it or you can follow a shortcut, which is by pressing down and holding the Display/Back Button for two seconds and it automatically shortcuts you to that section in the menu where you can go up and down, choose which button you want, go to the right and reprogram that button to do one of the any available options. Not everything is available, but there is a long list of items that you can choose from that button. And so, if there's a button that you don't plan on using, like you never wanna use Film Simulation, I highly encourage you to reprogram it and make it right for yourself. By pressing the Display/Back Button when you are shooting, you can change the different displays and if this seems familiar, we were talking about this but from the Playback perspective before. This is when you're shooting and so, you have a Standard view, Info off, Info display, which shows you your histogram and some of your other shooting data, and then we have a Duel display for manual focusing so that you can see with a, I think it's a three times magnified view of your subject when focusing. When looking through the Viewfinder and pressing the Display/Back Button, it'll change between three different options there. Kind of the largest screen possible, a smaller screen with all of the data outside of the area, which is nice, or another Manual Focus Display Only where it magnifies in the right-hand image what you see in the left-hand area there. I don't have a demo slide put in here, but I think it's a good place to do a little Manual Focus demo on this one, so I'm gonna get my camera in Manual Focus and turn my camera back on. I'm turning my camera off here, I wanna make sure my batteries last for this entire class here. So, in the Manual Focus Mode, I'm gonna hit the Display Button once, twice, and... We are getting, let's see if we can get that focusing point down on the fruit. So, now you can see, we have two screens. We have a big screen and then where we're focusing over on the right-hand side, and so now, you can actually see down here, the other little focusing area and I'm getting that magnified view over here. And so, I can get this view in the Viewfinder or on the back screen of the camera. I can't magnify that any more, just in case you're wanting to ask the question, can I make that even bigger? No, you can't, it's kind of a preset size on that. And so, it's kind of a neat way and a unique way, I don't know of any other camera company that does this and it's mostly thanks to the size of the Viewfinder in this camera. It's got one of the largest electronic Viewfinders available, that they're able to show you the entire area and a separate one for magnified area. So, if you like to manually focus, check that out and see if you like it.
Class Materials
Bonus Materials with Purchase
Ratings and Reviews
John Simpson
I highly recommend this class! Been shooting Nikon for 40+ years and decided to give my Nikon gear to my daughter and go the smaller and lighter Fuji X-T2 for travel. Excellent camera and this course was outstanding in helping me learn how to use the camera. I have watched a number of Nikon oriented instructional videos. This video by John Greengo is the best organized and informative presentation I have ever watched.
Monroe Nevels
We all learn from different methods. I, for one, learn best by watching you while teaching, and being able to work along side you, with my camera in hand, and then follow you. I highly recommend this class if you really want to know how to use your camera. Thank you John for helping me to relive my film days, and integrating into Digital. I now have my Fujo X-T2 programmed and I LOVE IT!
a Creativelive Student
Really appreciate John putting these Fast Start Series together. Went through part of the training waiting on my Fujifilm X-T20 to arrive, which did today. That allowed me to dive into the menu settings and get the camera ready to use. I found that we are on Firmware 3.0, so, I have some updates to get installed. The training was great and informative as always. Don't hesitate to look for his Fast Start for your particular camera, and the in-depth training on Photography Fundamentals. It is well worth your time and money to get this training, especially if you are an amateur like myself, but, thanks to John Greengo I am quickly learning to use my camera in Manual Mode, most of the time.
Student Work
Related Classes
Camera Guides