Lessons
Lesson Info
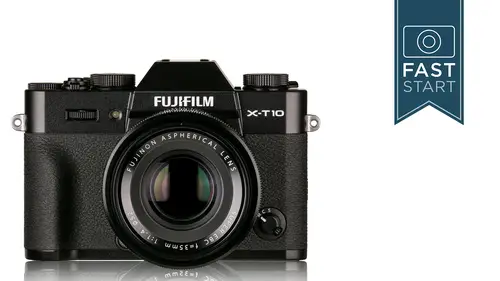
Back Side: Intro
Going to the back side of the camera, it is dominated by the tilting LCD on the back of the camera. And after that we have our EVF, very important here because this is the best way for viewing your images, it's got 2.4 million dots, so it's got quite a bit more resolution than the back of the camera. There is a diopter directly to the left of the view finder and this controls the focusing of the view finder, not focusing of the lens and so it has nothing to do with your final photographs, but it does have everything to do with the quality of the view through the view finder and so adjust it for your eyes, and it might be different than somebody else's eyes, and be aware that it does get bumped going in and out of the camera bag, so if you look through the view finder and it's all blurry, it may not be your own eyes. There is a sensor on the, right below the view finder, so that the camera will automatically switch back and forth between the LCD and the eye-level view finder, depending ...
on how close it senses an object to the camera. It assumes that if there is an object nearby, it's probably your forehead or your eyes and it switches over to the EVF. If you want to change this system around, you can go press the view mode button. Now, the standard system is that the camera will automatically switch back and forth between the EVF and the LCD using that automated eye sensor. And then you'll have four different modes that you can cycle through. The next one is where only the EVF is activated, and then only the LCD, and then another one where it's only the EVF but it will only turn on when it sense a eye or something close up to the camera, and if you know you're not going to be using the back of the camera, that could save you a little bit of battery power. The downside to the EVF eye sensor setting on it, is if you have the camera hanging over your shoulder or around your neck with a neck strap, having the camera next to your body is a physical object next to the sensor and that's going to keep the eye sensor on and that may drain the battery a little bit, so in those cases you might want to turn the camera off to save battery power. The display button on the back of the camera also controls what you're going to see either in the view finder or on the LCD on the back of the camera. If you press this button, it'll cycle through three different modes. It has a standard mode which shows you the image as well as a bit of information about what's going on, like your shutter speed, aperture, and exposure information. There'll be another one where it turns all the information off, which is really nice for compositional reasons. And then for the back one, it'll have an info display where it has no image at all and it's just information. And so if you don't like the one that you see, you can just press that button once or twice and rotate it through the other options. The play back button will put us into the play back mode and that's when a lot of the buttons change their aspect of what they do. And so from here we can obviously delete photos, we can use our keypad on the back of the camera to go to the next image or the previous image, but we can also use the front dial of the camera to go forward and back as well. We can also turn the back dial to zoom in and out, and if we just press it, it's going to jump in to the focus area that we've done, and so let me give you a quick demo of this. I think I've taken a few warm-up pictures before class today and so I'm going to hit the play back button. Let's see where do we wanna go? Let's go to this image here and so this is just a piece of artwork on the wall of CreativeLive here, and so if I wanna take a closer look to see if I got it sharp, I can just start turning this dial and I can zoom in on it. But the other thing that I can do from the standard position is if I just punch in on this, it's automatically going to go in to the focusing point that I have chosen And so just for fun, I'm going to throw my camera into an automated mode right now and I'm going to move my camera off to the side but I'm going to move the focusing point way off to the side. I'll show you how to do this in a moment. But I'm focusing over here on the side. I'm going to take that photo. We're going to play it back and now when I punch in, it doesn't go to the center of the frame. It goes over here to where the focusing frame was. And so a great way to check focus, especially for someone who likes to move the focusing frame around, and then you can use the keypad to move around further and you can zoom out a little bit wider. There's a little scale that you can see and a little thumbnail that shows us where we are in the frame. And so, if you want to make sure you got sharp photos, you gotta check them by magnifying them in the play back mode. Alright, one final thing on the play back is that we have a queue button. We're going to get more into the queue button later on, but in the play back mode, it is a RAW conversion option. So where, if we have shot a RAW photo and we're playing it back, we can make a JPEG picture out of it. This might be useful if we need to get a quick JPEG out of the camera for email reasons or handing it off to somebody who doesn't have the software to work with the RAW image. But that allows us to go in and make a quick copy of the image. No damage is done to the original, the original is still kept, it is not deleted. And then we can also check out more shooting information by pressing up and down. And let me go ahead and do that for you on my camera. And so we'll play back our image that we had just shot. So that's our play back image, and if we go up, we have our shooting information about shutter speeds and apertures, and folks, I wanna take a note here, I wanna take a moment here. There is something unique about Fuji cameras that no other camera does, and there is a little bit of a benefit to it, but it is just kind of interesting. Would you notice what that shutter speed is? Have you ever had another camera get 1/56 second of a shutter speed? No, they generally go from 1/50th to 1/60th. Fuji is the only company that breaks it down into some very strange shutter speeds like 1/17th of a second. They go for exactly what it needs and you're going to end up, so if you go through Lightroom and you look at your Fuji images, and you look at shutter speeds, you're going to have a huge number of different shutter speeds that you've chosen. Now, where this is an advantage with Fuji cameras is for anybody who shoots time lapse movies, and they do so under lighting conditions that change ever so slightly. One of the problems with other cameras is that they jump by a 1/3rd of a stop, and Fuji cameras will change by, I'm not sure the exact number, but about 1/10th of a stop. And so, if you wanna shoot time lapse, Fujis are some of my favorite cameras for shooting time lapse because of this incredibly fine detail in the ways they break up the shutter speeds. But in any case, looking at the photo information, if we go up, it's gonna give us additional information about the focaling and the aperture of the lens that we used and other settings that we have turned on the menu system, and then back to normal. It looks like it's not the downward button, it's just the upward button that allows us to go through and select other additional information but we also have the display, which allows us to see different information as well. And so there's a couple of different buttons for looking at more information. Alright so, video play back is once again a little different on this camera. And so, the controls on the back are gonna be as such. The downward is gonna be your play and pause, up is going to be to stop the video completely, and we're gonna have a fast forward option and, a rewind option. And so, if let's see, we'll go to my camera here because I did shoot a short video earlier. And I'll see if I can find it. Okay, so this is our video and I'm going to hit down, and it should, actually no, I don't want favorites. Now I have the downward for play, now I can hit play and so here's my video. I can pause it, I can start it again. I can go fast forward and it fast forwards to the end of the video. And so if you shoot videos, you just kind of have to learn these controls because they don't have a lot of visuals on the camera on how to do that. Alright, back to the keynote. And then if you do have volume, sound that you recorded, you can press the okay button in the middle and then that will pause the video so you can raise the volume up or lower the volume of the play back with the built-in speaker on the camera. Alright, working our way around the back of the camera we have our auto exposure lock button, and so this is going to lock the exposure if we are in one of the automated modes like aperture priority, shutter priority, and program. So, let me do a quick little demo on that one. Right now I have the camera in the program mode, and let me give a little bit of a telephoto zoom in here. And so, as I move the camera around, it's jumping from, it's staying at f4, but the shutter speed is jumping from 1/30th, 1/40th, 1/20th, 1/15th, 1/10th, and if I found somewhere that I liked the exposure, I could press in on this button and I do have to hold in on the button, and right now it's holding at 1/30th of a second. And you'll notice that there's a very slight coloring blue to it, because remember blue is where we've kind of locked a number in. And then I can move the camera over and take the photo and have that shutter speed locked in. So, that's a button that you have to press in and so this is something that some people use quite frequently. Myself, I rarely use it at all because I'm often using manual exposure and in manual exposure you don't need to lock the exposure in any way. Next to that is the auto focus lock button and so if you want to lock the focus, we have one button over here to do that. Slightly different than the exposure lock. In theory though, it's kind of working the same way. You focus on a subject, press and hold it in, and it locks that focus so that you can lift your finger up off the shutter and press it back down whenever you want. Now, if you want to customize this camera, Fuji has a lot of different ways to customize the camera. And the first way is in the pressing of the button. Would you prefer to do it like I just showed you, where you have to stay pressing on the button? Or would you like it where it's kind of like a light switch? You press it once and it's on, and you press it again and it's turned off. And so, we'll see this option when we get into the shooting menu number four under the AF lock mode. The other thing that we can do, is that we can swap the exposure lock and the focus lock button. For instance, you might get frustrated, say I use the exposure lock button all the time but the button's way off to the left hand side and it's hard for me to reach. Well, if you want, you can just switch the function of the buttons completely. The AF-L button also has a very interesting feature and that is, is when you have the camera in manual focus, and this is the switch on the front of the camera we haven't gotten to yet, but if you have that in manual focus, the focus lock button, well clearly wouldn't serve much purpose locking focus if the camera is in manual focus. And so, what Fuji very creatively did, it says we'll repurpose the button and when it goes into manual focus, this is a back button focus, and there's a technique that a lot of serious photographers like called back button focusing and it's where you use a rear button on the back of the camera to focus and not on the shutter release, so that you focus with one button and you take a picture with a separate button, separating those functions. And so, by putting the camera in the manual focus mode you still have an automated focus option by simply pressing in on this button. Now, there is a custom function in here under shooting menu one, when you press down on that button do you want it to be AF-S or AF-C, for single focusing or continuous focusing. And so we'll continue to talk about that going down the road. But I have mine set to AF-S, and I use that back button for focusing all the time. I really like it, I think it's one of the best features about this camera. We have our rear command dial and we can use that to magnify our images. And so what I'm going to do is I'm gonna do a little demo here, and what I'm going to do is I'm going to put my camera in manual focus, and so on the front of the camera I'm gonna flip this over into manual and let's make sure my camera is turned on. And so, I wanna focus on our little camera display over here and if I turn the focusing ring, I can generally see on the back of the camera oh okay, it's pretty close in focus somewhere in here, but is it really in focus? What I can do is I can press in on this button and now I'm magnified in and, I gotta move my focusing, I'm gonna have to move my focusing point over on top of the cameras. Let's see, right about, there, so now when I press in on the dial it'll magnify in on where that box is. And if I turn the dial, it'll go in and magnify at different levels. And now I can really see if it's sharp or not. And so, the camera does need to be in manual focus for this to work. Just punch in and it will magnify wherever that box happens to be. If you don't like where the box is, we'll talk more about that in a moment. And so, move it over here, press it in, two different magnifications. I like getting in as close as possible to see if it's nice and sharp. And so, that's another way of helping focus in the manual focus realm of using this camera.
Class Materials
Bonus Materials with Purchase
Ratings and Reviews
Dan Meylor
I purchased my Fujifilm X-T10 over a year ago and recently realized that I wasn't using it to its fullest extent. John's Greengo's video on its use opened me to a wider use. The information is clear, well organized, sequential, and helpful. I don't have the time to read a small print booklet and found the visual presentation useful because I could go through the steps on my Fuji. I'm still a little unclear on the seven custom setting and think Fuji should explain what each does. Thanks, John, for your work and encouragement.
user-98aab8
John Greengo's approach to teaching is the best. Each visual, each explanation and each example he demonstrated touched every sensory way of learning. The PDF print outs are a great bonus. Thank you for doing this video.
honolulube
I'm thinking about purchasing an XT-20, this course was very helpful to understand the camera beforehand. note: the opening slide in John's (excellent) presentation, shows an XT-1 not an XT-10... but I'm buying an XT-20, I think I got that right. - perhaps just an Easter Egg hahaha
Student Work
Related Classes
Camera Guides