Lessons
Class Introduction
17:26 2Welcome to Photography
13:08 3Camera Types Overview
02:00 4Viewing Systems
28:43 5Viewing Systems Q&A
08:45 6Lens Systems
32:06 7Shutter Systems
13:17 8Shutter Speeds
10:47Choosing a Shutter Speed
31:30 10Shutter Speeds for Handholding
08:36 11Shutter Speed Pop Quiz
09:06 12Camera Settings
25:35 13General Camera Q&A
14:38 14Sensor Sizes: The Basics
15:33 15Sensor Sizes: Compared
19:10 16Pixels
20:13 17ISO
21:13 18Sensor Q&A
13:34 19Focal Length: Overview
11:09 20Focal Length: Angle of View
15:09 21Wide Angle Lenses
08:48 22Telephoto Lenses
25:23 23Angle of View Q&A
09:29 24Fish Eye Lenses
10:39 25Tilt & Shift Lenses
23:42 26Subject Zone
17:19 27Lens Speed
09:56 28Aperture Basics
08:46 29Depth of Field
21:49 30Aperture Pop Quiz
13:23 31Lens Quality
18:30 32Photo Equipment Life Cycle
03:57 33Light Meter Basics
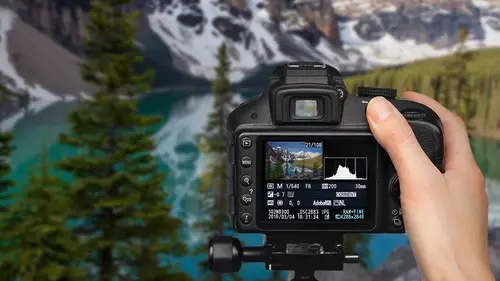
09:25 34Histogram
15:25 35Histogram Pop Quiz and Q&A
10:58 36Dynamic Range
06:03 37Exposure Modes
15:58 38Manual Exposure
09:38 39Sunny 16 Rule
05:54 40Exposure Bracketing
10:18 41Exposure Values
27:21 42Exposure Pop Quiz
26:43 43Focus Overview
16:15 44Focusing Systems
05:15 45Autofocus Controls
11:56 46Focus Points
07:35 47Autofocusing on Subjects
20:19 48Manual Focus
07:52 49Digital Focusing Assistance
03:40 50Focus Options: DSLR and Mirrorless
04:58 51Shutter Speeds for Sharpness and DoF
05:20 52Depth of Field Pop Quiz
12:14 53Depth of Field Camera Features
04:54 54Lens Sharpness
09:58 55Camera Movement
05:20 56Handheld and Tripod Focusing
04:32 57Advanced Techniques
07:12 58Hyperfocal Distance
06:50 59Hyperfocal Quiz and Focusing Formula
04:36 60Micro adjust and AF Fine Tune
05:34 61Focus Stacking and Post Sharpening
06:00 62Focus Problem Pop Quiz
18:07 63The Gadget Bag: Camera Accessories
25:30 64The Gadget Bag: Lens Accessories
12:46 65The Gadget Bag: Neutral Density Filter
20:43 66The Gadget Bag: Lens Hood and Teleconverters
08:55 67The Gadget Bag: Lens Adapters
05:43 68The Gadget Bag: Lens Cleaning Supplies
04:34 69The Gadget Bag: Macro Lenses and Accessories
15:57 70The Gadget Bag: Flash and Lighting
05:08 71The Gadget Bag: Tripods and Accessories
18:50 72The Gadget Bag: Custom Cases
11:20 7310 Thoughts on Being a Photographer
07:37 74Direct Sunlight
25:04 75Indirect Sunlight
18:49 76Sunrise and Sunset
18:39 77Cloud Light
14:48 78Golden Hour
09:50 79Light Pop Quiz
07:53 80Light Management
14:00 81Artificial Light
13:56 82Speedlights
16:02 83Off-Camera Flash
27:38 84Advanced Flash Techniques
09:49 85Editing Overview
08:24 86Editing Set-up
08:06 87Importing Images
16:45 88Best Use of Files and Folders
20:54 89Culling
20:56 90Develop: Fixing in Lightroom
18:13 91Develop: Treating Your Images
10:53 92Develop: Optimizing in Lightroom
14:51 93Art of Editing Q&A
06:01 94Composition Overview
06:53 95Photographic Intrusions
10:10 96Mystery and Working the Scene
16:18 97Point of View
09:11 98Better Backgrounds
16:02 99Unique Perspective
11:02 100Angle of View
15:06 101Subject Placement
41:14 102Subject Placement Q&A
05:18 103Panorama
07:39 104Multishot Techniques
13:57 105Timelapse
16:13 106Human Vision vs The Camera
20:07 107Visual Perception
08:35 108Visual Balance Test
22:56 109Visual Drama
12:25 110Elements of Design
28:57 111The Photographic Process
12:28 112Working the Shot
27:38 113The Moment
04:42 114One Hour Photo - Colby Brown
1:04:32 115One Hour Photo - John Keatley
1:03:05 116One Hour Photo - Art Wolfe
59:01 117One Hour Photo - Rocco Ancora
1:01:20 118One Hour Photo - Mike Hagen
1:01:20 119One Hour Photo - Lisa Carney
1:00:52 120One Hour Photo - Ian Shive
1:08:00 121One Hour Photo - Sandra Coan
1:10:29 122One Hour Photo - Daniel Gregory
1:06:07 123One Hour Photo - Scott Robert Lim
1:05:41Lesson Info
One Hour Photo - Lisa Carney
Hello, welcome, everyone to One Hour Photo. My name is John Greengo. We have another great episode for you here this month. What we're gonna be doing in this show today is I will be answering a few of your questions and you've sent in some very good questions that are very difficult to answer. I like those types of questions, so please continue to send those in. We are gonna have a special guest, Lisa Carney is gonna be here. She's a professional retoucher. Which in the world of photography is kind of on the opposite end of the spectrum where I am. So I'm gonna have a lot of questions for her cause I think what she does is very interesting and it's some really good stuff and she's brought in some work to show us. So we're gonna be talking a lot about that. And finally, we're gonna be looking at your photos. Photos that you have sent into the class pages, the student work. I've gone through and I've just kind of picked off some images that I thought were interesting in one way or the ot...
her. Lisa and I will both take a look at those and talk about what we like or what we don't like, how they might be improved, who knows what. So it's gonna be a good show here today. So, let's go ahead and get started with your questions. So, our photography questions, we're gonna get this up on the Keynote here. So, if you want to ask questions, the way that you can ask questions is by asking it at Facebook. And so I just basically go to the Facebook webpage and I look for people asking questions. And interesting ones that I think would apply to many different people are the ones that I'm looking for. That is known as the Creative Photography Challenge Group. And so go there. There's a lot of people posting photos and there's other challenges and lots of other fun stuff going on, so there's many other different things going on there. All right, our first question is what do you recommend for storage and backup when traveling? Well, this is potentially a very long answer and I'm gonna try to keep it fairly short. It depends on a couple of factors. First factor is how much are you gonna shoot? Another factor would be do you wanna work and view your images on a laptop computer or something larger than the back of your camera? And how much security do you need for your images, how much backup for your individual images do you feel comfortable having? When I go out shooting just for the day, I'm fine storing everything on one card. But once I'm out there for several weeks, I get a little antsy if everything's stored in one place and that's it. So, the simplest system that I like right now are cameras that have two memory cards in 'em. Where you can write simultaneously to both cards. That gives you a little bit of security if there is a problem with one of the cards. Now, if the whole camera is stolen, you're out of luck, and so you need to get something out of that camera. There is a potential system of where you're swapping cards in and out. One card's in and another card's out and something's always saved back in the hotel room or in the suitcase or someplace like that. But I think there are many different ways that you can work with just a camera. If you had three memory cards, you could have two in the camera writing backups and then you can take one of them out, put the blank one in at the end of the day, copy everything from card one to card three. Store that card three back in the hotel room and that's not with you, so if your bags got stolen or something like that, you would be backed up. And for relatively short trips and not too heavy of a shooting trips, those would work. Now, usually when I'm traveling, I'm taking my computer with me because I've had to have it in the past for backing up and I wanna see what I'm getting. A lot of times when I structure my travel trips, I'm going to a location for multiple nights. So, if something doesn't turn out the first night, I can come back, I can look at it, and go, oh, it'd be so much better if I was there 10 minutes earlier. The next day I can go back and I can fix those sorts of problems. And so that's a great secure system. And if you do that, then you can store images either on your computer or on an external hard drive. And in the past, 10 years ago, I had to carry six hard drives at a time with me cause they weren't big enough and I was shooting so much at the time. And nowadays, I'll store everything on the computer which is not a great place to do it, but my computer has a fair bit of space and I'll store everything on a backup hard drive which gets stored in a separate bag. And then I'm writing to both cards simultaneously. So I actually have four copies, which has been more than safe in all my situations. Everybody's gonna come up with their own solution and you just need to kinda run through the factors that are most important to you. All right, next up, I have a Nikon D750, but am looking for a lighter option with equal quality, what do you recommend? When I got this question, I'm just like, okay, this is a tough one. For those of you who don't know, the Nikon D750 is a full frame camera. So it's a pretty high-end camera and there's a lot of Nikon D750 lovers out there cause it is a very good camera. It's got a very good image sensor on it. Now, the only competition that I can think of that is lighter and smaller would be the Sony full frame cameras because they're mirrorless. The cameras do weigh a little bit less money, they cost about the same, sometimes more, but they weigh a little bit less. If you were just comparing camera bodies, you could save a little bit of weight by going to Sony. The catch is is that the lenses are about the same weight. By the time you put a kit together of two, three, four lenses, you're basically the same camera bag and so it really doesn't help you out, other than a couple of ounces. I wouldn't recommend buying a new camera system to save a couple of ounces, unless you're climbing to the top of Mount Everest. For most of us, it's not worth it. So if you do wanna stay in a full frame camera, I'd say stick with the D750. The alternate choices just aren't that much of a difference. If you are willing to sacrifice a little bit of quality, you could step down to the next smaller size sensor which is the APS-C sensors. The smaller size sensors will allow you to use smaller, lighter weight lenses. So, if you were to look at the Fuji system, I'm a big fan of their stuff, Sony's got a really good APS-C system. And those are systems that have been really designed around mirrorless, kind of medium size sensors. So their lenses are smaller. The Fuji kinda has the most interesting lenses I think as far as the range of lenses that are available. That's definitely gonna kinda save everything by about 25% in a smaller size package as well as lighter weight. So I don't think you can get really equal quality with anything notably lighter. But if you're willing to compromise a little bit of quality, I would look at one of the Fuji cameras or possibly one of the Sony cameras as well. The Sony full frame option I think is a great camera system. I don't think a good reason to go to it is to save weight. A good reason to go to it is for all the mirrorless benefits that it has. All right, what are your thoughts on the new Tamron and Sigma lenses? Is it worth it to pay more than double for some lenses when the other brands seem to have been doing so well? Thanks Mike. Well, this is a tricky question and it really depends on exactly which lenses are you trying to compare. So let me pull off a couple of examples for you. Canon makes a 50 millimeter, 1.4 lens, and it's been in their lineup for eons at this point. It's been there for about 20 years and it's an okay lens. It was decent when it came out and now after 20 years, it's kind of fading in its quality level in comparison with everyone else that's out there. Sigma makes a 50 1.4 that is easily double the money of the original Canon brand lens. Same focal length, same aperture. But it is better built and it is much sharper. And for some people, that's a big deal. And it's been a very popular lens for that reason. Now, let's go with Nikon. Nikon has a 200 to 500 wildlife lens. And that has been very popular. And I think they brought that out kind of in response to Tamron's 150 to 600, and then Sigma came out with 150 to 600, and there's a little bit of focal length difference there. And in that particular case, I'd stick with the Nikon one. The Sigma and the Tamron one are very good and there's a lot of people out there who use those and they're getting great results. They go up to 600. The Nikon only goes to 500. But I think that difference between five and six hundred is not a big deal. But the lesson to be learned here is that you have to really go with each individual case. What is it like comparing this lens versus this lens? You can almost disregard who makes the lens. How good is the lens? What's the quality of the lens? What features does the lens have? Then compare what you get between the two of them. Now, any lens from the name brand manufacturing, Nikon lens for a Nikon body, Canon lens for a Canon body, tends to be worth just a little bit more on the resale market afterwards. And compatibility wise, it's about 100%. So, when you are working with some of the Sigma and Tamron lenses, occasionally there are some features in your camera that will not work or will not work as well when you have these after market lenses on your camera. Now, most of these are not big issue deals. But in some cases they can be kind of important. I recently did a class on the Olympus OM-D E-M1 Mark II. If you use Olympus lenses, you can use every feature in the menu system. But if you use the compatible Panasonic lenses, you can't do this focus stacking technique. You can't use this high speed burst mode. So do be aware if you are not using the name brand manufacturer's lenses, are there any implications? Anything that's not gonna work on your camera that you are regularly using. Now, I own a Tamron lens, I own a Sigma lens, in addition to all of my other gear, too. Because those are the best lenses for what I wanted them to do. So you really have to compare them one on one. All right, can I use two different types of light having different Lumens and same color temperature for product photography? All right, thank you Kumar. All right and I'm guessing by the way that you spelled color, you may be from England or somewhere outside of the United States. So when we talk about Lumens, we're talking about brightness. So yes, you can have lights of different brightness and having the same color makes everything much, much easier to work with. Now, there are some photographers who want lights of different colors cause they're trying to do something unusual or creative or different. But usually if you're lighting a portrait for instance or a product or something like that, you wanna have the same color temperature on all the different places that you're illuminating that subject. So, yes, you can have different power amounts, but the same color. That does make things quite easy. All right, what are some factors that influence a printed photo? I want to make sure my printed photos look equivalent to what I see on my computer in Lightroom. All right, I'll first admit to the fact that I am not a printing expert. Now, I own a printer and I've done a fair bit of printing. One of the first things to know about printing a photograph is that when you are looking at it on your computer, what is the image that you're looking at? You're looking at bright little pixels, little lights that are shining at your eyes. When we print something, we're putting ink down on paper and the colors and light that we see from that is being reflected from the lights around us. And that is two completely different sources of information. An LED light versus reflected light off of a paper and pigment on that paper. So, in one sense, it's impossible to get printed photos to look just like images that you see on your computer screen. Now, you can get them pretty close. There's two steps. The first step is getting a color calibrated monitor to make sure that when you look at red, it's actually red and not orange or some other derivative of red on your computer. So, when you're working in Lightroom or Photoshop or whatever you work in, you're working and you're making your image look the best you can on your computer. Then, the question is are you gonna print it yourself? Or are you gonna send it off to somebody else to get printed? So if you're gonna send it off to somebody else, you've basically done all you can at this point to make sure that it's right. With a small little caveat there. But if you do have your own printer, you can also get printer calibration. That's where you print basically a test chart off of your printer and then you have to have a little color checker that goes in to make sure that your printer is getting you the right colors. Now, you can have everything set up as fancy as possible. You can bring in professional printers and people who set everything up, and you know what happens? You print a photo and you look at it. You go, it's not quite right. And you gotta go back to the original file and you have to make a little adjustment to it. So every photographer that I have seen who prints a lot does test prints. So what you learn to do is you do strip test or you do small samples. So, rather than printing the 30x to see if it looks good, you'll print an 8x10. And one of the very important factors, and we don't have time to get into the whole thing here, is the printing paper. There are paper profiles that you can get so that you can get the right amount of ink on the right type of paper cause some papers absorb ink more. So if you wanna do a test, you wanna do it on the same type of paper. So that it's got the same absorption of the ink and the same reflectivity to light. So calibrate your monitor, that's kind of the first step. That's what pretty much what all photographers should be doing. Calibrating the printer. Knowing what type of paper you're gonna print on and adjusting for that and then doing some test printing in strips or in small sections. So, I hope that helps. Once again, I'm not a printing expert, so don't hold my feet to the fire on that. But those are things that I have learned throughout my time in photography. So, thanks a lot for the questions. Great questions. Keep them coming in. Remember that you can ask your questions at Facebook. The Creative Photography Challenge Group. or you can actually hit my Facebook page up myself under John Greengo Photography. So thanks a lot. Keep those coming in. All right, it is now time to bring on board my special guest. I'd like to welcome Lisa Carney. Come on out, thanks for joining me here. Thank you, John. Thank you for having me. Professional retoucher. Pull up a chair. Thank you. Let's have a talk here. So, for the folks at home who don't even know what a professional retoucher does, explain briefly what it is you do. All right. So what I do is primarily in entertainment. But I do do product retouching as well. Photographers and/or companies that own products and whatnot will come to me and say, great, we want our images manipulated in whatever way they're looking for and I retouch them. So I'm a Photoshop artist. Okay, so how clear are they about what their final vision is? Oh, boy, that's a million dollar question. (laughing) Some are beautifully clear because they understand the process and some are not clear because they don't understand the process. And what I mean by that is I have literally had clients say, oh, we love the look of this ad, can you just have the people turned around? (laughing) As if there's a button on the computer to take a portrait from behind as opposed to forward. So, literally, those kinds of questions. So, do you work in Photoshop? I'm primarily, I'm 90% Photoshop. You live in Photoshop. Yeah. So, how did you get started in this or when did you get started and how long had you-- Oh my lord, a hundred years ago is what it feels like. I got started easily well over 25 years ago. Photoshop didn't even have layers back then. And I went to a photography school and I thought I'd be a portrait photographer. And when I got out, I realized that I really had this affinity for montage, you know Jerry Uelsmann style work? Okay. Really, really drawn to that. In my personal work, I would take transparencies and cut them up and layer them and then make prints out of them. So, I got out of art school, owed a lot of money, a lot of money, and there were already a lot of photographers in Los Angeles shooting, and I realized I had this skill and there was this thing called Photoshop starting up and there was a buzz about it. And I just kinda went left instead of right. Yeah. And 25 years later, here I am. So, what was the first version of Photoshop you used? Good lord. Photoshop 2.0. 2.0, wow. Right. I don't know, CreativeLive did a video on current Photoshop experts going back and using Photoshop 1, have you seen that? Yes, I have. And I would be hard pressed. But I still remember. I have to tell you, even now in Photoshop, I still use some of those really basic, basic, basic tools like channels. Channels came out in 2. and I still retouch using channels, because that's how I learned. Really, okay, so take us through the process as far as somebody comes and they say, hey, we need a project work done-- Okay, so there's a couple of ways this works out. On a good job, how it works out is, I'd like to stress that, a photographer will contact me and say I have a job. Client A wants these shots done. And I'll get the production notes. And what this photographer will do, will say, great, how should we shoot it? What color backdrop should we use? What kinda stop differential do we want on the lighting? What color backdrop? How far away should I be? Do you need plates? A plate would be if you shoot the environment without the product in it. Or without the person in it. So that's an ideal job. If the photographer comes to me before the job is even shot. It sounds kind of unusual cause-- It is. More and more photographers are realizing they save money if they do that. Occasionally, I get brought on set during the shoot. Oh really? And that is fantastic and I get half the retouching done. Cause when you have something on paper on screen, and you've set up your shot, when you put that item actually in the photo, as you're standing there it looks fantastic. But when you get that actually printed out, you realize, oh, I should've just been down two more inches and it'd be perfect. And when I'm on set we can actually do that. And before the set is struck, we can fix it. Oh, that's nice. Yeah, it is really nice. That makes it a lot easier. It saves a lot of money actually, too. So, what percent of your job is fixing mistakes that photographers made versus just making something look good? Ooh, that's a really good question. I would say about 50/50. Really? I'd phrase it a little different. It's not necessarily mistake a photographers made, but it's perhaps not recognizing that a collar was sticking up. Or the light didn't fire in the background. Yeah. Not necessarily a mistake. But just a little tweak. An imperfection. Yes, yeah. And that's gonna happen to all photographers-- Absolutely. Cause things happen very, very-- Absolutely. quickly in our world. Yeah, and especially with people. The body might've been perfect this way and then the smile was just a little bit better, so we need to switch the head. Right, right. So, explain some of the different genres that you work in. Okay. I would say a good 80% of my work is entertainment. So that's all compositing. It's taking different shots, a lot of head strips, different bodies. It's hard to get actors to show up for photo shoots. So what you'll have is you'll have a head from a scene in the film. And then you have to put it on a body double. Oh gosh. So yeah, it's fun. It's very challenging. And a lot of different scenes. So, most of my work is in entertainment. And then advertising, advertising product. Automotive. Editorial. I love editorial jobs. Those are really fun. They're a little more fine art granted. And then just basic beauty, cosmetic beauty. So, if somebody was interested in photography, how would they know if this is a good route for them to begin? I think any more now with digital technology if someone is liking as a photographer getting into Photoshop and manipulating their work, then chances are they got the bug as I call it and they like that and that's a good indicator. If folks don't wanna touch their work, like I kinda gather that you're not really a big manipulator. Well, I have a journalism background. Actually, when I was in college, my senior thesis was on digital photography and what was possible and what we could do. But journalists kinda say you're not supposed to really touch it. And I think that photographers should feel free to not retouch their stuff. Like if that's what's in your heart and you don't wanna do that, great, don't. And if you have an inkling for it, like I clearly took to Photoshop like a duck to water. Then that's the path. Right, and so it does seem like this slippery slope. And it was a big controversy when it first came out and it's still a controversy now. I mean, there's a number of photo contests that I've seen where they suddenly discovered that somebody did some-- Absolutely. Photoshopping. And it's not what they were intending. You don't have to name any names. But have you ever had a job that you're working on, it's like, they're asking me to do something that just feels wrong? Yes, yeah, I've had-- Can you tell us more without getting into the specifics? Yeah, yeah, yeah. Well, I can tell you what I try to do. So, in my work, when I retouch, I try to not over retouch, first of all. And I make the client ask me to go too far. And when I say retouch, I mean like body shaping or over slimming and making people look what I call plastic or fake. So, I as a retoucher try not to do that and I'll make them ask me to. That's step number one. Step number two. I did a big swimwear catalog. It was huge, fantastic job. And the way the client used to have it, the folks looked like barbie dolls. Like they were retouched into plastic. And it was a swimwear catalog for athletes using Olympians. And so I asked the client, the creative director who I really loved him and I said, "Hey, who's your client? "Oh, it's for athletes, right? "So, when those gals work really hard to get those muscles, "that's a point of honor, right? "They want those, don't they?" He said, "Yeah." I said, "Why don't we leave 'em in?" And he's like, "You know, that's not a bad idea, "why don't we leave it in?" So, it's a subtle push. You're very subtle. You have to tiptoe around those sorts of issues. Yeah, yeah. Do you look at other things in the industry as being right and wrong? Oh, heck yeah, yeah, absolutely. What do you see? This is me editing cause I'm not sure if I should say something. I see, for one, older women getting over retouched and I can't stand it. Yeah, that's annoying, but what I do when I, I have had a job recently where the sample that was out there was very over retouched. It was a 70 year old woman, beautiful, made to look like a 35 year old. Oh, gee. It's just wrong. And she didn't look like herself anymore. So when they gave me the portion of the job that was mine and they gave me the sample, I asked, "Can I not match that? "Do I really need to take it that far?" And I think it helps that I've been doing this for 25 years, that I'm willing to push back a little bit. Do you ever refuse to do work? Yes. Just not done stuff. Yes. Is there any particular genre? Political. If it's a political area that I don't agree with. I won't do it. Yeah, okay. Because what I feel what I have is, I'm selling something. I'm actually enhancing something. And if it's a point of view that I don't support, I'm not gonna put my voice to it. Okay, that's good. So, now do you work by yourself, do you have other people that you collaborate with kind of on a regular basis? Yes and yes. Yes and yes. So, it depends. I have a pretty wide body of work and industries I work with. So when I do entertainment, often those are very huge projects with very short timelines. So I'll work on a team. And then I often have smaller clients where it's just me. I know there's a wide variety there, big change here, but how long does it take you to do a project? And what's the range? What's simple? What's complex? Right, right. Well, given that most of my work tends to have a beauty slant to it, beauty takes a long time. So generally, a beauty shot, a headshot for a gal is a four hour to eight hour job. If that kinda helps? Yeah. All day. But I've also been doing this for 25 years, so I've got some tricks in my bag if you will that can speed it up. Right. And I guess we probably got some techies at home, what sort of equipment do you use? I use a trashcan. A Macintosh Trashcan. Okay, let's-- All right, I do believe it's called a Mac Pro. I'm sorry to say-- It's the black-- It's the trashcan. It looks like a trashcan. And I say trashcan with love. I love my Mac computer. I use a Wacom tablet. So, I used to have the really gigantic one, but they don't make those anymore. They make 'em as a Cintiq. Which they're crazy expensive. They're beautiful. Right. And the process is a little different. A Cintiq you're actually looking at the image as you're retouching on it. Yes, the actual display and you're writing on it. And I don't particularly care for that because where my pen is, I have the images and it's in the way. Thank you. Makes me crazy. (John stammering) Well, it's slightly different. It's slightly off. I was told they were called Wacom, but now Wacom. Wacom, Wacom, Wacom, I don't care. And they were trying to sell me this screen that you write on and I put my finger down, it's like well, I can't see exactly where I'm doing it. And I'm fine drawing down here, seeing where my cursor is-- And that's how I work, I work this way. Yeah, how big is your monitor? It's the largest Apple you can get, I'm sorry, I'm really bad with numbers. Okay, don't worry about it. But it's the largest screen Apple had sold. They don't sell 'em anymore. We'll talk about your classes coming up here to CreativeLive. But any tips, just kind of general tips that come to mind for people who want to get into Photoshop and start retouching? One, just start, first of all, just do it. Like jump in, fully jump in. Two, if you're into retouching at all, you have to have a pressure sensitive tablet. Anybody trying to retouch with a mouse, no. It's like working with a brick. Absolutely, and you can't do what you need to do cause Photoshop is really illustration if you ask me. It's illustrating with photography. And so yeah, just no. I gotta tell you, they sell really little ones. Yeah, the little four by five ones. I'm a big fan. I have the medium size. I think it's like six by nine. Yeah And I don't use it that much. I use it maybe, let's say, once a week Okay. for 10 minutes. But it's really nice when you have that. Yeah, they're nice. And honestly they have one that I think is $69. and it's about that big. At least it's a start. I will tell you a partner, a business partner of mine, he's been doing this 25 years. That is his size choice for professional work. Really? Isn't that interesting? He likes this little tiny pad. Wow. So, it's a way to start. The other thing I would suggest for folks starting out in retouching is don't try to be fast. Get good. Then get fast. Because I find folks are trying so quick to get the quick keys or the speed that they lose all the quality. Get the quality. Figure out the process. Then you will get fast. Nice. Now, you were saying that you were going to school originally for photography, Yeah. portrait photography, Um-hmm. and so how does that influence what you do? Does it just give you a good base knowledge going forward? Yeah, I think it made me to be honest. So, I have a full degree in photography. Full, went the whole nine yards, got my bachelor of science in photography. And I think it makes me a better retoucher because I understand lighting. I understand the end goal. And I can communicate in the same language as my clients. So, you'll find retouchers are either illustrators or photographers as a general rule. You know, you said something before we actually got started that kind of struck me at home because it's true with me as well. What you're doing now did not exist when you were in grade school or high school-- Right. or in college to get a degree. Right. You had to Isn't that crazy? I know. It's kinda cool in that in a sense-- Cell phones didn't exist. Yeah, but now if you go back and you're like, well this is the skillset you need to develop, are there other things from your personal life that you think you've been able to direct into this that, I mean, like are you good at drawing or-- Oh, that's a really great question. I have a degree in art history. Okay. And actually, that was monumental for my career. I would think so, yeah. Absolutely, any kind of art history understanding because it's understanding the reference and resonance of what imagery and how imagery is taken in by society and what we're putting out. So I think that was hugely important, studying the history of photography. Right. Hugely important for me. And I don't think people would get that. As a retoucher, well, it's just about making image. For example, if I'm doing a movie poster and we're talking about the vibe and the feeling and someone, an art director or creative director could say, "You know, I want a Maxfield Parrish look." Well, I know who Maxfield Parrish is and I know what the look is. Or a Man Ray look. or even William Eggleston, you know those kind of traditional photographers. Oh, good, well, let's go ahead and take a look at some of your images. So you brought a few in. Tell us a little bit about either what this was for or how this was used. All right. There's a photographer who I work with quite a bit and I have a few of his pieces and I absolutely adore working with him. His name is Dana Hursey. And Dana and I do collaborative work. And what he was looking to do is doing these kind of otherworldly pictures that were more illustrative, almost like an illustration, and kind of bordering that line between photography and illustration. And he did this series on 1950s, like a 1950s style genre, but with something a little off to it. And what I really liked was developing the look with him. And we did a bunch of test shoots and came up with a look that he felt comfortable with, that he liked. It was really fun. It was very collaborative. So, you were working for quite a while on this process? Yeah, for a while, yeah, yeah, and that's the beauty of developing a relationship with a photographer. Because you want to understand their sensibility and what they're looking for. I think most professional photographers as a rule, not all of 'em, are not great retouchers. And they shouldn't be because they're shooting. They're out there working and honing their craft while I'm honing my craft. And when we can come together and collaborate is really great. I've been amazed at the rise and dominance of Instagram. Yes. And the filters and stuff. So do you use filters or plugins, that whole genre of? I have to tell you that those filters and genres of image making for me is a little bit of the bane of my life. Because what will happen is a photographer will come up with one, and what my job is to do is to make things reproducible and changeable. So, what I have to do is figure out how to, for this look, for example, you might be able to find an Instagram filter that makes this. My job would be, you come to the photo and you say, "Can you reproduce that look in an editable format?" So, Nik effects, for example, do you know those filters? Oh, yeah, yeah. So, Nik effects as we knew, Google was gonna discontinue them. Um-hmm. The minute they stopped selling it, you know it's being discontinued. And in the entertainment industry, designers love that look, so I've been spending the last two or three years, reverse engineering those filters into curves, and adjustments layers. So that I could reproduce the look. That was a good question. So, those filters, while they're great, for a conversation, they're a bit of a handicap cause what happens when they don't make them anymore? Or the software doesn't get updated? Well the gripe that I have with them is that somebody will see this photograph and they'll go, "Wow, that's a great photographer." They'll completely forget about the retoucher. Sorry, I'm sorry. Hopefully. No, hopefully, we're invisible, we should be. And they'll say, "Wow, that's a great photographer, "that's a great photograph, "I wanna take pictures like that, "what's the filter that you used?" Right. And then they're gonna wanna use that, and it's like, well if that's what you think the key is, everybody else will just copy that. Right. And then it's gonna get discontinued and they won't be able to use it. And you'll find there's areas of advertise photographer, photography, pardon me, that get really popular. So, for example, Jim Fiscus had a look that was very popular, that high pass look with the glow. Jill Greenberg as well. And they run their course. So, you get the look, people like it for a while, and then it goes away. Let's go to the next one here. Same photographer. Now, if you look at Dana's work, I think you look at this and you look at that past image, you wouldn't think the same photographer shot it. No, it's a very different style. Yes. Very different style. Yeah, Dana, I just love working with him and look, it is over-retouched, over-retouched, but it was the look he was going for. Um-hmm. He was going for this kind of robot-y mannequin look, so that's why that's so smooth. Now, my guess is because as I said, you're in a different part of the galaxy than I am. Yes, yes, absolutely. And so on an image like this, it looks pretty straight out of the camera with the exception of the skin, am I guessing right that it's the skin that? It's completely not what he shot. Yeah. A whole new, I'm sorry, I don't show before and afters as a general rule because it could be a little discourteous. Well, we all know what the real world looks like. Right. Right, there's-- Look at your friend. Yeah, there's nothing in this that was remotely what it was shot. But the thing I should state about working with him is it's a conversation we have, so we know where we're heading. So it's not that he made a mistake and I have to fix it. It was that it was all shot with the end result in mind. Might diverge off here a little bit, like if you look at an entertainment magazine, that's got pictures of all the stars in it and stuff, are they being worked on in these? Oh, sweet Jesus, are you kidding? Yes, absolutely, nothing is. I mean, except for the paparazzi photos Right. where they're trying to get them at their worst, Right, right. it seems like. Oh, yeah, no, I mean, because they look like you and I. They've got this going on. They've got their hair is sticking up. There's something wrong. This needs tucking or whatnot. There is not a photo out there in any kind of publicity manner, that's not paparazzi, that isn't worked on. Really, and so, everything? Everything. Everything. How do you feel about that? A little awkward at times. It's interesting. I struggle with it a little bit only because in my mind, since I know cause I'm working on it, I think I'm a supermodel. I look the same as everyone else, but I remember and I reflect at times that other folks don't have that same privileged view that I do. That we're all beautiful. Who cares if there's a little of this? So, yeah, I get conflicted on it. If they don't hire you, they're just gonna go to somebody else. There's lots of retouchers that they can go to. Yeah, yeah, and I suppose, what I try to do in my industry again is to try to push back and not have it be so much. Try to just steer the ship just a little bit Yes more into the normal world. Yeah, because I don't think it looks good otherwise. Super skinny is-- Very unrealistic. Yeah, and who wants that? Okay, now this screams Hollywood to me. This was part of the conversation. Again, this is with Dana Hursey again. I call it digital Botox. And it's this kind of satire on what we're doing here. We're all over cleaning up everything. I will have to tell you however, this lovely lady needed like nothing. I mean, her original, she's absolutely stunning. This actually, that's a head strip, the body was cut off. Where do you cut it at, the chin? In the neck or? No, about a quarter of an inch under her chin. The frame was just cut. Oh, okay It was different. He was hand holding. Okay. We just had to do that. So, this is kind of a commentary on beauty and retouching. (laughing) I mean, I saw this and it was just so clean and so perfect and like the teeth are just way too perfect. Absolutely, and it's satire, this was actually satire. And maybe it didn't go far enough, I'm not sure. But I will tell you in all honesty, she wasn't far off from there. Yeah? She was otherworldly. She was good. She was otherworldly. So, how did this photo get used? Where would people might have seen this? I'm actually not sure. That's an interesting thing. I am literally in a dark room retouching and I often don't know where they're going. Oh, really? No idea. Isn't that interesting? They need it and there it goes. Yeah, and occasionally I'll see something out in the world and I'm like "Oh hey, I did that. "Oh look at that." Where I often do know the end usage is for entertainment, because I need to know sizing. Right, right. Yeah, that can be tough. I remember back a long time ago I was doing sports photography. And back in the days where Sports Illustrated was shooting film, they would shoot a big game. They would send everything FedEx overnight, and they were done. They're like, "Oh, you're on the cover. "Oh cool!" They never had any say in it. It's like, you're in charge of your one little department. Absolutely. You're master of that little domain, and after that, once it's gone ... Whatever. There it goes. Yeah, that's very much is where ... I mean, people don't even know I do anything. If I do my job right. People don't know I did my job. Don't notice. Okay. Let me just take a wild guess here. This is a composite. Yes. Wow, I'm so right on. And again, this is another instance where I have no idea where this was used for. So occasionally I get hired by agencies on behalf of photographers. So I don't even know who shot this. And asked to do some fashion work on it, and do some minor retouching. And I am oftentimes a clean-up person, and what that means is a job will go to somebody and it doesn't get executed well, and I get to fix it. That's always fun. That's tough. That's always fun. That clean-up mess. Yeah, clean-up crew. So I actually have no idea where this and the next piece you that you have, fashion, ended up being used for or who it was for, cause it was for a agency. So there's beauty and there's fashion. Yes. Both of which I know nothing about. Yep. What are some differences or similarities? Excellent. Fashion for ... I'm gonna say this in the nicest way possible. In fashion photography it's really about an object, not a person. So there's a lot of trimming and moving and skewing and the person is treated more like an element. They're not a famous person in that general sense. Right, absolutely. They're just a model. They're just a figure-- They're a-- an object. Well it's the clothing. Yeah. And it's an object for, think of like a rack for the clothing. And I don't mean that in any kind of disrespect. Versus let's say editorial. So if you're doing editorial work, and it's about the subject, actually the person, you don't over manipulate. You don't squish and skew and change cause it's the character of the person that you're trying to communicate. This, it's the dress and the style and the vibe. If that makes sense. So these get liquified and warped and trimmed and stretched. You flip, like in a editorial or entertainment, you never flip the person. You never flip it. Oh okay, yeah. It's golden rule. Left and right side are different. Do not flip. Fashion it doesn't matter. And in fact, this one, her hair, two pieces are from the same side and it's flipped over. (laughing) And made into something new. And, let me guess it's three photos? Uh, actually I believe this one might have been eight. Believe it or not, the people get stripped in one piece of fabric comes from something-- Oh, really? Like I can't actually remember on this one, but yeah, you'd be amazed how many photos there are. That's surprising. Yeah. That is surprising. Well if I do my job right, you don't know. Yeah. That's the plus. This looks like a movie poster. Yeah, no. Same thing, same fashion. But I will tell you, I don't know if you've noticed out in the world, the genres have started to meld more. So gaming now looks like entertainment. Mmm. And editorials starting to shift more towards entertainment as well. It's trends and fads. Right, right. Yeah. So what do you do to stay on top off that? Is there ... You know what's interesting as the retoucher in the closet, as I like to call myself? Is I am often not the purveyor of that. My clients come to me because they have a look they want to do. And I exercise that look for them. Okay, interesting. Yeah. I feel like a second set of hands to the photographer. So I'm trying to execute the photographer's vision. Not my vision, their vision. Interesting, yeah. It's just an interesting world. It is. It's completely different from yours. And so on that note, I should say that I do my own personal work. That is my work. And it's photography and it's got nothing to do with any of this world. And that's my vision. This is my assisting. I'm actually helping someone produce what they wanna produce. Right, right. So one of the challenges in any type of art is knowing when you are done. Yes, yes. How do you? Is it like this is how much money they gave me and that's how much time they get? Or I think I got what they wanted ... That's a really great question. I have a few rules that I try to do. First, you give 'em what they ask for. Second, you try to give them what they should have asked you for. And then three, you give 'em what they didn't ask for at all, but is a better self. So depending on the job, if I can give them three different versions, I will do that. Okay. I was gonna ask you, do you give them different versions? Like, I know this is what you asked for, but I just did another one that I wanted to play around with. I will tell you on that clothing catalog, that's how I did it. Yeah. I gave them what they asked for. And then I said, "Could we do something a little different?" And then here's a split the difference between the three. When you present that second one, that your version, do you have any phrases that try to soften it? Not like, you made a mistake in what you asked me. Oh yeah, don't ever say that. But I just played around with this to see if you would like a different version. Well I have on occasion done where I've said "Well, if you've noticed, the trends are shifting "towards less retouching." Or there's been a lot of commentary about over re-touching or bad Photoshop, so would you consider heading to this gentler version? (laughter) With a little caveat. With the caveat of I will of course do whatever you like me to do. Right, right. Yeah, it's a tough nut. That one, it is. It really is. Yeah, that is a very interesting field. And talking about how do you know you've gone too far? And when you're done? That is a really seasoned question. I think initial retouchers and anyone who's starting out, chances are they're going to be what we call hand-fisted and going a little heavy. So my advice would be when you start, go ahead do what you're gonna do and then just pull it back a little bit. If that makes sense. That makes total sense. Cause the knee jerk is gonna be to go too far. Really? Cause in my photography class, my fundamentals class. When I go into light room and talk about saturation and sharpness. What I say is go to the point where you say, "Oh my God." And then come back to 1/3 of that. Absolutely. Where you can clearly see what's going on. And then when you come back, it's just this subtle hint because once somebody, "Oh, you really over saturated that." You've clearly gone way too far. Right, right. You want it just that subtle look. And also I think that what you're talking about is a little bit about when the process becomes more the focus of the image than the actual image. Right, and photographers can get all deep down on the-- HDR, HDR. the tools. (laughing) Yeah, we have a book here. Yes, oh this was such a great project. So there was a photographer, Michael Muller, he's an entertainment photographer. He shoots a ton of all the Marvel, American Hero, that kind of stuff. And he's a big underwater shooter. He loves shooting sharks and nature. Well his wife wanted to do a mermaid book. So he shot it. And then I got to composite it. This is all completely composited. Imagine, that's her daughter. And it was a whole book on mermaids. And I think it's such a lovely, lovely book. And the nice thing about this was again, it was very collaborative process. So they had the idea. And the rough notion of what they wanted the image to be, but I got to do the images completely. It was one of those rare occasions where I got to actually put my two cents in there. And explore aesthetically. And I just think it came out really sweet. And I would imagine that a lot of photographers who came up with an idea for a project like this, you know the first instinct, at least from my perspective, is how can I get this in one shot in the camera? Absolutely. And you can just run yourself ragged trying to make that come true. It's like I need this for this, and I need that. And I can't do the same thing. When the solution was, okay this needs to be a composite. Needs to be touched. Needs to be fixed later. I will tell you retouchers have a similar problem. So for example, let's take this. Let's say I have a movie poster shot and they have a glass with the hands. And they just want a different glass in there. Or a different hand. Retouchers will often spend hours retouching out the fingers, instead of "oh well honey, "just go shoot another glass and stick it in there." So we have the similar thing where we'll kill ourselves trying to illustrate something, rather than just go take another photo Right. and drop it in. I guess I'm just thinking about the plates that you were talking about. Yes. Shooting just a blank of the scene. Or just pretend like you're holding a glass. Don't even put a glass in there. Exactly right. Well and that's when if a photographer could collaborate with a retoucher before the shot. They can tell those things ahead of time. So now I can change it to a red cup if you want. But I can't now. It's more difficult. Or just put a piece of black tape over that and then I can fix it. Whereas taking out the, whatever. Interesting. Yeah. Thinking ahead, planning. Planning. A big part of photography. And again, this is another Muller shot. And what I like about working with him, is I feel like he really let me have some reins on the aesthetics for the color correcting and the tone. And again, when you have a collaborative process and you work with someone for a while, you can share a vision. And when photographers are willing to open themselves up to have someone else come into the creative process, and not just grab the whole thing, you can do some pretty amazing stuff I think. Now this seems like a more complex image than any of the other ones. Just cause there's more detail in this one. Right. And actually, oddly enough, it was, it had a beautiful backdrop and a set. This was one of the very few that's pretty much a straight on shot. Do you know how this was used? Editorial. So I thought Entertainment Weekly magazine is what I believe. Okay. Uh, vampire TV show. Oh right. True Blood? Is that it? I'm not sure. HBO. Okay, okay. Any idea on how long it took you to work with this one? Three or four hours. Not too long. No, not too long. I'm pretty fast. I've been doing it a long time. You get it down. Yeah. And the tablet's really make things fast to work with. Excellent. Well thank you very much for sharing those. Yeah, it's my pleasure. My absolute pleasure. Let's take a look at a few of your classes here. For folks who maybe are interested in these classes, give 'em a brief bio, or not bio, but a little intro to what each one of these classes are. Excellent, all right. So the frequency separation. So frequency separation, I don't know if you know about it, it's a particular retouching process where you separate out the color information from the detail. And it allows you to retouch much faster. But it's this kinda quirky little weird, it's not intuitive. Let me put it this way. So this is a class that's really about demystifying and breaking it down. And really explaining how it works. And how you can really advance in it as well. That's a heavy retouch, that is not a beginner course. Okay. What type of photography uses that the most? Or is there a type? There is a type, but it's still kinda new. Okay. It's kinda new genre. This is definitely presented for portraits. Okay. And just for portraitry. But there is a whole genre you can do with the product and all that but that is not covered in that class. And that's our only before and after shot right there. Yes, and look how close she was. Do you see? She was already stunning as it was. Easy job to work with. Yes. All right. So color techniques for retouching. Now color techniques. This is a class that's gonna breakdown all about color. Using color adjustment layers. Why would you use X adjustment layer next to B adjustment layer? And which is the best one? For what kind of results. Talks a bit about, you were talking about printing. People talking about color for printing. So it talks about color space. Color settings. So it's a little dry in that area, but a very, very, very important to know where you are. Now is that a kind of beginner, intermediate, or advanced Photoshop level? I would say that's intermediate to advanced. But when I say intermediate, it means do you have basic understanding of layers, masks, and selections? Okay. So kinda know your way around Photoshop. You have a basic understanding of the tools. Okay. And then portrait retouching. Portrait retouching is A to Z on portrait shooting. Not shooting, excuse me. Just on retouching. So it's skin, hair, body shaping, color correcting, brushes, that sort of thing. All right. And Photoshop level for that? I would say that's a little higher than basic. Because again, it presumes you understand layer masks-- You gotta know where the tools are. Yeah, know the tools. Cause I'm not going to cover any of those. So I would say, just past basic to intermediate to definitely advanced. I kinda run the gamut. It's a long course. It's a six hour. All right. Well you know this is where photography gets fun. You start getting really specialized in there. Absolutely, yeah. So, let's take a look at some photos. An image review of your photos. Excellent. And both of us will get to kinda comment on this. So our first image is VidmantaMinkstimas. My first inclination is I like. It's very good. I love the pattern. One of the simplest forms of taking a great photo is just find a pattern. Absolutely. Could you use this in your work? Do you see? Oh absolutely. I will tell you to go check out a TV show on ABC called Once and Again. Excuse me, Once Upon a Time. It's a ABC television show. And they have a whole series of artwork that uses this kind of patterning with trees. Um-hmm. For the last two or three seasons. So yes, this is a look we would definitely use. I believe the Woodsman, the movie, the Woodsman? I'm not familiar with that one. Yeah, that's a Snow White film. Had something like this. Yeah, I could see this as kind of the background-- Absolutely, it's absolutely gorgeous. for the movie poster or something. And so I'm gonna have my, I got a little quibble here. It's a pattern shot. So anything that kinda breaks up the pattern kind of takes away from it. And so that one tree over on the far right, that's kinda half the height, makes me kinda wanna explore the forest a little bit more twisting the camera left and right because a foggy day is a great time to go out and shoot. Cause it just cleans up the background. It gives nice clean background. And so maybe pointing the camera more to the right or more to the left depending on the lights and darks over there. But that one little tree, I might just five degrees to the left. Yeah. And get that guy out of there. Can I ask you if we go back for one second? Yeah. The other thing that I would do. And I don't know how photographers feel about this, about framing, and that it's got that 35 millimeter frame. Right. Cause I would just crop it. Would you go more panoramic or go more square? No, more square. I would just crop out that ... Let's just do that. Let's do this. And I often wonder with photographers if we get very attached to the framing. Oh we do. I used to shoot the Hasselblad. And that was like the square frame and that was it. Yeah. That was it. And then when I got off the Hasselblad and I was shooting with four by five, then it was that. And I didn't ever want to crop. I wanted to crop everything in camera. So we should talk about the cropping in camera. Yeah. So as a retoucher or a finisher, which what I do, I can't stand it when photographers crop in camera cause I've got no extra. Ooh. So let's say this photographer wanted to sell this piece. And they wanted to use it for a billboard, and they just needed a little more on the side, oh, you shouldn't have cropped it in camera. Don't crop it in camera. Crop it in post. Right. But I think that for a photographer is a really tough nut. It's tough. And so in my classes, here's what I tell people to do. Shoot it as tight as you can and then back off and shoot it again. Excellent point. Because photographers are trying to get every pixel on all the good stuff. Yeah, fair enough. And so you do need it tight, but digital, just shoot another one. It's not like it's a piece of film and it's gonna cost ya a little bit of money there. That's a great idea. Photographers, they're looking through that square. That rectangle and they're brain current just starts thinking in that. And one of the things I like is I love going more cinematic. I love going 16 x 9, or two to one ratio on it. I like square. I don't like things that are just 5% off of square. That's just ... Interesting. But it's you know, personal preference. Well and that's what I'm wondering if, digital kinda freed me from this. Is the notion that every image that you're looking at has what it wants. Like some things want to be small. Some things want to be huge. Some things want to be square. Some things want to be rectangle elongated. And it's not the box that you've got in your hand, it's what you're looking at. And you're really separating yourself in having that conversation. Be really good. And having the mindset of how it's gonna be used in the final. Absolutely. Like if it needs to fit in this poster box that's 20 x 30, it's gotta go with that. Or if you're gonna sell this. Like are you shooting for stock? Right, what's the most versatile on the market? So knowing the end result is very important. Absolutely. And then shooting for what it is there. All right, so we have Mohamed Buyabes here. Let me get back to my full screen here. And so first, it's a dramatic image. I love black and white. I love highlighting your subject. Do you think this was shot in the studio? Do you think this was something they created? No, I think it was found lighting. Found lighting? I don't know. Interesting question. Yeah, it's hard to tell. So it's nice dramatic lighting. I don't know how to improve this image. I know that there's probably dozens of different images kinda playing around with that one strip of light on the left. Right. How much of it do you want? How bright do you want it to be? Do you want it to be a continuous line on it? Do you think there is something that would have made this better? Yeah, there's a feeling I get when I look at it where I feel a bit contained, which might be the desire of the look. But my shoulders really start crunching when I'm looking at it. So I'm not sure if that was the desired result. And then one of the things I'm noticing, and I know the viewers may not get to see this, but how this looks on the screen and the contrast is completely different than how it looks on the screen behind you. So on the screen behind, there's detail. Right. Yeah, you can see the shirt and the separation between-- And there's not, I kind of like a tiny bit more detail. So that goes back to the question of your viewer who was asking about printing. I think this is a really good time to talk about how your image gets used and what it ends up looking like. You don't necessarily know. The final form, yeah. And that's really challenging. Yeah, cause you could have something that looks great on your computer, but then by the time they have it put on the bus stop billboard and the paper that they used with super cheap paper or something. Right, and is detail coming through? I had a job once. It was a Wesley Snipe's movie where he is the vampire, Blade (snapping fingers), and I did not run what we color a solar curve to check my pixels on the picture, and I had filled him in. So it was a black gradient coming up his body and the logo Blade was in front of him. I did not do a solar curve. On the screen, looking through the pixels, it was black. On the print you could see through to his body. And it got printed. Oh. And the job got rejected and had to come back. Oh gosh. And it was all because I didn't do a solar curve on my computer. Wow. And I don't even know what a solar curve is. Well see, take my class, There you go. and I'll teach you all about it. Yeah, lots to learn in there. Okay, so a little adventure photography. This is-- It looks like Iceland. Yeah, I was gonna say. This looks like Iceland. It looks like potentially a shot from National Geographic or something that you would see in there. In general, it's a spectacular environment. I love the roof there with the light on there. Any quick thoughts from you? You know what? I always hesitate to say this because I'm not sure about again, when it's fair to say about manipulating or not manipulating, but what I like to do when I look at photography is I squint down. And I look at what my focal point is. And what my shape is. And I feel like the figure is what I want to be looking at, but when I squint down, I don't even get there. It's all in the ice. So I think perhaps have the figure pop up a little more. I might consider darkening the cave behind a little more so that figure can come forward. Well you know when I saw this, I was thinking okay, it looks like they're holding a light of some sort. But the main light is an off camera light that they've triggered probably with a remote. And I would kinda like more of a highlight on that person in there. And so if they maybe had two or three flashes there. They're gonna light the background a little bit softer with one, and then have a little bit brighter, more of a spotlight on them. Absolutely. And then as I look at this now, I'm kinda wondering if that person, I don't know, male or female, but if they were kinda moved a few feet up to their right, and they were more on the peak of that little hump, Absolutely. that might-- It would for framing. Yeah, cause then it fits more clearly in the frame because right now, the light goes down to their right leg, which just becomes pure black. It kinda fades into the darkness there. Well and the key is light against black. And black against light. So, if that figure moved up, they'd be against a darker background. Yeah, but a great environment there. Yeah, beautiful. Okay, so I think we're up in Vancouver right now. So this is one of my favorite times of day to go out photographing is twilight. You get this nice blue in the sky. And so, that's Expo '86. I went up to Expo ' Mmm, nice, okay. there. That was a big thing for me. But I don't know that point of view with the bridge in the foreground. That's not really doing it for me. You're holding your fingers up. What do you think we should do on the cropping? I would come way in. And I mean way in. Because I-- Should we go vertical? I'd go square actually. Okay, let's just go to custom and make this a full one by one. And so ... Yeah, cause I just don't know where to look and I feel like the bridge could be a nice entry in, but just barely, yeah. Okay. Yeah, and then perhaps, again I'm a retoucher, so I think as retoucher. I think the dot, like a vignette on the image could help bring the eye into center. Well you know it's kinda funny. Because there's a lot of lenses that have vignetting, which is darkening of the corners. And it's like oh, I don't know how much vignetting does this lens have? And the fact is that I add vignetting to more photographs than I take out. Absolutely. So let me go in here, actually it's in effects. And you can make it, obviously terrible that direction. And it's like here, to me that's way too far. And I'm at 48, if you want to see the numbers. And so I'm gonna come back to just a nice subtle darkening of the corners, bringing your eyes into the middle of it. Yeah, so that's a good idea. I didn't really think about a square on that one. Well cause I think a square is a very balanced, calm crop. And this is a crazy picture in the sense that there's a lot going on, so it's like okay, gentle. Nice. Okay, excellent. And so next one here. So my first thought on this one is I wish they'd been out there at the time of day that the previous image was shot. Absolutely. Nighttime photography can be a lot of fun. But having that little bit of color in the sky can help out so much. Well I think it would give it just this infinity depth if there was just that little magic hour behind. Yeah. And that can last anywhere from 10 minutes past sunset for two hours depending on how far north you are there. All right, we're running out of time. Let's just do one more. All right, so this one. Oh, I forgot to bring up the name on some of these. So Nathan Mccreery, thank you for submitting this. I believe this was shot with a four by five. Just techy, you know. And so a lot of landscape-- (mumble) four by five. Yeah, it's that aspect ratio. You know it looks like it's beautiful dessert environment. They got some kinda nice light. What interests me is over on the right hand side, there's some side light cutting across those rocks over there. And I wish there was more of that on the rocks in the foreground. Yeah, it's interesting. I think it wants a little more contrast as well. Yeah, it might be a little flat in the way that it got submitted to us through the JPEG system. So we try not to be too harsh on people, I'm not harsh at all. in that regard. But that's perfectly fine in case people are thinking the same thing cause ... And this is gorgeous. Now, do you do much with black and white versus color? I shoot primarily in black and white. Oh, okay. My personal work. What's a key important for shooting black and white, do you think? What I think is nice about shooting black and white, it's all about competition at this point. Yeah. That you're not distracted by color. So I look at this, and I'm like, okay the picture, I think that the diagonal is saving it. Um-hmm. Because otherwise it would be cut in half. It would have been a exact 50/50 split. But because it goes off, with the shadow, it gives it a dynamic line. So I think composition is most important with black and white. Which is why I enjoy it. All right. I'm afraid that we're gonna have to call it there. We've kind of run out of time with Lisa. That was great, thank you very much. Thank you very much coming on. It was great to see your work. Great to see your advice for everybody else. So folks, thanks a lot for tuning in. You can tune back in next month when we'll have another new episode with another mystery guest at this point. So keep checking back. And we'll have more here for you. Thanks a lot.
Class Materials
Free Download
Bonus Materials with Purchase
Ratings and Reviews
a Creativelive Student
Love love all John Greengo classes! Wish to have had him decades ago with this info, but no internet then!! John is the greatest photography teacher I have seen out there, and I watch a lot of Creative Live classes and folks on YouTube too. John is so detailed and there are a ton of ah ha moments for me and I know lots of others. I think I own 4 John Greengo classes so far and want to add this one and Travel Photography!! I just drop everything to watch John on Creative Live. I wish sometime soon he would teach a Lightroom class and his knowledge on photography post editing.!!! That would probably take a LOT OF TIME but I know John would explain it soooooo good, like he does all his Photography classes!! Thank you Creative Live for having such a wonderful instructor with John Greengo!! Make more classes John, for just love them and soak it up! There is soooo much to learn and sometimes just so overwhelming. Is there anyway you might do a Motivation class!!?? Like do this button for this day, and try this technique for a week, or post this subject for this week, etc. Motivation and inspiration, and playing around with what you teach, needed so much and would be so fun.!! Just saying??? Awaiting gadgets class now, while waiting for lunch break to be over. All the filters and gadgets, oh my. Thank you thank you for all you teach John, You are truly a wonderful wonderful instructor and I would highly recommend folks listening and buying your classes.
Eve
I don't think that adjectives like beautiful, fantastic or excellent can describe the course and classes with John Greengo well enough. I've just bought my first camera and I am a total amateur but I fell in love with photography while watching the classes with John. It is fun, clear, understandable, entertaining, informative and and and. He is not only a fabulous photographer but a great teacher as well. Easy to follow, clear explanations and fantastic visuals. The only disadvantage I can list here that he is sooooo good that keeps me from going out to shoot as I am just glued to the screen. :-) Don't miss it and well worth the money invested! Thank you John!
Vlad Chiriacescu
Wow! John is THE best teacher I have ever had the pleasure of learning from, and this is the most comprehensive, eloquent and fun course I have ever taken (online or off). If you're even / / interested in photography, take this course as soon as possible! You might find out that taking great photos requires much more work than you're willing to invest, or you might get so excited learning from John that you'll start taking your camera with you EVERYWHERE. At the very least, you'll learn the fundamental inner workings and techniques that WILL help you get a better photo. Worried about the cost? Well, I've taken courses that are twice as expensive that offer less than maybe a tenth of the value. You'll be much better off investing in this course than a new camera or a new lens. I cannot reccomend John and this course enough!