Lesson Info
56. Camera Accessories
Summary (Generated from Transcript)
The lesson covers various camera accessories that photographers can use to enhance their photography experience. The instructor discusses topics such as camera grips, remote shutter releases, memory cards, battery chargers, cleaning tools, viewfinders, camera straps, and weather protection. He provides information on the different options available and offers his own recommendations based on his experience. The lesson emphasizes the importance of choosing accessories that meet individual needs and preferences.
Lessons
Class Introduction
23:32 2Photographic Characteristics
06:46 3Camera Types
03:03 4Viewing System
22:09 5Lens System
24:38 6Shutter System
12:56 7Shutter Speed Basics
10:16 8Shutter Speed Effects
31:57Camera & Lens Stabilization
11:06 10Quiz: Shutter Speeds
07:55 11Camera Settings Overview
16:12 12Drive Mode & Buffer
04:24 13Camera Settings - Details
10:21 14Sensor Size: Basics
18:26 15Sensor Sizes: Compared
24:52 16The Sensor - Pixels
22:49 17Sensor Size - ISO
26:59 18Focal Length
11:36 19Angle of View
31:29 20Practicing Angle of View
04:59 21Quiz: Focal Length
08:15 22Fisheye Lens
12:32 23Tilt & Shift Lens
20:37 24Subject Zone
13:16 25Lens Speed
09:03 26Aperture
08:25 27Depth of Field (DOF)
21:46 28Quiz: Apertures
08:22 29Lens Quality
07:06 30Light Meter Basics
09:04 31Histogram
11:48 32Quiz: Histogram
09:07 33Dynamic Range
07:25 34Exposure Modes
35:15 35Sunny 16 Rule
04:31 36Exposure Bracketing
08:08 37Exposure Values
20:01 38Quiz: Exposure
20:44 39Focusing Basics
13:08 40Auto Focus (AF)
24:39 41Focus Points
17:18 42Focus Tracking
19:26 43Focusing Q&A
06:40 44Manual Focus
07:14 45Digital Focus Assistance
07:35 46Shutter Speeds & Depth of Field (DOF)
05:18 47Quiz: Depth of Field
15:54 48DOF Preview & Focusing Screens
04:55 49Lens Sharpness
11:08 50Camera Movement
11:29 51Advanced Techniques
15:15 52Quiz: Hyperfocal Distance
07:14 53Auto Focus Calibration
05:15 54Focus Stacking
07:58 55Quiz: Focus Problems
18:54 56Camera Accessories
32:41 57Lens Accessories
29:24 58Lens Adaptors & Cleaning
13:14 59Macro
13:02 60Flash & Lighting
04:47 61Tripods
14:13 62Cases
06:07 63Being a Photographer
11:29 64Natural Light: Direct Sunlight
28:37 65Natural Light: Indirect Sunlight
15:57 66Natural Light: Mixed
04:20 67Twilight: Sunrise & Sunset Light
22:21 68Cloud & Color Pop: Sunrise & Sunset Light
06:40 69Silhouette & Starburst: Sunrise & Sunset Light
07:28 70Golden Hour: Sunrise & Sunset Light
07:52 71Quiz: Lighting
05:42 72Light Management
10:46 73Flash Fundamentals
12:06 74Speedlights
04:12 75Built-In & Add-On Flash
10:47 76Off-Camera Flash
25:48 77Off-Camera Flash For Portraits
15:36 78Advanced Flash Techniques
08:22 79Editing Assessments & Goals
08:57 80Editing Set-Up
06:59 81Importing Images
03:59 82Organizing Your Images
32:41 83Culling Images
13:57 84Categories of Development
30:59 85Adjusting Exposure
08:03 86Remove Distractions
04:02 87Cropping Your Images
09:53 88Composition Basics
26:36 89Point of View
28:56 90Angle of View
14:35 91Subject Placement
23:22 92Framing Your Shot
07:27 93Foreground & Background & Scale
03:51 94Rule of Odds
05:00 95Bad Composition
07:31 96Multi-Shot Techniques
19:08 97Pixel Shift, Time Lapse, Selective Cloning & Noise Reduction
12:24 98Human Vision vs The Camera
23:32 99Visual Perception
10:43 100Quiz: Visual Balance
14:05 101Visual Drama
16:45 102Elements of Design
09:24 103Texture & Negative Space
03:57 104Black & White & Color
10:33 105The Photographic Process
09:08 106Working the Shot
25:29 107What Makes a Great Photograph?
07:01Lesson Info
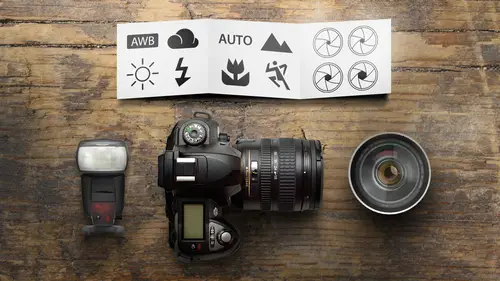
Camera Accessories
It is time to start the gadget bag. And so we've brought out a few of the little gadgets that you might want to get into. And they're all about solving problems, not about having trinkets in your camera bag. It's about solving problems. We'll take a look at some of these. And we've got all sorts of stuff to talk about here. And this is kind of the grab bag for the rest of the class you might say. So we're gonna talk about camera accessories, lens accessories. We'll get into our macro session. We kind of ran out of time in the lens class. We gotta have it here because there's a lot of accessories that go with it as well. I gotta admit, because I do know about a lot of these gadgets, and some of you out there know a lot about these gadgets. This is kind of just the tip of the iceberg. I mean it goes far beyond. And I'm just trying to point out the main stuff to people who want to get into this. But there is many, many more things that are out there and we're just gonna touch on some of t...
he most valuable, at least I think, for basic photographers. We're gonna first be looking at the camera body itself. And one of the things that you may have noticed is that the professional cameras from Nikon and Canon are these really big cameras that have integrated vertical grips. And there are vertical grips that you can get for a lot of the other cameras. And pretty much all of the intermediate to higher end level cameras are gonna have these battery grips down below. And they're gonna do a couple of things. They're gonna make the cameras more comfortable for shooting vertically. And they're gonna give you storage space for extra batteries. Anywhere between two and three batteries in the entire system so that you don't have to change out batteries quite as frequently. Now, I gotta admit, at one point I was all into vertical grips. I loved vertical grips on all of my cameras. And that was partly because I shot a lot of sports photography. And if you do sports photography, you're typically photographing humans in somewhat standing up positions, which means you want to shoot vertical so that they fill the frame and you have as much data on them as possible. I don't do as much of that now, so it's not as helpful. But for anyone who shoots sports photography or portrait photography, it is just more comfortable having that position. The battery exchanging is a smaller issue in most cases. I remember shooting some time lapses where I had a camera shooting time lapse over about eight hours at night, and one battery just wouldn't last it the whole night. And so having multiple batteries in there made that a little bit better, the situation. And so sometimes they'll also add in extra features. Some cameras, I know they added in GPS, or the extra plugins. The Fuji system gives you, I think mic inputs. Or is it headphone jacks on that one? And they'll give you extra buttons on the front and back for focusing and dial control. It also, kind of on a minor side, it makes you look more professional because your camera is bigger in size. I tend to do more travel photography. And so I don't need that. I'll just turn the camera sideways and that's small. But something I don't have listed up here is the vertical-- the hand grips that go on the cameras. And so I'll have a camera. They sometimes make these. I don't have the proper screw with me right now. But they'll give you a little finger grip on here so that you have a better grip on the camera. Now this one actually adds in a quick release plate down here. and it moves the tripod socket and it actually gets it here so that you can mount this with more different lenses. But I do like a camera that feels good in the hand. Sometimes I like a camera that's really, really small. And so having one of these dedicated optional little finger grips. And this is available for the Fuji cameras here. I don't have the vertical grip, but I do have this larger grip, and it's much deeper on my fingers here. You can see how much more grip on here. Which is kind of nice because when I hold the camera like this it doesn't just slip out of my hands. One other thing. I really don't have a spot for it in here. But I saw that a Leica camera had this really cool finger leather loop. And it was like $150. And I said, "You know what? "I have some old scrapping and some electrical tape. "I bet you I could make something that works like this." And so what I did, I stick my two fingers through here, and I kind of put my bottom finger down here, wherever it's comfortable. And so now I can have my camera like this. And it's just a nice way to hold the camera and have a little bit more stability. But if I do need to open a doorknob or use both hands, I'll just leave it on here. Like a very fancy keyring or something. And so I just made this with a couple straps of nylon loop that I had from a spare strap, or some camera bag device of some sort. Whatever makes it feel comfortable, whatever works for you. There's a lot of different solutions for a lot of different people in there. Remote shutter release. And so these are the little cable releases. I brought a couple in here. I've got one from Fuji. This is a really simplistic one from Fuji. It's just a single button. And if you want to do a long exposure you're gonna press in on the button and push it forward. And if you have your camera in the bulb mode, it will just leave it open as long as it's on there. This is a fancier one from Canon. Canon makes a simple one. But then they also have a fancy one, and this is an intervalometer, it has a timer. You can do a long time exposure. So for instance if I wanted to do a 2.5 minute exposure, I could dial in two minutes 30 seconds, start it, and it would automatically end it. With the simplistic one I gotta keep an eye on my watch to do it. You could also do intervalometer work with this. And so you could have the camera take a picture every 10 seconds, and I could program it in here. Canon is now putting that in the camera, so you don't need to buy this on the modern cameras in order to do the intervalometer work. Normally on a camera, I don't like using this because it's got this thing that's moving around on my tripod. And so I just use the self timer. But, you know, just the other day I was shooting some photos and I was shooting down a long street that had traffic. And I had to shoot my shot between the cars. And timing two seconds between cars is not easy. And so the cable release, now, now, now. Even though I had a fast enough shutter speed, it's just this allows me to be very precise about the timing of the shot. And so it's very, very handy to have those around for a lot of different types of photography. If you want to be able to remotely control your camera or fire it from a distance. If you want to mount your camera someplace because it's unsafe, or not allowed to be there. I remember at one point I was mounting cameras in soccer goals so that you could be right behind the goal. And you're not allowed to stand there. You've got to stand back behind the lines where they have for photographers. Mount a camera in there in a device and then have a trigger that would trigger it in there. And so there's a lot of these that are out there. You want to make sure that it's got a good signal. Because there's some infrared remotes that you can get, and they work like TV remotes. They're good for about 20 feet, and then in sunlight they don't have very good distance. The radio remotes are the ones that allow you to fire over hundreds or thousands. Pocket Wizard makes some of the most popular, some of the best ones out there. There's a number of after market ones that are much less money that are a little less reliable, but they're pretty good deals out there. They'll also offer you multiple channels. And on your next big basketball game that you go to, or you watch on TV, look behind the backboard and there's probably gonna be about three or four cameras mounted up behind the backboard, and they're gonna be triggering those cameras with these wireless remotes. And as I say, you can have different channels, and different grouping so you can have different cameras firing. Sports Illustrated, I don't know if they're still doing this. What they would do is they would have a photographer who is assigned to shoot an event. And he's got to get as many different angles as possible. So what they would sometimes do is he'd be shooting at one end of the court, and his camera, as he's shooting photos, would also be triggering one or two other cameras that are mounted somewhere in the stadium. And they may or may not be shooting what he's shooting. But if he's shooting something at the basket and that one's pointing at the basket, he's getting two shots at the same time of the same thing. And maybe that will be a better angle view. And it's really kind of nice if you need to get your camera into an unusual position to have a really reliable remote. Sometimes they're made by independent, or by the manufacturer of the camera. But in most cases, I kind of like the Pocket Wizard system because they can work for triggering camera to flash, or remote to camera, or remote to multiple cameras, or remote to multiple flashes. So it depends on what your setup is. I have three of these so I could trigger my camera, which could trigger a flash, and that flash could trigger another flash. And so, some helpful devices. Obviously memory cards. We talked a little bit about this before. The compact flash and the SD cards are the most common out there. MicroSD is being used in some of the GoPros and some of the really small cameras out there. XQD is something that was brought about to offer faster speeds. They keep figuring out faster ways of doing things, and they keep coming out with new standards. Physically I love the XQD size card. It's small. It's really rigid. It doesn't look like it's gonna break in any case. I'm not a big fan of the SD cards. They just seem kind of flimsy. I have yet to break one, because I'm careful with them, because I know they would break easy. The compact flash ones seem to be very, very durable. I've heard them getting thrown through the washer and still coming out and having all the data on them. And so when you're looking at memory cards, obviously the first thing to look at is the size of the card. For quite a while I thought that, you know, I would never need a card bigger than 32 gigs. And 32 gigs is gonna be fine for most people in most situations. If you're gonna shoot video, that's when you need a lot more. I have a lot of 32, 64, 128 now because they've come down in price. The speed of the card is important to people who shoot lots of photos, people who do sports photos and need them downloaded onto the card very quickly to clear that memory buffer on the camera. For the average photographer, memory speed is not a big deal, and buying a card that is twice the speed for four times the money is usually a pretty bad deal unless you know you need that speed. And most people just don't. Then there is the minimum speed, which is more important to those of you shooting video. Because video needs to constantly be recording a steady stream of information. And so that minimum speed needs to be pretty fast. And there is a number of different standards out there. And those of you shooting HD, that's not that big a deal these days because 4K is here, and that really shoots through a lot of data. And if you're gonna shoot 4K, you'd better get some of the very top end fast cards when it comes to that minimum speed. And then on the SD cards, the newest cameras are using UHS-II cards which have two lines of information and can read and write information more quickly. If you are gonna invest in these, you should check to see if your camera actually utilizes this information. And there are a number of cameras out there that may utilize it in card slot one, but not card slot two, as some cameras will hold two cards in there. So make sure you're getting the right card in the right place to get the major benefit of it. If you're shooting a lot of photos very quickly and you're trying to download stuff, one of the complaints on cameras that have two card slots that are of different systems is that it can only go as fast as the slowest card. And so if you have two cards in your camera, it's only gonna be able to write as fast as the slower of those two cards. So I tend to like to buy cards in two packs and having matching cards for any camera that has two card slots. I find downloading from the camera to be cumbersome and very, very slow. And so it's not a process that I like using. The card reader I think is a much better option. I've had the same card reader now for probably about five or six years. Paid $20 for it or so. And it's much faster than downloading through the camera. And if I want to be downloading while the camera is off shooting something else, you don't need to have the camera around. You don't need the battery power. If you have a slot in your computer, that's of course a very good way of getting the information into your computer as well. You're not gonna shoot anything if your camera is dead, so you should always carry a spare. Even if you don't think you need it. That's like your seatbelt in photography, is just make sure that you always carry a battery with you. I have actually sewn my own little pouch. And in that pouch are the three things that I really want to have with me: a battery, an extra battery, a memory card, just in case something happens with that memory card, and a little cleaning cloth. When I have that, all I need is my camera and my lens and I'll probably be fine. That's kind of your last ditch emergency things. There are two different types of battery chargers. Most days cameras are coming with what is known as travel chargers, which are very small in size, thankfully, but they are kind of trickle charge. They're kind of slow in the process. A number of the higher end cameras, the professional cameras, will come with what are known as speed chargers. And they're about getting the entire battery charged up in an hour and a half or something. And so sometimes those may be available for your camera, but they may not be supplied with your camera. You have to buy it as an additional item. Other issues with charging in the car. You can buy car chargers. I don't really bother doing that. I would rather get an inverter, which is something that you can plug into your cigarette adapter and then you can plug anything in. You can plug your phone, your computer, and a variety of things. But if you wanted exclusively one for your camera, you could. There are AC adapters for people working in studios, scientific environments, where you need to have constant power to the camera all the time. You don't want to use batteries. But it's this inverter I've found really helpful for anyone who likes to do road trips, and might be camping out and away from electricity for a while. Now if you have never left your home country, you might be surprised to find that not everybody uses the plugs in the wall the same as everyone else. And so there's a lot of very good resources online where you can find out what the plugs are in where you're going. And then of course getting the appropriate adapter set so that you can plug your stuff in. Now, this generally is not a problem. But there is also different voltages running through those power things in the wall. And you want to make sure that your device can handle the power of where you are going to. Now most devices will be ranging from 100 to 240, so it can handle all of the ranges in all the different countries. But there are some older devices, or there might be some specialty devices, or some very cheap items where they didn't really go through the process of getting it tested on all the different voltages out there. So make sure it can accept the systems that you're going to be encountering on any sort of travel trip. I've done a number of what we would call adventurous trips, a long ways away from electricity. I've traveled for up to five weeks without any electricity. And solar charging is something that you may need to look into if you're going to be going to Everest Base Camp for multiple weeks on end. I've looked into this, and I just don't like what I see, even now today. You really have to be out there for a really long time to make it worthwhile. Because something like this, this Goal Zero, which from what I've seen looks to be one of the best systems out there. There's a variety of systems depending on how big and how much money you want to spend. But even something like this is about $600. You might have to ask yourself, well how many batteries could you buy for $600? Just leave them charged up, ready to go. And that's what I ended up doing for my five week kayaking trip up in Alaska is just, I bought like 12 batteries, and just had them. And I ended up going through about eight or nine of them. I turned the display on the back of my camera off and I didn't spend my evening hours in my tent ogling at photos that I had taken that day. So I had to be very efficient about using the camera. But just buying a bunch of batteries might be a better solution. Because you need solar panels. And it's not just charging your battery. You have to charge this other battery that you then plug your battery into for charging. And so you really want to think about weight, size, and money spending, and what's the best direction for you. If I was going up to Everest Base Camp for a couple of months, yeah, this is what I would have. I hope your photos don't look like this. Mine do from time to time. And that means that you have got dust on your sensor. Dust is gonna show up as little black specks on your sensor. And it's gonna show up a lot more clearly when you shoot at f/22 than you do at 1.4. And so if you want to test your camera what you do is you photograph something white, a white wall. You don't even need to focus on it. It can be just a piece of paper three inches in front of your lens that's brightly lit. Put your camera at f/ and you're probably gonna find a few spots in there. To clean it there are these rocket blowers. And you don't want to use the can of compressed air. That has propellants in it that might damage your sensor. What I do is I hold the camera upside down, put the mirror into its lock up position, and then clean it out by blowing air in there, hopefully knocking out any of the dust. If you still have dust on the sensor you're gonna need to go to stage two. Not everybody is comfortable with stage two. Stage two involves sweeping the dust off in some way. In the past I have used the sensor swab system, which is a little alcohol you put on this clean swab and you swipe across the sensor, cleaning off the dust. But you gotta make sure you don't damage that sensor in any way by poking at it, or getting it wrong. This is tricky because then there can be a little droplet on there, and you kind of wipe that off, and you've got to clean it again. It can be a little bit fussy, but it is what the professionals use. A system that I heard. I can't confirm but I've heard pretty substantially that they're using this up in the International Space Station is this lens pen kit. And it's got what looks to be kind of like a felt tip pen that's got a special little pad on it. And it's got this loupe system here. And you go in there and you just kind of sweep off the dust that you have. Let's see if I brought-- What did I bring in? Did I bring that in? I thought I brought that in. Oh yes, here it is. It's a magnifying loupe. Let's take this off here. And it's got a little helicoid here so that you can adjust the height of this depending on where your sensor is, whether it's in the mirrorless or SLR. And then, watch this, it's got its own built-in light. And so I can look in here and I can see very, very sharp focus. And you've got a hangnail. You can really see that clearly right there. And so it's good for multiple reasons I'm sure. But I've needed this. And it's cut out here. And I think I forgot to bring the pen out. But the pen looks like a normal pen but with a bent side. So you're in here, and you get that off of there like that. And it seems to work pretty good. And it seems like it's pretty hard to mess that one up. But the one that everyone should have is my blower brush. And where did my blower brush go? Right here. If you're gonna clean a camera, there are two stages-- Not those two steps, but another two stages. The first thing is just cleaning off the mirror housing in here. In here we have the mirror, which is blocking any sort of dust from getting in the sensor. There's also the shutter unit. And stuff can get on the back of your lens, and in here. And so I always like holding my camera upside down. And you don't want to stick this in because you don't want to poke that mirror or anything. And I just like to get around in different sides and knock that off first. And then the second thing I would do is go into mirror lock up and do the same thing again with the camera in mirror lock up, where I can actually get access to the sensor. One of the reasons why you don't want to leave your cameras with a lens off a lot of the time. For a mirrorless camera, you don't have that kinda first stage. And so you can actually see the sensor there. And so let's go ahead and just clean this. Hold it upside down and blow some air in here. These rocket blowers are kind of new to photography. We didn't have these back in the film days, and we were cleaning film off. But these give you a nice little puff of air. Not too strong, but it should knock off most of that dust. And if you're not traveling with one of these, you're setting yourself up for some problems. Because what are you gonna do when you're in the middle of Tanzania, on our safari, and you've got a dirty sensor? Yeah, I know you're gonna come knocking on my door. But what if I'm not answering? You want to have one of these yourself just in case to clean off for those sorts of things. The viewing loupe. This is for people with SLRs. And I've found this very helpful if you do have an SLR. It really helps out because it makes you look like you are official now. And so when you're out shooting in the field and you can't see what's going on on the back of your viewfinder. You play the image. There's just too much light hitting it. You hold this up to it, and boom, it blocks out all the light. And it's like okay, now I can really see what's going on. And so this is one of the reasons why I like mirrorless cameras, is I don't need to bring this thing. Because that's like the size of a lens. I could bring a lens instead of this. But with SLRs, if you really want to confirm that you got it for sharpness reasons, for color reasons, it's a really handy device to have. And so when I'm doing workshops and things, I will have this around because I want to look at your camera and I want to see if you're getting things right. And that's kind of my official check to see if it's good or not. So they can be very handy. The Zacuto one is really nice. It's a bit more money because it mounts onto the back of the camera. And it was originally designed for people shooting video. Because in shooting video you've gotta have the mirror up and you can't look through the viewfinder. And it gives them a better view and a more stable position for holding the camera. And these will sell for between 100 and $250. Most people don't need this, and I don't see this around, but it is available for many different cameras out there. Not as necessary with cameras that have flip screens. But it allows you a 90 degree angle of view. A lot of times people will have their camera mounted up on a tripod for looking at the stars and it ends up being down here. If you've ever tried to look through the viewfinder of a camera at this position, it's really uncomfortable unless you get a chair that is exactly the right height. And so being able to look in at an angle like that is really nice. Now as I say, the cameras that have a flip out screen, not as big a deal. But if you do need a viewfinder, it is available in some cases. Protecting the LCD screen is something that I generally like to do. It's something that can get very easily scratched. And it does lower the resell value of your camera quite a bit. Because I know I would not pay very much for a used camera that's got a lot of scratches on the LCD. And so you can usually buy these for about $10 or so. Sometimes they'll go on the top as well, so they've been kind of handy. All right, we'll dip our toe into video here. And one of the most important things about having good video is having good audio. You can go to a place like YouTube, and there is some horrible video quality. And people still love those videos. But if it's got bad audio, just no chance. And so there's a lot of good microphones that you can get that mount right onto the hot shoe of your camera. And then if you want to put a dead cat on the end of it, a big fuzzy sock basically, it's gonna help muffle all those wind noises that would be buffeting against your camera or the microphone. So you're gonna get much better sounds using that on there. And this is just, once again, it's the tip of the iceberg when it comes to audio. It's kind of the minimum amount of effort that you can go through to get good audio when you're out there shooting. And that's about what I'm up to when I'm shooting video, the minimum necessary. GPS is something that a lot of cameras are including in the camera itself, which can be kind of nice. It does have limitations because a GPS receiver that is small enough to fit into a camera housing is only so powerful, and it may not work in forested environments, or where it's blocked by trees and so forth. There are external systems that you gotta pay a lot of extra for. They're gonna run a few hundred bucks, but they might have a much stronger signal if that's something that you want to be recording on a regular basis. You know, I know that there is the potential for an entire class on underwater work. And I've only taken a handful of underwater photos in my life. And there's kind of different stages. If you just kind of want to dip your toes into the world of underwater, you can get yourself a point and shoot waterproof camera. The Nikon here is actually one that has interchangeable lenses. Limited range of lenses, but it is something that you could change the lens on. Then above that is going to be a full housing. And somewhere in between that is what some people just refer to as the Ziploc bag. It's a very fancy, well-built bag designed for putting your nice camera in that are generally quite good. But then the people who are fully into it are gonna get a housing. And in almost every case, the housing is more than the camera. Sometimes it's twice as much. Sometimes it's 5000, $10000 for a really good housing. And that's when you become fully dedicated to a certain camera, and it takes a lot to switch cameras and switch systems at that point, once you have a housing that you like working with in that case. And so I think that kind of wraps up most of the camera accessories. I will mention on straps. I have a love/hate affair with camera straps. You'll notice that my standard camera doesn't have a camera strap on it. And that's because I'm so often using the mounts that go on them so that you can put them on a tripod. And using them so frequently on a tripod. One of my favorite straps is this Black Rapid strap. And they make a bunch of really fancy stuff. And like most companies that have come up with a solution to a problem, they came up with an elegant, really nice solution and then they said, "We need to make a whole company. "And then we have more products. "And we'll make fancier and fancier stuff." And they've got all these double things that work great for certain people, but I just wanted a basic strap. And so I like one of their simplest, smallest, most basic straps. There's no adjusters. And the thing that works well for me on this is that I don't normally use a strap, and the normal attachments for a strap kind of take a little bit of time to put on. But I can just quickly screw this onto the baseplate on my camera and I can quickly have a strap. And it's just real simple. It's got some great rubber on it. And it just hangs there very comfortably, and it's very, very simple. And I just don't like straps that take up so much space. And because I use a tripod a lot, straps and tripods just don't go real well together. Now sometimes I know, because of the way that I'm traveling, I really need a camera strap, and it's just gonna be on there all the time. And so this one is by Think Tank. And this one has rubber woven into it. Or glued onto it. I don't know how they did it. But it's just grippy in the hands, which feels real good. And it attaches in the normal way to a camera. And it's just small, it's simple, and it doesn't scream out, "Steal me. I'm an expensive camera." And so I'm not a big fan of the Nikon and Canon straps and things like that. I just like a small, simple strap because I can just wrap that up, put it next to the camera, and it doesn't take up a lot of space in the bag. But everyone's gonna have their own needs. And, you know, if you're a concert photograper shooting with two cameras. One of the big fancy vests that's got clipped into your belt, holding four pound cameras on each side. Whatever works. You know, there's a lot of different solutions out there. Little Leica camera. I don't have a Leica camera here. But just one, a little wrist strap. There's a number of little wrist straps that you can get. This is just a nice leather one that's got some good strong stitching in it. Hooks up pretty quickly and has a nice little strap in there so that you can release it, handle it here, so that you can use two hands for going into your bags and doing things like that. Sometimes that's a nice solution too, depending on what you're doing. There's a variety of these out there on the market. And if you're just looking for something really small and simple, that works pretty nice. I like this wrist strap when I'm working with a camera bag and I'm trying to change lenses. Because generally either the camera is in my hand, where I can hold onto it, or it's in the bag and I don't need to carry it over my shoulder. If I know that I'm traveling with just that camera and not my camera bag, and sometimes I do like to go out as lightweight as one camera, one lens, then just a shoulder strap works really good. And so there's a lot of different solutions for different problems out there. I was wondering if you could speak a little bit-- Oh, sorry. I was wondering if you could speak a little bit about sort of weather. You know, go outside right now, it's raining. And so wanting to protect your gear in that kind of situation, but still be able to take photos. We're in Seattle. If you haven't heard the news, they say it rains here. And it does from time to time. It rains here. Technically less than New York, but I'm not gonna get into a shouting match. So it does rain here. And I occasionally want to go out in bad weather and shoot. And there's different levels. There is kind of this light little mist that comes down. And don't worry about that for relatively short periods of time. Most cameras are gonna be handling that just fine. Some cameras are better weather sealed than others. The Fuji XT-2 is pretty well weather sealed. The Canon 5D Mark IV is a very weather sealed camera. The higher end cameras are even more weather sealed. It gets to be a little more challenging when it's raining hard. And I did not bring it in. There are rain covers that you can buy. And there are specialty rain covers that are designed for certain sized lenses. And I made my own rain cover because I'm not cheap, no, I'm thrifty. And I like designing stuff that's custom built for me. And so I went down to the fabric store. And I looked around at all the different fabrics. And there's this-- I wouldn't really call it a fabric. But it was something that looks like it was designed for the window of a convertible. So it was like a hard plastic, but it was bendable. And I just bought a whole gigantic roll of it. And it's, I dunno, it's like a millimeter in thickness. And I just cut out a big square. And then I cut out a hole for my viewfinder. And then I put some velcro on the bottom. It looks kind of awkward, but it's like totally 100% rain proof, unless it rains from the bottom up or I hold my camera upside down. And so there's a variety of solutions when it comes to that. If you're gonna be out shooting a lot, there are really good nice rain covers that have bungee cords that go around the front of the lens, so use your lens hood in that case. One of the things I've learned... Because at one point I'm like, "It's raining again and I wanted to go out shooting." And a lot of things in photography, you should think exactly the opposite. So it's, "Wait a minute. It's raining. "What if I shot a whole project "just shooting out in the rain? "That's a good idea." And so then I started figuring out, okay, what do I need to shoot in the rain? And so what I was thinking what I wanted to design, and I only got halfway through it because I found out shooting in the rain really is hard, is a light stand that had an umbrella so that I could have somebody holding the umbrella for me. Because I didn't have somebody to hold it for me. And that only went so far. But one of the problems with shooting in rain is that it's like a gigantic filter. And so sometimes, I've got the gumption, I'm so excited. I've traveled someplace. I'm like, "It's raining but I want to go out and shoot." And I go out to a park and it's raining, and everything that I shoot has this blur filter on it called rain. There's certain things that you can do in the rain. But there's a lot of things you just can't do just because you're out there and your camera can handle it because of that rain filter, which I didn't really think too much about until it actually started being a big problem. But rainy times are a potential time when you're gonna get some great reflections, and some possibilities where other people aren't out there. So I don't want to discourage you from exploring the world and trying new things out there. It's just a very challenging environment. Having a good camera, and then getting an appropriate protection system for what you're doing.
Class Materials
Bonus Materials with Purchase
Ratings and Reviews
a Creativelive Student
Love love all John Greengo classes! Wish to have had him decades ago with this info, but no internet then!! John is the greatest photography teacher I have seen out there, and I watch a lot of Creative Live classes and folks on YouTube too. John is so detailed and there are a ton of ah ha moments for me and I know lots of others. I think I own 4 John Greengo classes so far and want to add this one and Travel Photography!! I just drop everything to watch John on Creative Live. I wish sometime soon he would teach a Lightroom class and his knowledge on photography post editing.!!! That would probably take a LOT OF TIME but I know John would explain it soooooo good, like he does all his Photography classes!! Thank you Creative Live for having such a wonderful instructor with John Greengo!! Make more classes John, for just love them and soak it up! There is soooo much to learn and sometimes just so overwhelming. Is there anyway you might do a Motivation class!!?? Like do this button for this day, and try this technique for a week, or post this subject for this week, etc. Motivation and inspiration, and playing around with what you teach, needed so much and would be so fun.!! Just saying??? Awaiting gadgets class now, while waiting for lunch break to be over. All the filters and gadgets, oh my. Thank you thank you for all you teach John, You are truly a wonderful wonderful instructor and I would highly recommend folks listening and buying your classes.
Eve
I don't think that adjectives like beautiful, fantastic or excellent can describe the course and classes with John Greengo well enough. I've just bought my first camera and I am a total amateur but I fell in love with photography while watching the classes with John. It is fun, clear, understandable, entertaining, informative and and and. He is not only a fabulous photographer but a great teacher as well. Easy to follow, clear explanations and fantastic visuals. The only disadvantage I can list here that he is sooooo good that keeps me from going out to shoot as I am just glued to the screen. :-) Don't miss it and well worth the money invested! Thank you John!
JUAN SOL
Dear John, thanks for this outstanding classes. You are not only a great photographer and instructor, but your classes are pleasant, they are not boring, with a good sense of humor, they go straight to the point and have a good time listening to you. Please, keep teaching what you like most, and I will continue to look for your classes. And thanks for using a plain English, that it's important for people who has another language as native language. Thanks again, Juan