Basic Copy Paste Workflow
Lesson 10 from: Get The Most Out of Your Photos With Capture One Pro 12David Grover
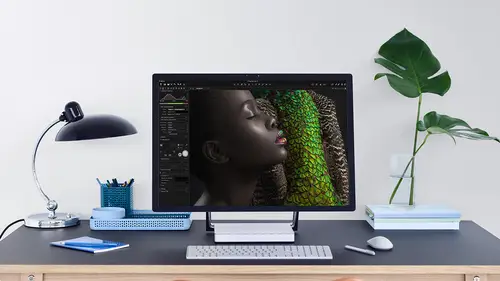
Basic Copy Paste Workflow
Lesson 10 from: Get The Most Out of Your Photos With Capture One Pro 12David Grover
Lesson Info
10. Basic Copy Paste Workflow
Lessons
Interface Overview
04:08 2Customizing Your Workspace and Keyboard Shortcuts
15:55 3Making Your First Catalog
07:02 4Importing Your First Images
11:51 5Virtual Organization
20:21 6Basic Tool Behavior
13:32 7Starting Approach to Editing
24:02 8Next Level Editing
20:10Color Tools Overview
16:28 10Basic Copy Paste Workflow
10:40 11Basic Export
13:32 12Getting Started on an Edit
05:13 13Adding Layers to Your Toolkit
10:25 14Radial and Linear Gradients
08:21 15Luminosity Masking
10:12 16More Advanced Layers
22:44 17Removing Simple Objects and Local Adjustments
14:52 18Advanced Color Edits
05:31 19Using the Color Range to Select Just What You Need
05:45 20Editing Colors in General
03:48 21Editing Skin Tones
14:30 22Combining Color Selections with Layers
08:58 23Creating Masks From the Color Editor
10:28 24Color Grading with the Color Balance Tool
16:34 25Intro to Second Day
01:37 26Session Overview
05:47 27Tethered Basics
05:04 28Setting Up Simple Sessions and Setting Naming Conventions
10:11 29Controlling the Camera
05:08 30Handling Next Capture Adjustments
07:39 31Using Live View Focusing and Overlay
19:40 32Selecting Images and Using Smart Albums
14:55 33Saving a Session Template
03:51 34Overview of Process Recipes
05:28 35Tokens Overview
26:21 36A Simple Round Trip
14:04 37Sharpening Workflow
08:06 38Creating a Recipe for Web Output
15:50 39Selecting with a File Name List
11:46 40Using Plugins and Sharing to Clients with PRODIBI
06:06 41Image Review 1 - Sometimes Simple Works!
08:44 42Image 2 - Radial or Gradient Masks, Object Removal
07:28 43Image 3 - Keystone Tool and Aspect Ratio
09:11 44Image 4 - Using Styles in Capture One
10:04 45Image 5 - Black and White
09:13 46Image 6 - Landscape
07:22 47Image 7 - Portrait
05:06 48Image 8 - Action in Lowlight
07:46Lesson Info
Basic Copy Paste Workflow
on the last basic thing that we need Teoh talk about or something that we do all the time is copy paste. So we take some adjustments from one image, and we copy them across to everything else. So if we look at a sequence off images, let's select all of these and I'm gonna reset. So, Commander, that'll reset everything back to default. So let's take the 1st 1 on. Let's do some edits. So let's just bring up the exposure of tiny bit and I'm going to reset my workspace. Open up all levels se auto levels. Hey, presto! Already looks a bit better, darkened down the mid tones a bit on. Let's have a little bit of clarity. So that's my basic at it Now. These three further images were shot under exactly the same conditions, so it makes sense. Teoh copy paste across. So let's shift. Click on Bring those up and let's put a crop on a swell. So I grabbed my crop Curse it'll and even in multi view Aiken still work with the crop as well. It's still set to square, so let's right click and say unconstrai...
ned and then added, My crop like so So I've got a crop and some adjustments that I'd like to get across to the other images Really simple. So up in the top right hand corner, we've got copy and apply. So if I click on copy and I go to the employee arrow and click, then it copies across. But you're going to say what's going on? It didn't copy the crop across. That's totally intended behaviour. So the default is is that crop is ignored in the copy paced process. So if I say undo, let's go back to where we were and look at what happens when we press copy. So I'm in the adjustments to Tampere, this one. It looks a bit like a clipboard. So when I click on copy over here, it checks on everything that is part of the image so we can see exposure levels. What else did I do? Clarity. And someone. So that's all loaded into the adjustments clipboard. But if we go to composition, you'll see that it's not checked on and again that an intended action, the reason being is that often crop can be dynamic, especially if we think of something like wedding photography, we might have 50 or 60 shots. Where the environment lighting conditions is is the same, but the crop is always gonna vary a little bit. So when I say paste over here, nothing happens with girls to the crop. Now, if you find that super annoying and in some cases it is super annoying in the adjustments clipboard tool again the sup menu, you'll find an option called Auto Select, and by default it will be on adjusted except composition. So if you want it toe also reflect the crop. We can change that to adjusted. So now if I say um, copy this time it's click on copy. Appear copy on we look a composition you see Now it's got the crop checked. So now when I press supply, it sends that crop over to the other images. Now, the nice thing is, I can also just play around and edit the crop as I see fit, even with, you know, like a multi view situation like this. So if you want the crop to be reflected, that's how to do it. Let's go back to the default and we do a couple of others, so let's grab this one. I mean, in this this situation, it would be super annoying toe have the crop because it's landscape and portrait, so it doesn't make sense. So let's bring these up similar kind of action. Almost perfect out of Cameron, Let's just had a bit of contrast orto levels on and let's have a bit of clarity. So just a little bit. And once again we say copy and look at this. When we hover over the deploy button, it's gonna be hard TOC because it's quite small. But over here on this check box, you'll see a little number pops up and it says four. So that's telling me it's going to affect four images Now. What this Tuggle does is it simply means effect all the images that is selected. So in this case, four images or only is affect the one that is the primary. So it's this funny capture one term where we talk about the primary variant that's the one with this solid white border around it, and then the other variants which of the selects. So if this is off, if I see copy paste, nothing happens because this toggle is being turned off at some point. If you're new to capture one, you will probably accidentally turn this off. We will be pressing it thinking What does that do? I Well, it doesn't do anything. I'm gonna leave it turned off on the next time you try and copy paste or you try and process 50 images, it only happens to the 1st 1 and it's really annoying and it drives you crazy. So just check that generally you want tohave this one turned on. So now when I say paste, it now goes across to everything else. But again as I change my option there. If we do copy Paste, it's not doing the crop as intended. Now you might ask, What's the point of having this stupid total? I'm gonna always wanna have it turned on on time. The answer is no. In some cases, you might not actually want it turned on. So if we bring back our viewer labels, says turned the labels on, on with it on. If I use a short cut to say, Let's look at these four images and think which one's the best? I'm going to tag it green. So I'm gonna Press seven on my keyboard. Oh, it's marked everyone green. That's super annoying, so I need to clear those tags. Eso I've got six. It's my short cut. So if I turn this off and then mark you seven on my keyboard to tag Green, you see it only happens to this one so it can be a useful toggle to turn or enough. But at some point, if you're new to capture on your turn it off and it will drive you nuts for half a day heat because you won't figure out what's going on. It also exists in the edit menu eso sort, where his image menu edit all selected variance and a handy short cut to, of course, sticking on the subject of shortcuts that copy paste action. You can also do as a short cut to so you can see here copy adjustments and apply adjustments. Shift command. See Chief, come on V again. If that doesn't make sense to you, just change it to something else in the editor. So that's copy paste everything. So as soon as you click copy that would load everything into the adjustments keyboard. You can, of course, uncheck them before pasting if you only want a few to come across. But sometimes it can be really handy to just copy one adjustment across. So let's go back, Teoh. Let's take these as an example. So let's bring up these four and actually, let's go to these four. Make more sense. So let's are going to do command off a reset research adjustments so we can start from scratch. So once again, let's do auto levels on the 1st 1 auto levels. Actually, with the selection like this will work on everything. That's a good accidental think. So what I'm gonna do is just turn that off and do auto levels. This one, let's have a bit of clarity and contrast. And so and let's also throw in a crop like so. And we going to do standard things you did before Copy paste. So that brings those across except the crop. But what if I want to copy across the crop or some other adjustment? Is Aziz well? So if I go to the crop tool itself, this is under the this tool tip here it looks like a little Lenz said, the lens to tap. If we go to the crop tool. Remember, Right back at the start of the course, we spoke about these icons on each tool, So this one is a copy pace just for that. So if I want to get the crop on this image over to the others, I can click on the little up, down arrow. See Crop is ticked, and if I say a ploy, it copies it all across like so. So if I'd change it again, let's just make a tight crop so you can see and I click copy paste and quick apply. Then it goes across. So this works for any adjustment, and it's really super useful. So let's do it again and employ. Or it could be. If you think you know what, I just want to tweet the exposure. So if I just brighten it up a little bit, copy, see? Explosion contrast is ticked and say Apply. It comes across Now. If you want to make that even faster, you can suppress that dialogue or just say, Apply straightaway by holding down shift, and if I shift, click the up and down. Then it goes a gross straight away, like so so really handy thing to know. So copy and apply up here. Copy and apply all except the crop copy and apply on any tool. Just that individual tool. Really useful for lots of reasons. You could be copy and applying metadata like keywords across exposure changes, crop and so on. So in this case, we copied across the crop and then I can just drag each one and then fix the crop. But if that crop has to be the same dimensions, that's a really simple way of doing it.
Class Materials
Bonus Materials with Purchase
Ratings and Reviews
Leon
This is a superb course. David is an excellent teacher. I'm coming to the end of it and have learnt so much. I've been using the software for a year, self-learning as I went along. I had watched the odd David Grover video on YouTube, but never got much further in my understanding of the software. Capture One is brilliant software and to do it justice you need to learn it properly from an expert. Highly recommend this course if you want to produce professional results.
lakiut
Excellent course and a very engaging speaker. If you are starting with Capture One 12, this is the best class to take. The lessons are presented and explained in an organized way that it shortens the learning curve. Thank you, David. Cheers!
Jino Lee
One of the best course I've purchased. Very helpful and I learned so much more with this course and in a short period of time, than all the official Capture One You Tube videos put together! Anyways David Grover is the same guy who does the Phase One C1 official YouTube videos, so there's no better person to conduct this course than him! Truly excellent and if you think you know all about C1 Pro 12 interface, wait till you watch this course.