Camera Settings to Control The Scene
Lesson 3 from: Getting Started with Off-Camera FlashErik Valind
Camera Settings to Control The Scene
Lesson 3 from: Getting Started with Off-Camera FlashErik Valind
Lessons
Class Introduction
06:46 2Seeing Light and Why We Add Strobes
05:36 3Camera Settings to Control The Scene
06:20 4Controlling Off Camera Light
11:50 5Accent Lighting the Subject
19:10 6Shoot: Overpowering the Scene
10:29 7Shoot: Creating a Whole New Scene
17:01 8Class Recap
05:48Lesson Info
Camera Settings to Control The Scene
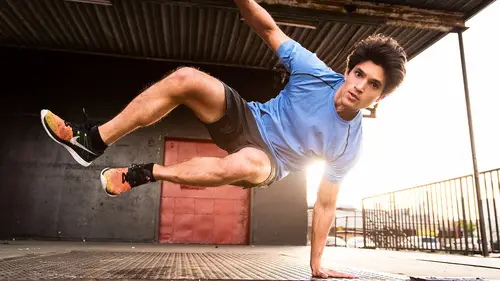
The next thing is controlling the scene with camera settings. This right here is one of the most empowering and important things I want you to take away from the class. So controlling the scene with your camera settings. This is the ISP, aperture, shutter speed, this is how it's going to impact your final photo. We've talked a lot about light and how it hits the face and the quality of it, but we're not shooting in a vacuum, we're not always shootin' in an empty space. Usually we're shootin' in a studio like this where there's window light or outdoors where there's tons of sunlight. So controlling the scene with your camera settings is gonna be extremely important. So the big things we're gonna control is aperture. This is the first thing I like to set, and that gives us our depth of field. So for portraits, usually I like to start at around f/4, or 5.6, and that's gonna make sure that my subject is in focus, but my background is pretty blurry, so it's gonna make them pop out of the im...
age. So that's the first thing I set, the aperture is, I'm considering how much depth of field and how blurry I want my background to look. The next thing is shutter speed. This is what you're gonna be changing constantly when using strobes out on location, 'cause the shutter speed controls the ambient light, the shutter speed's gonna control the light in this room, or the light out in the park where you're photographing, or out on the beach. And then finally, ISO is the global intensity of light, which means if I crank up my ISO, the light from my strobe and the light from the ambient existing light are both gonna get brighter. Same as if I go down with my ISO, they're gonna get dimmer. So after I've set those two, if I want everything brighter, then I start playing with my ISO. But the shutter speed is the biggest thing that we're gonna be looking at. So global means the ambient and the strobe light. Here's an example of shootin' in New York City, and I wanna show you how powerful your shutter speed can be. Alright, so, I just grabbed a friend really quick, one evening as the sun was setting to get some shots out there off of one of the cool graffiti buildings right by my apartment in Manhattan. So, this shot right here is just two of my buddies. One actually stopped by, he was on the way, like grocery shoppin' or somethin' and I had another friend out there holdin' the light for me. And I wanna show you how with shutter speed you can really control ambient light. I mean, I can turn off the lights on New York City with shutter speed. So all my camera settings are gonna stay the same here. I'm at ISO 400, I'm at f/5.6. And in the bottom left you'll see my shutter speed, that's the only thing I'm gonna change. And as I change my shutter speed, look at what happens to New York around us. We slow down one stop. Slow down another stop. Slow down another stop. And one more. I'm able to literally turn the lights on in Manhattan. And if I go back and I speed up my shutter speed, I can turn the lights off on Manhattan. That's only happened one other time, that's when we had the hurricane come through and the power went out. Alright, other than that you're not gonna be able to get much control there. So shutter speed allows you to just turn the lights on and off on the world. It's pretty impressive how powerful it is. And as I go through this one more time, notice that as my shutter speed changes, the light on my subject doesn't at all. So having strobe lights gives you this independent control. I can turn the lights up and down on the world, and I can keep the power consistent on my subject, to make sure that that intensity and that quality of light looks good. Here's a very practical application for everyone out there that shoots weddings or environmental portraits, if I want something very contrasty and moody, I'll use a fast shutter speed out there on location and I'll drop down the intensity of the ambient light, so my bride pops out of the scene. Now if I know my bride is a super bubbly, happy person, and she likes these airy, energetic images, I might slow down my shutter speed, might put her in this bright, happy location so all the sudden we see more detail in the background. So there we go, 200th of a second, 1/60th of a second. It doesn't sound like big change, but it completely changes the environment and the feeling of the photograph. And at the same time, by mixing in my aperture, I can now get a super blurry background. So see I've gone ahead in this instance I'm probably at f/2.8 or f/4. I'm focusing on my bride, we all know that the men are usually just the props in the wedding anyway, so I can blur him out in the background a little bit there. And you see previously it was all about the location and my bride, so I was at f/11, so everything's in focus. And then I'm here, and I'm at f/2.8. And then again, when I put them together, I'm at probably around f/2. to get a nice blurry background. So it shows you aperture's gonna control your background, shutter speed is gonna control your environment, and if I wanted everything brighter or darker, then I just start turning my ISO up and down. So you have a lot of control in camera. And that's all with one light, one strobe, and you're gonna see it here in about two minutes. The other thing to consider is your maximum sync speed. So this is somethin' I wanna throw in here, 'cause if you're a little newer to using strobes, which many of you are, you actually have a limitation when you're synchronizing with your off camera lights, and that's called your x-sync or your max sync speed. It's usually around 160th to 1/250th of a second on your DSLRs, and that's basically as fast as you can go while synchronizing with your strobes. The reason for that is, you have two shutter curtains, so basically your shutter curtains are closed. When you pull the trigger, or press your shutter button down, what it does is it opens the first curtain, revealing your sensor, so you can see your whole image sensor here. That's when the flash fires, pop, covers the whole sensor, and then the second one starts coming behind and closes. Now once you go beyond your maximum sync speed, he's not happy about that, once you go above your maximum sync speed, your first curtain opens, and your second curtain actually has to start chasing it, and you never really get in an instant where the sensor or your film is completely exposed to the light. So the faster you go, you start to get these little black bars. And what that is is you're actually photographing the rear curtain on your camera. So you've heard of rear curtain and first curtain sync? Yeah, you're shooting so fast that your picture is taking a picture of like the inside of your eyelid. It's takin' a picture of the second curtain. So the faster you go over your maximum sync speed, you get more and more of that rear curtain, until eventually you're just photographin' the inside of your camera, you're not photographin' anything else. So that's the only consideration I want y'all to keep in mind is play with your shutter speed up and down as slow as you can hand hold it or with a tripod, and then go ahead and turn it as fast as you want to dim down your ambient light, just making sure that you stay below whatever the maximum sync speed on your camera is. So check the camera manual or google it, figure out what that is, usually it's around 1/200th of a second's a safe spot to start on most camera manufacturers. And that's for your mechanical shutter. For you electronic people out there, with the mirrorless cameras, you cannot synchronize strobes with an electronic shutter. So make sure you have your mirrorless camera set to mechanical shutter when you're synchronizing with strobes and then you won't have any problem it'll just be like a DSLR.
Ratings and Reviews
Piotr
this is a super express class, fantastic... within very little time the guy explains what other need hours and hours to explain. clear explanations supported by practical examples how to sue light and what happens. this i avery basic but if you need to refresh your basic knowledge it is highly recommended to listen to this guy, he is good he is also fun
Jeanna Rice
Worth every penny! I'm a natural light photographer looking to have more control in less than ideal lighting situations and this class was perfect! Erik covers so much great information in an efficient and effective way. He automatically answered all my questions just as they came to mind throughout the class! Love that he covered both creating dramatic and natural-looking lighting no matter the environment you're in! Thanks Erik!
Rich
Erik is concise, approachable and effective with his teaching style. This class had the perfect tempo yet covered some of the most important concepts and things that people usually struggle with (aka me) which is mixing ambient light with flash. Superb class, superb teacher.
Student Work
Related Classes
Lighting