Lesson Info
7. Color on White
Lessons
Course Introduction
03:20 2Understanding Lighting Diagrams
12:11 3High Contrast Portrait
12:43 4Finding The Light
12:02 5Subtle Beauty
06:10 6Soft Fine Art
10:46 7Color on White
08:33 8Catalog Shots
06:00Light From Below
07:38 10Fresnel Beauty
05:58 11Old-Time Fashion
11:31 12Superhero Light
09:11 13Simply Stunning Beauty
11:10 14Controlling Shadows
13:20 15Soft Fine Art
04:51 16Front Bokeh
08:28 17Large Soft Light, the Easy Way
06:51 18Creating Motion
07:28 19Dramatic Light Using White Balance Shifts
05:47 20Simple Soft Light
05:50 21Grinder Girl
10:28 22Large Soft Light
07:30 23Vertical Contrast
07:17 24Light Rays
10:57 25Wide Angle Texture
05:08 26Closing
06:08Lesson Info
Color on White
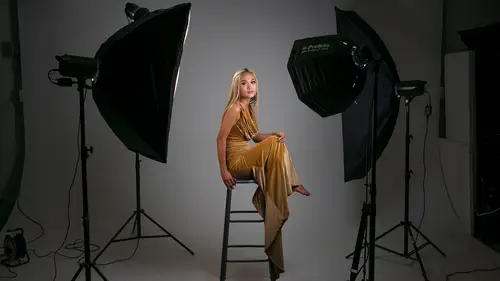
It's time for me to show you one of my favorite tricks and that is using gels to add color to white fabric. And so what we're gonna do here Theresa has this amazing blue dress on. And so I wanna compliment that with a background that's also blue. Now you could use contrasting colors. I could use a red background or whatever I want but I chose to go blue with blue just to keep the theme of bluey blue. And so the way this works is, it's all about flagging the light, controlling the light with grids and things like that and using gels. So let me first walk you through how I have things set up. So I have this beauty dish right here. It is my key light, and we are gonna set that at about F10 and the light is it's got a grid on it. So it's this guy right here. I've got this exact thing on my beauty dish and that's gonna restrict the light and make sure that it doesn't fall on the background or mess up any of the stuff that is below like the floor or anything. So we're really controlling that...
light. The other thing we have, we're gonna sort of dim the light so you can see this fabric back here. This is called tool. You can get this at any fabric store. It's very inexpensive. It's about a dollar 80 per yard, something like that. I have a hundred feet of this between two light stands and we've just sort of strung it up here in random patterns and clamped it down with some, Aclamps. So this is lit with, from the side it's side lit. And so what we have is two lights. I'm gonna go over here to this side and show you sort of what we've done. So we have a light over here, it's to the side to make sure that this light isn't hitting Theresa or spilling on the floor. I have a flag. And so what this flag is doing I can move this back and forth. You can see, I can move this flag and make sure none of this light is hitting anywhere except on the fabric itself. So just on the tool. And so that's what this is doing. So I have one of those on both sides and then they also have a flag behind the light and that is making sure that none of this light is hitting the background. So it's just a slice of light on the fabric. And then we have some gel. So I have some blue gel. I'll just stick that over the of light and you don't have to do anything fancy. You don't have to have any gel holders if you don't want I just tape it on there, no big deal. And so you can see that we still are controlling that light. So we're seeing how that light is being controlled there. So I really wanna keep that just on the fabric itself. And so I've got one on each side. So now when we go back to the main camera you can see that that has turned from white to this beautiful blue color. And that's what we love about this. You can make this any color that you want because that- I'm gonna steal your light. So that is gelled. So it can be red or green and blue or purple any color of gel that you can find. You can make that white turn into that color. The other thing I have over here is a separation light. And it's up here sort of high. In fact, I'll turn on the modeling light for that one. So right now that is turned off. Let me turn on the modeling light. There you go. So now you can see that we have this light that is hitting the back of Theresa's head and the side of her body. That's just gonna help her stand out just a little bit from the background. So we've got a key light. We have a fill light with a flag to make sure none of this light is spilling into my camera lens. That's really what that's about. And then two lights eliminating the tool fabric. So one, two, three, four lights in this setup, key light, a kicker light or fill light to the side and then background lights. That's how this works. Okay. Now it's time to meter all of this stuff. So the key light, I want it to be bright enough to illuminate most of Theresa, but not so bright that it's throwing light way back in the background. So around F10 is what I've discovered works for this. So I'm gonna turn on my light meter and we've already set these lights in advance just to save some time. So what I'm gonna do is on my light meter I can select different groups. So my key light is group one. My fill light back there is group two and the two background lights are group three. So group one, I'm going to meter that. And that meter's right at F10. So we have an F10 set up. We have group two and we'll meter that, that meter's at F and then group three, I'll meter that and that's at 3.2. So what I can do here though, is I'm gonna use my exposure no flash power notation and see what all that works just to keep things consistent. And so let me go and do that really quickly. We'll go back over here. Here we go. Okay. So first let me meter my first light. That's F10. I've put that in memory, hit exposure, Delta EV exposure. The second is 0.5 negative 0.5 that's the fill light. And then my background lights can meter those that's negative three. So and if I meet both of them at the same time, it's a negative two. So you'll have to, it depends on the gel that you're using. So these background lights back here right now am I metering with this lure up and metering both lights at the same time dead center? It's negative two, but if I had a different color gel, maybe red or yellow I might need to back that down a little bit. So it you'll have to season that to taste is what we want to do. So I have this at F10. And so what I'm gonna do because we really need a lot of space. And if I'm right next to the main camera I will not be able to get all of Theresa in the shot. And so what I'm gonna do here is first of all let me turn on all of my modeling lights. There they go. And then I'm wanna take a shot with all the groups on and I'm gonna walk past the main camera. So I'm gonna walk way back here and I'm gonna get really low so that we have sort of this powerful shot wonder woman shot. I'll take that photo. And I love this shot. So I might be too low for this but that's the shot that we get from this. I think it's just really powerful, really majestic. And I absolutely love it. So what I'm gonna do is I'm gonna break this down by group. And so what I'll do is I'm gonna change this and I'm gonna turn on just group one. And I'm gonna take a shot with just group one which is the key light. And then I'm gonna turn on just group two and take a shot then I'm gonna turn on just group three and take a shot. Then I'm gonna turn on all the groups and take my final shot. Okay. Now we're gonna put those side by side so you can see what each one of these lights each one of these are doing. So I will hit this and there you have it. So the first image is the key light. The second image is that kicker fill light. The third is just the background lights. And then the fourth image is all of the lights combined. Now I love this fourth shot. I gets just really a beautiful shot. And so what we're gonna do here is now that we have everything set up, you've seen everything done. We've shot our shots. It is now time for our last looks. (upbeat music)
Class Materials
Bonus Materials with Purchase
Ratings and Reviews
LeCompte
The class is comprehensive without being too complex! An all around 'how-to' guide with examples in real time with real people doing it for real. Showing 'What If' structured classes and showing 'Here is Why' Does not drag along but quick and concise. AND brought the support staff for deserved bow at the end. Nice Guy & Nice class 4 Stars at least!
Student Work
Related Classes
Lighting