Lesson Info
3. High Contrast Portrait
Lessons
Course Introduction
03:20 2Understanding Lighting Diagrams
12:11 3High Contrast Portrait
12:43 4Finding The Light
12:02 5Subtle Beauty
06:10 6Soft Fine Art
10:46 7Color on White
08:33 8Catalog Shots
06:00Light From Below
07:38 10Fresnel Beauty
05:58 11Old-Time Fashion
11:31 12Superhero Light
09:11 13Simply Stunning Beauty
11:10 14Controlling Shadows
13:20 15Soft Fine Art
04:51 16Front Bokeh
08:28 17Large Soft Light, the Easy Way
06:51 18Creating Motion
07:28 19Dramatic Light Using White Balance Shifts
05:47 20Simple Soft Light
05:50 21Grinder Girl
10:28 22Large Soft Light
07:30 23Vertical Contrast
07:17 24Light Rays
10:57 25Wide Angle Texture
05:08 26Closing
06:08Lesson Info
High Contrast Portrait
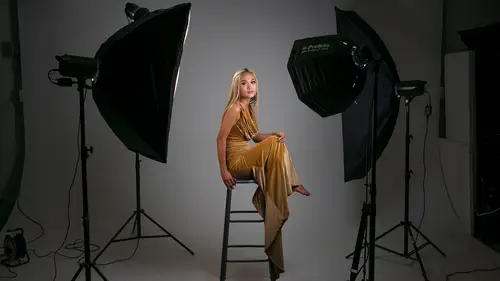
In this lighting setup, we're gonna do some dramatic, black and white photos and we're gonna do that with just two lights. The key foundation of this is the direction of light and the position of the camera. And so let's first look at our key light. And so I have chosen to use this beauty dish with a grid. And you notice that this is directly 90-degrees from Theresa, so we're gonna get really strong highlight. You can see this shooting to the side here. And what that's gonna do is it's gonna illuminate one side of her face and the other's gonna fall into complete darkness. Let's talk about this grid. So you can see from the side here, we've got this grid that it absolutely keeps the light from spilling. So Theresa, take a half step back and I'll move this around. You can see that when I move the light, if it's not coming straight out, the light doesn't even show up. So take another step forward, Theresa. And then we have it right to the side of her. In fact, I'm gonna raise that up jus...
t a hair so it is right in line with Theresa's face. Okay, so that's our key light. That's just gonna give a strong side light and we know that strong side light loves black and white. So what I'm gonna do in Lightroom, so I've got my camera tethered to Lightroom. You can see I have my tethered capture bar here. One of the things I wanna do is I wanna change the develop preset from none to black and white. And then I'm gonna change it to high contrast. And so what that's going to do is when the photo comes in, it will automatically be converted to a black and white photo and that will save me some time. Okay, now let's meter our key light. So here's our key light. I'm gonna meter that. It is F10. Actually, it's F9. I'm gonna change that so it is F10. I want it to be F10. So there we go. It's F10, exactly. You can see that F10, exactly. Okay, that's fantastic. So I've metered that. What I'll do is then I'll make sure that I've metered this and then I'll store it in memory. F10, it's in memory. Okay, F10, it's in memory, I can use my Delta EV metering to check the other light when we get there. Now I need to match my camera so it's already at F10. And so now, let me just take a photo. Bam-O, and let me put this up on the screen and check it out. We have this beautiful black and white photo of Theresa. Now one of the things you're seeing immediately is that Theresa is totally just falling into blackness. Her hair is black and so we need to fix that in some way. So I'm gonna show you what's happening here. So we're gonna turn off the video lights and we're gonna zoom in on Theresa here. So Lexi's gonna zoom right in on Theresa's face. And you can see how that light is illuminating just her. There's no light spilling on the background. Even though I have this big, white cyclorama, you don't see it 'cause no light is hitting that. So I have a second light. I'm gonna turn this second light on. And what this will do is bam, now you can see a silhouette of Theresa. I can adjust it so I see a little bit more of the top of her head. Maybe I can raise it up, whatever I need to do. So the thing is, when we're on Lexi's camera, you can see that the camera, so her camera is where my camera will be, it has to be inline with Theresa and the light behind her. So if Lexi moves her camera. So Lexi, move to the right or the left just a little bit. You can see what happens. Keep going, is you start seeing this light peeking back from behind Theresa. And so you need to keep your still camera inline. So go right back to dead center and you'll see how that solves that issue. Okay, we're gonna turn our video lights back on. Let's get back to our metering. We know that this key light, this F10, I've put it in memory. I have my Delta EV metering. And based on experience, I know I want that back light to be one stop brighter, +1 on my Delta EV metering. So I'm gonna meter to the light behind Theresa, and hold that. And you can see that right now, it's +08. So it's not quite bright enough. So I'm just gonna move this a little bit 'cause that'll help hide it. And I'm gonna keep metering this till I get it right to +1. So we're right at 1.4. There we go, that's close enough. So that's 1.1. 1.1. So I don't really mind if my metering is off by one-tenth of a stop. That, to me, is okay. So on my lighting diagram, I will have 0, F and then +1 for my background light. So, we already have one look. That was that really black and white image. Let's take the second look here. This is going to be essentially the same thing except for now, when this comes in, you can see that we have this beautiful light that is wrapping around Theresa. And so we can see that she has more than just a face. We can see her hair and we can work with that and we can do several different things. So that's the beginning point. That is portrait number one. I really like that. But what I wanna do is I wanna take that to a different level. And so what I'm gonna do is I'm gonna go to this back light here. And I'll turn off the modeling light just so we don't blind anybody. And I'm gonna take off the reflector. So this was the reflector that I had on. And what this does is it scoops up all the light, it's hard to say, scoops up all the light, and it makes it go straight forward, essentially. So I think it may be a 30-degree spread of light. Now, we have no, we have nothing on this. Fact, Theresa, if you can take a step to the right just so this camera can see this. You can see, this is totally a bare head. There's nothing here, at all. And so the light is just going wherever it may. So Theresa, go ahead and step back to where you were. So what's gonna happen here is instead of the light just hitting the back of Theresa, it's also gonna hit this white floor, the white wall. It's gonna bounce light everywhere. And so what we should get instead of a completely black background. So if we look at the computer again you can see that that background is jet black. Let's see if we get a gray background, more of a gray background. So I'm gonna meter this. I wanna keep it to the same ratio. So still, I want it to be +1. So it's not +1 right now because I took off that reflector. So that reflector takes a lot of that light and makes it punch right to Theresa. So with this, what I'll have to do is increase the power just a bit, until I get it where I want it to be. So now it's, again, it's +1.1. There you go. So +1, +1.1, +0.9, all close enough, I think. So now, let's take a second picture with this lighting setup. Look straight at me. Chin down just a hair. Excellent. I'll take that shot. And you can see this comes in, we don't really have enough of the background, we're not getting to that gray. So what I need to do is I need to take it from + where it was, let's take it up to +2. Let's see if that will get us to the same place. So I'm gonna take this. I'm gonna increase my output and meter this light. Now it's +2.2, 2.1. There we go. So I've doubled the power of that light. And now let's see how this is looking. Beautiful. Okay, yeah. Exactly. Now you can see that the background is going from completely black to more of a gray. We could even go up to +3 and we get even more gray. So I'm gonna do that. You can make this a subtle as you want or as bright as you want. It's up to you. So that's +3. So +3, there it is. So we went from +1 to +2. Now we're at +3. Let's take a look at this. Beautiful. Okay, now that background is really, I like that best. So maybe 2.5. But you see it went black to a really, really dark gray, to a medium darker gray. And we're starting to see that light sort of bounce around which looks pretty cool. Okay, so that's a look two. I like that. Now what we're gonna do is something really fun. I'm gonna just take this light back here, I'm gonna spin it around. So it's gonna be in the same position. I'm just spinning it so it faces this big, white wall. It could be a seamless, white paper. It could be whatever, it doesn't really matter. I'll make sure that's lined up. I think I moved it just a bit. I'm not even gonna change anything. I'm just gonna take a shot with the same values and let's see what we get here. And check this out. It's probably too bright. There's too much light falling in. So what I'm gonna do is I'm gonna meter this light normally, on the wall. That meter's an F9. I'm gonna take that down to about 5, 6. 5, 6. What a lucky guess. 5.6. There it is, 5.6. So all that did is it gave me a relative value of how much light is hitting that wall. And so now it should not be completely white. But nice. So it's not blasting out Theresa. The thing I don't like about this is Theresa is too side-lit. So we're gonna need to do one more thing to fix this, and that is simply taking our key light, moving it just a bit more to the front of her. And you can see, maybe, on an overhead, how we, yeah. So we just moved that just a little bit more to the front. And now, I'm going to take this shot. And that fixed that side of her face just being totally wiped out. Now I can go in here. I can go to my Develop module. I can bring open these shadows here. I can take my blacks, I can raise them up. And now, maybe I will crop this just a hair so we have a little less of that. Let me make sure this is 16 by nine. There we go. Okay, and there you have it. There is the shot that I think I like. That's my preference for this shot. And we have just done it. Theresa, congratulations. It's the first lighting setup of the 20. Now it's time for us to take our last looks! (gentle rock music)
Class Materials
Bonus Materials with Purchase
Ratings and Reviews
LeCompte
The class is comprehensive without being too complex! An all around 'how-to' guide with examples in real time with real people doing it for real. Showing 'What If' structured classes and showing 'Here is Why' Does not drag along but quick and concise. AND brought the support staff for deserved bow at the end. Nice Guy & Nice class 4 Stars at least!
Student Work
Related Classes
Lighting