Lesson Info
11. Old-Time Fashion
Lessons
Course Introduction
03:20 2Understanding Lighting Diagrams
12:11 3High Contrast Portrait
12:43 4Finding The Light
12:02 5Subtle Beauty
06:10 6Soft Fine Art
10:46 7Color on White
08:33 8Catalog Shots
06:00Light From Below
07:38 10Fresnel Beauty
05:58 11Old-Time Fashion
11:31 12Superhero Light
09:11 13Simply Stunning Beauty
11:10 14Controlling Shadows
13:20 15Soft Fine Art
04:51 16Front Bokeh
08:28 17Large Soft Light, the Easy Way
06:51 18Creating Motion
07:28 19Dramatic Light Using White Balance Shifts
05:47 20Simple Soft Light
05:50 21Grinder Girl
10:28 22Large Soft Light
07:30 23Vertical Contrast
07:17 24Light Rays
10:57 25Wide Angle Texture
05:08 26Closing
06:08Lesson Info
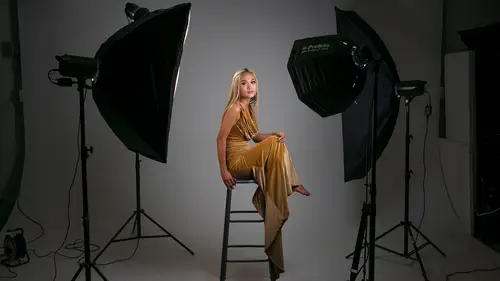
Old-Time Fashion
We are going to continue our lingerie shoots, shots, our lingerie shots. But we're gonna go back in time and I wanna create sort of an old time, maybe 1920s, 1930s, kind of a looking shot. And so Theresa has this very elegant nightgown on. And so we're gonna make this sort of a desaturated high contrast shot. Now, the way I'm gonna do this is I'm gonna do some tricks that I have learned over the years. And I'm gonna be using grip like this. This is a piece of Cinefoil. What this is is it's like aluminum foil but it's totally black. You can shape it and bend it, just like aluminum foil. You can poke holes in it and do all kinds of interesting things. So I'm gonna be using a piece of this to create some interesting stuff. And then the other thing I'm going to be using, I'm gonna grab this from you, Theresa, thank you. Is this, I've got two of these, these are grids. So grids, you can see, they control the spread of light. And so I'm gonna use this on my second light, my background light,...
as well as my key light. So my a key light is this guy right here. It's a beauty dish and it also has a 20 degree grid just like this on that. It's at about six and a half feet high, it's really high. And then Theresa is gonna be looking into this light. Now, the way she's gonna know if she's positioned correctly or not is just by looking at the grid. And so she'll know if she sees something like this that doesn't show her the light, that she needs to move so she can see straight through that. So that's a trick when you're metering lights with grids or you're positioning models, you should be able to see straight through that grid if you want it to be directly at your model. Okay, so what we're gonna do is first, we're just gonna work with the key light. And so what I'm gonna do is I'm gonna meter this. And so I'm gonna meter it to the light there. And that meter's right at 5.6. And so the cool thing about this, and I can't show you the meter readings because you'll see in a second, the meter cam is being used for something else. So you'll just have to take my word. So we're at 5.6. And so what I'm gonna do is have Theresa look up at that light, and I'm going to just sort of take a shot here that will look something like the final image. There we go. And that looks pretty cool. And so there we have it. So that's not a super interesting shot, it is what it is. And so we need to add some pizzazz to this. And so to do that, well, we have to make some changes. So the first thing I'm going to do is I'm gonna turn on my background light. So I'm gonna turn that on. And this, I'm not even gonna meter it, but if I did I would meter it on the background back here and I would want it about two stops brighter than my key light. And so this is one of those things that you can sort of season to taste. You can just sort of turn this up and down, look at the image on your computer or your camera and see if you're getting what you want. Because you'll see why it's not so important to get an exact meter reading. So when I turn on the modeling lights, we're gonna turn off all of the other lights here in the studio just so you can see what's happening here. You can see that we just have bunch of light falling everywhere. And so what I've done is we're gonna turn back on the lights in the studio, just so you can see this thing. I have a piece of that Cinefoil, that black foil. And you can see right here, we can zoom in on this a little bit, you can see that I have poked a bunch of holes in that. And so it's in a shape of some spirals and some other things. And so what happens is if I then turn on the modeling light and now Matt, go ahead and kill all of the lights in the studio. You can see on the background that it is creating this really crazy look. If I move that closer, we get this big thing, if I move it farther away, so just by moving this closer or farther from our light you can see the background changes dramatically as well. So if I just sort of put this about right here, and let me just take a photo with it there. So Theresa's gonna look up at that light. What we're seeing is, well, she's totally overexposed. And you can sort of see the stuff that's going on in the background. And so what we have to do is we need to figure out how to control that light. And so the first thing I'm gonna do is I'm going to control the background light. So I've got this grid here. And so what I'll do is I'm gonna take the grid and I've set up a clamp in advance, and I'm gonna put this grid right over the front of this light. And then I'll just clamp that down. Now you might be asking, why not just use a normal grid on my light, a normal 20 degree grid? Well, I would normally except the grids that I have for these lights are stuck in a shipping container somewhere on the high seas and they did not get here in time for this class. And so I'm just using the grid that I do have just to make it work. Okay, so let's kill all the lights one more time. And now you can see on the background we've restricted what's happening on the background. So we can see there from our sky cam, we're restricting how much light is spilling. And so let me take another photo and let's see what we're getting. Perfect, Theresa. Now we're starting to get that pattern. Oh, doesn't that look cool? That looks cool. But down in the lower right hand corner of this image down here, we have a bunch of light. That is coming from our key light. And so what I have on the key light is I have a giant flag. So this big black piece of cloth here that I can move around is called a flag. And it is made specifically to block light. So let me show you, you can see on the background here when we turn all the lights off, you can see that behind Theresa there's a bunch of light. And when I move this flag in, I'm blocking that light. See how I'm blocking that light by moving this flag back and forth? So even though I have a 20 degree grid on Theresa it's not restrictive enough. So I'm gonna restrict it even more by putting this flag on there. So now I'm only getting the light on Theresa and none on the background. And so now when I take that same shot again, blammo, now you can see that we have eliminated that light down there in the corner. And I can see that maybe that light, that pattern needs to change a little bit. I can move my little gobo, that's what this would be called, a gobo or a cookie. I can move that around to try to get different effects. So if I had an assistant, I'd maybe have the assistant moving things around. But look at what that is doing. It's taking that white background, and because no light is hitting the background except what's going through that foil, we're getting the pattern of the foil and a little bit of this down here, this sort of grid shape, that's from the actual grid that we're using. So different sizes of grid, five degree, 20 degree, 40 degree, whatever, will give you different effects. So what I'm gonna do here, just so you can sort of see how this has worked, I'm going to remove my piece of pre-stabbed, pre-sliced, so that's what I just used. So I'm gonna take a different piece of this that has not been sacrificed. So I'll need about that much. And then what I'm gonna do is I'm gonna make a new pattern. So the way you do this is, you take your knife, you take your Cinefoil, and then you just stab and go at it. So I'm gonna make maybe some wavies. I don't know if this is gonna be better or worse or what, I'm just stabbing away. Sort of uncomfortable doing this, but okay. I just watched a crazy killer show last night and so now I'm feeling like I'm a crazy man. Okay, so now I'm gonna mount this. I want to see what happens. And Theresa's looking like, what? You're what? And I'll put this on here. I'm just using a normal grip head as the clamp. And now let's turn off all the lights and I'll sort of see, I've gotta turn on my modeling light. There we go. Ah, that might be sort of cool. Looks sort of wavy. Let's see how it works out in the photo. So there we go. Oh, way too much light, way, way, way too much light. So what I'm getting is something unexpected. So I think what I'll do is I'll sort of move this and crunch it, move this a little closer. You never know exactly what you're gonna get until you do it. Just gonna move that closer. We'll try one more shot, see how it works out. Ooh, that's sort of cool. Yeah, I like the first ones better. These second ones aren't as fun as the first ones. So to make this all come together, thank you, Theresa, just hang out there for our last looks. But what I wanna do is I'm gonna go back to, I think it's about right, right about here, I think, is the one I sort of like. So what I'm gonna do is I'm gonna go to my develop module. I'm gonna take my saturation down just a bit. I'm gonna take the black down. I'm gonna open up the shadows just a bit. I'm gonna go down to my clarity, crank that way up. Maybe that's too much. It's hard to see with all the video lights what I'm doing. But whoops, clarity up a little bit. Okay, we're gonna go with that for now until I can edit this properly, but that's pretty cool. So let's take our last looks.
Class Materials
Bonus Materials with Purchase
Ratings and Reviews
LeCompte
The class is comprehensive without being too complex! An all around 'how-to' guide with examples in real time with real people doing it for real. Showing 'What If' structured classes and showing 'Here is Why' Does not drag along but quick and concise. AND brought the support staff for deserved bow at the end. Nice Guy & Nice class 4 Stars at least!
Student Work
Related Classes
Lighting