Lesson Info
5. Subtle Beauty
Lessons
Course Introduction
03:20 2Understanding Lighting Diagrams
12:11 3High Contrast Portrait
12:43 4Finding The Light
12:02 5Subtle Beauty
06:10 6Soft Fine Art
10:46 7Color on White
08:33 8Catalog Shots
06:00Light From Below
07:38 10Fresnel Beauty
05:58 11Old-Time Fashion
11:31 12Superhero Light
09:11 13Simply Stunning Beauty
11:10 14Controlling Shadows
13:20 15Soft Fine Art
04:51 16Front Bokeh
08:28 17Large Soft Light, the Easy Way
06:51 18Creating Motion
07:28 19Dramatic Light Using White Balance Shifts
05:47 20Simple Soft Light
05:50 21Grinder Girl
10:28 22Large Soft Light
07:30 23Vertical Contrast
07:17 24Light Rays
10:57 25Wide Angle Texture
05:08 26Closing
06:08Lesson Info
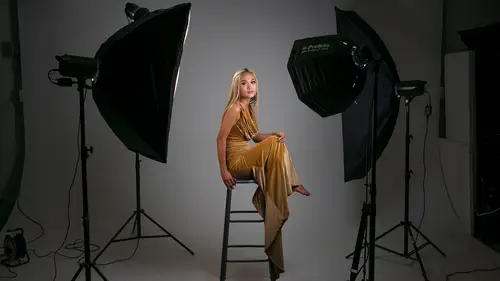
Subtle Beauty
We are gonna do another subtle beautiful shot with one light. This is glamor shot. Sheila is back here, in her bikini, and we're going to create something that could be a fine art photo. And so the key to this is light from two sides, but we only need one light to pull this off. So our key light is right over here. This is our rotoluxe, it's a square soft box with a grid. So that's really controlling the spread of light. So we're gonna get some spill on the background. That's okay, we wanna see some of that blue; But it's really keeping things directional. On the other side here, we have this silver panel. So this silver foil panel is gonna reflect a lot out of light. And because it's silver, it is specular. And so that means it's gonna be as punchy as possible. And so we are gonna have light that's brighter on one side than the other, but that's okay. Because we sort of have light coming from two different directions, at a 90 degree angle, what's gonna happen is right here along her a...
rm and her leg, it's going to be a dark line. So we'll have light to dark, to light. And so when she moves, it's gonna create those shapes and textures that we really want. And so we're gonna have her doing all kinds of cool poses and those poses are gonna show up because of the way we have been lighting everything. So, the metering for this is a little bit weird. And so let explain that. So, normally with one light, you would light to the light itself. So, if I do that though, I'm getting a value of F13. So, let me just show you on the meter here, we have F13. And if I shoot at F13, well, let me just show you. So, I'm gonna go over here, set my camera to F13, and then I am going to... You don't have to do your crouching tiger hidden pose whatever, you can just stand right there. So, I'm gonna shoot this at F13 and it looks okay. I'll hide this little tethered bar. It looks okay, but we don't really see the bounce; It looks underexposed a bit. That's because of the way this lighting setup is. What we have to do, is we have to meter for the shadows, not the highlights. We wanna preserve the shadows. And so to do that, instead of lighting or metering to the light, we meter to the camera. So what I'm gonna do is I'm gonna take my lumisphere and point it where my camera's gonna be, not where the light is. So I'm gonna sweep bend down here, take that. We'll meter this a couple times. And yeah, so this is metering at F8. F8, so that is a significant difference between F13. And so what we'll do here, is I'm gonna go in here and shoot this at F8, and we can compare those two shots. So, try to do the same exact pose that you did before which is that exactly. (camera clicks) I'll take that shot. Now what we can do... Look at this shot. When we look at this in the computer, I'll pop out these panels, notice now you can see that we have a highlight on this side. We have that shadow that we were talking about right there. And then we have the highlight on the other side. So this line is going to move with her arm and with her body. And so if we show these side by side here, you can see that. On this one, you can't really see that line, on this one you can, this one is a little dark, this one looks really amazing. And also with these, you're probably gonna be doing some post-production. So, it's okay to have some over... We wanna expose to the right side of the histogram. It's what we wanna do with this, we wanna be able to do you maximum post-production. Okay, let's review. We have a medium size soft box with the grid, controlling the light at a 90 degree angle from the camera, silver reflector bouncing stuff in. We've metered to the camera, which is metering for the shadows; And then that way the highlights will be a little hot, but we're gonna get something that's really cool. Let's talk about the pose. So we looked at some photos that I'd taken in the past. We found a cool pose. And so Sheila gonna try to do this. She's gonna try to get up on her toes. So, balance is really difficult to do this. So what we're gonna do, is I'm gonna count to three, she's gonna get up on her toes, I'm gonna take a shot. And then we'll do that until we get a shot that works. So, we're gonna sort of slow down. I'm gonna come back a little bit and are you ready? I'm ready. Okay, you're ready. I think I'm ready. And 1, 2, 3, (camera clicks) And I missed it a little bit. Take about two small steps back. There we go. I was getting the edge of the paper there. So, hold that right there; Just look down again. Hold that. Don't even go up on your toes yet. And then on the count of three, I want you to go up on your toes. Ready? 1, 2, 3. (camera clicks) Okay, let's see, Ooh. Ooh, look at this. That is so cool. So we have this shot that really, really looks beautiful. If we go back, we can see another shot that I really like, and then the original shot. So, I have three options here to choose from. I can then go in and do some post-production, change the color, I can add some gradients if I want to, I can convert this to black and white, I can do whatever I want with these photos. And I think they're just really, really beautiful. Okay, so what we're gonna do now that we've seen how this works, is we're gonna go one last look around at all the different angles. And so are you ready? We're gonna do our last looks. (upbeat music)
Class Materials
Bonus Materials with Purchase
Ratings and Reviews
LeCompte
The class is comprehensive without being too complex! An all around 'how-to' guide with examples in real time with real people doing it for real. Showing 'What If' structured classes and showing 'Here is Why' Does not drag along but quick and concise. AND brought the support staff for deserved bow at the end. Nice Guy & Nice class 4 Stars at least!
Student Work
Related Classes
Lighting