Lessons
Day 1
1Day 1 Pre-Show
06:09 2Four Secrets for Great Design
49:25 3Morning Q&A
26:05 4Morning Recap
18:39 5Striking Images
34:14 6Faces in Design
17:24 7Layering and Simplifying
21:33Introduction to Typography
51:51 9Typographic Offenses
35:15 10Formatting Text
29:10 11Formatting Text in Different Programs
19:30 12Day 1 Wrap-Up
03:40Day 2
13Day 2 Pre-Show
08:07 14Designing Logos: Fonts and Text
1:27:39 15Editing Text in Adobe Illustrator/Photoshop
54:50 16Taking Control of Color
46:26 17Creating Business Cards
49:07 18Business Card Makeover
1:04:37 19Day 2 Wrap-Up
03:24Day 3
20Day 3 Pre-Show
03:53 21Designing Magazine Ads
1:20:03 22Designing Postcards & Event Posters
1:16:44 23Creating Your Own Patterns
1:14:18 24Creating Custom Photo Books
1:25:21 25Day 3 Wrap-Up
04:18Lesson Info
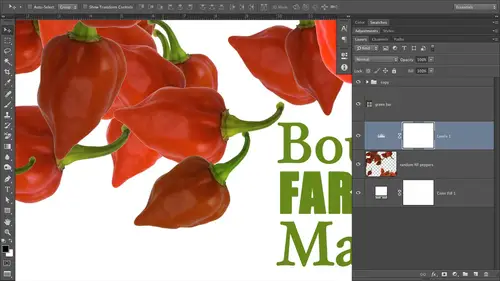
Designing Magazine Ads
I'm gonna be creating them in photo shop just because I'm in photo shop all day, every day, and I figure most photographers have photoshopped or elements if you're following along and you've got elements. A lot of the things that we're going to talk about today are Accola ble coupe that applicability in that program to So do you take in. If you've got elements you can follow along, you may not be able to do everything I do and find a shot, but you'll be able to do quite a lot of it. So if you're designing and something else, such as in Design, my good friend Erica Gamut did a wonderful two day boot camp on powering Up With in Design. Here it creativelive, and it was just a week or so ago. So if you didn't know about that course, and there's some in design users out in the obvious pleased to take advantage of that course, it's incredibly reasonably priced, and she's got some really great information specific to in design, so check that out. So here we are in our ad, the first thing we n...
eed to do before we even sit down and photo shop is to place a nice phone call to the person who's gonna be printing this ad or the publication to which that you're gonna be submitting it because you're going to need to get designed specifications. One of those specifications is How big does the document need to be if you're gonna let some of the imagery hang off the edges? We've talked about that earlier in the week. That's called a bleed. So if you think about that the images bleeding off the edges of the page, then your document needs to be a little bit larger than its final print size. We saw that when we were creating business cars the other day, and if we have time later in the afternoon, at the end, will go back over creating that business card document cause I saw a lot of young online had some questions about that, but do you have a phone call with your printer or the publication and get the specifications first? Because the last thing you want to do is design something absolutely beautiful a masterpiece, if you will, and then have it be too darn small to print that would just be heartbreaking, and you'd have to do something that I loath, which is starting over eso. We're gonna go ahead and create this ad right here. And if we look at what's going on in my layers panel, you'll see several things. We've got a solid color feel layer at the bottom of the layers panel. You can see that on the right side of my screen. I snatched one of the yellows from one of these ladies shirts and use that as the background color. Why? Because if you steal a color that's already in the photo that you're going to use in the design than your assured that it's gonna match. And it's one of the easiest ways to start out with a color palette is with a piece of art that you're given toe work with or that you decide to work with. So let's say you're making an ad for your photography studio. You choose the photo that you want to use in the at, and then you kind of go from there. The next thing we've got is a texture layer. Now this is just a kind of a soft focus image, and I'll use my keyboard shortcuts for toddling off all of the layers in the photo shot panel so I can show you just that one layer. It's option on a Mac or all on a PC, and then click the visibility eye of the layer that you want to remain on. And Photoshopped turns off every other layer, which is kind of nice. So I'll go ahead and change this blend mode back to its original, so you can see what that photo looks like. That kind of image is fabulous for building in another level of depth in your designs. It's really, really great. It's also a perfect kind of image for you photographers out there to sell as a stock image because designers like me will download that stuff. All right, so the next a little piece of art we've got going on here. I'll go ahead and change the blend mode back to this in lower opacity back down. There we go. The next thing we've got going on in this layers panel is a shape that I downloaded from. I stopped photo Downloading a shape like this is a great way to introduce a little bit more excitement this particular shape introduces action in energy despite shape. It's got so many things going on. It's got a dot pattern back there. It's got splashes of paint, all kinds of wonderful stuff, all the different stock image companies right now, all the big ones, you know, I stopped photo for Tolia shutter stock. All these guys, they have a wonderful database of illustrations in an illustration like This isn't made from pixels. It wasn't created in Photoshopped. Most likely was created in a program like Adobe Illustrator or Free Hand, where you're creating art with the pen tool that's made of points and then paths or lines in between. And the beauty of downloading a vector or an illustration like this to use in your designs is that they're infinitely scalable. And if we bring him into photo shop as a smart object than Photoshopped, remembers all the superpowers about that file format and that one of the superpowers about vectors is that infinite scalability because they're not made of pixels. So there's no pixels to in large into therefore pixel ate so points and passed, so that's a really neat thing. So we're gonna use this illustration and then we've got a photo. Also, this one I believe, came from Istock photo as well. And how do I figure out what size I needed the photo to be? Well, I simply created my document. We're gonna do that together here in a second. And then I looked at the image size of that document, the whole document size in pixels, and that gave me a maximum pixel with and high. So when I went to the stock image company to purchase the image, I was able to buy only the size that I need because photographs were sold by size on these stock agencies. Okay, whereas illustrations or priced per complexity. So really, in a stock image situation, you know why spend more money if you're not gonna use it? That said a lot of these stock company, especially for Tolia, which is my favour at the moment, they offer a really nice subscription plan so I can download the largest pixel dimension image that they have because they have all the different sizes. So I just download the largest one and then I just resize It is I need to you. So that way I don't have to worry about it. But if you're on a budget and you don't have a subscription plan, then once you create your document here in photo shop, you can take a peek at the image size and you can get those maximum pixel dimensions so you don't have to buy a honkin big One by little him and save some money. Take yourself out too much. Also in my layers panel here, I've got another little levels adjustment layer that was just to brighten that image. See how we can turn it off and you see the before and after and you'll notice that these two layers let me zoom in, are kind of their layer thumbnails Air scooted over to the right just a bit, and they have a down reporting triangle or era, which is like a triangle. But not that arrow lets you know that they are grouped to the layer underneath. Okay, so that's how we're shoving that photo through the illustration. We're gonna do that a couple of times so that you really get that down. Then I'm also gonna show you how to shove a photo through text as well as another shape just that we really get that information into your brains and then last but not least appear towards the top. We've got a couple of text layers. We've got another little smart object that the little microphone at the bottom right is just a stock illustration that I downloaded as well again bring it in as a smart object so that I voted so that photo shop remembers all the superpowers. And I can experiment with size of those pieces of art without having to worry about losing quality, which is nice. And then we've got our Uriel These. That last line of text is in red where I get the red from one of the ladies shirts right over here so you'll see me doing a lot of color theft from images because it's easy and it just works. Okay, so let's go ahead and create our new document. So we'll try it up to the file menu and choose new. Or we can simply press the keyboard shortcut, which is listed here to the right command or control in on a PC in for new document. And let's say we've already had that lovely phone chat with our printer or are the editor of the magazine. Whomever that. We're submitting this ad, Teoh. And they've also kindly told us the exact document dimensions and the resolution that we need for everything. Toe look good. Okay, so let's go ahead and press the tab button to get down to the Whitfield and we're gonna enter 7.125 This is just one of many dimensions that you might encounter. It's not. You can't use this as a standard add size, okay? And from the measurement pop up menu to the right of the Whitfield, let's choose inches. And then in the height field, that's type 8.5 and press tab again. So that were at the resolution field. Now, the resolution feel is how you control the size of pixels. Okay, I go into a big resolution discussion in one of our earlier classes. Um, I can't remember which one it was. Maybe CS five intensive. I'm not sure, but in one of my other classes here it creative why we have hours on resolution. But just for a moment, I'll tell you that it term is the size of the pixels. And when you're printing an image. You want those pixels to be so small when they're pretty that you can't see them individually. That's what Make sure your print looks all pixelated. If you've ever printed anything from the Web, you've seen that happen. Hey, so the larger the resolution number, the smaller the pixels become. And if you just wanna forget about this resolution business, just remember the number 300. And if you always have a resolution of at least 300 those pixels, we're gonna be too small, See once it's printed Now that said, if you're told by the printer or the editor of the magazine or what have you, that they need more or there you need your pixels to be smaller, so you need a higher resolution than do what they tell you to do. But 300 is just a good gold standard. Pixels are gonna be smiling if you can't see them, so we'll go with 300 on this one, I'd say, unless you're doing a coffee table book, you know. So if you're doing a or a high end magazine like one of these Lux magazines, Denver has one called Denver Looks So magazines for the hoity toity, and I think that they require 600 peopie I because there's printing at such high quality and by armies, if you're printing anything on your own printer at home, I haven't absent are 3000 which is just amazing. So depending upon what I'm printing in the kind of paper and printing on, I may go up in resolution at home. But you can do your own tests to see if your eyes can really tell the difference between a resolution document in 600. So that's my story on resolution, and I'm sticking with it. So we're gonna be creating these ads and RGB color space, which stands for red, green and blue, the other color space she might encounter. It seemed like a stands for Siam, magenta, yellow and black. And if the person you're created this ad for tells you that they want you to design it and seem like a mode, go ahead and do that. That's perfectly fine. But often times the printer would just assume, if not prefer to get an RGB file and let their digital presses or their image center do the conversion from RGB two seem like a it's This used to be a huge deal. Huge deal. It's not so much anymore because printers have evolved. The equipment that they're using has evolved, and you're seeing more digital presses now than we used to have. So it's just not that big of a deal. If you do design an RGB and you've got a lot of bright, highly saturated colors in your design, those colors air going to dull just a little bit now there's a lot of things that come into play with that they may not dull at all. But the kind of press that it's being printed on matters, the type of stock or the type of paper, the type of substrate you'll call printers call their media substrate. It all depends on all those different things. They're all variables, so you may not see any difference between RGB and seem like a but you might. If you do have to create your design or add and see him like a then I would highly recommend that you get a hold of little color Swatch books called Pantone Color Swatches. I have a couple of those here to show you this is a Pantone Color swatch book. Okay, so it's got all kinds of color combinations, mixes of ink made from seeing my king in here. And what you can do and photo shop is you can dial these. You can dial these numbers right into the program because all of the adobe creative suite applications have all of these Pantone colors built in that you're not going to see them unless you go hunting for them. I'll show you where those are here in just a little bit. But if you do have to print and see him like a then it is a good idea to get a hold of one of these books and choose the color. Because these books, we're going to show you exactly what that color is gonna look like once it's printed on the paper. So even if it doesn't look exactly like it does in the Swatch book on your screen, you've still you're still choosing from the Swatch books. So you know what? It is gonna end up looking like once it's printed. Now these watch books come in a couple of different varieties. This particular one is showing you how seeing like a or Pantone colors made from seeing my care. Gonna look on uncoated paper and uncoated paper means that paper has not had any special surface at it. Teoh that keeps Inc from absorbing into the paper quite so much. Okay, so colors will look a little bit different on uncoated paper versus coated paper. So figure out ASAP. Rare is Hey, is this being printed on coated or uncoated and according to what they tell you? Then look up your colors from one of those color books that air uncoated or coated. And again, the coded colors are kind of like the whole difference between RG B and C and y que if you compare a coded color or a paper permanent on uncoated stock compared to one printed on coated. I thought I had an example here, but anyway, if you're gonna look a little bit more vibrant, if they're printed on coated paper, so just keep that in mind. Another little Pantone Swatch book that I absolutely love and this one is is the one that I use most often times, and it's called the top 100 colors. So if these larger swatch books completely overwhelm me like they do me a little bit. See, it all goes back so we really can't process more than three or four choices. We really can't. We want choices, but we can't process them. This book, which is a significantly thinner and smaller, it's got the 100 top colors in it. So when I'm trying to do something like this that I know that's going to go to see him like a then oftentimes use this book. Okay, so Pantone and get a pantone dot com p a n t o N e And look for all these books, they may be available on Amazon to you. I haven't searched for them on Amazon, so I'm not positive Anyway, this just a little bit of a discussion about RGB versus seem like a So we're gonna roll in RGB and click OK, and then Photoshopped is gonna create our document. So here is our blank slate. So after we've created the document, let's go ahead and place the photo and all this zoom in a little bit by pressing command plus on a Mac or Control plus on a PC. And then let's bring that photo end to photo shop in the manner in which we can experiment with different sizes without losing quality. Okay, so we're gonna bring It is as a smart object. So choose file place, navigate where it lives. When you do purchase the course of the files are gonna be divided up by day And then in the folders in society to those day folders I've tried to be as descriptive as I can, so you can kind of find the file that we're working with the any good time so you can follow along. So we're in the, uh, actually, the day three files Somewhere down here. All right, here we go. So we're in folder number one, the karaoke bar and our ladies. Let's bring those guys in first, and they are the second I stopped photo file here, so just go ahead and click place and fun shot brings in the photo, but it assumes that you're gonna want to do some re sizing, so it gives you these handy re sizing handles all the way around the edges. I don't need to resize this particular photo, but if you did, you'd simply hold down the shift key toe. Keep your re sizing proportionate cause you don't want these ladies to get all mopey job squished and squashed. And then he would simply drag any corner handle inward to make it smaller outward to make it larger. If you want to resize from the inside out, therefore adjusting all four corners at once. Then you would add another keyboard shortcut. And that's the option key on a mat are all on a PC. And that way, when you do your re sizing, see how it's occurring from the inside out. That's just a couple of little time saving re sizing tips for you. So usually when I'm re sizing with the's handles like this, I will always hold down shift option on a Mac or shift Ault on the PC. So we're just gonna go ahead in press return to let Photoshopped know that we're finished with the rece izing cause it has a one track mind and will squawk it. If you try to do anything else why, you've got an active bounding box on your screen now. The next thing we were going to do here is bring in our frame, so now we're gonna bring in our illustration or are vector piece of art that's comprised two points and pass that we purchased ahead of time and we're gonna bring it into our design. So again we want to bring it in in a way that photo shops going to remember that it's a vector which gives us that scalability. Now we brought in a J pig as a smart object. It normally J pegs normally don't have infinite scalability cause they are made from pixels. However, when you bring him in as a smart object for the shop remembers their original pixel dimensions. So instead of re sizing the same instance, if you will, of the photo when you're experimenting with size here in Photoshopped, photo shop goes back to those original pixel dimensions. If you brought it in is a smart options. So that's why we brought in R. J. Peg is a smart object to, so let's go ahead and choose file place again. Navigate to the illustration. If you get this place, pdf dialogue boxes click OK, you can do a heavy sigh there to you. I do that like it helps, so we're gonna skewed our illustration up a little bit and I might make it just a little bit smaller, cause I want the photo to come through that little drop of paint there. So again, shift option on the Mac or shift all on the PC make that illustration is a little smaller press press return when you're finished. Now, let's push the photo through the frame. And this is really a handy technique to have, no matter what you're doing. Okay, this is a great technique. Have up your sleeve over here in the layers panel to push the photo through the shape. The photo needs to be on top of the shape layer. Okay, so we're gonna click and drag our photo above that shape or illustration. This technique works on anything. Text. It could be a brushstroke he made on a otherwise transparent layer. And it doesn't even matter what color this item is that we're gonna push the photo through because it's going to completely disappear here in a second. So once you've gotten the photo above the shape text brushstroke, whatever it is that you want to push it through, then you're gonna point your mouse at the dividing line between those two layers and you're going to hold down a modifier key, and that's option on a mat or Ault on a PC. So as soon as you point your cursor at that dividing line, once it changes to this little square with downward pointing arrow, go ahead and give it a quick click and you're going to see the layer thumbnail of the photo Scoot a little bit to the right, and then you get that downward pointing arrow that says, Hey, I am being pushed through What's underneath me pushed through the shape of what's underneath me in previous versions of the program, that little icon instead of the Square and the arrow, it's intersecting circles. So this particular icon is new in CS six, a little bit more descriptive of of the action that's occurring, which is nice. Nice visual feedback. Thank you, Adobe. Okay, so here is our photo through a shape. Pretty cool, huh? When you're doing this, you do need to be cognizant of the edges of your photo. So, for example, if I wanted to move the photo around inside that shape, I could go grab the move tool, Or I could just press V the for move. And then if I have the photo layer active, I can click and drag, and I'm moving the photo inside the shape. Now you'll notice if I pull it up too far, you can see the edge of the photos showing through the shape. So just be cognizant of that. Your photos edges will show through. If it's if the size, you know, isn't exactly what it needs to be or, you know, you move it around too far, just be aware of that. So you want to make sure that our ladies the photo is coming through all those a little different pieces. I don't care so much about these little pieces that period because those were gonna end up hanging off the page anyway. So just be aware of that. Now. If I wanted to move the shape and the photo around as one piece, I was simply activate both of those layers. So shift, click or command or control, click it those layers or not, consecutive toe, activate multiple layers. And now when I mouse over to my document with the move tool, I'm moving the whole mass around. Okay, so, well, this position, it a little bit higher up in our design because for I flow OK, so this is a vertical orientated design. So our eyes were gonna go, you know, top lift, move right, and then down. So I'm just gonna skip this image up a little bit more, so it's really eye catching. The next thing we're gonna do is build a new background color, because why is boring, boring, boring, boring. It could be a fabulous design element. As we looked at on day one of this class negative space is quite useful to rest your eyes and make you feel like the design you're looking at isn't quite so overwhelming. Which, of course, means what That the viewer will transfer that feeling of overwhelming tor difficulty to your ad content and your business and your service. So that's a bad thing. But in this case, we're gonna add a new solid color background. Now, most folks, they're Photoshopped jockeys that have been using the program for a long time. We're gonna add a new empty layer, right, and they're going to feel it with color. That's the old technique. So that's an editing habit that I would like you all to break because there is a newer, more efficient manner of doing that, and that is to add a solid color fill layer so we can do that in a couple different ways. We can trot up to the layer menu, choose new Phil layer, solid color or radiant or pattern. We're going to be using patterns here just a little bit as well. Show you how to create your own repeating patterns and photo shop because that was a request on Facebook. I love it when you'll make requests for classes, because it really helps me find Tune it so that you get what you want, because I've got a 1,000,000 techniques so bloody me know specifically something the year after. It is a great, great thing, very helpful to US instructors here. So we can either choose layer Newfield layer solid color or my preferred method is to click the little half black, half white circle with the very bottom of the layers panel and the film layers appear at the top. So we've got the same option, solid colored, radiant pattern. So we're gonna use solid color. Apparently, the last color we used was bright green, so what's the color? Picker is open, We can mouse away from it and our Kirshner becomes an eyedropper, meaning you can steal color from that photo. So let's mass over here to the yellow on the lady shirt, and I don't want it to be that light. So I'm gonna click around on her collar to get a little bit of a darker, almost into the orange round. So I'm like in that color so I can click OK and close that dialogue. But let's say that once I see it now in its entirety, that oh, not so much, not quite the right tent of orange. I don't have to mouth all the way down to my foreground color ship. Open the color picker and fill that layer with color again. That's three steps. You don't have to do that with a fill layer. All you have to do is double click the fill layers thumbnail in your layers panel. The color picker will pop right back open. And if you decided you wanted red for this background, which would not work people, then you can see how easy it is to experience with color. Since you used a filling layer. Phil Layers will not add as much file size to your document when you're saving it. So we're talking about hard drive space here. The more layers that you add to photo shop that air filled with actual pixels, the bigger your document gets in terms of file size and hard drive space. Solid color feel layers that this not really pixels. It's instructions that's telling Photoshopped, Hey, Phil, this labor that color. That's also why we use so many adjustment layers when we're correcting our images. And photo shop is much more efficient to use adjustment layers because they're really kind of like instruction sets. But the main reason is that it's easier to experiment with color on this. Also, if we, let's say, had to increase the size of our canvas for any reason, and you had simply filled an empty layer with color, then you have empty space between the original size and the size that you enlarge the canvas, too, so you'd have to refill that layer with color. So using feel layers is just the way to roll pay. So they came along several years back. I don't remember exactly what version but they've been in all of the CS versions, so it's time to start using them. So now let's bring in our texture file. So once again, I'm not really sure how big I need it to be, So I'm gonna bring It was a smart object so that I can experiment with size and don't have to worry about losing Quality said She's filed place. And our texture file is this one right here and there. It ISS I'm going to reduce the size of my campus, my zoom level, just so I can see the whole thing cause I need to resize that texture file so that it fits the whole document. So let's push command minus on a Mac or control minus on a PC. And now we're gonna use our modifier keys again, shift option on the Mac or shift Ault on the PC so that were re sizing from the inside out. And we're keeping our texture proportional. It's not getting squished or stretched. Press return. When you're finished, I'll zoom back in a little bit. Now we need to change this layers blend mode so that it blends in with our background color that we made from our filled layer blend modes control how color on one layer interacts with blends with cancels out, covers up color on other layers. And I've got a wonderful class on blend modes here. Creativelive called a Photoshopped deep dive blend modes. So if you're curious about limos, I highly recommend that day we spent the whole dadgum day on limos. So let's go ahead and change the blend mode of this layer by using the pop up menu toward the top of the layers panel. And if I come across anything that specific Teoh a version of photo Shop, I'll tell you. So if I don't say anything, that means that this stuff has been fed a shot for Brazilian years pay so that come across anything that is like CS five receive six specific I'll holler. So we're gonna change the blend mode of this texture layer to something in this first category. Here. They're not really categories, but it's easy for me to explain them that wakes there, these little bitty dividing lines in between, like every five or so of these modes. The first mode in this second little section or category here is your clue about what all those modes are going to do to your overall image and by the overall image. I mean, the whole composition, all of its layers and everything. If you choose any mode in this category, your resulting image is gonna be darker than he started out with. Okay, if you choose any mode in this category, it starts with lighten, then you're resulting in, which is gonna be lighter than you started out with. If you choose any mode in the overlying category is gonna be it's gonna have more contrast. Okay, so there's darkening going on with these five modes. There's lightning going on with these five modes, and there's a little bit of lightning and a little bit of dark and going on with these seven or eight moves. So for this one, we're gonna choose Darken because I really like the way it looks. That looks pretty good, but it's much too strong. If I put text over that, nobody's ever gonna be able to read it. Arguably. That's why you're putting text on the ad is for them to read it. So let's lower the layer opacity so we can do that in a couple different ways. If we have an idea of the opacity capacity that we want to try, we could double click it in that field. The top of your layers panel and just type in a number or what I usually dio is I point my cursor at the field label where it says opacity. See how it turns into a little scrubby bar, So it's a hand with them, an arrow on each side. Once you see that scurvy curse, or you can click, hold down your mouse button, and if you drag leftward, you're going to be decreasing opacity. If you drag rightward, you're gonna be increasing opacity. So let's bring this one down to somewhere. Oh, the 40 ish range. Perhaps there we go so that we we've got a nice texture. We've added depth to our peace, but it's not so overwhelming that it's distracting to everything else. And I might even go down a little bit more on that. Do you keep in mind that the printing process itself is going to dark and everything you see? Just a touch again. The paper slash media sash slash substrate that you're printing on is gonna affect that. And you may not know exactly what paper that you're gonna be printing on, but just know that the printing process, by its very nature, is gonna dark and everything. Just a touch. So what I usually do good rule of thumb is when I get the texture file or layer looking like I want it, I'll go down anywhere from 3 to 5% Maurin opacity just to kind of compensate for that little extra darkening, especially when Texas involved cause I'd rather my texture layer be a little bit to lie than the text be unable to be read. So that's just a good rule of thumb. So now let's start adding our text, our ads looking pretty cool here. But this takes your file adds a lot of energy as well to the peace. And if you think about what we're designing, we've we've got a fake karaki bar add going on here. You want that excitement and energy in the design. So think about the message here again, the imagery, the fonts, everything sends a message to the viewer, and you want that message to be accurate. We wouldn't want this ad to be all sleepy and boring. Would we nobody come to the karaoke bar? We got a jazz it up a little bit with energy in these shapes, and the lights give it a lot of energy as well as the color orange. So now let's start adding our text will press Tito, activate the type tool. I've still got the opacity field active over here, so pressing T didn't do anything, so we'll go ahead and click it. So now it's come over to our document, and we could do one of two things. We could click and drag to draw a text box, and that would be handy in that. If what you're typing is wider than the document dimensions, the shop will just let it hang off the screen. Arguably hard to see what you're typing if it's hanging off the edge of your screen. If you create a text box, then Photoshopped will automatically do the wrapping for you to the next line. It won't put in carriage returns unless you press return, but at least it won't hang on as of your screens that you could see what you're typing. So let's go ahead and do that will draw little text box here. So just click hold on your mouse button and drag diagonally downward with the text tool. And now we should have a text box. And while photo shops thinking hard about drawn that text box, I'll just have a little drink myself. See high Color coordinated the the beverage toys for the outfit. Isn't that nice? So what farm shop is really doing here? I think his because I have a slew of fonts activated like or so I left wants, I believe, since this is the first time I've used the type tool since I launched her opens, the program Photo shop was initializing the type tool, and it was loading all those font previews into the Fatman. You so remember the other day? I believe it was Day two when we were talking about fought management software and I said, Hey, y'all, if you'll notice your applications were taking a really long time to load funds and I said that Microsoft Word was notorious and it's got a little status bar on the splash screen. You can see those funds being loaded, then you're a good candidate for fund management software because then you can't that the software itself handles the activation and deactivation of your funds. In other words, if I didn't have the fox and I'm gonna about to use in this document activated and I had fun Explorer exe pro running, which was the software that we looked at the other day. Then it would intercept photo shops, request for those fonts, and it would say, Oh, hey, I got that else turned those on for you. And now we're good to gov. And you don't even have to restart the program so you can just type on. Okay, so that's what font management software would do, and that just produces the amount of load time that you get. So I think that's what we just experienced was a slew of fonts being populated in the front money. Okay, let's go ahead and type our text for this one. We're gonna tap karaoke e mania, and the last time I set type, it must have been green. So it's difficult, See? So let's go ahead and change that and bring it up in font size so that we can see what we're typing. So I'm gonna do three quick clicks to highlight everything on that line and in the options bar once you have the type till act, if you get a whole bunch of options specific to that tool. So this little color swatch in the options bar towards its right hand side is gonna let you change color. So let's give to click here again. I'm gonna steal color for my image because I know it's gonna match. So mouse away from your color picker. And once you see your cursor turn into an eye dropper than you can begin clicking to pick up color, that's in your image. We did this on Bob's card the other day. Soles roll with that brown for the moment, and then I'm gonna go up in font size with a keyboard shortcut. Shift command greater than on a Mac or shift control greater than on the PC just enough where I can see what I'm typing. Come back over here, press return and continue typing. So Thursday's remember to put all the pertinent information in your ad. The who, what, when and where. So Thursdays nine PM to close. Chelsea What I just did there. I didn't this type of hyphen. Did I know I used a keyboard shortcut on a Mac? You can create a slightly longer dash, which is good in situations like this, because think about when these things printed. It's going to be kind of small on the page, and a regular hyphen is really short. So nine times out of 10 if there's some kind of a you know, one time to another time, you know we're Wednesdays through Saturday's or nine PM to close that kind of thing. I will use what's called an in Dash E in okay, and it's slightly longer than hyphen. And the way he created on a Mac is option hyphen. Maybe it's all happened on a PC, but I'm honestly not sure. The keyboard shortcuts for those things are a little bit different on a PC. But you could just do a Google search for Windows in Dash E in, and you'll find a keyboard shortcut for it. So that's why my dash is a little bit longer. I also like to put a space on either side of that, and we'll say close wound nine PM to clothes and clothes and put in all caps because I want to draw attention to it. Press return again. And now we're going to add some more important information. Ladies drink free capitals again because that's a big deal. Get those ladies in, then the guys will come into your bar if they think, Whoa, there's gonna be girls drinking. They'll be there, then the next thing we're gonna do is actually would create the other type on another layer. Let's go ahead and get this formatted. This first line attacks is really my headlines. So we're going to go back to those font categories that we talked about the other day and choose a headline font or a display fonts something that is really nice, big, thick and is going to catch attention and gives us contrast. So I'm gonna choose in patch for this one so I can either go up to the fun option bars, a font family minyan option bar, or I could open the character panel which will do in a second. And if he's got impact on your computer, it's a fabulous fun. It really is a fabulous fun, and I use it for headlines all the time. It's nice and big and thick. I also like to use it when I'm bringing a photo through text because you need big letter characters to see the photo. So let's go ahead and come up in size on this one again. And I believe that ending size was somewhere around 49. There we go. See, we've got some nice contrast going on now between our headline and the rest of our text. I'm gonna bring down the size of our second line here by using are saying keyboard shortcut. We're gonna bring that one down to about and then make my text box a bit bigger so I can see the other text. It's in their triple click to highlight that line, and this one with our keyboard shortcut again, is going to be about 25 or so. Here we go. Now, I'd like to close up the space between these lines of text, and we decided the other day that was called letting. So let's go ahead and do that. You do need to highlight the lines you want to effect if there's more than one and there is in this case and we're going to use a keyboard shortcut Command option up. Arrow on a Mac or control Ault up Arrow on a PC. Basically, the arrow is your telephoto shot. Which direction you want to affect that letting? Do you want less? Letting close it up? So we're going up. Do you want more leading? Spread it out So you can think of that is why you would press the down arrow key so close that it quite a bit like that. And then I'll highlight this last line again, and I want to nudge it up just a little bit with letting these leading controls also live in your character panel. So will come up here to the window menu and choose character. So we've got all of those controls right here you're letting is this guy right here. Second row of settings, 2nd 1 And if you forget when any of these do just point your cursor at the little icon to the left of the field and if you let your mouse be still for just a second, that little yellow tool tip will come up. So we're gonna go ahead and finish this. Add up quickly. Here. Uh, then we will take a couple of questions, and then we'll blow through the ad again. Okay, So if you've got any questions, go ahead and be firing those up. Okay, so we've got those lines of text set. Now we can go ahead. Just use the same text box. So to add our other text, so we'll press return. And what's the more important information that we need to add or what is the additional information that we need to add to this design? What's the U R l? What if I don't know? You know exactly where this club iss. Well, then go to the u r l to find out more info. So let's type that in. We're not gonna type the h t t p colon slash slash cause that would make you what loser? That was mean. But seriously, it will make your ad look a lot less professional. So W W w the singing bar. And if there really is a singing bar, I don't know what this is. All fake, Okay. And then the last piece of information that I think is good to add for include on this ad is the address. Okay. So even if you're gonna put the address on there, I would still put the URL. So we've got our your else Nellis at 2 34 Rainbow Lane. I don't know if there's a Rainbow Lane or not in Boulder. Wouldn't surprise need it now. I didn't. Wouldn't really even have to put the state on here, because what kind of publication is this ad gonna likely go in something that's local. So there's no need for me to put the state in there or the ZIP code, you know, especially leave off the ZIP. Code is nobody's gonna be mailing this bar Anything. I'd hope not. So think about what information really has to go on here and leave it off if it's not important. But do remember to put important elements on here. The who? What, when, Where? So that people don't get frustrated. Well, she didn't even tell me the website. Now I don't know. I have these questions. I don't know where to go. There's no phone number. I can't call the bar, so think about all that kind of stuff. So for these two pieces of information down here, I want to draw attention to them. So How am I gonna do that? I'm gonna change the color of the text. So highlight the text that you want to affect, just like you were in anywhere. Processor, Let's change the color by either clicking the color swatch that's in our character panel or the color swatch sets in. Our options bar doesn't make hill of beans difference which, when you go after So now that our color pickers open, what do you think we're gonna do mouse over to the edge and snatch up another color? Let's make this red. Okay, then I'll make it stand out quite a bit. So we'll click. OK, now one of the last things we need to do here is increased the amount of space between this line attacks. The ladies drink free in the URL. Now I could do that with leading, but that would get a little bit clunky. A better option would be to use that space before setting that we looked at on Day one. So let's go ahead and do that space before in space after controls in all of the Adobe Creative Suite applications live in the paragraph panel because it's really a paragraph level kind of formatting. You're talking about space before the paragraph space after the paragraph. It's not gonna just any of the spacing inside the paragraphs only gonna adjust it right after a carriage return or right before. So let's go ahead and click within the line that we want to effect. I don't have to highlight anything with this. For with this formatting setting, just click inside the line you want to effect if you've got the character panel open in any of the CS APS, and you probably got the paragraph panel open as well. So just look for another little tab. Click paragraph in your space before setting is right here. That kind of the bottom row. And these icons really do a good job of visually indicating what that setting is going to do. So if we click within this field and you could just have a guess at it, let's say maybe I want 24 points of space. Or you could do just like we did with the opacity setting and the Layers panel. If you point your cursor at that little icon next to the field, you're going to get that scurvy cursor again so you can drag with lift to decrease that setting or drag to the right to increase that setting. But most often times I just do this visually. So let me zoom back out so we can see the whole ad See how much space we added there. Between those two blocks of text, we're following the rule of proximity group related items together. Okay, while arguably all of this is kind of related, it's not as much as this stuff is really important. This stuff is really important, and they kind of go together. So proximity builds in resting space for the eye and gives your viewer a structure. They know what's related and what's not. Just had a quick plans. Last but not least, let's go ahead and change the font of these guys down here. We're gonna change the u. R L too bold, because I would. I'm trying to really highlight that. So instead of just go into the character panel impressing the bold button, we're going to choose bold from the font style menu because the designer made a bold version. So it will always look better than any faked, bold version that the piece of software is trying to create on the fly, which is what you get when you press the be the bold would be inward or the boulder t here in the adobe CS APS So we'll go ahead and choose bowl to really make that stand out. And then I'm gonna make this line attacks a little bit smaller so I can track it out. So we're gonna make that about 15 point. And I only know that cause I've done it 100 times and then we could control tracking. It's right here in our character panel, but again, keyboard shortcuts We're gonna make you much faster This so we're gonna use the same keyboard shortcut that we did for letting, which is command option on the Mac or control option control all on a PC. But this time we're going to use our left and right arrows and said over up and down arrows so saying keyboard shortcut up and down effects letting left right effects tracking. It's supposed to you. There we go. I had that. I had the setting in the tracking field active. So see how Photoshopped has a one track mind it couldn't do anything else while it thought I'm waiting for her to type in a new tracking setting. So space that a little bit now. What I'd like to do is close up the leading again space between the lines. So let's go ahead and highlight the lines we want to effect. He's air saying Keyboard shortcut except with the up arrow Key Command option or control Ault. Pero actually, I just need to effect that one line. There we go. And the last thing I would do is track out the Oriole. Just snuff because it would be nice if this left line imaginary line, all that our biggest pieces of texts were equal in with its another little typographic trick free. So that looks good to me. Now let's go ahead and grab the move tool and drop all that text down a little bit. And since I have snapping turned on in Photoshop, I can feel the text when it gets dead center. It's snapping when I get close to that, and the way you turn that on its to go up to the view menu in, Turn on snap. All right, so there's our ad. Doesn't everybody want to g o. Aren't we all excited to have any questions on that one? Okay, I'll go to karaoke with you. Okay, I think we're on. Maybe not tonight. But the next time you're here, please, there's a great place we can go. Well, I guess before we go to karaoke A we have to take some questions. So, um, actually, this one is really good because you just left off with snapping, and I think that might answer it. But you might have some other ways to do this. So Scout from Los Angeles is saying, is their command to center a text box on the canvas when you're first starting? You know, that's a good question. There's not really but Photoshopped does have alignment tools. So what we could have done, uh, is highlight the earth. Activate rather the layers that you wanna effect. And if you're trying to send or something on the page, you also want to activate either the solid color, feel air or the background layer, and then with the move tool active k, the arrow, the top of the tools panel. You'll see these alignment controls darkened so that you can use them you'll only see them active if you've got the move toe active and more than one layer activated in your layers panel. Otherwise, they're gonna be great out like these guys aren't. You can't click him with their great out. Even if you scream, you cannot click them with a great out. So to activate these alignment tools, you have to have the move till active and more than one layer. Once you do, you can just click this one the next to the last one align horizontal centers, and that's gonna align the horizontal centers of everything that you have active in layers panel. And if you've included that background layer that solid color feel, then the other thing will pop to its center. So that's a a little tip for you. Thanks for asking that question. All right, great. We also have a question from Esther Louise from Central California. Yesterday, a little color, a little circle of color popped up when you were using the dropper tool. And today it's not there. So I win that fund so that certainly do you know what? I love myself where you know what, Let's take a look at that I believe the reason that it popped up yesterday is because I had actually activated the eyedropper tool instead of using the eyedropper inside the color picker. So let's just take a look at that that you know if they're shot. There's always six ways to do the same thing. So if we activate the eyedropper by pressing I so it's up here in the top quadrant of your tools panel and we mouse over to our image and we click and hold on. Our mouths met, and that's when we get that sample ring. That's what it's called. I mean, if you can see in the options bar the check box towards the right, says show, sample ring, it's on by default. So what this is doing is it's letting you. It's just giving you a preview of the color that you're mousing over so you can see if, oh, that's really the color I want to be sampling. You're picking up right now, so you could have used this tool to set your foreground color chip to the color you wanted the fill layer to be, and then when you created the field layer, it would automatically been the color you wanted. Same thing with the text. If it any time you can remember to set the color first, then you don't have to experiment with it after. But I usually don't remember to do that, so but I'm glad we had the question to point out the sample ring. The grey outer ring is just a neutral spot. Arresting spot for your eyes, the semi circle at inside the ring at the top. There's two semi circles inside that great ring that one of the top is the color that you're currently clicking on. So I have my mouse button depressed right now. See how if I move over to another color, that'll change. Now I'm over red. And now the first color that I clicked on is that lower semi circle. So it's showing you the previous color in the current color just for comparison. See how those keep changing as I'm mousing around. That sampling ring was new in CS five, I believe. Okay. Thank you. Um, we have some really, really good questions today, so Well, maybe ask a couple more months. Your move on. So Patty que says when calculating documents, sizes for ads. What is the difference between the bleed area and the safe area? Does it? It doesn't just It's just kind of by per the newspaper or whatever, Right, right, So ads and sizes you're gonna be different across all of publications if you'll notice newspapers you're getting thinner, thinner, thinner, thinner at sizes are always changing some magazines or get a little bit thinner, their ad sizes getting smaller as they compile in more ads. So there's really no set add size. You need to ask the printer of the publication. What she's talking about on Bleed Area versus Safe Zone is oftentimes these folks that you're designing for our oh, so happy to give you a template and oftentimes that template we're gonna see one from in picks later this afternoon. Rumor Making our photo books. Oftentimes, those templates will simply be a J peg image, but they will have put lines in that image so that when you open it up in in design photo shop or what have you you can see where the safe area is for tech. So the safe area is that printer or that publications way of saying, Hey, if you put text inside this area. It's completely safe. I promise it won't get trimmed off during the actual printing process or during the paper cutting process. The bleed area is the opposite of safe. Okay, the bleeder is saying, Hey, this is really not supposed to. It's going to be chopped off, but you don't put any text in the bleed area because it's gonna be trimmed. But that bleed area is the part is the extra bit of size all the way around your document that gives you the ability to let the image or whatever it is, hang off the page so you would not get a bleed if you made the document the exact size that it's gonna print because there's no bleed zone. It's just a little bit of an enlargement in your document. You let the image hang off The edge is, but you know that that's going to get trim so you can't put any text in there. So text keep text in the safe zone, and then if in images hanging off the page, that's the only thing that should be in the bleed zone, and you really don't want your text right up against that bleeds own because then, unless you were designing it to look like your text is about to fall off the page because that's what the viewer is going to feel like. They're gonna be uncomfortable reading your ad. So I usually a good rule of thumb is leave about 1/4 inch away from any safe zones, or quarter inch in from any kind of safe zone guide you get as a template from whatever printing company or publication that you're working with is good. I've never had anything chopped off that I wasn't expecting to be chopped off. That's an unusual statement, Dio One more quick question, and then we'll move on. If you were designed this for an online magazine, his poster print. Would you feel comfortable using any of the online resource is for Pantone colors Like I found an AP News. The Pantone has an app for the IPhone. Sure, and I think it's available for Android as well. So have used any of those three sources. Are you comfortable with that, or would you still use the printed options? Absolutely. If you're designing for something that's not going to be printed than using the kind of online options you want, even if you're not. I'm glad you brought this up. Even if you're not being forced to print and seeing my K, these swatches air still good because they can help you be a little bit more accurate in your color picking. If you need to say, use the exact ups brown, that kind of thing. So using these Swatch books is really the only way you can assure that you're going to get a an exact match of the color that you need, and you can use the built in swatch books and photo shop. Even if you're not going to see in my K, you can get an idea of the colors that you want to put in your business card or your ad or what have you? Go ahead and I'll, um, in the photo shop and just, you know, even if you're still in RGB. So the only difference between this added an online and would be that you would have typed in 72 for your pixels per inch for resolutions to the pixels of the larger for online and and you could have used any of those online tools. Let me show you where the swatches aren't Photoshopped real quick, so we're going to bring up the swatches panel. Actually, we don't even have to do it from here. But you can access them here, too. Let's just open the color picker. So you have all seen the color picker 100 times, Click list, little button color libraries, and that's where these books live. Now what you're not going to see in these color libraries is any visual difference between an a color printed on uncoated paper versus coded. So if you are printing, it is good. Have these because it's physical. You can see the color difference between coated and uncoated. Therefore, you know which one to choose online. You can't see that, but you can access them by clicking color libraries. You look at that. There's our books, and you've got a bunch of other color sample books to choose from his well, So here's our Pantone, solid, coated, solid, uncoated. Here's our specific seem like a coded versus uncoated etcetera, etcetera, etcetera so you could access those right here and use them for color picking. So, making oops, you won't let you scroll in this little box, but you can just kind of use this little rainbow bar. Teoh, determine what range of colors you want to be in. So here's the kind of orangey range actually back up there so you could use this to pick. And once you see a number, you actually don't even have to click it. You could just type in the number and photo shop will choose it. So if I wanted a specific orange that I could choose that. But again, you just don't get any indication of the difference between coated and uncoated online. But it's super handy to have here. And then once you find a couple of these, if you want it, if you're gonna need to use them in subsequent documents, you might add them to your swatches panel right here. So if I say adis watches that orange is gonna appear at the end of this little swash channel here and then if you want to go back to the color picker, just click the button. It's called Picker. That takes you back to there. So here's where I can add that to my swatches panel, so keep your eyes peeled. for an additional swatch to end up right there gives you the chance to name it, and I usually name them by their actual names. If that was what it waas click. OK, see how it appeared right there? So get extra. It'll color. So then you. That gives you a little bit more accessibility to that particular color for the other elements in your design. So let's say this ad is done. Now let's talk just a moment about saving it, and then we'll run through it all again. So two things for your continued success in designing and printing is save it in the native file format of whatever program you're using. If it's an in design, save this as an in design file. If it's illustrators, save is illiterate. File. Photo shop Save It is a native Photoshopped document. Why? Because that keeps all of your layers intact. Should you have to go back and change something, you don't have to start over, so we're gonna choose photo shot from the format poppet Menu click OK, and if it's next week or 10 years from now, we can reopen this document and and continue to edit it Now when you're preparing your second file, right, so we always save our master. Think about that. Save your master document in the software's native format. Save an additional copy and whatever the file format the printer is asking for or the publication is asking for or to send to your client as a proof. You don't ever want to give away these files you want. Keep them, squirrel them away so we'll choose from the format menu. Let's say your printer said, Well, I'd really like a pdf of this and more and more and more we're seeing Pdf's requested from printers because it's easier for them. It's also easier for you. I don't have to worry if the printer has any of these fonts I've used because creating a PdF of this ad is really just gonna take a high quality picture of the ad as a whole. So the printer's not gonna have the individual pieces and parts. I don't have to gather up the photos, the texture layers, illustration, the funds, all that stuff and create a package and hand that off to the printer like we used to have to do, is a matter of rule. You just don't have to do that anymore. Unless, for whatever reason, the printer specifically requests. And let me tell you one thing. If you're if you have a choice on printers and they don't let you do it this way by sending the pdf and they want all the fonts or they want you to create outlines out of the fonts we did that the other day where we took a fun type that we typed took that font. We turn that font into edit herbal art. If your printer request that stuff, tell them politely. Thank you so much. I'm gonna go with another printer. Really? Because that is antiquated stuff there. A lot of printers these days prefer PdF less work for them. And it takes the guesswork out of it. Because if you give them all the pieces and parts, there's a good chance that that ad is not gonna look exactly like you thought it would. Maybe that printer turns on a different version of fruit bigger, you know, Nolly or they're different styles with the same font family. There's different font versions. Who knows how many font versions there there are of Helvetica you know, just like software version. See us once es to CS three, CS 5.5. Same thing goes on in funds. So when you provide fonts to a printer, there is Ah, a little bit of Ah, uh I'd be worried about it. You know where they gonna turn on the right one. And they're gonna activate the right font for my design. So I would change printers if they wanted you to package up everything like that. If you're not in charge of the printer than you, don't, you know you don't have any recourse, but there we go. So when she's Photoshopped, pdf and I'm gonna go ahead and click Save because I want to show you just a couple of options you're going to encounter in the pdf little dialog box that comes up So we'll go ahead and click Save. I'll turn off my layers. I don't want any layers. And there photo shops is telling me, Hey, anything you choose in this pdf dialogue can also change stuff in your save as dialog box. That's time. So here's our adobe pdf dialogue and your printer, if he's a good 1 may also give you one of be presets to use for your pdf. And if that's the case, that's really the best thing. Because if you don't have to worry about anything else, you just choose the preset there, right here in this standard category. And if you choose one of these guys and again this information will come from your printer, then you're done. If they don't give you a preset and you are printing this ad, then coming on here to the compression section in this left hand box in turn off this poppet, many right here where it says by keep it down Sampling. That's just a fancy way of saying, Hey, you could throw away some pixels to create a smaller file size. You're going to say, Do not down sample In that way, you're gonna create a high quality Pdf as as high of quality as Thebes document that you originally created to make your design. So do pay attention to that when you're saving it. Another file format that you might encounter when you're going to print like this is you may be requested to save a tiff. Choose file save as to physician of their file format. It's there's no compression involved in. It's a lossless formats. You're not losing any information, not going down in quality. And that's also available from the same format poppet menu. And it's near the bottom T I f f So you just choose tiff. Now, tiff files can be layered file, so I just want to make sure that you turn layers off when you go to tiff. So always save your master document in the native file format of the software that used to create it. Then you're going to save out additional documents to you send to the printer sent to the client so on and so forth. All right, let's do again. File new. You've already called the printer. You know exactly what size to make your document Come down here to the Whitfield. Let's type 7.125 Change our unit of measurement two inches Press tab to move to the next field into a 300 pixels print because I don't make your pixel small, and if you won't see them once it's printed, we're going to stay in RGB color mode. Click. OK, let's bring in the photo. We're gonna place it as a smart object because that gives us the ability to resize it without resize it multiple times without quality loss. You just don't want to make the pig er that the picture a lot bigger than it originally. Wasif, you're experimenting with size because again, photos don't have that superpower of infinite scalability like vector illustrations do. So we've got our photo here. We don't need to resize it. Now let's trot back up to the file menu, bringing our illustration so file place. We're going to need to make this a little bit smaller. So shift option or shift Ault, and then you can click within the box and move it around while you're re sizing it. Now let's shove the photo through the frame. The frame needs to be under the photo layer. The photo layer needs to be on top of whatever shape you're trying to push it through, and then we're going to press and hold option on the Mac or Ault on the PC as we point our cursor at that dividing line between the two layers and what you click. Then the photos shot through that shape. Incidentally, if you need to Take that photo out of the shape. Just do the same thing again. Option or all click point your cursor at the dividing line. Click it again in that clipping group has been released. You can think of it as your clipping one layer to another to create a group. Here we go. Now let's move the whole mess up in our designed by activating the move tool or by pressing V toe, Activate, move, tool. And then we're gonna shift click to grab all the layers that we want to affect, and we're just gonna skewed our illustration up. Now let's add a solid color film layer case. Let's go down. Teoh the half black, half white circle at the bottom of the layers panel. Chew solid color skewed the color picker out of the way. If you need Teoh Mass over to your document and steal a color click. OK, now, because of the layer that I had active when I made that Phil layer, it ended up in the middle there. Just drag it wherever you need it to be, so I dragged it down. Great. Now let's add our texture file. So choose file place. I'm gonna zoom out a little bit because I need to see the whole document in order to resize it so that it feels the whole document shift option shift Ault on a PC Dragon e corner handle outward. Here we go. Now let's change the blend mode of that layer to darken and let's drop the opacity somewhere around 30 35% again printing processes going to darken it Just a touch. Now it's at our text Presti. To grab the text tool. You can click and drag to draw a text box if you like, click and drag diagonally downward. You start adding your text uncle and tried at all that Thursday's nine p. M. We're going to do an end ash eat in dash cause it's slightly longer than hyphen. And we do that by pressing option hyphen on the Mac to close. Ladies, drink free. Debbie, Debbie, Debbie the singing bar dot com to 34 Rainbow laying boulder. I'm gonna highlight everything because we're gonna change the color of all of that inward feel sweeps. Now we can come appear to the Options bar. Click the color Swatch mouse over to the document snatch up a color. Now let's change the leading real quick So command option or control Ault plus an up arrow on the PC to kind of bring everything in a little bit more closely. Now let's start fine tuning each line. So we're gonna triple click the first line, change the fund to impact because it's a great display. Fonts really, really thick. And we're gonna bring that up in point size to about 49. The rest of these guys, we're going to set those in fruit eager light condensed. So we've already got the fruit of your family chosen. So I'm gonna go to the style menu and she's like and Dan insisted, Bring those in a little bit. Now I'm gonna make these last two lines read by highlighting them, clicking the color swatch in the options bar and stealing a red from this lady shirt That looks pretty good. Now I need to build in some more space between the URL and the ladies. Drink free or the apparently one lady is to drink free. So let's bring up our space before commands. So open the character panel several different ways to open it. If you've already got the text tool active. Then you can click this little panel looking icon to the right of the options. Far Oregon's choose character from the window menu and our space before and after controls or in the paragraph panel. Any time you open the character panel paragraph panel tags, along with its photo shop, assumes you're going to need to use it to, and it's right most of the time, so we will add a little space before there. Saul, zoom back out. Make sure that you position your cursor within the line that you want to affect, and I'm using a little scrubby feature. So point your cursor at the Littlefield label and then drag, click and drag to the right to increase, click and drag to the left decrease. And now the last thing I'm gonna do is make the You are a bold because I want Teoh, and I guess I'll fix the spelling of Rainbow. See how dangerous it is when you're typing and you can't see what you're typing. Am oldest. Choose bold from our family menu here, and I'm gonna go down in size a little bit because I want the width of the U R L to be the same with as our headline on head and cold. Fix my little baby there as well. So I'm using keyboard shortcuts to go down and font size. And then I might track that out just a little bit and keep going down in size just so they're kind of equal in with. And if you're using keyboard shortcuts to just letting and tracking and they jump in increments. So if you need to find Tune, and then you will need to open the character panel, so I need I don't need 90 point tracking. I don't need 80 point tracking. I probably need about 82 or even lower than that, like 78. Here we go. We'll call that good. So now we can use our move tool to reposition some of the elements in the ad. Let's drag our activate the layers that are photos on. Let's call that done any questions on the ad part, and then when we come back, we'll look at another example of how to shove a photo through text call S. O. H. Wheeler. Photography says when creating a pdf for your client and they only have Microsoft Word. Will they be able to view the image, or will they just see an encrypted version? They should will. First of all, when you create the pdf, you're making a picture of the whatever it ISS. And if your client, when when you say they've only got my purse upward, that's not an accurate statement, because on every computer that we're purchasing, whether it's Macs or PCs, they're going to be some kind of image previewing tool in there on the Mac, it's called Preview. I'm not real sure what it's called on Windows, but there is an equivalent picture viewing applications, so they're gonna have something else. They could viewed it in word what word will open a PDS little open right at so they will be will see the picture to you and maybe just one more before we go to break this one's about printers. Are you open to that sort of question? Maybe we'll see. It's interesting, but you know, people are at least thinking about starting to print their stuff. So T Eaglet says, I was just wondering if Lisa uses the ups in our 3000 printer for all of her personal printing, such as business cards, photos, adds etcetera. They say that they're trying to decide on an inkjet or laser printer, and you've mentioned a couple of printers. So that's really great question, and I am happy to answer it. The answer is yes and no. I love Epsom printers there, my brain numb choice. I would never brian another printer from any other company other than Empson. I love my are 3000. We gave away in our 2000 the other day in class, and that was cool. I print my own photos there that that are 2000 or 3000 or wide format printers he can print up to inches wide. So I do use them unless I need to go bigger and then I'll use a lab like in picks dot com. It wasn't Mary P. I x dot com. We're gonna look at their website later today under no circumstances ever, ever, ever do. I print my own business cards the time, the sheer volume of time, and it would take me to set up the document to go several up on a page so meaning that I would be printing several business cards per each piece of paper. It would be a long time that it's just too difficult, and I make too much money doing other things to waste my time trying to do that myself. Printing business cards has gotten so affordable companies online overnight prints dot com does a pretty good job. There's just rules and gobs of them. Vista prints, printing for less, and there's just tons and tons and tons of them. And they'll do rounded edges, which I love on your business cars. And so, in other words, you can get it done much faster, much more accurately. They will look for professional because it will be thicker card stock, then anything that you could put in your printer yourself. You're also not going to get those that perforated field. Oh, in that cute some, I made their own business card. That's so sweet. I used to do that. I've evolved and the prices come way down on getting them printed, so it's just much more affordable and you'll save time. Your time is worth money. A lot of people go down that rabbit hole of do it yourself. They're not calculating what their price per hour is or what they want to make. And your be making a lot less wasting your time doing something like that. And you get frustrated, cause what if paper jams and all that kind of man is so have somebody else print your business cards, But those printers air really great for for creating pieces of art. Now, in an ad situation, you're not gonna print the ad and take it into somewhere. You're going to send that digitally so you wouldn't be printing your own as at home. Now, printing your own yard sale signs? Absolutely. That are 3000. You should see my article size. They are fantastic. I bet they are. They have little photos of white flowers, so maybe so. Maybe a little photo shoot of some of the items that are in the yard sale.
Class Materials
bonus material with purchase
Ratings and Reviews
a Creativelive Student
… exactly what I needed for current and upcoming projects! Actually, it was much MORE than I thought I needed. Once it all sank in, I realized just how much I didn’t know, but needed to know. The training is top-notch and very effective, and just to top that off with a cherry, Lesa Snider is the most engaging instructor with whom I’ve had the privilege to learn. I can’t recommend this course, Graphic Design for Everyone enough. … talk about “clicking” with an instructor… A self-professed Southern geek/nerd with a sense of humor is a darned near perfect click between that instructor and this student. I love to learn anyway, but Lesa Snider’s classes are a wonderful blend of fun that runs throughout the entire course of technically advanced concepts and application. Where do you find a course where you laugh as much as you learn (both massively)? … a Lesa Snider course. I’ve already put the course material to good use and look forward to using the class info and skills even more in future projects.
Adrienne
I've been a fan of CreativeLive for along time. I've attended many classes, but this is one of my most favorite sessions. I think Lesa is a great trainer and find I am learning a great deal. I liked it so much I actually purchased this course. I would watch any course she was part of. Great graphics design course and wonderful tips.
a Creativelive Student
I enjoyed it very much. However, I hated that I could not pause or rewind,,,so I had no choice, had to purchase. :)Lesa is a terrific Instructor. She takes the hardship out of the learning process with her wonderful ever so friendly personality. She instead turns it into a joy and I enjoy very much her courses! Thank You Lesa!