Lessons
Day 1
1Day 1 Pre-Show
06:09 2Four Secrets for Great Design
49:25 3Morning Q&A
26:05 4Morning Recap
18:39 5Striking Images
34:14 6Faces in Design
17:24 7Layering and Simplifying
21:33Introduction to Typography
51:51 9Typographic Offenses
35:15 10Formatting Text
29:10 11Formatting Text in Different Programs
19:30 12Day 1 Wrap-Up
03:40Day 2
13Day 2 Pre-Show
08:07 14Designing Logos: Fonts and Text
1:27:39 15Editing Text in Adobe Illustrator/Photoshop
54:50 16Taking Control of Color
46:26 17Creating Business Cards
49:07 18Business Card Makeover
1:04:37 19Day 2 Wrap-Up
03:24Day 3
20Day 3 Pre-Show
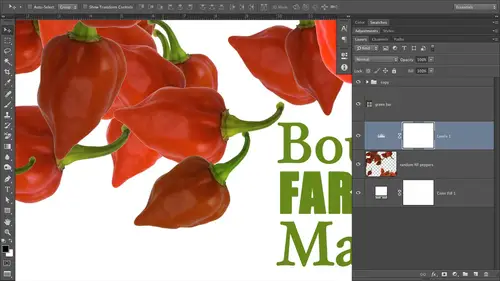
03:53 21Designing Magazine Ads
1:20:03 22Designing Postcards & Event Posters
1:16:44 23Creating Your Own Patterns
1:14:18 24Creating Custom Photo Books
1:25:21 25Day 3 Wrap-Up
04:18Lesson Info
Editing Text in Adobe Illustrator/Photoshop
now. I don't expect the photographers who are tuning in right now. Teoh, do it this way. So this particular example, you could do the exact same thing in photo shop. All right, But we did Photoshopped a moment ago. So this is kind of for the designers out here who who are using Illustrator. So we're going to do that. So I'm gonna go ahead, and this is what we're gonna create. Okay, So I'm gonna go ahead and delete this, and we're gonna do it again. It's all just go ahead and click to activate my art. I'm just using the arrow tool. Looks like the same one we had over in photo shop. So now we're starting with a blank canvas. So the first thing you want to do is, of course, create The editor will type. So what we're gonna do iss grab the text tool in illustrator Looks like a big T. Exactly the same as it doesn't Photoshopped. So give it a click and we're gonna come over to our document and click. So we got the blinking insertion point of the cursor and we're gonna type are text. So we're ...
gonna create the Ben and Karen logo. So it's gonna be a B and e k. Okay, so I'll go ahead and double click it and make it, uh, big enough that everybody can see. And incidentally, this is another great keyboard shortcut free. You'll notice that I'm increasing the text size with the keyboard shortcut. This keyboard shortcut works across all of the adobe Creative Suite applications, and when you have the text tool active and you have text highlighted, you can press shift command greater than to increase size, shift control greater than on a PC or shift control less than to decrease size ship come in listening on Mac, and that's really handy for sizing things visually. You can also just keep holding down that greater than or lesser than sign. And, um, the text will either increase in size or decrease in size, depending upon which button you're using. So that's big enough for us to kind of see Let's grab our move tool, and I'll move it down a little bit. There we go. So now what we want to do is we want to get a fund that's gonna work. So I was talking about Ben and Karen are just happy and friendly, which makes me think a little bit of rounded shapes. I want to go for a fund that has some nice rounding it. They live on the vintage bus and travel the continent in it and it's got rounded edges on the bus to you. So it just seems like round is the way to go. So the fund that that we chose is called Gilbert. A case was g h I b e r t I. So I'm gonna go ahead and double click to highlight the text, and we're gonna come up here to our fought menu, and we're gonna go find that funny so scrolling, scrolling, scrolling There's giver, say, And I started out with the font That is 241 points. So we'll double click in the point size field and change it to 241 impress Enter. So now use my move tool again and kind of scoot that back over. The next thing we want to do at this point is turning into edible art. Which does, of course, means it is not gonna be edible text anymore. I'm not gonna worry about placing this edible text on another layer because it's just too Dad gum letters. And if I can't be bothered to reach out to letters and I need to take a break, run around the block, come back. So while we have our text box kind of activated here, we're gonna trot up to you the type menu and choose create outlines. And there's your keyboard shortcut, of course, Shift command Ofer outlines on the macro shift control Oh, for outlines on a PC. So we're gonna create our outlines Now, the thing about this is when you create outlines initially like this of text that you've created on a single layer, if you will, it's automatically kind of grouped together. Okay, so we need to break it apart so that we can alter the be independently of the K. So let's trot back up to the object menu and shoes on group. Okay, so now that should let us grab each piece individually. If you guys remember yesterday when we were putting all those design principles into action and we made the party ad for the masquerade party and in the discussion on repetition, I stole some of the feathers out of the mask and the art that I downloaded that that's this is how I did that so that art was all kind of locked together so that you couldn't resize part of it without re sizing the whole mess. So since I wanted to steal a little piece of the art, I had to break it apart. So it's the designer that groups it together, and then you could break it apart to either steal or alter one little piece of it. So the next thing we need to do is select the be. So I'm gonna go ahead and give it a click. And so the next thing I want to do is flip that be well, flipping an illustrator works a little bit differently than flipping in Photoshopped an illustrator. You're choosing the axis. You want to flip the piece of art around, Whereas you would think we could just use a flip horizontal control to flip flop. This be we're gonna flip it vertically because illustrators talking about the axis around which you want to flip, not the actual direction that the arts going to go. Does that make any sense? So, to me, this should be a flip horizontal, which it would be in Photoshopped with the free transform tool, you can flip it horizontally, but an illustrator we're gonna use theory, reflect tool, and they reflect to ISS Somewhere over here, it's hiding somewhere over here. There we go. So it's hiding within the rotate tool sets All seem a little bits. You can see that. And again, I don't expect photographers to be following along on this part, so just take a little break. This is for the graphic designers out there. So in the tools panel, just find the little rotated, um, or the round arrow. Rather. So that's the rotate tool. And within that, Tulsa is the reflect well on. That's for making a copy of something. So we're going to choose the reflect tool, and then we're gonna come over and we're gonna double click and our document, which should heaps. It's already doing it. It should let me just double click and bring up a dialog box where we get that reflect option. But I'm not seeing that happen, which is very interesting. It is oh so fun and things do not work as you expect them to work. OK, so we'll try it again. Grab the reflect tool and then we're going to come over here and it really should be bringing up a dialog box. I promise you it should All right, we'll do it the hard way. Well, let's go ahead and rotate it. I wonder if the dialogue boxes coming up. I'm just not seeing it somewhere. I'm not sure. So let's go ahead and just rotate that thing. So I'm just clicking and dragging holding down the shift key to rotate the B. Now, I'm gonna go grab the move tool and skewed it back up here. Okay, so now what I've got is the B over the K. So all zoom in a little bits. You can see the only other thing we did at this point was we made this vertical part of the logo a little bit thinner in nature, because when we stack them, it just looked a little bit too thin. So what we're gonna do is grab the direct selection tool, so kind of the same thing and that we didn't photo shop a moment ago. This black arrow will affect the whole letter and or the whole path rather that the letter is now comprised of. But the hollow arrow will let you select specific points so that you can alter them. So I'm actually gonna move this, be over just a hair for a moment. So, actually, I can actually see how wide I need to make it. So we're going to grab the hollow arrow, which is the direct selection tool. And this time, instead of just clicking on the path like we didn't photo shop, I'm just going to click and drive to create a selection of those points. And when I do, they become highlighted. And then I can just use my arrow keys in tap to the left to decrease the size of that path that I selected or to the right to increase the size. So I'm just gonna make it a little bit more narrow. And then I can come over here to the K, and I can click and drag outside of the path and I want to alter to select. However many points might be in between this case, there's only two. And to make that part of the K a little bit thinner, I'm gonna tap the right arrow key. It's to make it a little bit there. Come over here. Grab the path selection tool, Click the be president. Hold the shift key to scooted over. And that looks a little bit better to me. And then the last thing that I did was grab the points on the K here and scoop them to the left a little bit just to make the this part a little bit more narrow because it was a little bit too wide. So again, with the direct selection tool, click and drag outside of the point area path area that you want to grab and distraught straight down. Actually, I need to grab the whole I need to grab all this. Okay, So now, as I tapped the left arrow key, I'm decreasing the width of that K. Okay, that's all we did. That's all we did. The last thing was that we drew a circle so we can come over here and you've got shaped tools and illustrator just like you do Photoshopped. So I'm gonna click on the little square icon of the tools panel and come down here and grab the rounded rectangle tool and then to make a perfect circle in Photoshop or illustrator or in design, any of the adobe APs You're gonna press and hold the shift key so that will make a perfect circle. So present hold the shift key and looks like I got the rounded rectangle tools to the he lives. There we go. The lips too. Do as I say, not as I do. Okay, so there's our circle, so you can just you can position it while you're in the act of drawing it. So right now I'm holding down the shift key cause I wanted to create a perfect circle. I've still got my mouse button depressed because I'm in the act of drawing the circle. But if I want to move that circle while I'm drawing in the press and hold the space bar and then drag with your mouse and you're moving the circle so I doesn't need to reposition it just a little bit to get an idea of how big I want to make it. Okay. So as soon as I get finished repositioning and I can release the space button and continue dragging Teoh increase the size of that circle and move it back up if I need to. And then what I did was I had no Phil on the circle because I obviously don't want it to be filled with black because that covers up everything. So, at the bottom of the tools panel and illustrator, we're gonna click the little square with a slash through it to say no feel. And then up here in the options bar, I'm gonna enter a value for stroke, and that's going to give me an isil outline. So we'll say Oh, probably about I don't know, five or so and that's it. That's a little bit about how you can do in an illustrator versus photo shop that works very similar, except for the whole flipping at the different, you know, with a different tools so you could use the reflect tool and illustrator. And really, when you double click on your campus, a dialog box opens up on X you which axis do you want to flip the artwork around? So to flip the B backwards like we did with rotating it, we would choose the vertical axis because that's how we want to flip it. Okay, which is opposite of what we would do in photo shop. The beast. Yeah. We're just gonna pretend like it's not. What do you mean? I think you need to check your glasses, Bob. Okay, so now let's go and close that file and let's come back to our footage Shot file that we have all these different logos here. Okay, so we're gonna look at how we made some of those. And again, if you purchase the course, then you're going to get all of the PSD files that have all of the funds, all the sizes, all the formatting in there that I have done so that if you see treatment that you want to recreate yourself, you can go in there, see exactly what fun I use. Exactly what size tracking all that kind of gets stuff. The weight of the font. Did she use a light version, or was that a regular? What was it? So now let's come find that file. So if when she person, of course you're following along when we're working on logo's, you're gonna be looking for the logos file, and I've tried to name them in the order that we encounter them so the 1st 1 that we're gonna look at this file number three typographic logos dot psd So we'll give that a swift double click and opens up in photo shop. And you can see over here on the right hand side in my layers panel that I've tried to be as descriptive as I could. It was a large to be too descriptive of all these different treatments. But in the naming of, put them all in folders. Okay, In folders in photo shop, you can create by using the little fly out menu at the top, right of the layers panel. She can say new group from layers so you could activate the layers that you wanna stuff into a folder. It's just for organizational purposes so that your layers panel isn't out of control. So I've used the folder name to kind of describe the treatment. So hopefully you confined whichever layer you want to work with. So was he made a little bit here. So here's all the different ones that we started out with, So why don't we go ahead and turn off the visibility of some of these guys and create a few of them? ourselves together here. So we talked about a keyboard shortcut earlier, which is very handy for this. And that is to hold down the option key on a Mac or Altana PC and click the visibility icon of the only layer that you want to see. In this case, that's going to be our solid background layer are solid color feel layer, which is where the whites coming from. So let's give that a click. So photo shop turned off all the other layers of everything I had turned on without us having to go click Click, click. You can also click and drag while holding down the mouse button down that road. Visibility eyeballs to either toggle multiple layers on at once or toggle them off. So okay, so let's go ahead and sets and text, so we'll press T to activate our text tool. Or you could click the Big T in the tools panel and let's just go ahead and click just up here towards the top left and let's set some text. I'm not gonna worry about what thought it is. Initially, I was going to go ahead and type it so to create the 1st 1 that we had. We're gonna type Nelson, and I'm gonna mouse away from my text and pull it back over onto our campus. He can see it, and it's actually the same. Colors are background right now, but I'll fix that. A second photography. So now let's go ahead and press command A. To select all the text or control A on a PC. And let's change our text color so it's visible arguably a little bit easier to work with, if you can see it. So let's click the little black color Swatch that appears in the options bar. Now the options bar changes according to what tools currently active in schools pale. So since the text tool is active, we've got text options up here, and one of those is to change the color so we can click that little black swatch. Then we can come over here and make sure it's black. There we go, and let's look at layers stacking order and see if we can figure out why we're not able to see our text. There we go. When we created our new layer, it landed in a group that had its visibility turned off, that's what we can't see it. So let's go ahead and click and drag this guy all the way up in her layers panel. So we're above all those other layers that I mean for you. I really don't want you to delete those there. Go. Okay, so now let's start hunting for fonds. Okay? So to change the fine or change the formatting, this kind of formatting of the text and photo shop or an illustrator or in in design or inward or whatever you're in, you do need to highlight all the words case you need to highlight it. You can do that by triple clicking within the text if you've got the textile active. If you triple click quickly, triple click quickly. Everybody tried to say that 10 times fast. Then that will highlight everything that's on that type player. Or if you're If you've got a blinking cursor inside of text, you can just press command a on A Mac or control a on PC. And that's the keyboard shortcut for select all. And that will highlight all the text to I'm gonna drag back over here just a little bit, so now we can go find a different fun. Well, the make that really thin. A classy, elegant look. Let's come up here to the font family menu. You'll now know the difference between font family and font styles, and let's go find future so it's cruise on up. And if you just point your mouse cursor towards the top of your screen, you can just let go of everything. And we'll just continue to scroll if you have a bunch of fun activated like we do here. So let's keep Cruz and up to find future, and there it is. So we'll give it a click now from our style menu, which is to the right in the dough. BCS APS. If you're in word, that will be a sub menu of the font family menu. Okay, so it's all in one menu in those programs. So let's come over here and find the light version so you can see if I zoom in a little bit all the different styles that are built into future so you could have a whole lot of fun with this one. But we're after the thinnest of the thin styles that future contains, and that is the light version. So let's go ahead and click light. And now we've got that nice, then elegant looking text going on my letters, air crashing into each other so I can fix that with leading. Okay, the leading controls don't live in the options bar. They live in the character panel, so you can think of that as an extension of the Options bar. You can open it in a couple different ways. You can click this tiny little icon towards the right end of the options bar while the text tool is active. Toe open the character panel or you contrite up to the window menu and just use character so it doesn't matter which way open it. But that's where you can get to the leading controls in the leading control is right here this little guy right there, the, uh, second row second field, if you will. But if you forget what each of these controls do, this point your mouse cursor at the little icon to the left of the field and you'll get a little tool tip that says, Hey, set the leading. That's what I do. So you could either click on top of the little icon and drag to the right to increase letting. See how that's changing over here and our document as we do that you could do that way. If you drive to the left, you're gonna decrease letting. If you know what you want, you're leading to be You could simply double click that field and type in another number. Or you can do it with the keyboard shortcut, which is what I prefer to do You. And if you want to get fast at editing text like this, which is a good idea, then I do encourage you to memorize these keyboard shortcuts. And they're pretty easy to remember in there at the keyboard shortcut for letting Kern ing and tracking which the three that we are going to use the most are very similar. Okay, so here we are. The keyboard shortcut for letting is option Commander command option that down Arrow key on a Mac or control Ault up or down Arrows on a PC. Okay, So as I'm pressing the up arrow on increasing leading Okay, I will increase it too much. Now what I need to do is affect my point size. You can do that in a couple different ways. You can double click toe highlight the word that you want to affect. You could either use the point field in the options bar or the point field, which is right here in the character panel but again to be faster. Let's use a keyboard shortcut. So let's use our shift command or shift control less than to make it tiny. Because in order for this to work with the same fun we need to build in a lot of contrast rights, that's the only way this is gonna work, in my opinion. Okay, so we need to make one word really big and one word really small. And now the only thing that's left to do is to figure out where within this area, we want to set the first words. And Nelson. So look at the shape. Okay, if this if this name were longer, let's say Robertson something like that. Then it might just tug between the tea Theus ender of the tea in the centre of the H. So do look for shapes, natural nesting places, if you will, when you're doing this specific treatment. If you had an incredibly short name, last name or word that you're doing this effect you. Then it might nest between the Ascender of the H and the Ascender of the tea. See, why was handed to go over those terms yesterday? Because if we didn't do that, you'll be like a sender. Descend. Er what s so the bit that sticks up above the body of the letter? Is the Ascender the bit that hangs down or its tail? Valid colleges, the D center. So look for a natural nesting spot. You know who knows what this word is when you're doing this in your own business. So for this technique, there might be a place where it just kind of fits in. So do you look for that? So look for shapes. So you can either at this point, if you really wanna position this precisely in a different in a spot where it kind of nest in there, you might wanna have these two pieces of text on different layers or in different text boxes so that you could freely move them around so I can do that real quickly. Otherwise, you'd have to use spaces to try to get the alignment right, and that can be a little bit time consuming. So let's go ahead and split these two guys apart, so we'll just do it. Go ahead and double click photography pressed Command X or Control X on a PC, and then we still have a textile active. Let's go ahead and shift. Click somewhere else in our document shift clicking while you have the tactical active. Let's Photoshopped know that, Hey, I want to create a new type player. Otherwise, it thinks you want to edit the current type player, so shift like somewhere else, and then we'll just paste by pressing Commander Control V. Now any time you have the type tool active and you've got a blinking insertion point in text, if you mouse a little ways away from that, I'm not pressing anything. I'm just mousing away from it. Then your cursor turns into an arrow, so that's how you can move the type around without having to go. Activate the move tool in the tools panel. So let's just mouse away from this a hair, and then I can click and hold down my mouse button and drag that word around, okay, cause now it's on its own layer. Then toe. Activate the Nelson layer. I can come over here to my layers panel, give it a click to activate it. And since I'm not editing the text, I'd have to grab the move tool. But then I can position it anywhere I want que No zoom in a little bit more so you can see that So, in my opinion, are contrast isn't quite high enough. So I either need Teoh. Make Nelson smaller or photography larger because it's not quiet enough contrast. And a good way that you can tell if you've built enough contrast in your own experimentations is to step away from the screen. Step back, you know, and that gives you a little bit a better perspective on how much contrast you've got going on, especially in size. So let's go ahead and make photography bigger. So let's double click that type player to both activated and select all the text it's on and are highlighted. And let's keep making it bigger. So it's easier keyboard shortcut, which is shift command greater than or shift control greater than on the PC. Let's keep bumping it up and there will become a point where it's is clear to you that there's enough contrast. Probably when you get a little squirmy. Whose look can I make this this big? Is this gonna look okay? That's probably just about enough contrast. See the difference between those two that we just did? So you got to be careful because you need the contrast to make a technique like this work. So let's build another one. Okay, let's go ahead and turn the visibility eyeballs off on these guys and let's create another one. So let's grab our text tool by pressing tea or clicking it in the tools panel. And this time, let's do a little bit of, ah, stacking technical. So we'll type Lisa Nelson and Mouse away from my text and click and drag it to reposition it on my canvas so I can actually see it and then will press return and then we'll type photography. Okay, scoot him over just a little bit. So for this one, I'm going to make photography quite small, and we're gonna use a future a light in conjunction with Future a bold to give us contrast. So I've already got all of this set and future A light. So really, all I need to do this point is highlight the letters that I want to change the fun of And I'm clicking and dragging to highlight this time because if I just double click, I'm going to get the whole word because I didn't put a space between the two words. So photo shop, it seems it is one more than it is. But I don't want to change the front of the whole word. I only want to change part of it. So you've got a highlight It just like he would in any word processor. You have to tell it Hey, what part of this text I want to change? So now we can either try it up to the font style menu and the character panel, which is right here or the exact same menu in the Options bar case. What says light right now in both places that lets you know what style you're currently using? So if we click that little downward pointing triangle now, we can come down here in choose bold or extra bold or heavy. Okay, so there's our bold. So now we've got our contrast built in. Now the next thing we want to do is greatly decrease the size of photography. So since that's one word and we do want to affect the whole word, let's double click it so that it's highlighted. And now we can use our keyboard shortcut to go down and font size. So shift command less than on a macro shift control less than on the PC. And what we're going to do with this one is expand the space between the letters uniformly on. We learned yesterday that that control is called tracking, so we're gonna track this out okay again. For this to work, the contrast needs to be quite high. So you're gonna have to go down in size quite a bit on this one. Okay, so let's let's go ahead and add some tracking to see if we've gotten it anywhere. Close to a small is it really needs to be tracking can be affected in the character panel. Cells do middle of its You can see that. So tracking is right here strictly underneath, leading and again if you forget which controls do what Just point your cursor, Adam. Let go of your mouth. Let it be still for a minute, cause if you're wiggling it around, that tool tip is never going to come up S o B still. And then that tool tip will come up and tell you what that control does so again use keyboard shortcuts. He'll be really fast at this. So the keyboard shortcut for tracking is option command, huh? Right arrow on a mat to increase her left a road to decrease or control Ault on a PC. So to expand the tracking, we're gonna go ahead and hold down those modifier keys and then just tap the arrow, okay? And in my opinion, were not yet small enough on photography for this to really work. OK, so I'm gonna double click it again. He's our keyboard shortcut to go down and in font size. And as I go down and font size, I'm also decreasing. The amount of space on my with is narrowing as I do that. So let's go ahead and use our keyboard shortcut for tracking and increase that again. Increase the space between the letters uniformly so command option on the Mac or control all on a PC and just tap the arrow keys on your keyboard, the right arrow to increase space, the left arrow to decrease space. So if you want to jam letters together so that they're completely illegible, decrease tracking like that. Now what I've got is a little bit of a challenge, because I need for this logo to work. I need them to be equal in width, so I have a choice here. I can either decrease the size of photography, or I can increase the tracking or the size of this line of text. So by triple clicking, I'm grabbing everything. I'm highlighting everything, and I can see my character panel that the tracking amount currently is negative. 75. That's why the letters look really close together. Okay, so what we can do is either either keyboard shortcut to change that or if we just want to go back to the default setting of tracking. Then we can use the character panel and just click the downward pointing triangle next to that control and choose zero. See how the letters just spaced out a little bit. So that's the default setting souls in back out so we can see everything there we go. So now I've got plenty of ring to keep adding a little bit of tracking in the second word. Now, using the keyboard shortcut will only get you so far. OK, because with the keyboard shortcut, you're jumping these settings and increments of about 10 or 20. Okay, so if you let's say you're using your keyboard shortcut for tracking and you can't get it perfect, then that's when you would come up to the character panel and he would change it. So if 625 value of tracking is too much, you might want to try 5 for 5 75 so you can see how that's changing as I'm altering the number. So that's how you can be very precise and make sure that your two lines of text are equal in width, and that is, in my opinion, what you need for this particular logo to work. If you wanted to be real precise about it, you draw guides on either side of that logo and that that would let you be really, really precise on there. So, for example, my rulers were turned on so I can go ahead and set a couple of guys visually. Just click and drag from the ruler area over into your document, and I consider guide on both the left and right sides of my text. Here, you'll notice that my God, you're kind of snapping. So if I don't want that behavior that is default behavior, let's say that I couldn't get the guide positioned where I want it. Then you could just turn off snapping by going up to the View menu in choosing Snap. So if it's got a check mark next to that means it's active. So if you click it again, that check mark is gonna go away means it's turned off and that can let you position the guide by FREEHAND if you will. Okay, so let's say that's good. So now I can keep altering my tracking so that I'm imperfectly equal in with on these two guys and again if the keyboard shortcut won't get you there because it's jumping in to large increments than alter it in the character panel. So right now we've got a value of 5 50 for tracking. Let's try 5 so that's almost. There may be 5 There we go. And if you can't get it perfect with the two of them being on the same type player than you can do exactly what we did a moment ago, and that is just double click. To highlight a word, cut it or delete it by pressing commander control eggs and then using that shift click trick to create another type player. Paste it, and then you can just position it with your arrow key to get it in exactly the right spot so that their equal in with any questions on that. So far, any questions from the Fabolous Internet in all those logo's used the same kind of techniques. Okay, it's just setting the text, changing the final, changing the family, changing the font style, changing the point size, adjusting the tracking, try it just for organizational purposes. In your Layers panel, Try to keep a much text on a single layer, as you can. That will just make it easier for you to see what the heck's going on in your layers panel. OK, but if you can't get the spacing or the positioning exactly like you want it, then just go ahead and put the different components of that logo on separate layers or separate text boxes. And then you can use the arrow keys and you can get it exactly like you want it. Okay, question from Mary from Costa Rica. Is there a standard with size that used when designing your logo's negative? The's great thing about designing them in this way? Another great thing about typographic logo's is that they're vector in nature, so they're infinitely scalable. You design this at any size and scale it if you needed to be bigger or, you know, make it smaller. If you need to do that the way you would do that, though, once you've got all your formatting, you don't want to be affecting point size. At that point, if you're just trying to make the whole mess smaller or larger, what you would do is grab the move tool instead, and you would activate all the different layers that that logo lives on just one layer. Activate the one if it lives on multiple layers like ours does here because we had to split it apart to get the tracking of photography just right so that it's equal and within positioning and all that, then you would activate multiple layers. So just shift. Click near the layer name area not over here near the layer name area to activate multiple layers if they don't live next to each other. Let's say, for example, you wanted to activate both photography and nelson down here than you'd command or control click toe. Activate multiple layers that don't live next to each other. Okay, so we'll go ahead and activate both of those. And then you'd use free transform to do your sizing changes. And that wont mess up any of your formatting because the last thing you want to do is start dinking around with point size after you've so painstakingly gotten the tracking jazz perfect. So now you could choose edit free transform, and that gives you re sizing handles around the whole mess, and then you can press and hold the shift key. Make it smaller, make it bigger. So that's why I say it doesn't matter at all what size you designed this at. You can make it whatever size you need for whatever uses, you know, if you're taking out ad space on the billboard, which, of course you will have so much new business from learning how to make your visuals look professional. That, of course, you will be able to purchase space on a billboard, right? Advertise your photography studio. Then you would need to make that really, really big. Okay, so, Lisa, photo Lisa with an ally, not an L E. Says when dealing with logos and graphics is illustrator. Better to use if you can. On. And then she goes on to say that she really recently bought Illustrator, but she's not so sure if she should be using photo shop instead. And should she put the time into learning Illustrator, right? What's your opinion? Illustrators? Certainly more powerful vector editing tool than Photoshopped. However, photo shops text has been vector in nature for several versions, So the stuff that we've been doing in class, it doesn't matter. If you use illustrator for the shop, you're creating the exact same thing where you get into trouble with text and photo shop is when you rast, arise it and you turn it into pixels. Then, if you start scaling text that you've turned into pixels, let's say you've run a filter on text that will turn it into pixels. So the text kind of becomes a piece of arts no longer a point in path based when you rast arise, text like that and then you start doing things with it in you save it out. In any file format that doesn't support vectors, you can lose a lot of text quality. And that's why a lot of people are scared of setting text and photo shop. But mailing that fear is coming from the days when Photoshopped text was just pixels in nature. So you didn't have that flexibility with scaling and manipulation with the vector tools like we do today. So if you've got the last three or four probably five versions a photo shop, you've got real live victor text. So it's the equivalent. You just have to be careful how you save it out. You just don't wanna save it out in a format that's gonna pick slight everything so you could save it out as a photo shop. E p s E. P s stands for encapsulated postscript, which is Ah, postscript nature and file. So you would choose file save as and from the format pop up menu, you would just choose Photoshopped GPS, and that's going to give you a high quality vector file that you could also open up in Illustrator. But my point is a long way to say that currently, right now, the things we've been doing, it doesn't matter if you do it in one or the other do and the one you're most comfortable in now. That said, when you get really good at this kind of manipulation, if you want to take that further than Illustrator does have a larger set of vector editing tools, then further shop. But with each version of photo Shop, that's where we get more of illustrator more of in design. It's like photo shops gonna be the Microsoft Word, which means everything you know and the kitchen sink thrown into. I just wanted to say to kind of follow up. We even have people following along with Microsoft paint. People are asking questions about Microsoft paint, and, um, so everybody out there is kind of trying it their own way, which is yeah, absolutely. And that's the beauty of this is that even if you don't have any of the adobe creative suite applications, you can do everything we're doing now. It may be a little bit more challenging because you don't have type players you don't have layering in Microsoft Word or apples, pages or keynote or anything like that. So it can be. You may have to do if you work arounds to get the positioning just right. But you can absolutely do all of this. We looked at that yesterday. The terminology will be a little bit different in those consumer based programs that it will these professional level programs. So if you're trying to affect spacing and something like word or pages were keen out, look for anything called character spacing. Okay, if you're trying to affect letting, that's gonna be called something like line spacing. So I try to put in a little bit friendlier terminology for the consumer products in the pro products. But you can do all of this, and that's what makes it great. Net Ingenuity and AUSTIN, Texas are there benefits over one landscape shape over another landscape. Portrait square. Are we talking about logo size or business card size? We're talking about logos in general. It just depends. Now, if you're planning on putting, if your photographer you're planning on putting or real estate agent planning on putting your photo on the business card on the front. He wanted kind of stay away from a super wide logo because it's gonna prevent you from putting that photo on there. Hey, so I tend to go for a little bit more narrow. So probably a portrait orientation in Logan. They just want don't want to make it to Why? Because if you've got a photo that you can put on the card is the best thing. Because remember, we talked about yesterday a picture's worth 1000 words. You're gonna get attention much more quickly with a striking image than any kind of text. I don't care how pretty you make the text. A picture is gonna grab attention faster than Tex at all. I think about it. You come home and you've got a pile of business cards. Is one with text going to stand out in that pile? No, the picture is going to stand out in that pile, so that's really how you're grabbing attention. So if you're going to do that, I would stay away from really wide logos. But that said, another attention grabbing aspect. If you did want to go with a wider kind of landscape orientation of, ah, logo. Here is what we talked about earlier. You could put gesture, logo and maybe a phone number or something, our email address or a website on the front with nothing else. And that would also be a no attention grabber because of the sheer volume of negative white space that you've got and then the logo. It would be so strong on that otherwise blank canvas that it would be striking in and of itself. Okay, so let's create a couple more, and then we will have a lunch break. And then when we come back, we're going to dive into color a little bit. And then we're going to dive into business cards and then magazine and fun stuff. So I'll go ahead and turn off the visibility I of these guys that I made and will create another one. So let's do one that's really squished together. So grab, go grab our text tool again and we'll click within our document. So we'll type Nelson and then return portrait studio, and we're gonna mouse away from our techs. Weaken, reposition it on our document. Now, this time we're gonna change the font something different, so I can either press command a to highlight all that text or control a on a PC. Or I could just do a fast triple click to highlight everything. Or you could just double click the type layer icon itself, layer thumbnail metal, highlight everything, and we're gonna come up here to either the font family menu in the character panel or the front family. Manion Options Bar doesn't make a hill of beans, which one of those you go after? So let's change this to Myriad. Myriad was in one of our one or two of our fought combinations that always work that we used yesterday. It's all come down here, Teoh, myriad pro. And then we can either use the style manure character panel or the style Manu in the options bar, and we can see that with married, we've got lots of fun styles to work with here. So again, when you're designing it with whatever it is, try to limit yourself to to fonds. But better yet, limit yourself to style within the same family, and you will never have to worry about your piece looking garish because all the funds will go together. So that's the beauty of this. So we're going to choose myriad Bold City bold. So let's come down here. Two symbol, so semi bold is kind of in between regular and bold, A little bold almost bowled. So let's give that a click. And now what we can do is make sure we've got a right alignment turned on. So our alignment tools are in two places in the options bar, the stacks lines, and then they're also in the paragraph panel. So if we click that tab, you can see those alignment tools right here as well. So we've got a ride alignment going on, and now we're gonna play with size and letting for a different effect. Okay, So for the word that I have deemed not most important, we're gonna make a size of about 78 or so. OK, so this time we're gonna accent the word or emphasize the word portrait. So this one I made 83 points and then studio was a little bit smaller than anything else, and I made it 75 points. Okay, so we've got a little bit of variation between size. Now what we're gonna do is squish it together with leading so to affect letting everything needs to be highlighted, OK, or the line in which you want to affect needs to be highlighted because I could change the leading independently on each line if I wanted Teoh. Use that for positioning, but I need to highlight all of it. So now we can either use are letting controlling the character panel, and again it lives right here, right here. Or you can use keyboard shortcut, and that's what we're gonna do. So the keyboard shortcut is command option up or down, arrow on a Mac or control all up or down arrow on the PC, and we're just gonna kind of squash it together and call it done. Now. When we start adding color to this, we will increase readability on a ledge ability because if we were to colorize those in, let's say different shades or tents of blue, then you would. Your eyes would still be able to do pattern recognition on the words, even though they're kind of overlapping, so color would help would help that a little bit. The last thing I do to this logo and a zoom in a little bit is tighten up the spacing we talked about yesterday that that by and large, I used negative five, um, tracking on everything that this kind of squishes my letters together just a little bit. So let's look at how that looks on this text. Swell. Select all Commander control A and then come up here to the character panel because I wanna do just a little bit of tracking and my keyboard shortcut is gonna add, like, 10 automatically. So it jumps in increments. So I'm just gonna type in negative five and that squishes and together, that's a little bit for this particular one. I might even go a little bit higher, something like that. So once we add color to that, that would be a neat anything. So let's do one more in the mold, break for lunch, Go and turn the visibility. I off on that And let's do that nice kind of rough looking one that we angled. Okay, so for this one, we're gonna used to different type players because we want to rotate one word and not the other word so the only way you can do that is either make two text boxes or to type players over here in Photoshopped. So school hand type in Nelson. And then let's shift click. And again we're shift clicking because if you don't photo shop could get confused and think that you just want to keep editing the currently active type player. We're forcing it to create a new typewriter, So then we'll type in, Uh, let's do this a little bit differently. Let's say studios skewed these guys over. She can actually see them. Oops, here we go. And for for tire. First, there's so many different words that you could use to describe your business so you'll notice me vassal ating between Nelson Photography Nelson Portrait Studio, Nelson Studios. So, depending upon if you try some of these typographic techniques out on a set of words, remember that you can change those words. It's your business. So if photography is a bit too long to do the typographic technique, you want to dio you studios instead. It's your business. You can do whatever you want. So for this one, let's go ahead and make Nelson. Let's use that font so we'll double click this one, and we'll go choose my favorite script. Audios pro on your script, pro. There we go, Beautiful. And let's come up in point size a little bit again using our keyboard shortcut. This one we need to current a little bit. See the space between the E. In the end, it's greater than the space between the E and L. So let's Kern, that's we haven't done that yet today. So again, you could either use the character Pannell Kerr. Earning is right here underneath point size. So this guy right here or you can do with the keyboard shortcut, which is option on a Mac or Altana PC. Tap the left arrow key to decrease current ing or the right arrow key to increase turning. See how much better that looks since we just tucked that E next to the end. So now let's go ahead and effect studios, and for this one, we're gonna go back to future a light because we want a nice, thin font. With that, there's future. And then from the style menu, let's choose light. There we go, and now it's greatly decrease point size, so this one would work with either studios or photography. Either one skidded up here. Then we could track it out or see. Here's yet another option that I didn't even include in that first file. So you're going to come upon your own combinations as you're playing around with this. I don't think there's enough contrast in that. So if I were going to do that, you go down and point size even more. See how Now we've got more contrast in there Now. I'm just using the arrow key, and another variation on that would be to track it out. So let's double quick to highlight the word and use our keyboard shortcut for tracking option command on a Mac or all control on a PC. Tap your right arrow key to increase tracking. Are your left arrow key to decrease tracking mouse away from the taxi that your arrow tool and disposition it, however you'd like, I probably add just a little bit more tracking their cause. When you're stacking type like this, you really do You want the wits to be equal, you said. So there's yet another idea what your thought about when the Upper Texas intersecting the lower text. Is there any rule? I like it. I like it too. But could it obscure the lower letter? We don't understand what that letter is. Yeah, let me make this little bit bigger so we can all see a little bit better without pixelated from increasing the, uh, zoom level. You don't want to completely obscure letter. But remember, we re by pattern recognition, right? So we don't have to see the whole letter, even the whole word to be able to figure out what it iss. So I wouldn't worry too much. So you're going for a visual effect here. Like I would probably reposition this fire, did it myself so that maybe the the tail or the descend er of the end maybe comes through the you like that cause to me that little bit more visually attractive, Then it kind of running into the side. If it's intersecting it, then that's just another indication that the two are related when they're over overlapping like that. So there's no real hard and fast rule this what looks good to you, Really? But again, we've got pattern recognition going on, so we're gonna be ableto tell what that word is.
Class Materials
bonus material with purchase
Ratings and Reviews
a Creativelive Student
… exactly what I needed for current and upcoming projects! Actually, it was much MORE than I thought I needed. Once it all sank in, I realized just how much I didn’t know, but needed to know. The training is top-notch and very effective, and just to top that off with a cherry, Lesa Snider is the most engaging instructor with whom I’ve had the privilege to learn. I can’t recommend this course, Graphic Design for Everyone enough. … talk about “clicking” with an instructor… A self-professed Southern geek/nerd with a sense of humor is a darned near perfect click between that instructor and this student. I love to learn anyway, but Lesa Snider’s classes are a wonderful blend of fun that runs throughout the entire course of technically advanced concepts and application. Where do you find a course where you laugh as much as you learn (both massively)? … a Lesa Snider course. I’ve already put the course material to good use and look forward to using the class info and skills even more in future projects.
Adrienne
I've been a fan of CreativeLive for along time. I've attended many classes, but this is one of my most favorite sessions. I think Lesa is a great trainer and find I am learning a great deal. I liked it so much I actually purchased this course. I would watch any course she was part of. Great graphics design course and wonderful tips.
a Creativelive Student
I enjoyed it very much. However, I hated that I could not pause or rewind,,,so I had no choice, had to purchase. :)Lesa is a terrific Instructor. She takes the hardship out of the learning process with her wonderful ever so friendly personality. She instead turns it into a joy and I enjoy very much her courses! Thank You Lesa!