Getting Ready Critique
Lesson 37 from: Group Mentorship: Grow Your Wedding Photography BusinessSusan Stripling
Getting Ready Critique
Lesson 37 from: Group Mentorship: Grow Your Wedding Photography BusinessSusan Stripling
Lessons
Day 1
1Mentorship: Introduction and Overview
20:49 2Mentorship: Business and Marketing
30:42 3Mentorship: Shooting & Post Production
15:21 4Social Media Marketing
13:07 5Google Analytics
29:16 6Targeting Your Market with Social Media
25:54 7Social Media Marketing Q&A
10:21Common Issues and Problems
20:01 9Student Questions and Critique Part 1
26:18 10Student Questions and Critique Part 2
20:41Day 2
11Month 1, Week 1 (Sept 8-14) - Assignment Video
10:28 12Month 1, Week 1 (Sept 8-14) - Feedback & Weekly Review
53:10 13Month 1, Week 2 (Sept 15-21) - Assignment Video
09:43 14Month 1, Week 2 (Sept 15-21) - Feedback & Weekly Review
43:05 15Month 1, Week 3 (Sept 22-28) - Assignment Video
07:12 16Month 1, Week 3 (Sept 22-28) - Feedback & Weekly Review
39:17 17Month 1, Week 4 (Sept 29-Oct 6) - Assignment Video
06:41Day 3
18Office Hours Overview
13:42 19Name Your Business Review
31:41 20Where are You Running Your Business Review
09:41 21Get Set Up Legally Review
16:12 22Personal and Business Finances Review
26:58 23Banking and Paying Yourself Review
15:42 24Pricing Problems and Case Studies
35:12 25When the World Isn't Perfect Review
23:56 26Mission Statement and Target Client Review
25:46 27Shooting: Macro and Getting Ready
17:26 28Shooting: Portraits of the Bride
14:24 29Shooting: Formals, Ceremony, and Cocktail Hour
16:30 30Shooting: Reception and Nighttime Portraits
18:46Day 4
31Month 2, Week 1 (Oct 6-12) - Feedback & Weekly Review
57:47 32Month 2, Week 2 (Oct 13-19) - Feedback & Weekly Review
55:04 33Month 2, Week 3 (Oct 20-26) - Feedback & Weekly Review
57:13 34Month 2, Week 4 (Oct 27-Nov 2) - Feedback & Weekly Review
47:48Day 5
35Details Critique Part 1
28:49 36Details Critique Part 2
23:57 37Getting Ready Critique
29:38 38Missed Moments Critique
11:44 39Bride Alone Critique Part 1
12:39 40Bride Alone Critique Part 2
21:04 41Ceremony Critique
12:36 42Wedding Formals Critique
19:18 43Bride and Groom Formals Critique
24:23 44Reception Critique
18:33 45Introductions and Toasts Critique
18:14 46First Dances and Parent Dances Critique
17:47 47Reception Party Critique
20:08 48Night Portraits Critique
15:38 49Month Three Homework
18:45Day 6
50Month 3, Week 1 - "Office Hours" Checkin
43:05 51Month 3, Week 2 - "Office Hours" Checkin
28:11 52Month 3, Week 3 - "Office Hours" Checkin
36:06Day 7
53Get Organized
30:40 54Editing Q&A Part 1
28:57 55Editing Q&A Part 2
32:18 56Editing Critique Part 1
33:32 57Editing Critique Part 2
31:48 58Editing Critique Part 3
28:43 59Editing Critique Part 4
29:33 60Editing Critique Part 5
21:51 61Final Image Critique
36:28 62Album Design and Final Q&A
21:57Lesson Info
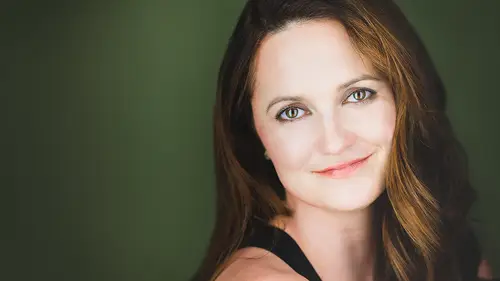
Getting Ready Critique
we're gonna move on into the getting ready. And there were a lot of images for the getting ready that are really excellent making very smart choices as far as scenario as faras lighting as faras storytelling. This is fantastic. This is one of my favorite images that was submitted of the entire critique. If the maker is watching this, um, I wish this were mine. This is beautiful people making great compositional choices. People finding the light, finding the light again, working with silhouettes in a really beautiful way. There were a lot of incredibly incredibly beautiful getting ready images that the only thing that I could say and I would say if they came up in front of me and competition is good job. You know that you're finding the light. You are finding beautiful composition. You're finding nice moments, nice expressions, creative compositions continuing to find the light, you know, beautiful work with focus, really beautiful use of back light. There were a lot of really stellar g...
etting ready images that also had really nice moments, really beautiful light. Working with what I could tell was really difficult light, but doing it really well finding creative compositions continuing to find beautiful light. There was just a lot of really exemplary work, especially in this section. I wanted to show these images to really sort of give a virtual high five to the people who made them. Because it's, you know, it takes skill to create these images. The beautiful layering here, pausing for just a second if you haven't found her already, there's a bride in the mirror off to the right. Really well done. I was really pleased to see people finding in utilizing light, not only using flat light in a way that's really flattering but finding dimensional light and using that in a way that's really beautiful as well. A lot of people really just nailing it. And I wanted to take a second and say Good job, you and you also you some really good captures that I wish were mine really lovely use of negative space and good handling of really difficult white balances and finding really nice moments. So if your image was part of these images, you know I got nothing for you. You're doing a great job. You are finding the light, your composing it really beautifully. You are on a good path. You should keep doing exactly what you're doing now. That said, that's not saying that the people that I'm about to talk about or doing a bad job or who should be doing other things. But there are improvements that do need to be made. For example, there were some instances where I could tell that they were shot with the available light in the room, and maybe the available light in the room was not necessarily the most flattering light. But it might have benefited by if there was any way you could move your subject to better lighting. That would have really helped images like this, though sometimes you have no control over the lighting that your subjects are in and, you know, and I by saying, Well, this is just a picture that's not meaning to be an insult. But is this a competition winner? No. Is this a portfolio image? No. Is this a blogged image? Not really. But what? I include this in a client's gallery. I would because Lord knows what scenario I had to work in and what light I had to work in. And maybe this was a quick grab shot. I don't know. I can look at your exit data and tell you you're doing a pretty good job other than your shutter speed might be just a wee bit fast. You could definitely you know what, 56 millimeters. Bring it down a little bit, but there's nothing wrong with this picture at all. The the lighting here. This is neither a silhouette nor a lit image. It's somewhere in between the two. It's too. I can't tell what's going on. It's really, really dark. And what it looks like happened and I could be completely wrong is that you were going for a silhouette but couldn't quite get there, because by the time you darkened down this image so that the bride became a silhouette, the background would have been too muddy. At the same time. It isn't exposed brightly enough to show the light that's kicking in on the bride's cheek. So in an image like this, you've got to commit one way or another. When you do something like this, you end up with a sort of in between image that is neither lit or silhouetted. It's just dark, but it's not dark to showcase light. It's just dark, you know, lack of directional light. There were a lot of images in here that had no directional light at all, or the light is used somewhat incorrectly. It looks like there's a large window behind these people turning the bride into the window. You know, this is a really tough location. I have no way of knowing if there was even a window in this room toe work with. But it looks like you're working with some kind of unattractive overhead lighting, but as a result, you have a lighting scenario that is really difficult, and in this instance, there would be nothing wrong with using a video lighter using a flash to emulate light from a window. But what you have here is a lot of unflattering shadows and a lot of harsh light. You've got a great moment. You've got good settings, you're halfway there. You would have just It would have benefited by adding an additional light source of some kind to help enhance your subjects. You found the light. The light is beautiful, but again, it's one of those neither silhouette nor a lit image. If you backed her up a couple of steps in front of the window. She would have been a silhouette if you had pulled her. See the light on this girl right here. If you had pulled this whole scene so that the bride was here or had the bride take two steps this way and turn around like the light here, you would have had better directional light on the face of the bride. So kudos for finding the light. It just could have been refined by the posing of the subjects. A little bit more to really help tell a stronger story and push your eye to the bride's face, because in this instance, the bride's face is one of the last faces that I see again. It's it's directional light, but it's these air fine images. What would have elevated the image a little bit more would have been a little bit more light on the bride's face. Brightest turned so far away from the light that it's just first of all, it's not correctly exposed. It's really, really dark thing. Exposure is probably about two solid stops underneath. If you're going to have the bride's back to the light, you're going to have to compensate with your exposure to brighten up her face. If you're not going to add on an additional light source to light up her face, you could have had returned another way. You could have had a return into the light. But what you found is a lighting scenario and then positioned your client s so that they're not being lit correctly. You know, just it's just flat light. Ah, little turned a little bit more into the window, turned a little bit more at an angle. But to me, when I look at this, this is a picture of the big hand in the foreground and not necessarily a hand working on the bracelet. So possibly a different crop. Possibly turning into the light a little bit more would have really helped you illuminate your subject. Turn right around the other way. The light that should be lighting her face is lighting her bun. Very simple. You found it is Turner around, Backer up four steps. The light that should be lighting her face is lighting the face of the girl behind her. And again, it's got some good examples. And here people who didn't have people, so they shot three people, which is what I suggested that you dio. But this is again. It's an issue of It's not a silhouette, but it's also not lit correctly. Otherwise, if you had brightened it up by about a stop and 1/2 you would have seen a little bit more light on the face. But it's too bright to be a silhouette too dark to be properly let yes curie reflectors with you. Okay, so you're really doing some room adjustments you might have. Ah, bridesmaid walk in and has a white, a bright dress and sort of act as a reflector. Or do you sort of, for the most part, like if I'm going to do something like this, if I'm going to go for a silhouette, you want to drop your exposure. But if you're not going for a silhouette, this is about two stops under exposed. Just open it up and you'll get there perfect thinking. There's nothing wrong with using the white background to totally like. Here's another example. You could have used this white background to totally blow out your image, but didn't it would have needed another 2 2.5 3 stops toe. Lighten up the front of the subject. Otherwise, if you wanted the background to stay the same, you could have introduced a reflector or a flash or a video light onto the face to brighten that up and again. Same thing here. It's just it's just not finding the light just yet. There's a light source behind her. It looks like a lamp. Either turn it off, so it's not a distraction in the background or face her into it, so it's used to illuminate the subject. You know, you've got a window to the side, you've got a window to the back. But she's turned so that nothing is lighting her face turner to the side so that she faces the window. You know, this is tough. This was obviously in a bathroom, right? Or in a space that doesn't have a lot of light. You're doing the best you can with the scenario that you have in front of you. Sometimes it's a grab shot. Sometimes you don't have time to do a video light doing the best you can open up the blinds behind the makeup artist. It would have helped fill in the scene just a little bit. Either turned the bride towards the light source or bring your exposure up because she's really severely under exposed. Here's an example of turning someone into the light source, but it's way over exposed. It's over, exposed by about a stop, maybe a stop and 1/2 Good job on finding the light, but you need to bring the exposure down because it's a way overexposed. Finding the light you obviously found the light, but in the client has even actually angled well into the light. But the photographer's angle is wrong. By being up above and shooting down, you just sort of get a mess of light. If you had shot straight into the side of her face, it would have been really beautiful. So this is an example of you found the light. You put the client in the right space, but then you put yourself in the wrong space, under exposed by a lot. There's that great window behind her. You could have turned her into the window. You could have sat on the bed. You could have gone to the other side of the bed. But if you're gonna have her back to the light. It's not exposed enough that lights of per face. In an instance like this, I would have turned her into the window, turn him into the window. You know there is. There is no light on this gentleman's face at all, so you either need to turn him into the window and use that light to illuminate him or fill in his face in some way from this side. Same thing here, backs or to the light source. And when Baxter to the light source like this, you either need to use something to fill in. The face is on your side, or you need to adjust your exposure accordingly. On a lot of these are instances of found light, but the subject is turned in completely the wrong direction, like I can't see her face it all, So we either need light filling her in, or we need her facing the light source a little bit more. Some rethinking of the Lin selection would have really helped make some of these strong images even stronger. For example, vertical at 28 millimeters again, that's what I mentioned before about a wide angle vertical tends to really distort your subject, so it's not as flattering as it would have been with a slightly longer lens. And here is kind of, on the flip side, using a really long lens. It's great cause you're getting the compression of the long lens. But 45 you're still getting a lot of the rest of the scene and focus, which doesn't help push your eye. No pun intended directly to the I. So I would have either shot it at, you know to eight, or I would have switched over to an 85 14 at to really help have that I be the sole focus in the frame, the wide angle even at 32 millimeters. When you're looking down like that, you've got distortion on the girls on either side on the top, down towards the bride. So again, there's nothing wrong with a 32 millimeter lens. But shooting down sort of warps this frame a little bit. I would have hot down and shot straight into it, and then it would have really minimized the distortion a bit. It's just the angle that's making it do that again. The wide angle on again 47 millimeters might not necessarily be considered a wide angle, but when you turn it to vertical elongates the body in a way that is not as flattering as it could have. She's a cute girl. She's in good light. It's a nice composition. Just something a little longer would have helped flatter the scene a little bit more, but mostly with wide angle verticals and with wide angles In general, you have to be really careful because you're going to get distortion. And then again on the flip side, just because you use a long lens, sometimes you need to reconsider your aperture or your F stop. At 56 you're getting a lot of this in focus, where the focus is really on the bride and the lipstick that she's holding to her lips. Changing over to something like 85 14 at 14 even at 18 would have really helped isolate your subject and tell a stronger story. The wide angle vertical again. It's just tough on women's bodies. It's tough, and even my pet peeve is the 50 at a vertical because even again it's a 50 50 is a great vocal link, but the 2nd 2nd you flip it vertically. Look at how stretched her head becomes. Same thing. 50 millimeter up close. You're starting to get almost a little bit of a fish eye effect. You know, just be very mindful when you're using anything wide ish when you go vertical, especially when you get up above your subject and shoot down, you start getting a lot of a lot of stretching. So these are just some examples of perfectly fine pictures that would have been benefited by a slightly different lens selection. Then we've had some compositional issues, and a lot of times these compositional issues can be solved by a crop or a different tilt. For example, till this so that the bride is straight up instead of leaning to the side and you've got a killer photograph, tighten up, you know, lose a little bit of the bottom, lose a little bit of the side. Stronger photograph. Ah, lot of the compositional issues that I was seeing involved too much headspace, right? Cut it in. A lot of photographers have that put your subject dead in the center thing going on sometimes it doesn't help the frame. Eliminate this and add this space to the bottom of the photograph. Just instead of going like this, go like that. Then you have more of this girl, unless extraneous headspace telling a better story. And here are some examples of you know, a little bit too much headspace. Bring it down. Instead of using this space at the top, use it at the bottom and include more of his body. This is so close that I can almost taste it. Just shift your camera a little over instead of having the extraneous space on the right side where there's a lot of curtains, use it on the left side so that you can get more of the dress. Too much space on the right, cropping into bodies on the left. Just sometimes it is simply moving your camera one inch to the right or left, and you've recomposed in a way that tells a better story. Take that headspace out, crop it down literally. If you take this picture and you lose all of this up here and then you loose like if you literally go like this to this picture, then all of a sudden you have a much stronger picture with less negative space, and I love negative face. But the negative space has to help tell the story. And when the negative space is just dead air at the top, it's more space for your eye to get lost. There's a lot going on on the bed, on the sides on the everything may be dropping down to floor level and shooting straight into it instead of shooting down, eliminating the headspace. Ah, lot of this is just eliminating the headspace. You got an extra third up at the top that doesn't need to be there. Same here. This is an excellent, excellent picture that would have been 10 times more excellent had the photographer taken one step to the right so that you saw a little bit more of this woman's face just a little bit more. And then you would have what is a phenomenal picture going from phenomenal to super phenomenal again? I'm not, you know, compositionally. It needed to come in closer on what's going on with her leg because I get lost in the top. You know this arm up here? This arm over here, the door knob here. This here that's taking away from this, which is a great picture so cropping down. All you need in the frame is what's helping you tell the story. Sometimes compositionally, it's about backing off a little bit close. Take two steps back and open up a little bit. Mawr show a little bit more of the scene, and then you have a little bit more context. Either back up or zoom in. This is sort of in the middle. If you step back, you have more of the scene. If you step forward, you have more of the detail headspace. Take two steps back or take two steps in one or the other headspace. Take two steps back or two steps in. Do you see? It's kind of a common thing over and over and over again, where for something like this, you're a little bit too close. You either need to get closer and focus on the hands or back up a little bit more and let the image breathe. Take two steps back. Sometimes it's just too close. Beautiful image. Take two steps back or two steps closer. Either focus on what's going on right here right there, or step back and show me more of the scene. This is kind of an in between where it's either a detail or it's an environmental shot of what she's doing. I either need to see one or the other. Or ideally, I see both. Take two steps in and focus on her hands and then take four steps back and focus on the whole scene. Then you don't have an image that is sort of awkwardly in between. Then you have to really strong images that tell two different stories. Sometimes you find something compositionally that is clever but doesn't really work in the telling of the story. The image in the mirror to the left is not entirely in focus, and the image to the right isn't in focus either, you know, and when you find something that is clever compositionally, it also has to tell a story. There's not, as my husband likes to say. Sometimes there's no there there in the picture, and that just means that you either missed a moment. You came in a second before a second later. I think that seeing this is what elevates you from just some other person with the camera, right? Like you clearly, haven't I? It just needs to be finessed a little bit more in the composition. Either take two steps thin or take two steps back. Same here. I'm not sure what's really being told here. The light is beautiful, but is this are you focusing in on the woman who is helping put the dress on? Are you focusing out on the whole scene? So maybe take two steps in, take a shot that's really focusing on this woman and then take four steps back and shoot the entire scene. It's a little too close, but it's not close enough. If you kind of get my drift, um, again, either step forward or step back. It's kind of one of those in betweens compositionally with a silhouette, having things cross over other things in a silhouette sort of muddies the story being told, you know, and I'm not making fun of the maker at all, But is this a picture of somebody getting their eye makeup done? Or is it a picture of somebody getting a fork stabbed in their eye, right? Like it's kind of hard to tell. And when you start muddying up a silhouette by having things cross over other things. The story isn't quite as clear. If the maker had waited two seconds for the makeup artist toe, lift the brush off of the face and shot right there before the brush came back and touch the face. Then you have a clearer story than it tells. There is no confusion. There are no lines crossing. So back up just a little bit. Get that picture. But when you come in and you do this, it's a little hard to tell exactly what's going on. A little bit too much bottom space. So excellent light, excellent composition. Maybe get down on the ground level and shoot straight in. Then you eliminate that bottom third of ground space that isn't helping to tell the story, either step in a little closer or set back and show more. There's a lot of head space and a lot going on on the right. Either crop it down on the top and crop it and on the sides or step back. So you're showing a wider picture. This and I see this happen a lot with photographers. You shoot with a 50. It's neither a wide shot or a close up shot. It sort of in between shot. Tighter crop, tighter crop, tighter crop to eliminate what's going on in the in the top. If you cropped down in a little closer to the woman's face, you have a much clearer story. A lot of head space, no pun intended again. Get a little closer or step a little further back. There's a lot. This right over here isn't help. Isn't helping tell the story of what's going on right here. So the story is either here in this part of the frame or the story is further back. Took me too long to find the subject. You know, crop it down on the top, prop it in on the sides, and then you have a really nice sort of peeping Tom shot, which is which is really nice again with head room and head room. Just crop it down, crop it down. If you find that you're continually putting your subject in the center of the frame with a lot of extraneous stuff going on at the top, all you need to do is bring that crop down or bring your angle down. And then sometimes we you know, something compositionally This actually took me a few minutes to find the subject, which I'm assuming. Is this woman getting her makeup done over here? What's going on otherwise isn't You know, if if I find I found this woman first and then this woman second and then this woman third and then this fourth and then this fifth, your subject shouldn't be the last thing that you find. So either a tighter crop on the subject. I mean, in this instance, that's what would really help is a much tighter crop down on the woman. If you're going to include other people in a frame, the other people have to be doing something to. And there's no story being told by the supporting players in the scene, sometimes compositionally. You know, it's not about too much headroom or too much bottom room. It's about you stepping to one side or the other. If the photographer had taken two steps to the right, showing a little bit more of the bride's face and a little bit less of this other woman's back, you'd be in a really good place. The head room thing again. Here's an example of a crop that's a little too tight. Take two steps back. Let the image breathe. Sometimes it's a really hard thing to do. You know, I tend to do like a crash. Zoom in on people's faces. If you just step back. Just a hair. You have a little more space for the image to breathe and a little bit more power to the to the moment, which is beautiful. You know, compositionally, you've got something great going on with the faces on the top in the bottom. But then you have this whole right hand side of the image that is just the makeup artist back. So perhaps the images made. Maybe you have to images. Maybe you have this right here, and then maybe you have this down here. That's two really powerful images, but this inclusion over here and the hot light coming on the makeup artists back pulls my focus from what is a really great composition on left side of the frame, just cropping in a little closer, a little bit less tilt, cropping in a little closer. There's a lot going on on the left and on the right. You know, there's I'm not really sure what the focus of the story is. If it is this woman with in in sort of the blue suit, she's a little lost in the rest of the scene. But if it's the bride, the focus isn't on the bride so compositionally. I'm not really sure what story is is being told. You know, she's turned away, so if it's a picture of the back of her hair, which would be fine, the back of her hair is under exposed and not lit. But if it's a picture of the glass, it's taking me a little too long to find the glass. Headroom. Bring it down, Bring it down. Um, a different crop to illuminate Teoh, eliminate the huge lamp over there or simply removing the lamp. Just take it off the table. Um, compositionally. I can't see the bride. You know, I love the two women on the side and their vantage point because it's really helping you, like, get in and see. But I I'm a little not sure of what's going on because I get their backs and then I get the bride's back so they get the backs of the other women. Just having the bride turn just a hair would have really helped compositionally taking two steps to the left because I'm losing the bride's faith crop down to get rid of the head room pit. There we go again. I'm not really sure what the subject is compositionally. If it's the woman who's holding her face up or her hand up in front of her face, it needs a tighter crop so that I could get to her face first. If it's the woman who is sitting in the chair, she's not the one that's in focus. Um, tighter crop. There's a lot of head and bottom room going on in here, you know, compositionally. I see the backs of the two women before I see the bride's it sitting down, take a step to the left. We're sort of losing her face a little bit. I understand what's going on here, but I'm not getting a strong story compositionally maybe taking two or three steps to the right so that I can see the bride space or taking two or three steps of the left, so I'm seeing her full back. This is neither a profile Nora back. So I'm sort of in between and I'm not sure what the story is. Straighten up the tilt, and then you have a great picture, you know, come down a little bit more so I can see a little bit more of the guy's face. It took me a second to find his face because I found the background. First a couple steps over to the left and you'd have a great picture. What? This to me. What this is is a picture of someone's hand. And I know that what you're going for is a picture of the bride getting her makeup done. So moving a little bit to the side, even if you have to turn, whatever your reflective surface is would help you get a really nice moment. But if you took a couple steps to the side and you realize the only women to get this reflection is by going back to where I waas, I probably wouldn't even shoot this because I'm not getting enough of her face to see what's going on and what I'm getting most of. Unfortunately, in the top right is the photographers hand in the camera so you can see the hand in the camera up in there
Class Materials
bonus material with purchase
Ratings and Reviews
a Creativelive Student
A couple years ago I attended WPPI and sat in on Susan's class. Out of all the classes I sat in on that year her's was in the top 2 for actual information and not just fluffy feel good hype. So I figured her Group Mentorship course would be a good one and it definitely has! A bit of background on me, I've been running my own wedding photography business for the last 6 years, 5 of those full time. I've taken tons of business courses and have circled back around to taking more classes to improve my craft. Susan's class focuses on both business and improving your craft. The big warning I have for this class is that there is a lot of homework, A LOT!!! But that is not a bad thing at all. I was swamped with weddings as the class started and was late to get to my homework but I'm so glad I didn't skip it because there was a lot of things I learned about my business just in answering her questions. I believe there were homework assignments every single day and while some are quick others will take awhile. So my recommendation is to take this course in your off season and use that down time to really concentrate on doing the homework and putting together questions to ask during the weekly chats. I was not able to do that as much as I wanted because of my schedule and I feel I did myself a disservice by not taking full advantage of what was offered. As another reviewer stated there were a lot of basic questions that were asked like how to get proper exposure in an image, etc. If you aren't sure how to do that then this class is not for you. I believe this class is geared towards those who are past the portfolio building stage and are looking to set their business up for success on the back end while improving their craft. Remember to ask questions, keep a notebook and write them down while doing your homework. Don't focus so much on what she uses for everything but why she uses it, if you understand the why you can apply that better to your business vs just the what. Again I would say to properly allocate time to take this class, treat it like a college class with weekly homework and study required. Don't buy it to watch later as you will lose out on most of what this class is about which is access to Susan for questions and feedback. Do the homework, I found the questions she asked us to answer led to a lot of revelations for myself in my business. Her questions led me to ask my own questions and review a lot of historical data for my business to get a better grasp on where I am. Luckily for me I'm doing way better then I thought ;)! Also I recommend for image critique to not just submit your best images, while we all like a pat on the back that won't make you better. She requested a mix of your best and areas of struggle. The images I submitted that I was struggling with are the ones where her advice will improve my craft.
a Creativelive Student
I found this course helpful - but I also did all (well most) of the homework and I think to get the most out of this class you really need to be prepared to do the homework - which does require a reasonable time commitment. I found the business information (month 1) invaluable, and Susan was very, very active in the Facebook group, constantly answering our questions, which was great. Month 2 was a big image critique and I also found this very helpful. Month 3 was about editing and it was also a critique, which was helpful as well. Susan, Sandra (her assistant), Jen (her post production person) and CL worked very hard for us so we could get the best out of this course and I really feel I did get the most out of it that I could have gotten out of it. It is definitely worth it if you are willing to do the work. All of my questions were answered and I feel like my work is going to improve for the better now. If CL run any more mentorships such as this one, I would highly recommend them as I found I learned a lot more than in a regular class - because of the homework and the feedback (direct from Susan) on the homework. I am so glad that she was honest about my images because now I am seeing them in a new light (no pun intended).
Carissa
Susan, simply amazing photographer, amazing woman, amazing business woman! If you want your but kicked then this the course for you! A kick start for your 'business', awesome .. honest .... brutal.... critique.... don't take it personally.This is a course for beginners and for those been in business for 4 + years. I have been in business for 4 years and this helped me seriously start from the beginning again on the business side of things and fine tune my processes. I learnt so much.... but was also great to know I was on the right track. For those beginning - oh I wish I had this as a guide 4 years ago!!! Enjoy! worth every penny! cheers Carissa www.capture-t-moment.com