Correcting Distortion in Photoshop
Lesson 5 from: Hot Tips from the Photoshop PlaybookBryan ONeil Hughes
Correcting Distortion in Photoshop
Lesson 5 from: Hot Tips from the Photoshop PlaybookBryan ONeil Hughes
Lesson Info
5. Correcting Distortion in Photoshop
Lessons
Photoshop Playbook
02:27 2Adobe Bridge: Camera Raw
08:04 3Quick Select & Refine Edge in Photoshop
05:33 4Sharpening in Photoshop
09:40 5Correcting Distortion in Photoshop
07:36 6Black and White Conversions in Photoshop
08:45 7Content Aware in Photoshop
11:02 8Depth of Field Modifications in Photoshop
13:33Lesson Info
Correcting Distortion in Photoshop
Let's talk about distortion for a minute. We talked about it a little bit with the IPhone. Um, I want to talk about it with, um, the places where we can correct the lens anomalies and the places where we can do even fancier stuff. So when we think about photo shops role for photographers, Um, if you're using light room, especially if you're using, like the creative Cloud photography plan, um, and you feel guilty because you spend a lot of your time in late room, I really go to photo shop anymore. Maybe former Photoshopped product managers with the only one who carry around that sort of guilt That's normal Light room is where you're doing all your global edits. Reading some of your selective edits where you're sinking your files. Hopefully, it's where you're using them on Labour Mobile as well. But photo shop is where you're pushing around the pixels. It's where you're doing magic. It's where you're doing things you can't do anywhere else. Um, one area where you can do things in both is...
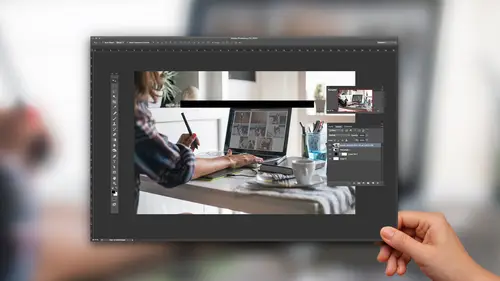
around correcting the normal problems with lenses. So let's just look at this image right here. This is a PSD so it's gonna launch into Photoshopped. But this is a great example of what I talked about earlier. Which is maybe I want a tool that lives in camera raw. That's okay. I can use this as a filter. Now, I'm gonna show you two tricks in one here before I go into camera raw. I'm gonna turn it into a smart filter, all right? And all that's gonna happen is it's gonna give me that same edit ability that I had before with sharpening, which is if I want to make a change to whatever I do in camera raw, I will be able to go back and make that change. Okay, so it's a smart filter and let's go in to camera raw. And the reason I want to go to camera raw is one of the things I love about camera is I've got lens correction right in here, okay? And if I come in here, I've got all these different options, and one of them is upright. And if I hit the upright control right there, it's gonna automatically apply that there, and it's gonna stand the image up. Um, but just to show you that beyond just what you have here. You also have Let's just cancel, come back and Photoshopped. I think that's right back to how it was. You also have a lens correction tools in Photoshop there they're similar but different. They both look at your, uh, camera and they both look at what you've applied to it and both of them. And the reason I show you this one is you just see a little bit more about what's going on. Both of them. Look at what kind of camera and lens you have was shot with the 24 105 What's unique about the one that you see and photo shop here is if you don't have the profile that you want, you could actually go to Adobe Labs and you could build your own profile. Um, and that sounds pretty wonky and crazy, and for the most part, you don't have to do it. But for people who are shooting like old Nikon glass on Canon five d mark threes or, ah, you know, people who are mixing all this stuff around and there are people who do that know that you can build your own profiles Now what we're doing when we correct this stuff is we're taking out distortion. We're taking out vignette ing, which these days is very fashionable to add, and we're taking out chromatic aberration, which is just a fancy word for color fringing. Those things can be done in camera raw, and they could be done here in Photoshopped as well Again. The advantage to doing that one in Photoshop is you could build your own profile if you didn't already have one. Otherwise, I would go through camera raw whenever possible. All images needs some form of lens correction. It's one of those things. Easy. Just turn on. Ah, and do as you come through there. Okay, Now, here's an example of something you could only do in photo shop, which this is our headquarters in San Jose. It doesn't look so wonky, but that's a very, very wide angle lens. And to fix this, what I'm gonna do is I'm gonna come into adaptive wide angle. This is a really neat tool, and the way that it works is it's looking at the exit data. It's looking at the information that sits alongside the file that tells it which camera lens were used. We could see that it's a Nikon D three s with a 10.5 millimeter lens. Hence the really wacky perspective on a back up a little bit. And the way that this works is I'm just going to click on the image. And as I move my mouse around, I'm gonna see that it's applying a line in the shape of that line changes now. What's happening here is it knows the geometry of the lens. It knows where the curve of the lenses. So it's going more curved on the outside than it is on the centre. I'm just gonna line that up with an area that should be straight and click on it, and it's gonna straighten that it'll even work on something like this tree. Here I click on that. It's gonna straighten that I click on the image here to make sure that straight I click over here. What you're doing is you're just finding straight lines in your image and clicking on it, and it works. It's almost like a tilt shift lens after the fact. I'm just clicking around my image and you don't have to do this all day long. Find areas that you know to be straight, and you can do some really remarkable stuff here. And it's It's like anything in photo shop. Its you know, its season to taste. Just keep doing it until it looks good to you. Um, for architectural photographers, for people who want things to look the way they really dio, this is the way to fix that. And then what you could do later is you could use content aware fill to fill the missing area there now something that a lot of people don't know. You can dio, because you could take your old Panos and you could fix them. And here's how it works. So here's an image that stitched together that is not my image, but everyone's got panoramas that look like this. Shoot it with a wide angle lens and they just looked kind of strange. Well, even if they've already been built, even if they were built years ago, you come into adaptive wide angle. We're just going to click on a couple of these. I click one there. I click another one over there. I click another one over here and let's do one across the foreground as well. Okay, that's fine. But what am I supposed to do with that? Well, now I click back on these, and I grabbed these little handles like so. And I can just come in here and rotate that and flatten it out so you can go back and you can fix all year old panoramas. You can tune them up, you can straighten them out again because it knows the geometry of the lens again. The workflow there is apply all that. And then let's just say we clicked, okay? Here. And then what I would do is I'd come in here and I would select the foreground. I'm just gonna take a big bite. I'm not gonna finance it very much. Uh, and I'm gonna come in here to edit Phil, switch that to content aware fill and fill in those missing pieces and areas like this over here. I might have toe tweak that a little bit more, but if you go through, you can fill those annan and fix that up. That's a good one, because I think we all we all have the general lends distortion. Um, and a lot of us have those panels that we built that just don't quite work
Ratings and Reviews
Mike Thompson
I think this class was well worth it. I like that you are sharing this info, like the "secrets" so I can try them and have acquaintances ask, "how did you do that". It was great. Thanks!
user 12004e
Lots of good tips. Gets to some deeper aspects of the programs.