Lesson Info
11. HDR in Lightroom
Lessons
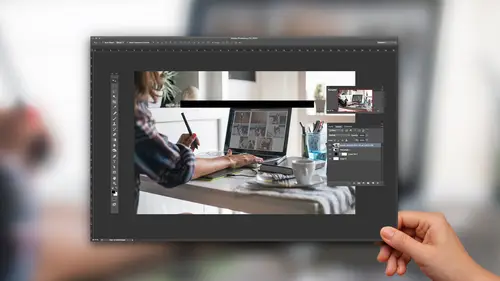
Photoshop Playbook
02:27 2Adobe Bridge: Camera Raw
08:04 3Quick Select & Refine Edge in Photoshop
05:33 4Sharpening in Photoshop
09:40 5Correcting Distortion in Photoshop
07:36 6Black and White Conversions in Photoshop
08:45 7Content Aware in Photoshop
11:02 8Depth of Field Modifications in Photoshop
13:33Lesson Info
HDR in Lightroom
going back to your question about HDR. Let's let's look at that light room workflow real quick. Just because I think that's it's really important. And the reason I'm comfortable showing light room is because going back to the creative cloud photography plan so many people who are using Photoshop are also using light room. In fact, I think originally a lot of people thought, Hey, you know, I paid 99 a month. I get Photoshopped onto get late room for free. But it's amazing how many people are paying 99 month for late room, and they say, Oh, well, I get Photoshopped for free So I've obviously showed a ton of photo shop stuff. I'm comfortable assuming that you guys have either used light room where you have access to it. So let me show you how I would do HD ours or panels again. If I taught this course a year ago, we'd be doing both of those in photo shop. But today I'd be doing both of them in light room. Okay, so over in light room, I've got a bunch of HD ours and a bunch of Panos, and s...
o let's start with the panels. This feature confused me at first because I heard it was in here and I was like, Oh, HD ours here. Panoramas here. Where is it? I couldn't find it. First you shift, click your files. You had the ones you want and then you control Click. Um, or you could come up to the menu, the photo menu, and you go into photo merge. You do it from the library, not the develop module. I understand philosophically why it's there. But I expected to find in the develop module. So if you haven't found it this where it is, um and you have your choice between Panorama and HDR, I go to Panorama and it just works. I just It just doesn't You just stitches them together, and it's just done perfectly blended. Uh, and it works. What's neat about it is because it's making a raw file. Um, let's just merge that. Have it done. That's a pretty big file, uses the GPU. So it's fast. But what's really cool is that because the output is a raw file, even though I asked it toe automatically crop it if I were to come in here and go to the develop module and select the crop tool. That's not that's finished file, not the unfinished violence. Did this one too many versions of the same file that one's been to photo shop already? The original files actually back there that I had it auto crop. But it's neat that I get to the rest of it so I could send that over to photo shop and I could fill that area out. Okay, let's look at HDR. So for HDR, where we're gonna dio is I'm gonna send these images over, um, for those of you who don't know and I think most people do. But some people understanding of HDR goes as far as the IPhone, HDR stands for high dynamic range. It's a way of combining multiple images, multiple exposures into one, just to sort of explain how it works. If I were able, if I were to like, hold my hand up, toe a bright window and look out the window, my I can resolve the view out the window, and it can resolve all of the detail on the back of my hand by point the camera at the same scene. I mean, they're gonna capture the detail in my hand and the view out the window will be totally blown out or I'll get the view out. The window in my hand will just be a silhouette. Our eyes have a much wider dynamic range than the camera, but by using multiple exposures, we can overexposed under exposed shoot in the middle, and as long as we have three or more exposures weaken, bake them together into something that looks like what are I see now going back to what we talked about earlier? People use that to create really weird looking stuff. Some people like that. I think it's kind of Thomas Kinkade of photography myself, but that's OK. Everyone's allowed to have their own view on it could be used for whatever you want. There's no rules to this thing. Um, all you gotta do is take multiple exposures and sandwich them together. So here's how we do it. There's a dark one. I've under exposed it. Here's another dark one. I've, uh, under exposed it a little bit less. Here's one. As the camera side, the camera does a good job of guessing the problem with the one that the camera metered is I have a bird flying through it and I've got this guy over here walking through it. And here's one that's over exposed, the skies blown out. But I've got all the detail in the boats. I want to take him altogether. Okay, So what I'm gonna do is I'm gonna shift. Click those four images. All you need is three. No need to go beyond five. Some people go crazy and do like 10. It's just not necessary. Uh, somewhere between three and five is the sweet spot. I use the menu before this time in a control click and come to photo merge HDR. I don't advocate messing with the images before you do this, build the HDR and then do it. Um, So what have I asked it to do? I've asked it to automatically align. It did right away in doing that. Um, I came up with a line content and an auto tone and auto tone. It did a nice job of colorizing it. The other thing is, we've got the d ghost amount by default here, set to medium. If there was none, it's gonna look funky. That guy's gonna come back in, and so is the bird. But with medium, they're gone. Now, what's really neat about this? If we merge that, we're gonna get another file right next to fight. We already have. Yep. This is a true raw file. I can come over here and I can do all sorts of crazy stuff to this. I can adjust clarity. Um, I come down here to De Hayes I've never tried to use on this file that has all sorts of crazy, crazy stuff. You can go nuts with these. The one other thing I would say about this that I mentioned before, but I didn't show hdr for black and white is really powerful. You can you can go from sort of a little too much to Wow, that's a dramatic image. I love HDR for black and whites. On this case, I might bump open the shadows a little bit more of it. You get this really neat look. So aged ers and panoramas, I love to use light room for that. Um, two minutes, Brian, I'm just gonna because we're we are running out of time. I would love for you to talk a little bit again where people can find your full playbook. Yes, absolutely. So there's you can absolutely go to the YouTube channel YouTube, Photoshopped Channel. But the best place to go is we. I wrote a blawg about this. Blawg started over dot com in the photo shop category. There's a link right here will make sure that that appears in the course that if you were to just do Playbook blog's Brian Adobe, it would take you here. I know that's a lot of information. It's the Photoshopped log on Adobe, and what this one has is I write about the success of the Siri's. But what's really cool about this one is the one place that we put links to every single episode. They're all right there. You can get every single one, all the stuff that we've gone over today and a whole bunch more. There's a ton of content there. The one other thing that I like to do and I do it especially for this course, um he is, and I call this sort of a demo of photo shops type tool, and I really do mean this. I can't promise that we're gonna be lifelong correspondents But if you guys don't find what you're looking for or if you have ideas for other things, send me a mail. I really do care about this stuff. I'm very personally invested in this course. It's on the Photoshopped team for 15 years. I can certainly pass on information to anyone that you like on. I'm always happy to author content or help people solve problems, so I'll sort of ended on that note.
Ratings and Reviews
Mike Thompson
I think this class was well worth it. I like that you are sharing this info, like the "secrets" so I can try them and have acquaintances ask, "how did you do that". It was great. Thanks!
user 12004e
Lots of good tips. Gets to some deeper aspects of the programs.