Preparing and Saving Files to Submit
Lesson 13 from: Make Money With Microstock PhotographyLesa Snider
Preparing and Saving Files to Submit
Lesson 13 from: Make Money With Microstock PhotographyLesa Snider
Lessons
Pre-Show
05:48 2Introduction to Microstock
19:26 3Learn What Sells
1:04:55 4iStockphoto Trends
17:07 5Model and Property Releases
09:15 6Cropping and Composition
31:14 7Shoots That Work
14:23 8JPEG vs. Raw
10:08Lesson Info
Preparing and Saving Files to Submit
now the metadata that I'm gonna have you set up in light room and Photoshopped. Unfortunately, you can't set up metadata and camera Buchanan photo shop that we're gonna create a very minimal preset because we really just want to be adding our copyright information to the images in the metadata preset. You can also add some keywords and tiling description and light room so we'll look at that Ah, little bit later. But for metadata preset that you apply on import, that just goes on Teoh. All of your images is a nice thing to do. So we're gonna put in your copyright information. So that's what we're going to do now. So we'll pop on over to light room to do that. So when you're in light room, you want to be sure that you're in the library module and then you're gonna trot out to the metadata menu. It's important that you're in the library module because you won't get that metadata menu. If you're in the develop module, it is a bit, uh, I'm selling the way the menu changes up there but never...
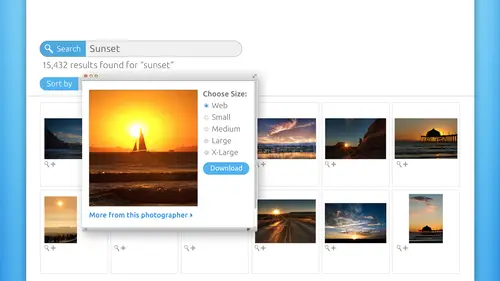
theless, so make sure you're in the library module, go up to the metadata and choose edit metadata presets. And in the resulting dialogue, you really just want to enter all the the I P T. C copyright information right here. So this is fun. So the metadata this in here right now is from Jared Platt when he was teaching a light room course. So he's added his meditator right here. But that's perfectly fine, Teoh. To show you, you can, though, add a copyright symbol in here, which I like to do. So we'll just click in front of his information and we're gonna press option G on a Mac or Ault G on a PC, And that's going to give you that nice little copyright symbol. And I like to add that to you. But basically, we can just roll with whatever Jared put in here if he had taken the shot. So if he wanted to change it for me, we get to say Nisa Snyder copyright status copyrighted. Contact the photographer for usage rights and then put in your website federal lisa dot com. And that's really all you want in your metadata preset because the presets gonna be applied to images in bulk when you're bringing them in on import. So there's not a whole lot you can do unless you do. You know, the same shoots over and over. Then you could fill out some of the other fields. But basically, this is what you want to put in there and then click done. Save changes as a new preset save as and given a name. So we'll call this one Lisa stock. Okay. And now, how do you apply that? Well, when you import images using light room so file import, we looked at how to apply a develop preset earlier in the day, which was right here. But your metadata preset is right here, so right underneath it. So look on the right hand side of that import dialog box and you're gonna find your metadata preset right here. And here's the one that we use for stock. So just like the develop settings, you might have several different developed settings. You might have several different metadata settings as well. So those air handy Teoh apply on import now over in photo shop, your metadata is in the file menu file info. And this one's wonderful because John Corner cello took this image of my husband, Jay Nelson, back in March, and he put his metadata information most likely in light room, and it rode along with it here to photo shop. So that's why we have John Cornyn cello here. The only thing I would have added to that is a is a year, and then he's changed it to copyrighted status. Not that's gonna keep anybody from stealing your photo, but if you look at the little document tap right there, you can see that it's copyrighted. So is this a little satisfying? Teoh. It's a little like peeing on the image popped into my head, came out of my mouth. It's satisfying to have that information right along with the image, because you do retain the copyright when you submit your images to the companies that we talked about, not all of them are that way, and you really do need to read the fine print before you submit because you want to own your images. So that's how you can add that metadata preset, which is very handy. Okay, we've been talking a lot about processing, but after you process, it's very, very, very, very important for you to view your image at 100% because again, that is how the inspectors are going to be looking at it, and they're gonna go across down, across, down, across down and inspect every single bit and piece of that image. So viewing it at 100% it's so easy for us to view at all these different zoom levels while we're editing it that we often times miss looking at it as the inspectors are gonna see it. So do you. Look at it 100% and open up another window. Compare it with your original, and that's a great checks and balances for you to see. If you might have gone a little bit too far on something or if you didn't go far enough, so do view it 100% in and compare it with your original. Now let's have a little bit about the don't. As far as filtering and special effects filtering will get your images rejected very fast. I had one of my images rejected for filtering, and I hadn't even applied any filters. Teoh and I did an appeals process with Istock photo, and I want so that image went into my database, but they it was a really beautiful image of the sweet field, and the sun was just trying, and they accused me of over filtering the wheat, and I didn't touch it, so I won that case anyway. You can appeal, but filters be very, very careful, I would say. Don't use any Don't use any of them but in a sharpening is a filter. Ah, little bit of creative blur can be okay, and these three examples work very well. I say These are the exceptions rather than the rule. And if you caught the filters class yesterday, are Photoshopped deep dive on filters and that covered all photo shops. Filters, not just CC, but this specific effect is being done with the radial filter set to zoom mode, and we showed that off yesterday because it's really cool. Most people just think the radio filter is good for making things going. A swirly direction. I don't use it for that Zoom is very good, but it's also in the radio filter, so this kind of thing, if it adds to the image, can be really great. But it has to add to the message, so your rule of thumb is to not do anything that's going to detract from that images special message that it has. So the zoom in all three of these situations works quite well because it adds to the message that these photos are trying to convey living fast, being in a hurry, you know, driving fast, speed, rushing, etcetera. So the filters that are okay are a little bit of blurring, like this radio blur. Sharpening is okay. Noise reduction is okay, though I really wouldn't do it in photo shop if that's all that you have. And of course, you can do that. Photoshopped has a noise category of filters and reduce noise is one of them, so you can try to do that. If you're going to do that, try toe. There's an advanced mode to that filter so you can choose to see choose to reduce the noise and individual channels. So try to find the one channel where the noise is the worst and reduce it there instead of just globally across all the channels. Do you make sure that you only reduce it in one channel, though? Don't do it in all of them. If you're going to go that advance smoke lens correction filters. Okay, because that's how we add our so we can fix some of the geometric distortion that we get in camera. And we can also add some nice edge vignette ing with the lens correction filter and Futter shop. So, really, those air the filters that you need to stick with when you're submitting to stock. Now let's talk just a moment about color. We touched on it earlier today. Partial color effects are starting to go out of favor with stock image companies, so they better be an amazing partial color if it really needs toe. Enhance the message. Years ago, years ago, a few years back, it was easier to get partial color images accepted, like the warmer seen at the top right here. But these days, so many people have been doing it that stock companies are getting more and more strict, so it had better really be crucial to the message of the image to do a partial color effect. So this image of the top right, we've got all the color dropped out, and not only is a partial color effect being added, but the photographer has gone in and added additional colors to the iris of that I. But it adds to the message in that situation. Dark and vignettes are great. The top left image is an example of that, so that has a little bit of a darkening around the edges, and that is just fine. You don't want to do that to every one of your pictures, because think about it. The designer may know how to do that themselves. They may not, but you just don't want to overdo that with the dark and edgy. Been s o do that to some if it enhances the photo, but try not to do it to all of them and leave room for the designer to take your image a little bit further. If they'd like other color effects that are okay, our color tents of any kind. Those were really wonderful. The image on the bottom is a good example of that was like a duo tone or try tone to me. So black and white. It's like we said earlier. Also fine. And can you submit the full color version the black and white in a dio tone? Absolutely. ISS and that would be working smarter. So you want to try to get as much submission buck for you know, your submission Bang for your shooting buck as you can. So feel free to do that. This. Make sure that it's done well. If you're gonna drop the color in photo shop, don't do it with a de saturate command. You know, do something like a Grady it map adjustment layer. Set your your default color chips to D for black and white and make sure that black is on top and from the half black, half white circle the bottom of the layers panel. Choose Grady a map, and that makes it beautiful. Black. My image in camera, raw and light room. It's very easy to create beautiful grayscale images there as well, with a lot of contrast, so make sure it's beautiful and make sure it's well done. And when we're ready to submit these images when we've hopped through all of those hoops and we are ready, you want to save as the high highest quality J peg to submit. So if you're shooting and raw, then you're going to do all it is much of your processing as you possibly can in raw. Send the PSD over to photo shop if you can. You know, from lighter and PSD over to photo shop or just from camera raw. Open it right into the photo shop can immediately or when you're done. Finished saving that as a high quality J pick. If you're already working with the J Pig, then the minute you come into Photoshopped, you want to say that as a Photoshopped document, and that will be your master editing file. And then when you're finished editing and you'll save out a high quality JPEG from that PSD, so we'll take a look at how to do that. So there's not a stock in is currently on the planet that accepts raw images. Let me think about it. What a nightmare to upload those suckers because they're huge, so you don't want to do that. So how do you do that? In photo shop, you would choose file save theirs, and from the resulting J Peg Options Dialog box, you're going to grab the quality slider and drag it all the way to the right. You are not going to choose maximum from the quality pop up menu because if you do that gives you quality value of 10. And you can do better than that. And you need Teoh. So drag the slider all the way to the right in the light room, you're gonna choose file export and from the file settings section down there in the middle Restart Seeing my red circles, you're gonna choose J Peg as the format. This is if you don't have to go in a photo shop, you know, to remove logos and things like that. So she's format J Peg, and you're going to drag the quality slider there on the right, all the way up to and from the color Spaceman, you're gonna ratchet it down to Adobe RGB in the image sizing section that's a little bit lower in that dialog box, you're gonna turn off output sharpening if you've done input, sharpening or if you've If you've gone ahead and applied sharpening in light room, this output sharpening would be like a preset that you want to put. So you want to turn that off and turn off the resize to fit check boxes. We'll start with Photoshopped. Since We've got just a couple of extra minutes here. I'm a little bit ahead of schedule. Let me go and show you how to do that black and white technique that I love so much in photo shop. So what we're gonna do is first press D to set our color chips to the default of black and wine. And then we're gonna press eggs until black hops on top and the color chips that we're looking at are these guys down here at the bottom of your tools panel. So we want them to be black on top, white on bottom. If it's wide on top and black on bottom, you're gonna create a digital negative or just looks like an X ray Negative. Really. You can invert it, but this is a little bit more efficient. So black on top, flight on bottom. And then you're gonna trot down to the half black, half white circle, the bottom of the layers panel. That's this thing right here. This is your shortcut to all of photo shops. Get out of the way. Adjustment layers. So we're going to click that little bitten and we're gonna choose Grady int map it's the next, the last one, and fire we choosing Ingredient map will. What's ingredient It is a gradual transition from one color to another. If we map the colors in our image 22 colors in the Grady Int that we just chose. Black and White Photo shop is going to re map all the shadows to the first color in the grading, which is black, which is why we put black on top. Then it's gonna map all the highlights to the second color of our ingredient, which is white producing and oh so beautiful. Grayscale image. Black and white image. Really? It's gorgeous, and that's it. Quick, quick question. Can you also do it? Do a tone using that same? No, no, you can do great question that you can do color tents using the black and white adjustment layer that you get from the same menu so we could choose black and white. And this is an alternate way to produce a black in my image. And if you'd like to tweak your images of food a little bit of a control freak, then you might enjoy the black and white adjustment layer method better because you've got all these wonderful sliders that you can use to fine tune the contrast in your image. You don't get that with the great map adjustment layer. I just In my personal opinion, I think the Grady it map adjustment layer creates a more visually pleasing black and white just right out of the gate. But if you do like a little bit of extra control than this black and white adjustment layer, might please you. And if you turn on the tent check box, then this is where our kind of fake duo tones can can happen here. Really, you're just adding a color tint. You don't have to be stuck with this brown tint that you get automatically. If you single click the tent check box, you'll open the color picker, and you can choose any color tint you want. Begin by telling photo shop what range of colors you want to use with this rainbow bar on the right hand side. And then using this box, you're gonna tell Photoshopped how dark or how light you want that particular color to be. And I like doing this with my black and white. It's quite honestly it is I like black and whites with a little bit of blue in there. It seems to add a little bit of richness and give the image a bit more depth. It's all cancel out of that and I'll show you one more thing since we happen to mention Dio tunes here. So once I have, I'll delete my Actually, you're here. Once I have leave how beautiful that black and white is. I just love it once you've dropped the color out of the image with the method of your choice. You know you're not letting Photoshopped take control of the color here because that would be a bad thing. Then what we can do is come up here to the image menu and change the mode to gray scale. Now, at that point, you're going to get some scary, scary messages and we're going to say Don't flatten, But go ahead and discard the color information there. Actually, we should have flattened because that's how are that's how our great map adjustment layer is gonna get applied. Okay, so we're gonna back up, have another go at that image mode Gray scale. Go ahead and flattened. Go ahead and discard. And now we're going to come back up here to image mode. At this point in the gray scale mode, our image really is a tree grayscale. So if you're sending this to pre press, you would not have to pay for color plates because it really has no color in it. Before we change the mode to gray scale, it was still an RGB image. We were just hiding all the color, which is fine, fine for stock purposes. But to get at duo tones, which were really beautiful, you have to first go in a grayscale mode. Then, once you're in grayscale mode, you go back up to the image menu mode and shoes Duo term, and you wouldn't believe the presets that air in this menu system right here. So click on the preset button, grab a nice beverage and just scroll seriously that outrages. Adobe spends boo coo bucks to color scientists to figure out these amazingly beautiful combinations of color, and so a few people ever use this. But it is a lot of fun, another fabulous opportunity. Look how beautiful that is. Fabulous opportunity for Friday or Saturday night with your favorite bottle of red or your favorite frosty beverage and just go through these presets. So these air beautiful. I mean, they're just absolutely gorgeous. And while some of them may look like black and white, they're not comprised of all kinds of different colors, sometimes even different tones of grey. So this is another way that you could add a creative color effect to your images. Don't go for some of these more drastic color combinations that that when you might be able to get away with. But just remember, when you're processing for stock, you have to err on the lighter side of processing. You don't want to go too far, but there's nothing wrong with submitting the color image of this shot a black and white and maybe a duo tone and to see what happens. The worst that can happen is that the inspector says no, that's not really gonna work out for our database. Great. At least you tried. You won't know if you if you don't try. Okay, so that's a really, really neat little tip right there. So let's say we were finished processing this image. I'm gonna go back to you RGB mode and now we're ready to save it out as our high quality J pic. So file save as telephoto shot where you want to put it? That's fine. Save as example, we're gonna pick Jay Peg from the format menu. Notice that we're not using the safer Web dialog box to get R. J Peg we're using Just save as so choose J Peg click Save. And here's the options box. So, for example, if I were to merely choose maximum see how you get 10 is the quality and that slider is not all the way to the right. So you want to drag that all the way, the right to get 12 for quality. This stuff doesn't really matter down here, so don't worry about that. Then go ahead and click, OK, and Photoshopped will save out. Uh, you're J peg over in light room. Get out of our import module here in. So let's pretend that we're ready to save this so we can choose file export. And here's our big file export dialog in what you want to do is create your own presets. We've got a slew of presets in here that folks have been creating. But that's right. You can create your own. So what we really want to do is find the, uh, image format. We want to change that to J pig. Okay, As soon as you do that, then you get this quality slider, slide it all the way to the right and from color space. You want to stay in pro photo or you want to choose Adobe RGB? I think for J pegs, you'd have to go to Adobe RGB anyway. But I could be wrong and then make sure that resized to fit is turned off. Make sure output sharpening is turned off because you've done that manually for each individual image and then include the metadata if you'd like and then export. You can also save a preset with this If you'd like to you. And once you save a preset, then you can come back up here in activates several images and then you can, you know, export with preset a little bit faster that way. So now let's talk for just a second about bridge in CS six. In previous what I'm about to show you, you can't do Enbridge CC adobe Really disabled bridge in the creative cloud. And, um, I think for the first time ever a photo shop got a 3.5 mouse rating in the Macworld because I wrote the reviews. I really gave them points off for disabling bridge like they did. They took out all of the output module so you and the export panel is gone. They said that the reason is because they're optimizing all their software for the high super high resolution retina and high DP I displays in that and to keep up with modern operating systems that those two pieces of functionality output module, which is how you made Web galleries and pdf's as well as the export panel those chunks of code have to be completely be written. They're working on a solution, but Bridge CC right now, severely disabled. So I'm gonna still use bridge CIA six for quite some time. But nevertheless, if you do have an older copy of Bridge CS six or prior, then you can do a lot of sorting and rating of your photos. That part still works. You could assign star ratings for them here in bridge, just like you can in light room and but it's that export panel that's really, really handy for processing your images for stock because you can set up. And I think I've got a screenshot. Yeah, you can set up a export preset in CS six in earlier versions of bridge. That would be a real fast way to output all of these images at a level 12 of quality. Don't resize, etcetera, etcetera. So I have a stock preset Enbridge CS six. And that's why I'm gonna keep using CS six now. You can also use the image processor script in Photoshop to batch Process a large number of files, and you can access that from photo shop and the file automate menu or from Bridge in the Tools Photoshopped menu. So there are some options for that. But if you've got an older copy of Bridge, then the expert panel is really handy for saving out all of your finished processed shots. Just a little word on that. Before we go into the titling and the descriptions of your images. Let's say you go out and you do one of those five shoots guaranteed for success, right? You go on a walking safari and you've got a bunch of pictures and that you're gonna process. Do you submit all of them that one time? No. You're going to take your cream of the crops your best of the best, and you're going to submit a handful of them two or three, and you're gonna see what happens. So that that does a couple of things that doesn't set you up for failure with, let's say, similar edits. So if you've got a whole shoot of these things and you process the moment similar way so you spend a lot of time doing that and then if you submit them all than they maybe they're all rejected and that can be a tough blow to take. So what you want to do just kind of, you know, dip your toes in that water just a little bit With that particular shoot, pick your best of the best. Process those and submit them and let the others sit, depending upon what happens with those first handful, then go back and process the others. But if you encounter a problem with those 1st 2 or three, then you haven't wasted all that time processing all of those other ones, you know. But I mean, with light room in camera raw, it's really easy to go in and fine tune your edits, but still you wanna pick your best of the best, process those and submit them and then just sit on the others and see what kind of response that you get. I think that's a little bit of a softer way to approach it. Yes, ma'am, you know, if your images have been accepted or rejected once you've spent wonderful question, what's the turnaround time? I stopped? Photo will tell you it take two weeks in my. In my experience, it takes about four days, but it just depends on how overloaded the inspectors are. So they'll say it could be up to two weeks, but it will be quicker than that, most likely
Class Materials
bonus material with purchase
Ratings and Reviews
Christopher Lawrence
As much as I love CreativeLive courses - I was somewhat disappointed with this one. What caught my eye today (11/15/17) was that the class was being broadcast for free. I made the (incorrect) assumption that it was actually being "taped" today. This material is quite old. I wish CreativeLive would put the original "broadcast" date in their materials - or, if they do, make it easy and clear to find. I also found that this instructor was not as professional as others. She frequently used words like "pissed off", etc. when talking about models and companies. She also came across as being "short" with the hosts when it came to answering student questions. I'm not a prude by any means, but when I am paying for a class, I always hope for, and expect professionalism. I am still giving this course a "thumbs up" because most of the information that I received was good, but I just wish it was a little more current. Chris
Nawalescape
For a starter, it is a good course, I am not sure if it's up to date, like what Cynthia said below, but it sure gave me a push to consider this project seriously, those saved images lying there in my hard desk should get out there with benefit.
user-038780
I really enjoyed Lesa's webinar. It gave me the encouragement and information I needed to apply to iStock. My photos were accepted on my first try, and I owe a lot of that to this class. Thanks Lesa!