Lesson Info
1. How to Paint with Light
Lessons
How to Paint with Light
1:24:55Lesson Info
How to Paint with Light
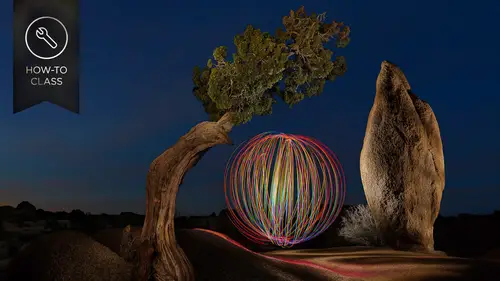
So like painting if you haven't done like painting before it's quite a different process because we're gonna start off with a completely dark room with dark room we're going to use a portable light source in fact, I went tio walgreens last night and I bought a five dollars flashlight I'm gonna like the scene using that flashlight just to show you don't need fancy gear instead you can start with whatever it is you have and then on lee, if you start getting serious about it and you really get into it and really want to do it a lot, then you could start investing in more interesting gear that might let you do more, but I'll just when you know that you can start with something as simple as a five dollar light source s so we're gonna start with a completely black or dark room it doesn't have to be absolutely black, it just needs to be dark enough that you might not need to let your eyes adjust before you feel comfortable in the room, you might feel the need to knock things over otherwise an...
d so it's dark enough that if I take a twenty or thirty second exposure that not much would show up at all that's the main thing if you're shooting outdoors, that means that the first time it's dark enough to do light painting is thirty minutes after the sun sets thirty minutes after sunset. Because when the sun goes down it's pretty darn bright, you can walk around without bumping into things for about a half hour. Then if you happen to be doing like painting outside there's a special thirty minute block of time that starts thirty minutes after sunset and what's special about that time is the sky's blue, but it's dark enoughto like pain. So if you ever wanna get a light painted seen nice blue sky in it, you got a thirty minute window starts thirty minutes after sunset that's kind of a special time when I'm out. So when you see examples that I'll show you here in a moment, if you ever see an outdoor scene skies black, you know, it was at least an hour after sunset. If this guy's blue, you know, it was in that magic window. Ok, starts thirty minutes after sunset, last half hour now, like painting, we start off with a black scene, and then we're going to use a small light source. In fact, let me grab my little here's one got this one last night. It says right here, five, ninety nine each two for ten bucks. We'll start with that, you can find this at the checkout register, just about any course restore anything else? Not my favorite flashlight but it's good enough for what we're going to start with uh and this is gonna be our light source, so we start off with a completely black room and this is our light source the on ly thing you're going to see in our images is what I point this at whatever I don't point this out is never going to get any light at all and it's just gonna disappear it's going to be black and so therefore weaken selectively light the scene and I'll be painting the light end by moving a light source around and one thing about that is the longer I leave it in one spot, the brighter that area will be and if I go over an area really quickly barely ever let lightheaded it'll remain relatively dark. I think of this a lot like using a can of spray paint if you think about spray painted you hold down the button constantly if you go over an area really fast, you get the lightest dusting of paint, but if you sit there and hold it, it builds up his arm or paint comes out of the can and you saturate whatever's there and so it's going to the same kind of thing when I'm painting so sometimes if you want to control how bright various areas are, you might count in your head and just remember that the last time you painted the scene he used about five seconds worth of light on this object and only about two seconds somewhere else and therefore in your head you might go one two three for five one two you know? So you try to maintain consistency in areas but you don't always have to think that way it's just if you find you have trouble keeping the amount of light at all consistent then you might want teo consider that so what I'd like to do is show you some examples I'll show you a little bit of progression of how my like painting has gone over the years and also show you my very first like painting ever, which I did back in high school and you'll see all sorts of different styles of like painting because with white paying you could make it look like a normal photograph if you wanted to and you could make it look like something completely different where people might even ask is it a photograph so I'll show you a wide range of the type of styles that I do so let's take a look here so here is one that I was at a desert party and I figured it would be interesting to create some interesting photographs but not all that interesting to just click and get a photo so in this case I gave a dancer a flashlight oh I gave you a very quick demo of how delight himself, which pretty much was point the flashlight at whatever part you want to show up and don't block the cameras view with another part of your body, and then I had him dance while he lived himself, and I thought it was an interesting photograph because not something that you would usually see captured that something like that, but this is my very first light painting ever he was in high school, it was back when I had shooting a film camera that's my brother on our living room sofa and I put my camera on a tripod, open the shutter and walked up to him with a flashlight and just kind of traced around the edge of his body in one thing I noticed on that shot was that behind his head there is a brighter area where I can see very distinct lines and that's where the flash light reflected off the window that was right behind him. You said not a sofa in the window behind the sofa, and that gave me an idea, and that is if the light goes directly into the cameras lens instead of being pointed at the subject, it's like kind of drawing with light is like like graffiti, so I'll show you a few examples where I took those ideas so here's an earlier like painting and if you look at it how selectively lit it isthe how it's not just overly even that because I decided exactly where the light should go and I pretty much painted in on the edges of the person's body I didn't want you to be able to completely identify them so I just painted one line down the middle of the face and that's have a thing the chair that she's sitting on those I spent more time and more evenly lit to make it look a little different in this case the colored that's in there was added later I was just using a white flash light but I added the greenish color and I shifted the color of her skin a little bit towards the oranges yellow range and photo shopped to make them separate well after lighting like people like this kind of selectively doing it I decided to experiment with other things and in this case what I'm doing is instead of pointing light source at the subject I decided why not not like the subject at all instead I did two things here I just took it white sheet and I threw it over a sofa had somebody sit down and I lit around them like the edge of where they are I lit the sheep they were sitting on just to kind of define their outer shape and then I turned the flashlight towards the camera if you point the flashlight right at the camera and you move it around, you're making white streaks of light just like you could use a marker and draw. And if you notice that the white streaks of light very and how thick they are, some are really thick. Some get really thin that's because if I point the flashlight directly at the camera, you see a huge part of the light, but if I angle it, then you could only see a little sliver, so if I'd simply vary it with my wrist like this as I'm moving then it's sometimes catching the full front and sometimes only a little and that's what caused the size to change like that? So in general, I was again somewhat tracing her body, moving around it and pointing the flashlight at the camera. Then here I found a little flashlight. Most of the flashlights I find I just randomly run into and in this case of front of mine had won that when you pinched it it's a little kind you might put on your key ring ah, you pinched in the light would turn on, but it would vary in color it would just slowly cycle, and if you push it again it would stay, and so in this case, I have these two people on a sofa and I pointed the little light towards the camera anytime I do that it looks like graffiti, it's, solid lines, and I traced the sofa that they were on that's the green line, I hit the button again, so it starts making weird colors and I just went down to the floor and I walked towards the camera, moving the flash, the light back and forth. And then I came and let the people that are there you notice on some of these earlier ones, the lighting of the people is not all that refined. Usually what happens when I first started out lighting with people as you'll learn, when I show you some things here? Oftentimes I was lighting from too close or the light source I was using was not defused, it wasn't soft and therefore you see this really lines on their face, but that progressed here if you noticed their faces thea there a little bit weren't evenly lit, not completely even yet, but if you compare their faces to their bodies, you'll find that their faces a bit more normal ish. So what I started do in this case was I started moving my life source further away from the people as I move the light source further away, it has more of a chance to to widen its beam and it also has a softer edges as you get away and so I started lighting people's faces from further away say looked a little bit more normal and then I felt wanted more of a special effect for their body then I moved in closer and so that's what we have here when I was on their body you can see a more distinct lines on there that's because the flashlights close doesn't have a chance to fall off just like if you guys could see me but five point the flashlight at me when it's really close and move it around it's very defined where it is but if I lighted from up here it's not very defined so if I like somebody's face from a foot and a half two feet away it's going to look rather diffused rather evenly lit if I like them from three or four inches away then it's going to be where very obvious where it is the light was moving then with light panting as with a lot of things it's a novelty when you first get started it's kind of like hdr when hdr first came out you saw these now look like ridiculous images coming out like wow, look what I can do with this and you kind of go nuts with it and then once the novelty wears off then usually you mellow out on it a little bit and you use that interesting look when you need to. But it's not like necessary all the time. This was before the novelty wore off. So if you look at the trailer that's there I did all sorts of weird stuff in any of the lines. You can see their army pointing the light source towards the camera and just using a bunch of different lights, then a centered refining things. Here you notice some light into space from further away because you don't see the lines on his face and same with his hand. And then this is a recording studio. Those with gold albums on the wall behind him, and I let them after he walked away, I looked on the shots here. He was in the room for a minute and a half s o I live him minute half and said, ok, you can leave and then I got a ladder and other things and I went up and lit what was on the wall. Then I started varying atmore. You noticed this skin on this one? You don't see the paint strokes of the light instead it's much more even, which is why flashlights further away. But then there's these wings that are sitting on top of her body, the red parts and there you can see it looks more painterly. Mohr modeled in that because I got the light source close and so we can see that. So they notice on my first ones in there there are people once you get used to that when you start using it for other things. So I started doing the landscape. So this one I can tell you was between thirty minutes after sunset in one hour. Why it's got a blue sky right then I started putting colored jealous in the front of the flashlight by put a red joe on it. I just hold over it when I'm lighting one area and then take that often put a blue gel on when I'm lighting something else and started to introduce more color. And so these are just some other examples. You can see me doing things in the landscape, but any time you see the blue sky, he had no, it was within a half hour little period. So just a bunch of different examples of a bunch of different styles. In one thing, when it comes to an image like this one is you notice how the front of the car the grill is half green and half red. Well, where if you're standing, where the light sources, which usually will be exits in your hand, the light will only be able to fall on what you can see with your eyes because it can't bend around corners where anything else, and so if you're standing right where the lord light sources and I want only half of the grill to appear a certain color, what I do is I walk around the car until I can't see half the grill, so if I walked to the right side of this car and start walking around to the side of the car at some point the other side of the grill, the other half will go out of my vision. It just I can't see it. I only can see half the grill if I liked from right there. I'm only lighting half the grill, then when I'm done, I walked to the opposite side of the car until I can't see the opposite side of the grill, and I like it with a different color, so here and you can tell this one. This was after I went to dinner, which means that came back and was at least an hour after sunset because the sky is gone so that special time really adds a lot more life to outdoor shots, so it's something to consider here, you also notice that you can't really see little streaks of where I painted, which means my life source was further away. Closer you get, the more you can see the streaks further way, the softer. And unless you can tell. Then I started experimenting with pointing the flashlight at the camera, knowing that it makes solid colored lines when I do that. And so, in this case at the barber's chair and I just kind of drove drew a figure in it. Well, I point the flashlight at the light source. This is one of those small l e d flashlights you might have on your key chain that you pinch see if the tiny little balls on the front. Then I started varying light sources. In this case, I used sparklers I noticed on the fifth of july. For some reason, these sparklers are extremely cheap, and you can find them at a grocery store, parking lots in certain states around the country. And I stock up and that's the first time, the shot that I found out that sparklers come in different colors. So the front car you see the yellowish, the other ones are more of a pinkish reddish that's just the sparklers came in different colors. All I'm doing is I'm walking around the car moving my hand back and forth that's why they look like squiggly lines and I'm tracing the outline I'm not tall enough to reach to the top of the trunk here so I just leaped I don't show up though because how far away was a sparkler from me well if you're holding a sparkler do you hold it within three inches a year face you know what the sparkles going there think hold an arm's length away and so on lee what's really really close to with it end of that sparkler is where the light goes and as long as you're not near that you don't show up so but I didn't just do one I had a lot of time here case you don't know I live in a motor home so I can park my house there take a nap come back whatever I want and so I did multiple versions and there's even me you can see a hint of me in there so you can see even if I get the sparkler really close it's not like I blatantly show up so then I started using that idea sparklers it's a new light source it's a new novelty and so you overuse it for a while intelligent longer novelty and then it becomes just a tool that you can use in a more subtle way this isn't subtle yet this is still novelty so here's, a friend of mine she's got a drum set in her bedroom and I want to take a picture over her and I just hold her had her hold still she's holding completely still unless she's a little bit blurry. That means she moved by accident and I walked around over the sparkler. And then I let her with flashlight another buddy of mine in a golf cart lit with a sparkler and then some flashlight on the little windshield that's there on the ground and on his face. But the reddish areas are sparkler, so then you start doing other things with it. This is a sparkler taped to a string and I'm spinning the string and then if you spin the string if you walk in a circle you make a big ball because the strings going around like this you walk in a circle and it goes around like a globe. So here I am in a winery I'm actually teaching like painting and I said, well, here let's, just do a a sparkler then that was the wait a minute sparklers like little fire like things going off. So what else could we do? And I found out that you can actually light steel wool if you light still want with lighter, it started dripping metal and if you put that in some sort of container, I put it in a whisk like you'd whisk in your kitchen and put it on the end of the string, you can spend that, and so this is still well in a whisk on the end of a strength don't try that unless you're not like I was here around concrete in water you don't want would grass especially dry grass and all that also be careful with your eyes and think because one little piece of that metal molten metal if it hits you could be bad if it hits your camera lens, it could be bad, so I wouldn't suggest that casually. Yeah, sure, ben, do you wear dark clothing when you paint with light? I wear whatever I'm wearing, but I only would say is they probably wouldn't be wearing white clothing or or bright yellow or something like that is just my wardrobe happens to have a lot of black in it, but it's not critical, I would just say medium to dark colored clothing cool and approximately how long were these these exposure? They've very dramatically ok where the ones with the cars that last car is pretty far away might have taken me two minutes to walk back there, whereas other objects the exposure might be thirty seconds it's however long it takes to finish lighting it and you just like the steel wool on fire you just take a lighter you go put it to the steel wall and it started dripping little molten metal it only drips a tiny amount but then if you start spinning it where it gets a lot of air hitting it the air kind of feeds the fire it and it goes but don't casually try that doing try this safety measures that way we're not going to this is also steel wall the same kind of idea here you notice a reflection on the bottom I mean the big time on the beach and I'm right outside of the surf where the surf might come up there on occasion so it's it's wet but there's nothing combustible around me that type of thing I'm inside the ball that's there because I'm spinning uh this thing on the end of a string going around me like this and then I'm walking in a circle um so then you start creating these orb like things which is just a light on a string and other environments so this is just a normal little blue led and then when I was done I turn that off and I live what was outside with a normal flashlight and so here is just more progression now it's less of a novelty do you notice how when you look at this image you're not saying necessarily like painting with this technique with whatever where it's it's blatant, you get more refined with it, but if I didn't like paint this, this car in this trailer would look just as dark as the trees that were there in the sky. That's the full moon, a lot of people will look for a full moon to shoot under, because if you do about it to two and a half minute exposure under full moon, the surroundings even really far away concert showing up in your scene so it looks more like daylight, but anything that's in the shade, anything the moonlight cannot reach because just not, you know, it's being blocked by some object is where it would be black and you have a chance to light things, and so here are serious and then finally more refined ones where if I use multiple exposures and I like each individual element within the scene one of the time, and then combine them, I can create some really refined images. But what I love is whatever I don't like doesn't show up. So in this case, that's in a museum clutter are all over this thing in that vehicle, you can't start it, remove it so that's what this is just on the street, so that gives you a sense for the variety you can do with, like painting. So what I want to do is show you how to get started with light penny and so let's, take a look at what we can do with this and some of the essential concepts I have a set up here and what this setup is is I just have some wine, cheese and grapes on the table. I just wanted to create something we could easily fit in the studio. This isn't my normal size stuff. If he noticed in all the examples you saw, did you see anything this small? So this is not my normal think of doing, but it's easy to do here, um, that's what we're going to use, I have my camera on a tripod and I'm going to use a wireless trigger. This is a little radio one where it's like a cable released without the cable, you don't have to have this. This is one of those things where once you get serious about like painting, then you end up using that so let's, come in here and I'm going to make sure this is on and I'm gonna put my camera in a mode called bulb mowed. Some cameras will have bald motor out on the camera, where you switch between aperture, priority shutter priority and that type of thing other cameras instead, you'll have to set it to manual mode. And in manual mode, if you just change the shutter speed and you get to the highest iq and go as far as length usually that's thirty seconds go one click beyond that and it will change the letter b for bulb and that means it'll stay open for however long you hold the button down so you could use a normal cable release here as long as it's the kind where you can press the button and then slide it for the locket in most cable releases have that or you slide it forward to lock and so therefore, whenever I open the shutter, I would just press a button, slide it forward and then just let it hang here I'd go do my light painting when I'm done, I would return and I would release it and I could look at the end result for me since I have this in my hand, it's just more convenient I could walk around and do it this particular one happens to be a brand called photo six p h o t t I x I'm not saying this is the best brand it's just the one I've got make sure just it can support bulb mode I've done one of the things have taken a little bitty flashlight this one happens to put out red light and I'm putting it by the base of my tripod in the hopes that I won't knock into by tripod iq and see where it is does that make sense? So what I'm going to do here is I'm going to focus and usually a manually focus because oftentimes it will be at night and if it's at night time and I can't see my scene I'll just take a flashlight you know pointed at the scene well I'm focusing but make sure it's clicked over to manual focus otherwise when you try to take a shot and it's dark in the room it won't take one it'll be searching for focus and when it does it'll probably blurry because it randomly focused so I haven't focused I need to start somewhere I mean I started I also one hundred just to start starting point that's usually on a cannon at least we got the lowest noise and I would usually choose my aperture setting the same way you choose it for any photo you've ever taken in your lifetime meaning if you need deep depth of field and all they need to be a highlight number if you need shalit up fear field in order one and I would often test it in this case I'm not going to test it simply because we only have a limited my time I'm starting with have sixteen this case on and I just need to start somewhere now I'm just going to test it to make sure this is working and make sure over here I get light room going so we can tether sure it's plugged in to take me a moment you don't have to shoot tethered undoing this so you can see it most of the time in the field I don't have space for a laptop and so I'm not necessarily shooting tethered because I don't have a table in the cord that was just more stuff to trip on in the dark but for you guys to be able to see it we need to be hooked up so let's just see if it's working and chemo should come up here in just a second then I'm going to come in here and just hit the space bar to zoom up on it and you can kind of see our composition that's here that's what we're going to be shooting I'm going to start off with just that simple five dollars light and it's got a little button on the back which is real nice for this so what do we got here? Camera on a tripod cable release starting with I also one hundred in my case f sixteen but if you need a different setting for different depth of field feel free to change it I tested it just make sure works then if you focused get some tape and tape down your zoom and your focus because I think it's bumped then you might not realize it and you're gonna have out of focus shots or your zooms gonna be wandering or something. If you tape it, you know, it's not going to be changing on you, that makes sense. All right, we're going to try thinks all right? So here I have my set up, and I'm just going to be like this when I light it that I want to show you a few concepts first before we darken it. If you like this from the angle of the camera over here, you're going to get the most boring life you've ever seen, because what happens is there's, no shadows facing the camera, it's all bright from this direction, and you're not going to see any texture in whatever it is you have. If, on the other hand you light and an angle coming off the side, the light can strike across the surface of something and let's, say it's this wooden table. If I like the wooden table from directly above, it'll be evenly lit and it will look usually relatively boring, but if I move it down at an angle, the lights going only strike the edges of whatever is here and that's going to be lift the opposite side of the ridges that are on here gonna have shadows is going to really make the texture come out. So I try not to light things straight on I try to rake the light across them because it brings out all the texture, all right, thank you. All right, so let's, just try this out. We're gonna get the lights dimmed down, and then I'm just going to do some test exposures to see how bright it's looking with this particular flashlight I've never liked painted of this flashlight before so it's hard to say exactly how bright is going to be? You won't know until you test it. So I'm gonna first glance down here and double check my tripod so I know where my tripod legs are, so I know not to trip into them. If you have any little bitty lights like the kind you put on your key chain and you can put them right by the base of your camera legs or in this case I made put mine in the middle was pointing at the one camera leggett might bump into then at least I can see it down there and I'm not going to hit it. So now what I'll do is I'm just going to turn on or open the shutter and I'm going to turn on my flashlight and just come in here in light just a little bit like that and then close it and we should see her and result in just a moment and all I'm looking for is I'm not trying to make a good looking image I'm trying to see how bright it is and to see I'm going way too bright or is it not bright enough if anything I'd love it to be not bright enough and the reason for that is that I was painting really fast I barely spent any time putting the light in there and it made it so that if it's bright enough to begin with I'm going to have to paint really really fast for now I'm just going to glance back here in the back of my camera because you guys can't see it there and uh ok actually don't look too bad but it looks pretty bright so let's try it again I'm in eternal lights down magically and this time hopefully you'll be able to see our test I'm just going to open the shutter turned on my flashlight and paint some white in to various elements not trying to be overly good with it and then close the shutter you know take a moment but hopefully we'll be able to see the result here in a second but what happens is if this is going to look ok on the first shot then the problem is the amount of time I was able to a paint was probably what only ten seconds or less and that's not going to give me very much time when I'm in there, I'll be just kind of how would I say just nervous about like, oh, I better not go to slow what you want to do is get it so it takes some time for it to build up so that we can go in there and spend as much time as we need, really painting it in, right? Hey, are you ah, using long exposure noise reduction, I usually am I can inhabit said toe auto and I find it those fine on a nikon I turn it off. The reason I turned off is on a nine kind it forces you to wait in equal length of time as the exposure use it just took. So if you happen to take a three minute exposure, you can't take another picture for three minutes afterwards, if night constant with sony, as far as I know they're noise reduction with cannon, you can take another picture right away. I don't know if it cancels the noise reduction or if it doesn't need it or whatever it is, but the auto setting on the cannon seems to be fine on night common soniya turned off so I don't have to wait so I can take another picture so now with this. Well, we're trying to get this going I'll just describe a few other things and if you have questions at the same time but one of the problems with most light sources is with flashlights, the trend is to make the flashlights brighter and brighter every year and they get to become ridiculously bright and that's not a good thing for what we're doing on a tabletop. If this is too bright, then we have to go so fast through here to not make it too bright because with my camera I only can set it to f twenty two is the more most aiken close down my aperture to cut light I also fifty is the lowest my camera will go to once I get to both of those the only other way I can vary how much light is getting in there is to use paint faster. I want to able to paint slow so I can think about it and control it and so look for flashlights that air low power they're hard to find these days ten loomans great flashlight for tabletop use but you're going to find three hundred lumens than a little bitty one like this look for very low power so mike, we think we got it good here we actually can see one of my results and if you look at it it's not that bad ah couple things about it is I can see the reflection on the glass that's my light source you can see the reflection self to be careful with that and bottle doesn't look very good it looks kind of dead kind of black knife looks really interesting handles a little dark all that cheese is really sticking out but you notice how most of the things that I did get light on or pretty bright I wanted him that down further because I want to be able to spend more time so what I'm going to do is I'm going to take this right now were it f sixteen and I'm going to change it I'm actually going to have twenty two that's going to close down the apertura my cameron let less light in and that's going to allow me to paint for a longer period of time because less light is making it through the lens that makes sense the other thing I could do if I want to be able to really paint for a long time is I could also bring my eyes so setting down mind the lowest I can get it is a setting called el for low which means fifty now by doing that when I paint over here I should have a lot more time that I can use but here's something else you could do instead if I simply interrupt the light source that I have with diffusion material there's some really expensive diffusion material. You can use toilet paper or this is a kleenex or of I'm sorry facial tissue to be brand agnostic there. The only problem is if I put this in front of the flashlight, this is going to show up pretty easily, like it's going to pick it up on the edge. So what I end up doing is I modify here I have what are known, I think, blowing cards for magazines. You know, when you flip through your magazines, these things fall out all the time trying to get you to subscribe to the magazine. Well, if I get one of these and just wrap it around the flashlight, figure out however much of it, I need to make it around that flashlight and then just tear it like that. And then I'm going to make it so it's just long enough so that it sticks out, maybe about a half to three quarters of an inch. So I'm trying to recess the front of the flashlight and then comes down onto the barrel enough where if I taped it there, it would stick, okay? And I'll tear it the other way, I'm going to end up wrapping this around the flashlight and taping it on. It's what you might call a smidt and it's something where you're trying to recess the light and the reason for it is so that it's difficult for the camera to see that front of the light source, because otherwise, if you saw the little list edge of this, you'd see a white streak on camera. If we recess it, you're going to see less so I would get some black tape next, because if the light hits this white sheet of paper it's going to show up in a light, the white sheet of paper and what I'll do is just put this across, you know, bended over, so that edge is not there. I'm going to the same thing on the other side, it's high tech, I tell you, so now we just have a black thing, I'll take my flashlight, and I'm simply going to wrap that around with a flashlight might be about three quarters of an inch or so recessed into this, and you can use higher quality materials, and then this will stay a nice circle, whereas a really cheap material is going to become a dis formed shape, one last piece of tape to sure that sounded great in audio there to stick it to it, so now we have a recess, and then I can take this hi tech material and if I actually turned on my flashlight and pointed at something, you probably won't be able to see this from where you guys are but would be a relatively well defined shape and a good amount of light if I just take a kleenex more toilet paper and cut it so it's the same size as the opening. All I'm doing is ripping it, but you can use a pair of scissors if you wanted to be more precise and they just take your finger and shove it in there so it covers up the front of the light source. What that's going to I'll show you higher tech methods later, but what that's going to dio is it's going to defuse the light so it's softer when it comes out and it's also going to absorb some of the light cutting down the amount of light we're getting out of it. So now let's do some tests here let's, figure out how long's it take me a light, various areas? How much time do I have now that we've changed those camera settings? S o I'm going to magically turn the lights down and then I'm going to come in here if you want to be able to see it. If we can look at the table it's over here if I pull out the little kleenex and you look at how bright it is hitting this area and then I'm just going to take the kleenex and shove it in there make sure it's covering it but it's going to cut it down a little bit and it's also going to soften it so let's do a test open my shutter come in here and now I'm going to see if I'm going to spend some time getting the light in here breaking it cross surfaces instead of going straight on and I can block I mean my arm could be directly in the scene as long as I'm not blocking the camera's view of whatever it is I'm lighting so I just need to hold my arm after the side for the wine is gonna be a challenge trying to see if I can backlight it but I think I'm going to get the edge of the flashlight in there let's just see what it looks like and what I'll do is after we're done doing this I'll end up showing you how I'd refine this well we'll process some of these images were find it so in here you notice that it's not all that bright which means we've accomplished what we wanted which is I can spend time now thinking about what angle light everything with without getting this thing to be overly bright you can see my flashlight over on the side that's when I attempted to light the glass I just should skip lighting the glass for now because I'll show you how to solve that and also show you how to get this bottled show up much better later on once we get the general idea for what to do with somebody's bottom elements so let's look at a few ideas because here if you look at how dark it is compared to the last one I could probably spend darn near twice as much time as I just did uh in order to get this nice and bright and that means I can just think about it and really control what I'm doing instead of being in a hurry so let's look at a couple of concepts quick first one is okay the first concept has to do with thinking about something completely different than like painting let's think about pool if you have ever played pooler seen pool being played here we have to pool balls this will end up helping us know howto light a knife in a second so here we have to pool balls if I want to get the white ball to hit the other ball I have two options and how to do it I could hit it and go straight across and hit the light that's there or I could bank it off the side here thank the ball off the side if you were going to bank it off the side here come down and hit the ball then you have to aim and if you did there's a concept that this angle right here is always the same is this angle it's known as the angle of incidents I believe is equal to the angle of reflection but I could be wrong with terms because I'm not a terming guy so those little angles will be the same well, you can also equate the same concept to having the camera sitting there in a knife if I have a camera sitting there and it's pointing a knife that's sitting on the table what you'll find is often times when you end up trying toe light this is the knife anything it's reflective it looks like a mirror will look like a black hole it will just be nothing there and the reason for it is you have a light source that you're pointing at it and in order to get that light to hit the light and make it into the camera lens we need to get the angle right so that you can bounce off of this and make it right into the lens if we get the angle wrong then instead you'll be lightened all you want but your lights bouncing off and it's missing the camera lens and it ends up being a dark blade even though it feels like your lighting it does that make any sense is for us thinking about the angle this angle that it comes in at his equal to the angle it leaves that on the other side so that might help us a little bit when it comes to lighting that knife is I need to think about what angle on lighting it at think about it is if I'm sitting here with life source and if this was like a pool ball and I had it come out here and hit the knife what direction wouldn't reflect off on that's where I need my light source to be but instead of being ableto calculating that in your head what's nice is you can just stick your head in front of the camera lens ifit's tabletop you stick your head in front of the camera then you can come in here and I'll do it without the clean accident so I see it and I can light it and that some angles I'm going to find it's really dark like right here I can't see anything and that other angles like right about there I can see a good amount or wants to get up here now I'm starting to see it and it can kind of figure out what angle like shiny things from mainly mirrored things if you wanted to light up either stick your head where it is or sometimes I'll have a friend standing here on what usually my wife karen and like, if it's a car bumper on an old classic car, we'll have her stand there, and I'll say, let me know when the bumper lights up and I'll be moving around to figure out what angle do I need to be at to get the light to reflect directly off of it into the length? Does that make sense? The other thing is, when it comes to lighting shiny things like a glass or a bottle, usually what makes these shiny things really be defined is how large the light sources relative to the subject, so imagine you're standing where this subject is that's your head and you're experiencing this light source if I'm lighting you from right here, think about how small that light sources that the little part inside here time not going to look necessarily all that good it's going to be a tiny little highlight because I'm just going to see a reflection of this on the glass if I really wanted to show up what I want is a big light source. I stole this from my wife, she does hand lettering when she does hand lettering, she'll drop in pencil first, and then she needs to trace that with penn on another sheet of paper, and she uses this to back line, but if you have an ipad, looks just like this, isn't it? And so with this I have hit run tough usb so I have a battery that used to charge your iphone with that is literally why have it? And it could just power you any usb device and I can come in here and have a really big light source this is going to produce a really big highlight on things like the glass it's in the bottle and so if you compare how big this would be where I set the flashlight imagine your head is sitting right where that glass is comparing this light source which is going to feel tiny compared to you from that perspective to this life source which is going to feel like it's larger than your head if you're sitting right there, the bigger the light source is the bigger a big reflection is going to be in here and the more defined these two objects will be so something like this could be useful any time you have overly shiny objects especially anything that it's black and shiny. If you have a black car, this is going to produce tiny, tiny little highlights on it that are look bad. This will produce the really nice big white ones that usually see on cars that make the fenders and things look great, so we'll use that in just a moment if you want to see an example of what I'm talking about in my example images before I learned this concept, if you take a look at this particular image and you look at the front fender, the fender is black and there's a little line on it right here. Or if I walk over to where the tv is, right, they're tiny tiny line that's tiny tiny flashlight that's a normal flashlight trying to light defender and you see that you get just the tiniest of a highlight doesn't look very good here. I got a bigger one. That's just happens to be with an angle in other things. But I'll show you a different image where I used had a similar problem here. If you look at the front fender on this side it's almost non existent because there's no big highlight in it. But if you look at the opposite fender, can you see a nice white highlight? Emmett that's? Because there was a white wall right here. And in a separate exposure I let the wall in the wall became a big light source just that lit that up. And once I took this picture and I saw what happened there, I masked it out so you don't see it in the end picture, but I was like big light sources give you nice highlights, so then I started using larger light sources do you see this highlight? Isn't that one much better than the one you saw in the first the red bus that you saw what that one there was? Is a light about this big? It was a video light, the kind you might put on the top your camera and that could be not a bad highlight, but this is even bigger. My ipad is even bigger just get a nap on your ipad that can fill it with white you can use that as a light source, then another concept is we have the advantage of time on our hands, so if you don't have something like this, I don't want you going by this I just stole it for my wife for a day uh and you might have an ipad or something else don't get into too much bending here until you get serious about this is imagine this is a soft box or something like this since we're not taking a picture that's one, two hundred fiftieth of a second like most people are instead we might be using thirty seconds or even mohr. What we can do is move a light source and by moving the light source it's going to make it feel as if it's bigger so this which would indicate something like this could be done this is easily using a stick of light that you move across the same area he would fill the same amount of space and it could produce that large highlight. The only problem with that is if you don't move it smoothly, you're going to get a little edge on it. So let's, dim the lights up let's, see what this could do, but now I'll put this in, and I'm not sure the exact like the time I've been tested anything, but we'll find out pretty quickly and we do look at the nice highlight on you guys can't see them monitor yet, but what I look here, I can see a nice highlight on a wine glass and also on the wine model you can start seeing the shape being defined and is defined by this huge highlight that's in there compared to earlier, when I attempted to light it. Do you see how tiny those highlights are? That's a tiny, tiny light source like a flashlight? And this is a big light source. You don't need something like this, though it happened to be it was convenient for me to grab you could just as easily get, you know, one of those reflector and diffusion kits, you can get around that coming a little zippered bag when you pull out the diffusion thing, it kind of opens itself up funk you see photographers holding it all the time to reflect light and the things well if you get one of those that's white just a white fusion panel hold your flashlight a few feet behind it so your flashlight is lighting that panel then it becomes your big light source or you can grab anything else but just like I could grab a sheet of paper here and just light it from behind like this if this is white on the opposite side then this becomes the light source and you vary the distance here until this is all the way lit up now let's do another thing when it comes to that highlight if you look at the highlight notice it's got a crisp edge on it it's a really sharp edged down there this down the side in this time when I'm going to do is try to get that edge to become soft and I might also put a highlight on the opposite side of the bottle so let's get the lights dimmed down got to be careful of your fingers if you get your fingers covering this up you'll see it in the reflection in that it won't be a nice rectangle so I need to hold it out here on the edges um with that and I'm just going to get it in here this one will first do about six seconds were held it still now, the second time I'm going to take another shot, I'll do the same like the time, about six seconds, and I'm going when I open the shutter just moving and I'll be one other one where I just walk to the other side and see about lighting the other side and I'll move it there and let's, see what we get go back one if we zoom up, look at this edge that's there the transition from the bright white highlight to the dark part of the glass compared to here, so this is not moving. The light source at all you see are very well defined edge some people like that looked like that, a really nice chris part, then there's moving the light source a little bit. It is just going to feather that it get it to be softer if that's, what you think looks better depends on the object you're shooting, but that's the difference, and the more you're using something like one of those reflectors that folds up, the more you'll probably want to move it because they tend to have wrinkles in them. From being folded up in a tiny little bank and if you just hold it up there you're going to see a reflection of the wrinkles in the subject matter but if you're moving it around it gets softens out all those wrinkles and it becomes much harder to see so if you're using something that folds up like that you might want to consider ah that then let's see what happened when I like the opposite side so there's just lighting the other side and they were able to get the other edge of the bottle a little bit there as well so you can try to put together this whole scene in a single shot but if you do you're going to spend a lot of time experimenting with every little part in the problem becomes that you need to get every single area within the scene toe look good in one shot if you bump something if you do something by accident you got to start the whole process over again but if on the other hand you want a lot more control the way I do it is I take separate shots and I combine them together and photoshopped invite doing so when I'm lighting with this light source I'm thinking on lee about the edge of that bottle and I'm not caring what's happening to all the other things in the scene because I'm no I'm going to capture him in a different shot and therefore I can concentrate on each area of the picture separately and I can figure out the best angle to light each area from so that's what I'd like to try it's just light each area in here and give you some tips about doing it and then when we're done we can combine together some of these exposures. The only thing is we got to make sure this tripod doesn't get bumped to for doing multiple exposures because they need to line up. But before we do that we have some general questions yeah, when we do and if anybody in here does but folks are one of those asking about your white balance that's another thing I'm going to talk about the each one of the light sources that I use puts out a different color of light and because of that right now my camera is set to auto white pounce when I open the shutter often times there's no light even turned on, so what happens is when you take a picture, your camera looks at the scene and tries to gas it what color of light is falling on the scene and corrects for it so it's reddish light it makes the image look less red so it looks like white light was lighting the scene with light painting if you're doing this, what you really want to do is get a little great card this card is called a y bell card that's w h I b a l but there are many different colors that makes of companies that make similar carbs. This is the one I like because this is the exact same size as those little things you already have in your key chain for grocery store and you're jim and everything else, they have to have it the little bar codes on him, and so you just leave this on your key chain, you could get one the exact size of a business card that you can leave in your wallet and so on it just find him to be convenient and also this is durable it's plastic instead of paper, some of them are fragile of other companies, so this is just what I happen to like, but by pointing the light source of this, we can measure what colors coming out of the flashlight and compensate for it specifically to get the color to look its best. So what we're going to do is I'm gonna end up putting this in the scene, and I'm going to end up lighting it with each light source that I'm going to end up using here, and we'll come up with a different white balance setting for each, which means well, compensate for the difference in color that each one produces by using something like this you want to just make sure that whatever you use is truly neutral gray it's not bluish your yellowish or anything else and that's why it's best to buy something that's designed for it? I just happen to like the one called y bell w h I v a l but there are many different brands to do the same kind of thing so anyway let's do some white balance will show you what I do when you're shooting tethered and we'll see if our tethering do you think needs to be restarted mike's have been talking for a while this quickly ok? S so what I'm going to do then is get the two light sources we've been using my big one here and my little guy we're going to end up getting different white balance settings for them so we can either easily compensate for it later and I'll show you how to get it so looks right on screen at the same time so let's get the lights dimmed down I'm getting this little great card and I'm just going to set it down in the scene somewhere where I could easily see it, I'll prop it up against the knife if I can and I'm going to light it with the light source, then I'm going to take a picture and I'm just gonna make sure that the end result is not blown out to solid white just that whatever it is is rendered okay in there and that looks a little bit right it's hard to know it's probably dark enough going to one more it might be just a little bit darker just need to make sure it's not close to being blown out toe white and all we're doing is capturing the color of this light source and since I'm going to be using this light source for most of my life painting what I'll end up doing is right here in light room I'll go to the develop module by clicking here the upper right where says develop and I will grab this little uh eyedropper that's here if you look right up there with an eyedropper and all come down here just click on that card and what I want to do is it will measure to see what color it wass so if this was making the card look blew it will measure how blue and it will make it so it's truly rendered is a great card meaning it will neutralize this the color of this is if it was white light then what I'm going to do is make sure that if I'm shooting tethered in light room there's a little setting down here it's just developed settings and you have if you haven't set to same as previous that means use the same adjustment settings that I applied in the very last image that I adjusted it applied automatically to all the images that I shoot from now on, which means it'll do that white balance compensation for every picture I take from now on if I haven't said the same as previous, so then I'm going to leave that card in there and I'm going to get a white balance for the big light source and we're just going to compensate for this one manually later on meaning when we get to the shots of these when we're actually combining pictures together, I'll go back to the shot I take of this and I know I'll be ableto tio get a measurement for so what? We dim down the lights? I'm just going to get this light source on and I'm just gonna like the cardiff weakened in the lights let's see if it's too bright or not take a moment to find out and I could see it's much more yellow light then the other one because right now we're getting the white balance that would be applied to the small flashlight so let's shoot some things I'm just going to take exposures for various areas there in the shot trying to figure out the best angle in type of lighting for each object gotta pull out that little white bell card though because we don't want it is part of our composition and then when we're done we'll combine the shots together so I'm good so I'm going to first just get rid of this big light source because it's in the way and I might forget about things also, if I'm gonna knock into anything it's going to be with this thing most likely it's a moving around, I'd rather have it happened at the beginning so I could start over instead of at the end when I would have to redo all the other shots if I knock something over. So I'm going to come in here, hold this up to get a nice highlight on the glass and just take one shot in case I wanna soft edge, I will move it on the next shot, and then I walk to the other side of the scene and I'm going to get a nice highlight on this side in just in case I want chris bed, you'll take one without moving it, and then you can leave the lights down, don't eyes to adjust to much. I'm just going to glance at the end results to make sure that they're not overly bright for overly dark it's gonna glance, I know not everybody can see them, but they look like the brightness will be fine, so then I'm going to come in and grab my other light source if I can find it in the dark here. And I'm going to start trying to light each individual area in this scene knowing that I already have captured a really big white highlight for both sides of both a glass and the wine bottle so I don't have to worry about getting reflections in those areas because we already got him captured in one shot and that's what we'll use for those areas in anything that I get in in other shots like unmask out I could just remove so I'm going to come in here just pick an element I'm going to pick the corkscrew that's here if I like the corkscrew from directly above the texture that is in the wood is not showing up very much I mean I can see the variation and color but not the three dimensional quality of it and so if you want to see a three dimensional quality of something usually your rake the light across it and let's see if I can show you the difference I'm going to take one where I light it from directly above and then there's going to be actually it's not too bright take me a moment to glance over there okay and then I'm going to rake it across and tackle break it from above I'm just going to move this intel I can see the three dimensional quality start to come out and let's see if you can see a difference if I bump into my chair all right, now, if you look at it when it was lit from above, you can see this, but in the wood on handle, I could see the variation in color, but I can't see any three dimensional quality to it. It doesn't really feel like much of it has raised that cia tiniest bit lowered over there, but if I compare that to when I raked the light across now, I can tell that this area is recessed mohr and that this area is flat. Can you get that sense that it has a little bit more dimension to it little more up and down to the feeling so any time I want to get that kind of ah of a look, I want to usually make sure I don't have the piece of kleenex or toilet paper in here because that would create too soft of a light source, and then I rake across the subject instead of points straight at it. If, on the other hand, I want to really soft feeling to it and I don't want to bring out the kind of grungy feel to it, then I want to have a piece of toilet paper or kleenex in our case shoved in here, and so what I can do is do that for each surface that's in here, I could do a separate one for this surface and then I could do a completely separate angle for the front parson of the corkscrew, I might like it from up here wants the texture to come out, that's everything. Then I'll work on the next year, and I'll say, ok, this area here in order to get a tow light up nicely, I might need to put my head near the lens so I can see when I see the reflection coming off of it, to figure out the right angle to get that tow light up and be nice and bright, and I simply continue working around the image on each particular area, sometimes lighting object like this fire six times until I figure out what I think makes the corkscrew part look its best and everything else it all depends how important the images to you, as far as how much you're going to invest in it like that. So I'm just going to go in here in light of much objects, and you'll notice that with the cheese and other things, I'll try raking the lighter cross it to get the texture to come out and also try one where it doesn't. So I have the option of using either method, and, uh, we'll just go in here and give it a try, so why we dimmed down the light. And I'm just going to pick the corkscrew I'm going to come down here, my head, near the camera, and I'm putting my flashlight around, moving around until I see the the metal portion light up when my head was right near the lens and that's wrong in a light from so I open the shutter, moving around a little bit to try to cover that a little turned off, and I just want to glance at the end result and what I mainly looking for to see is way too bright it's okay, if it's on a shiny object to get a and that actually didn't like her up to all that much it's okay, to get a little bit of a white, uh, highlight in it, but you don't want it to be the whole area blown out to solid white up there, and I'm just gonna do a few exposures from slightly different angles, and then I'll move to another object. Now I'm looking at the actual screw part of the corkscrew, moving this light around and seen, how can I get it, too? Catch the various shapes that air there where I might like it, and then I like from whatever angle that isthe, and I'm going to get the front here, I might rake it across a little bit. And I'll have to come back and review them to see if I'm going too fast or slow. We can always brighten your darken, but it shouldn't be overly bright or overly dark in this case, just a little bit on the dark side. What happens is your eyes went up adjusting it will end up just going next highlight on one of those okay, your eyes will end up adjusting to being in the dark, and unless that constantly is have me. But what happens your eyes and just being in the dark and as they adjust, what you see on your screen ends up looking brighter than it really is, so that if you end up later on the next day, evaluating what you did, you look at and go everything's dark. Why is that? Because your eyes got used to the dark and ended up be able to see all this detail that you wouldn't usually see during the day, so if anything, you want to tend towards a little bit brighter than you think he need when it comes to the on screen look, because the next day, when you're in a bright room, it's not gonna look quite as bright, mainly, you know, look to make sure we don't have blink, ease that are are blown out like that. So it seems to me like in here we need to turn on the studio lights are for you guys to be able to see here though so I'm never gonna have my eyes adjust to the the environment so I'm just going to write a bunch of stuff let's do it let's turn off our lights source up there and let's take a bunch of exposures I'm going to the cheese I'm raking my light toe look for texture and right there I see texture so I like from that angle moving around a little bit so that the light source is an obvious exactly where it was coming from picked the front of the cheese I'm moving my light source around until I start seeing a little bit of the texture in it there and then I'm gonna light it like this other piece of cheese moving my light source see if I can get some texture in it try from above that's not coming out with much texture of my own light it and just go through the scene each area of us to the handle of the knife if I want there's like a little of marking the knife they uh like a scratch I can try to get it to show up if I want to or I could try to avoid it by breaking the light across that if I wanted to show up or avoiding the raking if I don't but I'm trying not to capture too many object in one shot and I'll try different angles when it comes to the grapes oftentimes with things like grapes that earth slightly see through, I'll try at least one exposure where I backlighted I'll end up getting behind it and seeing if I get the light show up going through it and so capture some of that won't be able to do it in the center of the bunch because it's too thick, but I'll see if I could get just a hint of light coming through from various angles I might also try the same with the actual wine glass I can walk back here to the background and the main thing is you're going to see the white of my flashlight if I get it correctly behind the glass, but if I get a little bit underneath or something else you might not see if I can get some light to come through the liquid so it's not black liquid it's red I would usually experiment with this a bit more, but go and get the label the label's texture to it. If I light it from up front, you won't get much texture by rake it you get a lot of texture it's up to you how much of that sex area like in this case, I think the textures somewhat distracts from the text on the label so I'm only going to get a little and I'll just very the angle you get him to the texture and then just kind of build that across usually experiment with the blade trying to figure out right there it lights up click from right above you can also get the surroundings like the wood table I wanted credit break some light on I can do it from the other side but one thing it takes a long time to get used to is the fact that you can stick your arm right in front of the camera and as long as you're not blocking the camera's view of something in the scene then it's okay to have it there one thing that I also do is I almost always do what I call an ambient exposure which is to light the entire scene from far away where it's even light so from near the camera's view like this because if you ever forgot to light something you simply never let it there might be a small portion of the image where it's simply never got the light you were needing than this exposure could be used just for that area where we can use it to fill in you'll have to do this for a longer period of time from this far away because each time you double the distance you are away from your subject you only get a quarter of the amount of light and so I have to do it for a while up here, but that's like a safety exposure just to fill in if we need it doesn't have to be overly bright, but enough that would fill in if we really were missing something saudi, one more of those he just for the length of time that we have here, I'm not going to be able to experiment as much as I'd really like to on this scene, but I'm hopefully I'm giving you a sense for how to think about some of the challenges that you would get, like the reflections on the glasses and bringing out the textures and all of that in that through experimentation, you'll get used to, uh, doing this in general, so why don't we bring up the lights? We'll just put some of these together and answer questions as we do it while folks asking about nd filters ben the problem with nd filters is when you put a neutral density filter on the lens of your camera, you're also cutting down the amount of power your flashlight is contributing to the scene you're doing both at the same time, it really depends, it's ah, if you find that you just need it, if you absolutely cannot get along enough exposure to have the time to experiment, you could try it, but I would actually usually prefer to instead do something to cut the power out of my flashlight uh for me personally so the next thing I would do and here is I would adjust each one of these now the ones that had the big white light source the big panel we have through the white balance for because they're looking overly yellow but the others all I'm going to do is go to the developed module I'm going to look at each one and usually I sometimes need to adjust the exposure as a whole if it's a little too bright or dark and then I might need to adjust the highlights of the highlights too close to being too hot meaning almost white or are they not bright enough and I'm just going to go through each one of these and see if confined in them and we have a unique set up here where it wasn't easy for me to review things because every time we review things the lights go up and down and odd things but uh this will be nice to get a nice highlight on that knife not sure what I was doing in that one here I was trying to back like the the liquid in the glass wasn't successful because black in there but it could give us some light on the stem that might be useful if you find you need it and you happen to be in uh light room there's a trick on some of these sliders if you hold down the shift key and you double click on the name of a slide or not the slider itself but the name it will apply an automatic setting to it, which sometimes is useful for things like the whites. It will make sure the highlights are nice and bright, that type of thing, but any most of the sliders that air in here, you can hold down the shift key and double click on them if you want to try an automatic setting. Yeah, mostly should've been brighter, but let's start putting these together, even if I haven't adjusted them all because I wouldn't want to make sure you know how that process works. I'm just going to find the ones we did with the big light source, which had that little why bell card in it? S o here is the white balance card. You can see the big light source on the right side of the photo in the little card in it, and then you could see a progression of one, two, three, four images after that that I shot. If you select all of them, click on the first one, hold shift, click on the last one. Which you can do is go to the develop module in light room and at the very bottom is a choice called auto sink with a little light switch next to it and as long as that says auto switch auto sink it's turned on and you could it's not click this little light switch to turn on the choice called out of sync. What that means is if it says auto sink, any change I make this particular photo will apply to all the other photos they're selected as well. So I have right now all the photos that were shot with this light source, at least in that progression. And so if I grab my white balance eyedropper and I click down here, it will be adjusting not just this shot, but the other ones that are selected go back to my grid here, I could also shoot those ones that we did earlier um I grab them, I think they're over here there's our big light source ones and do the same thing. So I go to the developed module, grabbed the eyedropper, click there and they should all be adjusted then all right, I'm not going to adjust anymore because we're running out of time I'm going to select these and let me show you how you can combine them together and for now on going to select hopefully all these lineup select them all. I'm going to go here to photo edit in and there's a choice called open his layers and photo shop, and if I choose that now, what is going to be doing? Is it's going to open each one of those images and stack them one on top of the other in a single document within photo shop and that'll take a little bit of time for it to do it. So while it's doing that, we can cover any questions you'd like, but the general process is once these air stacked in photo shop, you're going to have one layer for each exposure, and if you click on each one of those layers in the layers panel, usually the top most layer will completely obscure your view of the one below it and so on. But there's a menu at the top of the layers panel it's usually set to normal, but if you click on it, it's, a long list and one of the choices and that list is called lightened mode, and if you sent all of those layers to lighten mode, then what happen? Pence is the top most image we'll only be able to brighten what's underneath it. It will not be able to darken anything that's under it, so the area is in that top most layer that are black we'll just go away and instead you'll see what's on the layer underneath because black would darken what's underneath, and if you do that for all the layers, then we're gonna have all the light from all those layers just add together into one picture and it'll be a ziff I did all those exposures together at one time, it'll probably be way too much light, but then weaken, turn on and off the eyeballs on various layers to control which ones they're contributing to our picture, and we can either use the eraser tool to erase things, or we can use a layer mask to temporarily hide things, and by doing so, we can build up the look of the picture so it just take another moment for it to finish this. I'll set him on the light mode, and we'll put a few of them together just being a couple minutes so there's one other mode you can use other than light emojis lino and it's called screen mode, the difference between lightened mode and screen mode is lightened mode looks at the top, most layer and says on lee. The parts of this that are brighter than what's underneath should show up in screen mode, it says. Ad this light to what's underneath I don't care if it's brighter darker under there just add this light to it so it means build up all the lights it's in all the layers and so on screen mode what happens is it's always brighter and sometimes it can become too bright but you have lightning screen mode I would say ninety percent of the time I use light mode one thing we didn't consider when shooting this is I could also capture an exposure for the background just go back there pop some light into the background so we don't have blackness another minute any questions you have a diagram showing this light stick? What is that? It would be a cz if you could get a light saber you know I mean anything like that, but white it's a stick of lighter, a fluorescent light bulb same thing and it just means if you don't have a big thing, grab a little thing that's long and move it across space and it will be the equivalent to a larger light source I selected all my layers here I'm gonna send him to lighten mode and that's all our exposure is put together at once, which would be way too much, but all I did is select all the layers to begin with and I change the menu at the top of the layers panel right up here to lighten that combine them all together and what I can do then is just turn off the eyeballs for most of these layers, you just drag up the column where the light vault, where the eyeballs are to turn them off, and this here's one I can just turn on the next one and say, is this helping or not? And what's fine one that we like, we'll show you how I might deal with still got multiple turned on here, all right, here I like the highlight on the on the, uh, corkscrew. I'll turn on the next one and say, do I like any part of it? If I do, I'll leave it turned on if I don't, I'll turn it off, turn on the next one and see if these help there we got the handle, but you see that highlight over on the right side, either grab the eraser tool or click down here at the bottom of my layers panel in the mask icon and if he had a mask and then paint with black, it hides things. If you don't like masks, you don't have to use them. Just grab the eraser tool you'll just as easily a race away that thing if you don't like it hitting the ground here, just paint with black if you have a mask and erase it away from that layer. Then go to the next one turned on and say does that help in any part of that that doesn't help either race it way with the eraser tool or use thie a layer mask so here I like the highlights but I don't like the light source in there so I add a layer mask paint with black and I said get rid of that I don't like that it's lighting the wood down here so I paint wherever I didn't like what that was contributing showing off its eyeball now you see what that's adding and you can simply come up here and see if you like what the other one's air doing this one I like the right side of the glass and the right side of the wine bottle but I don't like what it's doing to the wine glass so I click on it I add my mask paint with black wherever I don't like it so get rid of the light source and I didn't like it here get rid of that and I don't like what it's doing to the label so painted out and just continue doing that until you can add enough of this to get the whole image toe look att painting with black or the eraser tool that one's got my wife health carte it's probably don't want that so I need to find one for the knife and just build it up all right? Awesome! Yes but hopefully gives you sense for it. All you need is time in practice, but if you want to learn mawr, I have a whole another class, unlike painting on creative life. Thank you, yeah, thanks awesome. Hey, where can folks find you online? If you have more questions, they want to learn more about, like digital mastery. Dot com, conventional master dot com. Also, I have a book on like painting, and you have a free download of a sample of it and it's enough to tell you the camera set up that I use and all that to get your first light paint done.
Ratings and Reviews
dwt1952
Ben comes though with great teachings as always. Nice job. If you ever have a chance to see one of his workshops its well worth the time and costs to go.
Peggy Nugent
Wow! One of the best workshops I've seen on Creativelive! Lots of useful detail, easily understood. I've never done light painting but now feel that I can go forth and shoot with confidence -- Ben's lessons learned will really help me up the learning curve. Excellent!
Nancy Nolan
Student Work
Related Classes
Lighting