Attention Deficit Color Correction
Lesson 2 from: How to Color Correct in Adobe Premiere Pro For BeginnersAbba Shapiro
Attention Deficit Color Correction
Lesson 2 from: How to Color Correct in Adobe Premiere Pro For BeginnersAbba Shapiro
Lessons
Class Introduction
01:53 2Attention Deficit Color Correction
06:13 3Understanding Color
12:55 4Basic Color Terms
04:35 5Shooting for Easier Color Correction
09:53 6Color Calibration Gear
24:41 7Understanding Scopes
19:28 8Introduction to the Lumetri Color Panel
07:02Lesson Info
Attention Deficit Color Correction
Let's take a look at fixing an image. So I'm gonna go ahead, open up a sequence, bring a clip in. We'll jump over to here, let's bring this fullscreen. We have a variety of images here. Some are already color corrected, some are less color corrected. I'm gonna actually give us even more to work with. So we might have an image that is a little bit off so I see this image is a little bit gold, I'm gonna go ahead and just create a sequence with it. Drop that right onto create a sequence. And my assumption is if you are watching this class is that you've either worked with Premiere, you've taken the quick start course that we have or you may have taken the boot camp course that we have on Premiere Pro. So I'm not gonna necessarily be talking a lot about the nuances of this is where your affects control panel, this is what you do with it, we're gonna just jump right in to the idea of color correction. So, if I wanted to fix something and this isn't a bad shot. It's probably a little yellow,...
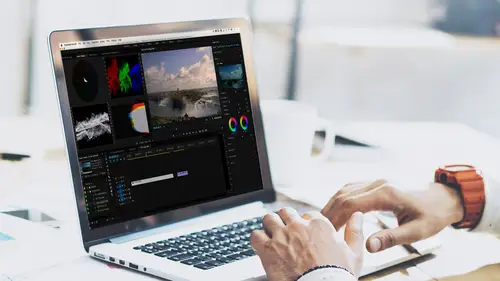
but I just wanna do a quick fix on it, so there's probably two things I wanna do. I wanna, first of all, if you haven't switched over to the color workspace, you might be in the editing workspace which looks a lot like this, go ahead and move over and switch to the color workspace. And if you've played with it, you might wanna reset it to its default, that way yours and mine will look the same. And let me talk a little bit about what we've done here. When you switch to the color workspace, it does a few things. First of all, it moves everything from your traditional editing over to the left and reveals this new panel, the Lumetri color effect. It is actually an effect that you can get also from the effects tab. But this automatically opens it up, so you can start working with these elements. And it brings a couple of things else into play. There'll be a new tab called Lumetri scopes, and we will talk about the scopes later on in the course. I'll just give you a peek at what our scopes are and these give me a graphical representation of the color and luminance information inside of my shot. So that's one of the changes that happens. Another change that happens is it turns on a feature, where if I have a clip in my timeline, whatever clip that my playhead is parked over it automatically loads it into my source monitor. And that's important because if it did not do that, you would think you're color correcting this shot, but this shot may have been the one loaded in previously. So it will automatically load in whatever shot your playhead is over. As a matter of fact, that's a preference you can set inside of Premiere, if you wanna work that way. So, let's take a look at this image. It's pretty good, it's very golden. We're only gonna do two things. This is the ADD version, we're gonna go right over here to our Lumetri color panel. We're gonna go into basic correction and we're just gonna use two things. And I'm not usually a big fan of auto-fixing, but sometimes that's all the time you have. Sometimes you just don't want to learn how to color correct, and you only have 15 minutes because you're sneaking away to watch this and your boss is coming back. So, there are two things you wanna do. You wanna correct the luminance levels. The darkest areas and the brightest areas and you can go ahead. This auto button down to the right. It only affects luminance levels, it will not change the color cast of your image. So if I click it, it will do its best guess, not dramatically different, but it brought the black levels down and it made sure the white levels were really bright. If I had an image that was a lot darker, and let's go ahead and bring one of those in. I'm gonna bring my palette up here. Let's step in to our media. So, if I have an image that is say, rather dark that should not be dark, and we'll go ahead and bring one of those images in. We don't wanna use a night shot. So we'll go ahead, there we go. Get to see my face, and. I'm gonna simply bring that in. So there's my lovely, lovely face. Let's see if my face is too big. I'm gonna go ahead, this might be 4K, so I'm gonna go ahead and set it to the frame size. No, we're good. So I'm obviously too yellow there. And I'm a little bit too dark, so I'll do an auto. It should have brightened me up just a little bit. And then if I wanna do color correction, I need to sample something that would be white. Our neutral gray. We'll get the color right there. I just grabbed something that should have been gray in my glasses, and you'll notice that it automatically took out that really yellow, golden color cast. So if you have no time, and don't wanna learn about anything else, auto will do its best guess. And I'll tell you something. It can easily be confused. If I did auto on a really dark image. One of these night shots. It doesn't know that it's a night shot. Let me go ahead and make that big. So if I go auto, it'll open it up. So now it doesn't really look like night. And then if I do the color correction, grabbing the little eyedropper, guessing that's something that should be neutral white. Kinda looks like sunset. But we know it was a night shot. So that's basically the two buttons you need to know for working with color correction.
Ratings and Reviews
Jason Acuna
I've been filming/editing language learning videos recently and thought "The free tutorials on YouTube are cool, but I wish I could pay an expert to just clearly explain white balance/color correction to me. How to confidently read the scopes, etc". Lo and behold, a few days later this course appears out of nowhere! It delivered all the basic stuff I wanted, clearly explained. I particularly liked the encouraging advice - if you get 95% there (regarding getting the 'perfect' balance), be happy with that 95% and keep moving forward! Thank you!
Bradley Jadir
Nice succinct class. Would be good to have a follow up more advanced class or more examples but this is certainly good for beginner, and more experienced editors that want to deepen their knowledge. (I don't consider myself a beginner as have been color editing for a few years but still learnt a bit here - having previous experience with the lumetri panel will be useful)
OLIVAfilms
It is a very very good class for beginners. It gives you a very good overview of the color correcting tools available and empower you. If you are advanced in color corrections and/or grading this may not be for you. Thanks Abba.