Basic Color Terms
Lesson 4 from: How to Color Correct in Adobe Premiere Pro For BeginnersAbba Shapiro
Basic Color Terms
Lesson 4 from: How to Color Correct in Adobe Premiere Pro For BeginnersAbba Shapiro
Lessons
Class Introduction
01:53 2Attention Deficit Color Correction
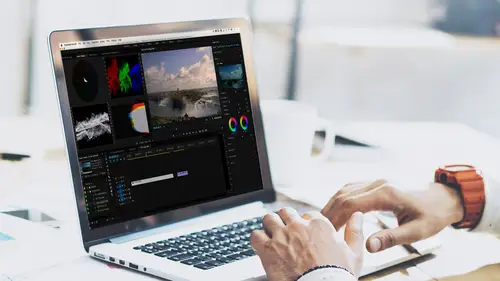
06:13 3Understanding Color
12:55 4Basic Color Terms
04:35 5Shooting for Easier Color Correction
09:53 6Color Calibration Gear
24:41 7Understanding Scopes
19:28 8Introduction to the Lumetri Color Panel
07:02Lesson Info
Basic Color Terms
So, some basic terms. Color correction, this is a term that we've been using already this morning. Really, what does that mean? It's anything, any correction, that changes a shot. Okay, now, the other term you're gonna hear is color grading, okay. It's often used interchangeably with color correction, sometimes grading is more stylistic approaches. The other thing is, when you say the words color correction, that implies there's a problem with the shot that needs to be fixed, and that's not always the case. It really annoys the Director of Photography, the DP, 'cuz then people think he did something wrong. But it's very normal to have light and color temperature change throughout a sequence. So color correction could just be matching things. You're not necessarily fixing things, so, it's used interchangeably, but really what we're doing is color grading usually, to give something a neutral feel, and then to modify it. Other terms you'll hear is something called a primary correction. Th...
at's the first correction that you might do with a shot. You wanna just get it generally, neutrally balanced. You wanna get it so that the grass is green, the sky is blue, flesh tones look good, and now you're ready to get in a little bit deeper, and you do something called secondary corrections. And that allows you to target a specific part of an image. And you can do this with a color mask, where you just select maybe the reds in somebody's shirt, and you say, "You know something? "They're too bright, too distracting." And you just bring down or mute the luminance value of the reds. Or you may go and a person's face may not be the right shade, they may be a little too yellow or a little too green, but if you correct for their face, then everything else in the shot goes a little bit off-kilter. So it allows you to isolate sections with a mask using luminance, or color, or a mask using a shape and just color correct a very small area of your scene. And you can stack color correctors on top of each other to work with different areas and different parts of your image. Another term you'll hear is something called a LUT, and this is bandied around a lot in the last few years because cameras can now shoot using something called log footage, are flat. Basically a LUT stands for the words look-up table. And when you shoot something log, and we have some footage that are log, it looks very flat. The goal of shooting something log is it allows you to get more dynamic range out of your sensor. So if you have some really bright areas, and some really dark areas, and you shoot it as you would regularly, you may get the sky blown out if you're gonna details in your blacks, or if you try to get the sky, where you can actually see the clouds, your blacks may be so crutched, you can't get any information. So, a little techno-geeky, the photographers out there will probably understand this, a normal video camera has about eight stops of dynamic range, which means, the lightest to darkest area can be about eight stops. If you shoot something log, where you're kind of doing a mathematical compression to the image, you can get anywhere from 12 to 14 stops of dynamic range. So obviously, that will give you more nuance in your image, so a lot of the cameras, even little cameras, I've had some pocket cameras that, you know, are semi-professional, that will shoot things using a log. And every camera has different types of log. Sony has a certain type of log, Canon has a certain type of log, Red has a certain type of log, and they even have variations in there, depending on ultimately what you wanna do with it, and then use different formulas. But just in general to know what a log is. And then one of the more critical terms, and what we'll be learning a lot about this morning in the first half, is scopes. These are the tools that you use to do a, technically a, qualitatively measurement, okay, of the contrasting color of a shot. Because your eyes get fooled.
Ratings and Reviews
Jason Acuna
I've been filming/editing language learning videos recently and thought "The free tutorials on YouTube are cool, but I wish I could pay an expert to just clearly explain white balance/color correction to me. How to confidently read the scopes, etc". Lo and behold, a few days later this course appears out of nowhere! It delivered all the basic stuff I wanted, clearly explained. I particularly liked the encouraging advice - if you get 95% there (regarding getting the 'perfect' balance), be happy with that 95% and keep moving forward! Thank you!
Bradley Jadir
Nice succinct class. Would be good to have a follow up more advanced class or more examples but this is certainly good for beginner, and more experienced editors that want to deepen their knowledge. (I don't consider myself a beginner as have been color editing for a few years but still learnt a bit here - having previous experience with the lumetri panel will be useful)
OLIVAfilms
It is a very very good class for beginners. It gives you a very good overview of the color correcting tools available and empower you. If you are advanced in color corrections and/or grading this may not be for you. Thanks Abba.