Using Curves to Fix Saturation
Lesson 12 from: How to Color Correct in Adobe Premiere Pro For BeginnersAbba Shapiro
Using Curves to Fix Saturation
Lesson 12 from: How to Color Correct in Adobe Premiere Pro For BeginnersAbba Shapiro
Lessons
Class Introduction
01:53 2Attention Deficit Color Correction
06:13 3Understanding Color
12:55 4Basic Color Terms
04:35 5Shooting for Easier Color Correction
09:53 6Color Calibration Gear
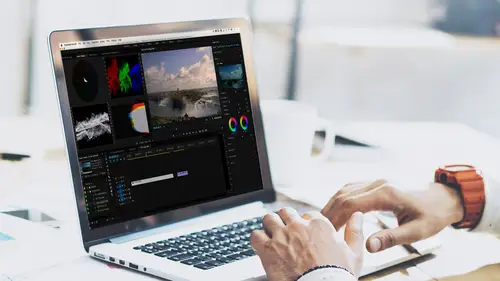
24:41 7Understanding Scopes
19:28 8Introduction to the Lumetri Color Panel
07:02Lesson Info
Using Curves to Fix Saturation
Here's an interesting image. And this is actually fun, I'm gonna let this play. This was shooting it as a toy camera, time-lapse in Puerto Rico. Looks kinda funny, if you'll notice, it's actually, it's almost worth, I like it so much I'm gonna make it full screen. Just fun. But it's really a little bit too dark. You know I didn't have a lot of control actually, if with the sun actually goes behind the cloud, but I look at my image and I can see it hit zero but I could brighten it up. It's the beach, I wanna open that up. I may wanna play with the saturation. I'm actually getting a little bit over-saturated. The blues here are actually exceeding my targets. So I wanna change some of these elements. So the first thing again, I always do, is I always do luminance. I just grab the exposure. I'm gonna open that exposure up a little bit and I like that already. I'm gonna go ahead and fix the color. I could do a sample. There's a lot of white here. Again, this is pretty blown out. There's pro...
bably not a lot of color affecting that chair, so if I click on it, it probably won't make a big difference. I really wanted something gray that would be affected by kind of the blue in the area. So that's pretty good. I could go ahead and work with my sliders to make it a little more neutral. So that ground looks a little more neutral, but I'm kinda happy with that. Maybe I'll open up the the mid-range a little bit and brighten up my shadows. Again, I like to toggle back and forth, before and after, that's kinda nice. But I still have to deal with these blue umbrella's because, they're still over-saturated. Now I could go and I could either play with my saturation, if I bring that down, look while the blue umbrella's are now legitimate, but the rest of the shot I'm losing the color on. Okay? So let's go ahead double-click on that and reset that. And again I could have tried to do the same thing with my vibrance. I can kinda do it, but again, it doesn't do exactly what I want. So let's go down to Curves. And instead of using the the actual curve line and making an S-curve, I'm gonna use this arrow here. And I'm going to pick a color, and it's going to be this blue that I want to affect. Now it does give us some of the default colors that we can start with. So if I click on one of these buttons, it kinda picks that range. I'm gonna reset this by just double-clicking on any of these little targets. So I could pick the blue. Which actually should be pretty close. And if I wanted to I can now say, "Just bring down the saturation "of what's blue in that shot." and if I needed to, I could add a couple of little blue I'm just clicking on it to add more keypoints. So look at that, I've been able to reduce the saturation of just the blue without affecting anything else. And the nice thing about this, it's really very powerful. Maybe I want to affect the saturation also of the sand. I think it's a little too gold. And I'm gonna just ballpark it there, I'm gonna eyeball it. I'm gonna put a couple of points in. And I tend to like to go with a square so I'm putting four points. And I could go ahead and bring down the saturation of what I think is the sand. This is just like a little guestimate. So this gives me a lot of control on modifying. I didn't really get the sand color. Let's spread that a little bit. There we go. Just certain color ranges to really focus it. So this is a really powerful tool if you wanna tweak things. And I pulled it in to lower the saturation, but if I had something that was really pale and wanted like it to pop. So maybe I have a woman walking through a relatively muted scene, and she's wearing a read dress and I want it to really stand out, 'cause that's the commercial I'm cutting. I could go here and select just this red and I could pull the reds up so those really pop. So let's say, let's grab any of the reds here, and you'll see anything that's red in the shot. There's some people wearing some red stuff. Let's bring that full screen, hit the tilde. Oh I like that. There's a graphics card. We don't wanna be your friend. Let's try that one more time. There we go. So, that's the regular shot. Of course as I did that, I went out of my little doohicky here. With and without. A quick fix using yet another tool within the framework of the color corrector. Are there any questions that have come? I wanna make that people have the opportunity to ask a question as we work through this. Let's see. Here's a question that came from Asmath who wants to know "Are there LUTs to make a vibrant shot like this more neutral like you shot it in a flat profile, so you can apply a more stylized LUT on top of it?" That's a good question. So if I understand it correctly, is there a LUT you can apply to actually pull the color out so that you can then apply another stylistic LUT. I would hesitate doing that because you're manipulating the image more than you need. You technically can create your own LUT that can take that image and give it the look that you want. So, if you already have something that's relatively neutral, you wanna fix it. Now what I wanna point out is, I've made a lot of changes here. And if I decided that this is kinda like the look I want whenever I use this toy camera effect. Instead of bringing it down where there's nothing with one color correction, and then applying a LUT to pop things. I could go over here and I could export a .cube file or a .look file, these both can be read by Premiere. And that in a sense is a LUT or a look for this type of footage. Okay? I could also create something extremely dramatic maybe where it's very golden and you lose all the you know, like you lose all the blues. If you notice on TV shows they, in some films, they have a certain feel to it. You know you watch Walking Dead or something and they pull out a lot of the saturation. It's a little bluer. It just makes it feel colder. So I could export that. And the nice thing is, if I bring another shot in, that's neutral, I could apply my own custom .look or .cube file to any clip and give it the look that I want. Or if I wanted to, if I'm working with somebody remotely, I could send them that file and they could import that. You saw when I hit browse and they could go ahead and bring that in and have the look of the show exactly the way you want it. And these are very small files. It's just math. So that's how I would do it. Yes technically I guess you could create something that pulls out the color and the saturation. But you're actually probably creating more work than you need to. Really the idea is that if you shoot it LUD it's so you can get extra information. Extra information within your shot. And if you just are taking it out to start with, you're not really gaining anything. So that's how I would approach it. And with color correction, first of all, very subjective. Every kind of colorist does work things differently, in different orders. Subjectively, what I might like for an image may be different than what you might like for an image. We all tend to see colors slightly different, so that is just some things to keep in mind. Let's take a look at some of the other things that we can do here. Some of the other options. I'm gonna go ahead and bring this down. So this shot's good. What I wanna work on, is I wanna show you a couple of other elements here. We're gonna look at the color wheels and we're going to look at our HSL secondaries. So there is a lot of overlap between each of these panels. In other words, if you notice, I had saturation in Basic and I had saturation in Creative. And actually, with this I can even increase saturation. So there's different ways to address making changes.
Ratings and Reviews
Jason Acuna
I've been filming/editing language learning videos recently and thought "The free tutorials on YouTube are cool, but I wish I could pay an expert to just clearly explain white balance/color correction to me. How to confidently read the scopes, etc". Lo and behold, a few days later this course appears out of nowhere! It delivered all the basic stuff I wanted, clearly explained. I particularly liked the encouraging advice - if you get 95% there (regarding getting the 'perfect' balance), be happy with that 95% and keep moving forward! Thank you!
Bradley Jadir
Nice succinct class. Would be good to have a follow up more advanced class or more examples but this is certainly good for beginner, and more experienced editors that want to deepen their knowledge. (I don't consider myself a beginner as have been color editing for a few years but still learnt a bit here - having previous experience with the lumetri panel will be useful)
OLIVAfilms
It is a very very good class for beginners. It gives you a very good overview of the color correcting tools available and empower you. If you are advanced in color corrections and/or grading this may not be for you. Thanks Abba.