Lessons
Lesson Info
Mono Printing
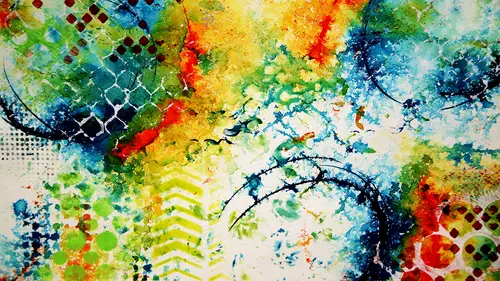
We're going on to some mano printing, and for that we're going to use, um are jelly plate now you could do this the good, old fashioned way and actually mix up clear gelatin and put it in a tray and let it sit up overnight, right? Clear gelatin this is the old fashioned way of doing gelatin printing is actual gelatin. This is a jelly plate that stays this consistency all the time. So the downside to the old fashioned jealous in print is that it's it doesn't last forever, right? But this last forever, and we're going to use it as a surface to roll out some paint and add some layers not only to the things that we started, but to some new pages as well. So you guys keep going with your paper towel printing another one or two prints? Um, I'm going to come over and clear the actually, yes, I'm gonna pull a couple of the acrylic inks, but I'm gonna leave the other one's there so that we all have some. It was a double up over here, right? Absolutely when it gets really dry in the very end, us...
ually what I'll do is I'll just lay it over a piece of paper and all kind of pleaded up. A little bit. This is just to get the last little bits of juice out of it, and I'll roll it this time. I only role in one direction with a paper towel, because sometimes, if I go back and forth, it just wraps itself around the paper tell mine is not quite dry enough for you to get the total effect of what that looks like. Sorry, maybe the camera, but can't quite see that. There we go. So that's just getting the last little bit of juice out of the paper towel. And if you throw it on there a different direction, you get sort of a plaid effect with the lines going to different ways. And then, like I mentioned before, this paper towel is two ply, so usually started the corner and kind of tear in a little bit. And then I have two pieces of tissue left over, and I just I just ladies over something to dry. Oh, speaking of driving, you have a little drying rack in between barbara and sarah. So later on, when there's things that need to dry kate, if you pass it down to sarah and karen, if you pass it down the barbara, you guys can hang things these not so much these don't need to be hung up because the acrylic inc and water is so thin that it's not super sticky, but when we're working with acrylics later, the next technique, we're going to have some really it's a thicker surface and you're going to want to go ahead and set those aside to drive if you if you pile up your papers and just put him over here like this when we're doing the next technique, they're all going to stick together through these air perfectly fine, yeah, okay, so I you can also put things back on your cart if your tables they're getting a little tio overflowing, there were done with the cops so you can stack those up and set him off to the side or put him in your car somewhere just get him out of your way, okay? We've got a good start on some backgrounds way we're going to move on teo jelly printing and for that we're going to be using a heavier body to acrylic paint you can use um acrylic paints straight out of the bottle, you can really is any kind of acrylic paint with this, I like the acrylic paints that come in a tube because they're usually a little heavier and I just open this box upside down there we go, I can't stop printing I know right this's when I teach this class I do this like the fourth technique because that people get stuck in this one that like I just want to do this all day you can go ahead and go on with what you're doing but this is what I want to do all day so I know that's the trouble of starting with this one but it's really you could definitely go back and do more okay so this is one where I'm going to pay attention when I'm picking out my colors I'm going pick out colors that are maybe not going to make mud unless I am intending to make mud so when you're ready to do this on the very bottom layer of your car you actually have a jelly printing plate um these are the studio's printing plates they're fantastic way air going tio scored out our three colors in probably three places so that's going to be a total of nine little dots of paint now I probably put too much there so don't do as I do but do as I say where you just putting tiniest little maybe like tic tack amount of paint in three spots of three different colors same color theory more important on this one than the one we just did as faras making brown because this is going to really roll together and blend a lot so we're going to try to avoid making mud this's right think somebody here yesterday said that they wanted to chew on it because it was just really cool consistency it doesn't matter which side is up it really doesn't some of them because they've been in studio use they get really dirty just take the cleanest side up okay sometimes the dirty stuff it stays on there is just serendipity and again back at some point in time and you get this really cool layer that you didn't plan so can you guys see how there we go your beach so we've got three colors in three spots a total of nine little dollops of paint I know so many colors to choose from thank you are alternative in q thank you when I roll this out with the breyer I don't want to overmix I want to still see all three colors so going to be kind of careful as I'm rolling this across because if I rolled enrolled enrolled what's that going to make actually this isn't going to make money because of the color right it's going to make one color it's going to make green because I've got blue, yellow and green if I can you going rolling and rolling and rolling it's going to make nothing but green now if my pain is really thick I can add an extender like a glazing medium I'm not sure if we take the tops off of these guests talked up really a little bit of glazing medium on here is going to extend this pain it's going to make it stay wet a little bit longer because when I roll acrylic paint out really thin, it tends to dry really quickly, so I'm going to put a little bit of glazing medium over top of this and again, trying not to over mix because I do still want to see those colors now into this paint e jelly plate. I'm going to press things with texture and a start with this trip president pull it up that makes a cool design on the plate, but it also puts paint on on my trip, but right, so I'm gonna stamp with that on one of the papers that I already made. So here comes the beginning of some really cool layers you see that again, you guys are close enough that you can share colors with each other, so you don't have to have all the same color, so I'm able to get a couple of stamps out of that. I'm going to try it now with my homemade stamp, so I'm pressing into the surface there and then I'm stamping it off on to something else so now again it's another big ink pad, you got it, but this time with thicker paint, then we did the first time around now these are the ones where if they get really thick on here we want to go ahead and hang them up. I don't want to staff a piece of paper on top of that with another layer of paint because we'll end up with one painting paper sandwich at the end that's not going to come apart okay now I pulled some of this paint off of the jelly plates with texture and a dentist strategically so that I still have some design elements showing here then what I'm going to do is I'm going to take a full on piece of paper and lay it over top and very gently press my hand down and pulled and then there's a really cool print ok and that's just from the subtracted method of pressing things into it and pulling the paint off I'm left with that sort of print and I always say there's enough paint here to share so I always press another piece of paper over top of it quickly remember this is acrylic and if I leave it there long enough it'll glue it together we don't want that to happen, but look at that I get to print for the price of one just out of one printing and there's still tons of paint on the surface of my plate so I can keep pulling prints another really cool thing to dio is lay a stencil I really like these open the big open stencils case I'm gonna lay the stencil overtop and take my paper and press it down and pull it off and check that out. So the stencil has masked out the area, but remember, whenever I put this onto the wet paint, whenever I put a tool onto the wet paint, I've got some color on there I thought this table was so huge and I'm already running out of space. I know, so I'm gonna lay this painting side down on something else and press sometimes it's really dry and you can't get another printing out of it, but sometimes you do just get a hint of a printing out of it and that's justice coop, I mean, right, not even thinking you're doing and that's what you have to do, you get into the mode of just one polling prints and pulling prints and pulling prints, and then at the end you went, wow, look at all these papers I have so I put that stencil down on here and pulled a print it's going to leave some residue of everything that I've done so far I'm gonna put that on my now it's not showing up that great, but that's ok that's, what it's all about it, just layering and to clean off my my my jelly plate, when I've pulled is much of the paint off of there is I can I'm just gonna press a piece of paper on there, rub it down and keep polling until no more painted coming off. Then I can throw some other colors on there and keep going, even though this doesn't look like it's clean it's pretty much not giving any more paint away so I can either take a baby wipe another one of my favorite studio tools I could not live without baby wipes in the studio had a really cute little like I don't know he's probably eight in one of my summer camps and he's, I don't know you what you call those baby wipes that we're not using them for babies, their art, their art wipes. You need to call him our white some like, ok, there's a million dollar idea right there, right? Just repackage it. They're called art wipes and they're going to cost twice as much. Okay, I can't get enough of this jelly printing something to show you a couple more techniques. I'm gonna throw some more paint on here different colors this time and talk about other things that you can dio there's more than oh yes, but wait there's more, yeah, you're right, quiet so we were using the thicker acrylic paints the tube, acrylic paint spurs, you can use the ones in the bottles as well. If you want to get a more variety of color there to clean my breyer off, I just roll it over top of that same piece of paper that I was using before to kind of pull the extra paint off and again, sometimes those are my favorite prince. At the end of the day, just the my clean off paper, you'll see a different the difference in the consistency of pain. When you roll this paint from the bottles onto the surface, it almost looks like the gelatin is resisting it. It'll kind of pool and puddle in in interesting ways, as opposed to the thicker, too paints, but that's great, because that gives me a totally different look into this I can actually draw now, things that I don't want to use on here are sharp ends. You don't want to use the sharp end of your pencil or the sharp end of your bamboo skewer, but you can use how you can use the dumb right, because exactly it's going to mark and mar the surface of the of the gelatin, print the gelatin plate, and so you want to use things like q tips are great, the eraser tip of your pencil fantastic. The end of your pipat would work just fine um yeah, the ends of your paintbrushes where they're kind of rounded we're great so into this I'm just going tio go to my typical round motive here certainly circles on I'm just making marks on to the surface and again pulling I don't press down really hard to begin with because I don't want it too right um and I don't want to push out all of the design if I press down really hard it's going to mush that design out and you're not really not going to see this as crisply and using just a regular I'm just using the regular the ones in the paint in the bottles this time okay, well, you guys are, um doing that I want to talk a little bit about the process of creating these layers sometimes you get little little areas that you really like hopefully get a lot of areas that you really like but sometimes something catches your eye. You know, like I really like the way that that pattern layers over top of that color and everything is just really working I always have my phone at hands those of you who have phones that have a camera in them I was have my phone at hand and I will take a picture kcia in the overhead now I have that as potentially is a piece of collage paper even though it's just a picture of that little spot right there because I'm gonna keep layering I'm going keep adding on to this who knows of that spot is going to be preserved at the very end but once it's in memory on my phone I can print it out and reuse it is a starting spot for other pieces of art so one of my I mean I couldn't do it without my baby wipes but I also couldn't do it out would do this art without my phone because I do take pictures of the process all along the way because then you have justice unlimited supply of prince of ah patterns that you can start with so how are you guys doing out there enjoying the jelly right? The jelly printing often I see sarah you're pulling a print off of the wet paint on top of the stencil is well, that's great even if it's not a full like this helps me give up that perfectionist like stamping back in the day of rubber stamping where he didn't get a perfect print you were like uh not perfect I have to do it again that's the whole idea here is that we're not going for perfection we're just going for what isthe all right? We're just going for getting some color layered patterns layered don't forget to use your handmade stamps too yeah, right, you compress your handmade stamp into this and pull up pattern and stamp it down on something else pretty. So you're going to notice a difference between using opaque paints and transparent paints as well. The opaque paints are going to cover up everything that's underneath, which is kind of a cool effect when you mask things out so that you still see what's underneath. Like kate, you just use that music paper and where your design is. You can see the music paper, right. The paint was opaque, so it covered everything else. His phones can be a really good job. The foam stamps are great. You can use rubber stamps as well. It's, just the rubbers, a little sharper, more crisp image. So the foam stamps really grab onto that paint. Yeah, that's looking great.
Class Materials
Free Downloads
Bonus Materials with Purchase
Ratings and Reviews
carlos.lijeron
As a proud father looking for ways to share good times with my kids, I'm glad to have found this course. I have tons of ideas that I can now capture on paper using a variety of tools. My plan is to take some time on Sundays to do only ART with my kiddos, especially on cold Winter days. The class is very informative, particularly in the items to get. Since this is new to me, I would not have any clue on what to buy, but Andrea gives you the ins and outs of what works and what doesn't ... a really good time/money saver. I highly recommend this course. Thanks CreativeLive !! You guys are awesome.
Haden
Wow, that was SO much fun! Lots of wonderful techniques I hadn't tried before.
Melissa
This is a great beginner course and is loaded with creative and simple ideas. I love the fact that Andrea doesn't waste anything! She makes great suggestions for reusing items that would normally end up in the trash and she shows you simple ways to cut corners on your crafting supplies. This is about making collage paper, not a final work of art. I can't wait to get started trying out her ideas.
Student Work
Related Classes
Paper Craft Ideas