Producing a Wide Range of Presets
Lesson 3 from: How To Develop and Sell Your Own Lightroom Classic Editing PresetsBen Willmore
Producing a Wide Range of Presets
Lesson 3 from: How To Develop and Sell Your Own Lightroom Classic Editing PresetsBen Willmore
Lesson Info
3. Producing a Wide Range of Presets
Lessons
Lesson Info
Producing a Wide Range of Presets
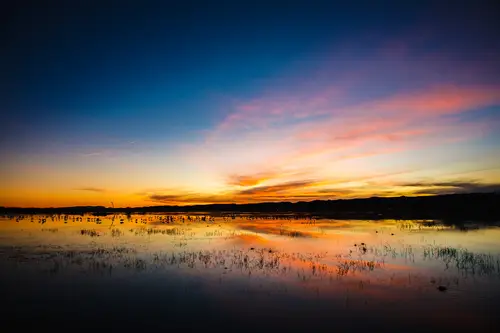
(upbeat music) Lightroom offers a special set of features that you can use with your presets that will cause them to adapt to each image that they're being applied to in a unique way. And that is it can mask areas based on artificial intelligence, trying to recognize either the sky or the subject in your photograph. So let's see how we can incorporate that to create a wider range of presets and ones that are much more sophisticated. Just be aware that these will only work if your purchasers have updated to the latest versions of Lightroom, because these are pretty darn new features. So let's take a look. So let's head over to the develop module. And in this case, I'm gonna go to the masking icon which is this one just below the histogram. And in here I'm gonna tell it to select the subject or this photograph. And the subject's blatant enough in here that hopefully it will be able to find and isolated. Then if I would like to work on everything except for the subject there's an invert...
check box near the upper right. I'll turn that on. And then I think I'm gonna lower the saturation on that background. And I might also come down here and decide to bring down the texture. That means the sharpness kind of in that background. I could also bring down clarity which will help to soften the background as well. And maybe bring down that a little bit further. I could also do things like shift the general color of what's there. Just whatever you happen to think of in this case. But the main thing is it's making the subject pop out from the background. Well, once I've done that I could come up here and name the mask if I'd like, you see it's just called mask one. But if I double click on it I could just call this background mellower. Click OK. And then I can come over here to my presets hit the plus sign and say, I want to create a preset. Now in this, I want to first check none. And then, well, not all check none. Then the only setting I want to apply in this case over here is masking. And if I had more than one mask, then this would give me a list of all the masks and I could click on whichever masks I would like to incorporate. So I'll turn on background mellower and I will give it a name. (keyboard chuckling) And then I'm just gonna make sure it's in our same group, click Create. And then let's test this. I'll just go to the next image that I have here. And let's see if that will be able to deliver a mellower background. And even if I come over here and just hover over it, you should be able to tell, it previews it it can do it that quickly. And then I click and after applying it I can just come up here to the mask icon. And there you can see it has isolated the subject of this photograph and mellowed the background. And then I could fine tune things a little further. I just need to click on the name of that mask. So I can see the settings that are here and I could bring it down even further to mellow things out. But that's not all I can do. I can also isolate the sky. And in this case, we have an odd effect applied to the sky but we can still adjust it just come up here to create new mask. And this time I'll tell it to select the sky. And now that it's isolated the sky, I could come in here and potentially add contrast to it or reduce it. I could maybe bring my highlights down. So I get some additional detail in that sky and adjust something like clarity to make the detail pop out. Be careful with clarity though, especially on skies. It's what causes the edges of clouds to have a dark halo. If I crank it up here, you'll see the dark halo starting to appear. I see it especially right in this area. So you don't wanna overdo clarity on skies unless you're going for a real artificial look. You can soften a sky though by putting it into a negative amount. And that's what I might do in this case, create a soft sky. So now again, I can name this mask. You don't have to though. You just double click on the name if you'd like to though I'll call it soft sky and then we'll click OK, And now again, I can create another preset just by clicking the plus button, create preset. And this time you notice it lists more than one mask. And in this case, I only wanna save what I'm gonna be doing to the sky. So I'm just gonna call this soft sky and choose the new mask we just made and get rid of the one that selected the subject and did inverse because I want that as a separate preset. So I can apply these independent of each other. Although I could save them both into a single preset and then it create and you can do a lot with these kinds of presets. If I come into this image now and I come over here to our presets, one thing you should be aware of though is when you apply a preset like we just made the one called soft sky is if that particular image already had a mask that was isolating the sky, if it had any kind of mask, for the most part, it will usually wipe them out. So if I come in here there was a mask originally I chose undue. So we got back to the original version before applying the preset, there was one called mask one. And if I come over here and apply soft sky, now we have both that mask one and soft sky, they're applied on top of each other. And so, this one was bringing down the contrast and bringing down the clarity. And then this one on top was also bringing down clarity but also doing some other changes so they can kind of stack up on top of each other. But depending on what the particular adjustment was, this can often counteract what is below it. But lemme show you why I usually name my masks. And that is because the default names of something like mask one is something that can easily mess things up. So let's say I come in here and I create a preset and I'm just gonna call this one mask test and I'm gonna save the one called mask one and hit create. Then I'm gonna come in here to this particular image and I'm gonna go to the mask that's already called mask one and I'm gonna change it. I'm gonna come over here and crank the saturation. I'm gonna make it really dark just to make it obvious that something is applied and then I'm gonna apply our preset. I'm gonna just come down here to mask tasking, click on it and look at what just happened. It went in and modified the one that was named mask one. It ended up bringing it back to what we had earlier when that particular preset was created. And it no longer reflects what we had a few moments ago. So if you wanna make it, so your preset has less potential of messing up any mask that are already applied in an image, then I'd stay away from the default names like mask one, mask two, mask three which is what you're going to get when you end up doing something like selecting a sky. So if I come over here and say select sky you can see that it's just called mask two. Well, if I apply this particular preset that is made using that to an image that already has a mask called mask two then it's going to replace it. So that's why having names like soft sky is useful. In fact, what I might suggest you do is to actually put the name of your preset pack in here, whatever you happen to choose to name it a dash and then the name of the preset, because then the likelihood of having an existing mask that had that exact same name is next to zero. And therefore, it will just be able to be applied to an image that's already been masked without messing up the masking that's already there. So I'm gonna choose undo a few times 'cause I didn't want to actually get those changes that were in there. We were just talking about some basic masking with these artificial intelligence based masks. And so, here's another mask that was made originally for the sky. And let's see what it's doing to this sky. I'll turn off this little light switch. There's the original sky. And oftentimes, if somebody amps up the colors in a picture by bringing up the vibrant slider, a sky is gonna end up looking overdone. And so, this particular mask was trying to mellow out the sky. Also, when an image is sharpened and when things like clarity are increased to make the image pop, they don't often help the sky. So in this particular instance, what's being done is the contrast is being lowered on the sky. And so is the clarity which is gonna make it. So we have fewer kind of halos around our sky. The clouds that are there, texture is also brought down because a sky doesn't usually have any fine detail to it. It usually contains soft information but people will often bring up texture when being applied to the entire image and that's gonna cause the noise in a sky to be exaggerated then it's just gonna make it look less natural. So in this case, texture's being turned down. The other thing is sharpness is turned down a little bit to soften that sky. So it's not getting so much sharpening and then this slider called noise it doesn't actually add noise to a picture. This just doesn't have space to say noise reduction. And so in this case it's been cranked way up to really get rid of any noise that's in that sky because that's the most common place to see noise which is in the solid colored areas of sky 'cause there's no texture to distract you from the noise. So this might not be a bad preset to save as well. The only thing I would do before saving it is rename my mask. And so I'm gonna call this Ben's sky mellower and then we can save it as a preset and I'll call it Ben's sky mellower, I don't know if that's how you spell mellower or if mellower is word, but Ben's sky mellower just gonna make sure that that's in there, hit create and now we have yet another preset. And if this is applied to somebody else's image, the likelihood of them already having a mask of that particular name is so low that I don't have to worry about it conflicting with anything else they've already produced. Sky masks are also great when your enhancing images that were shot at sunrise or at sunset, if you wanna be able to amp up that sky and most likely reduce a little bit of noise in it as well but by incorporating these artificial intelligence presets now, your presets can be much more intelligent when applied to different images. Instead of generically applying to the whole thing we can now isolate the subject of the photograph and you can always have somebody come in afterwards if it doesn't do an accurate job and touch it up using the various masking tools.
Class Materials
Bonus Materials with Purchase
Ratings and Reviews
a Creativelive Student
I loved it. Very clear and thoughtfully laid out to help you learn and get the most out of the class.