Lesson Info
22. Color Style #8: One Color Value Study
Lessons
Class Introduction
02:26 2Get Started Drawing
13:07 3Line Quality
18:27 4Shading
18:59 5Drawing Supplies
15:19 6Drawing Supplies Exercise: Draw Spoons
17:26 7Measurement
12:08 8Lightbox Drawing with your Mobile Device
06:48Learn Composition
10:17 10Refining and Shading the Layered Image
13:39 11Color Introduction
06:25 12How to Apply Color Using Watercolor
11:42 13How to Apply Color Using Gouache
07:06 14Color Materials & Setup
04:33 15Color Style #1: Pen and Watercolor sketch
06:05 16Color Style #2: Doodle style using Pen
07:01 17Color Style #3: Brushpen
06:26 18Color Style #4: Chalkboard Technique
15:23 19Color Style #5: Spot Coloring Book
07:44 20Color Style #6: Add Color with Your Background
03:07 21Color Style #7: Create Color Combinations with Metallics
07:01 22Color Style #8: One Color Value Study
06:25 23Using Multiple Colors for Shading & Highlights
19:56 24Develop your Style by Showing Your Work
06:04 25Ways to Display Your Art
22:03 26Turn Your Drawing into a Digital Product
09:16 27Paper Crafts with Your Drawings
15:50Lesson Info
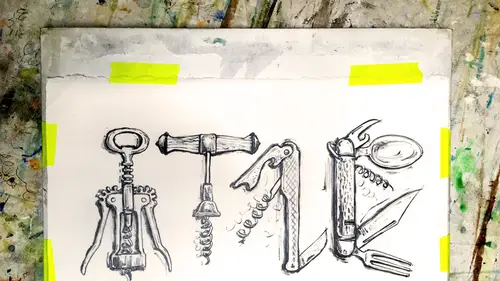
Color Style #8: One Color Value Study
Now we're gonna look at value. This is easing into doing kind of more of ah, more of a full painting with all the light in the shadow. Just gonna go with my endo ing to go pain again, and we're going to do like we did on our daisy. Look at some of the very light spots and try and avoid him. There we go. That guy kind of got wrapped around the edge. I'm gonna look at my other Okay, so I'm finding my very, very lightest spot. Well, that is very concentrated. I'm doing this on coated paper again so I can erase, but certainly don't have to. And I can tell already it's beating up and running away from where I wanted to stick. So I'm gonna do that little trick I showed you where I just get some water on a paper towel and just scrub about it a little bit. Could be that I had some oil on my hands or something like that. Does that actually remove some of the medium or does it just rough up the surface? I think it's just wrapping up, roughing up the surface and perhaps getting a little oil or s...
omething that might have been on there. Okay, so we're starting with our lightest colors. Neighbor. Remember how we did the daisy petals can kind of put a little bit of light thing on. And then I just rinsed my brush in the water and dabbed it off a little. Oh, thank you so much. Perfect timing. I dabbed it just in the water, and I'm on Lee. Have water on my brush right now, and I'm just kind of guiding the pigment out to follow my brush. There was actually no pigment on my brush at all when I painted that. So find another dark spot painted in. Well, those are pretty big dark spots. Okay? Just water on my brush. Just gonna blend that out a little. Okay, Can kind of see where I'm going with this, right. Okay. And this is really mimicking some of the techniques that you showed us earlier when we were doing the daisy and painting the different pedals. Yes, and also, it's kind of mimicking the things we were doing with sketching when we were doing all our shading and blending. We're just doing it in paint this time, okay? And with this coated paper, Aiken, I can just pick right into that. You could do a little on unquoted to to you could just pick right into a dark spot and just push it up where you want it to go. Pigment is really just like like dirt and flex felt a lot of the names sound just like dirt on broad number Yellow Oakar, Burnt Sienna. Um, it's very It's just like silt and your brushes full of water. And it's just like this little river that's just sort of guiding the silt in the direction you want it to flow. If you look at this very closely, like sometimes I'll do on the Thea um, my tablet, you can you can kind of go macro, and I'll just sort of watch the paint flow around. It really gives you a good idea of how the paint lays down. Okay, so now, darkest spot when you come in there like that. Okay, way dark. A spot. Now, here's another fun thing that happens when I get to the grapes I can do a little dot has to be kind of dry. I'm gonna exaggerate this just a little bit for a fact. I'm gonna make these a little bit bigger than they are. And then it might be too wet. Let's try it. Ready? Okay. So get your paintbrush really, really dry and just come in and try and lift out a dot for the highlight there. So it kind of makes things look really round when you just take out a little dot on the highlight. So this is kind of like you're using your racer as a tool, but you're using a dry paint brush on a wet round dot of paint. So it's kind of making those grapes that kind around. And all I was doing was removing the plate instead of adding it. Okay, so I think you're getting the idea on what? To dio. As you can see, I just go through all of the areas that are mediums. I leave the lights I color in the dark's darker same thing that we did with the pencil and you end up having something like this. That's a one color value study. Value is just study of lights and darks.
Class Materials
Bonus Materials with RSVP
Bonus Materials with Purchase
Ratings and Reviews
Lt. Cmnd. Data
This fun course is perfect for the beginner that wants to learn how to draw with pencil. Cleo had lots of great tips and techniques that are easy to employ and you can get started with whatever supplies you have around the house (back of the envelope and a #2 pencil..). It is great to have more fuel for my creative habit!
michella
This class is fantastic for getting you off and running for a daily practice of drawing and DIY exhibition. The range of techniques that Cleo goes over are easy to follow and enable you to create something that has potential! I am inspired to apply what I have learn in this class right away. I primarily work in the digital space, so spending time developing analog skills with an experienced instructor has been so valuable for me and my work. And as a side note, I loved focusing on everyday things (keys, scissors, etc.) and bringing out the character and beauty of those objects in our drawings.
Sierra
I thought this course was great! Cleo broke down the fundamentals of drawing in a way that was easy to understand. I was particularly impressed by the different tracing paper techniques and using the pencil as a measuring tool. After taking this class I can now look at drawings and identify the techniques that were used to accomplish them and that's an awesome feeling :)