Lesson Info
1. Editing in the Photos App
Lessons
Editing in the Photos App
19:06Lesson Info
Editing in the Photos App
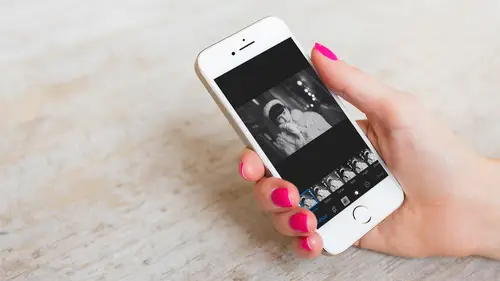
Now that you know how to take photos in your phone, it's time to learn how to edit them and organize them inside of your phone in the Photos application. So this is iOS and as iOS changes things might change a little bit, but we're gonna give you the best understanding of how to work within the iOS Photos application. So inside of iOS Photos application there are four different areas at the bottom. There's Photos, Memories, Shared, and Albums. Those are your four options. And if you click on Photos you're gonna see a timeline of your photographs. So everything is organized by years. So you see there's a lot of photos here represented in 2017. If I click on that then it further separates them out into different types of events. So it can see where I was taking photographs, because it's stamping them based on my GPS location inside the phone. Okay, so then you can see that if I have a GPS location it's going to figure out where I am and so on. Then I can just scan through and say, well,...
here I was on Mackinac Island, and so I can see all of the photos taken on Mackinac Island. That's a really great way to be able to find images very quickly. Just simply click on the year and then go in from the year and look for the location where you happen to be. And then once you click on that you can click on the actual photos and it'll take you through all of the photos that you shot on Mackinac Island, or if you click on the actual name, Mackinac State Park, if you click on that instead of on the photos themselves it will take you to a presentation style gallery that actually has at the very top a little slideshow pre-prepared for you. Now that slideshow when you hit play is gonna have a little bit of music to it, it's gonna show you the images, it's just self-generated. So the Photos application on your iPhone is just coming up with images and showing them to you the way it thinks they ought to be. If you wanna get further down into that and make your images and your presentations much better you'll want to actually select them and put them in their own albums, so that you're choosing exactly what you show to the world. So you can see below that is more images for you, kind of bigger, in a better presentation. And then at the very bottom of that there are the people that are actually involved in those photos, as well as the places that you were. And the places is a really interesting thing, 'cause I can click on Places and I can see where all of those photos were taken in a map. I can also come down and see related types of activities or places. So that's basically how those images are organized inside of your Photos application in your iPhone. Now once you get past Photos, then you go into Memories. And Memories are auto-generated slideshows based on places you've been or holidays that you experience. For instance, last weekend. So if you've just been traveling around taking pictures and you wanna see what you've been doing over the last week or so, if you go to Memories the iPhone is actually coming up with a set of images it thinks was a general event for you. For instance, if you look here on the second one that it created, and I didn't do anything, this is all auto-generated. It was saying, hey, here's all the photos that you took in Manhattan, you might wanna watch this slideshow. So if I click on that slideshow it'll show me that slideshow that I can hit play on, or I can look through some of the best photos, as well as maps of where I took them, and other related photos that I might be interested in. Then there's the Shared Galleries. Now Shared Galleries are your way of sharing with the world or with your family or friends images that you would like them to see as well. All you have to do is simply hit the plus button in the top left hand corner, you're going to create a shared album, so we would call this My Favorite Images. And then I would hit Next. I'm gonna share it with myself or I could share it with my wife or my kids or friends. Just simply put in their email address that associated with their account and then they'll get an email that alerts them to that gallery. When they click on it then all the images that you put into the gallery are going to be immediately delivered to their gallery on theirs and it will say My Favorite Images or Jared's favorite images or whatever you name it. So in order to add things to it I simply click on that gallery and I'm just going to click the little plus button right up there and I'm gonna start looking for images. So I just simply click on images that I think are interesting. And once I'm done I hit Done and now all of those images are gonna be posted, I could add a note to it if I want, but instead I just posted them. So now anybody who's associated with this gallery that I shared it with is going to automatically on their phone receive your photos. If for any reason you wanna add people to that gallery, so more people can see it or if you wanna remove people from it you just simply go to the bottom, instead of hitting on Photos, you hit on People, and then inside of here you can tell them what they can see, who can see it, and you can also delete the shared album, so that no one can see it. And now it's gone. But the most important thing for you is organizing. And that's gonna be done inside of the Albums section, which is over on the right hand side of the Photo application. And that's where you're going to see a lot of different auto-generated albums. The first thing you'll see is All Photos up in the top left hand corner. Then you're gonna see your Favorites, and those are the images that you have actually put a little heart on, you've favorited them. And I'll show you how to do that in a minute. Then you're gonna see albums full of People, then Places, Videos, Selfies, Live Photos, Panoramas, Time-lapse, slow motion, Depth Effect, Bursts. Below those auto-generated types of albums you're gonna see My Albums. And My Albums is where you're going to create albums that are specifically to organize your images. Just like before, you hit the plus button, you're gonna name your album. So let's just call this CreativeLive. And that's gonna be the name of our album, we'll hit Save. And now it's gonna ask me to add images to this collection. You can either select one image like this or you can click and drag across a set of images and that'll help to collect a whole grid full of images. Once you've done selecting, then just hit Done, and now you have an entire album full of CreativeLive photos. If for some reason you wanna add some more images to that, just simply click on that album and hit Select. Once you hit Select down at the very bottom is an Add button. When I click Add it takes me back to my photos and I can search anywhere in my collections. Now I can go back to Collections, I can go back to Years, I can look through the entire photo collection looking for images that I want to add. So let's just go to these images here, and I'm gonna start selecting images like this, and hit Done. And now those images are also added to this collection. So any device that you have signed into your Apple ID account is going to have all of these images, so that you can see them wherever you happen to be. Now remember, there's always the favorite button, so when I'm in any particular album if I click on an image and I really like that image I can simply click on this little heart button down in the bottom area and once I do that that image is automatically added to that Favorites album up at the top of your screen when you go to your Albums, at the very top, you'll find it right there in the Favorites. And all of the images that you have hearts on are gonna show up there. So that's a really easy way to collect a bunch of images as well. We're gonna go in and start working on some images that we photographed today. And I'm gonna do that by going to my CreativeLive album and I'm gonna search through here and find, here's this close up shot that we did of the succulent plants. I like that image, and so we're gonna start working on that. The first thing that I wanna do is I want to push on the little edit button, which looks like little sliders. It's got three little sliders there. I simply click on that and I'm inside of the Photos editor. So once I'm in here you'll notice a couple icons that you need to get to know. The first one over here on the left is the crop. The next one is the filters icon. The next one is the adjust icon. And the final one is more. Now remember, there's always the magic wand. So if you have no idea what to do with this photo just click the magic wand in the top right hand corner and it'll do a lot of stuff. And the beauty is that you can always go back in and reedit the stuff that the magic wand already did, because it's all registered there on the list of adjustments. So you have a lot of help inside of the native Photo application and Photo editor that comes on your iPhone. You can do a lot of great stuff here, so let's get you comfortable with that and then we're gonna move onto sharing. So let's first go in and crop this image. Once we're in the cropping tool there's two options. I can either rotate it with the button on the left hand side or I can change the aspect ratio on the right hand side. So when I do that if I want it to be square I just simply hit the Square button and it gives me a perfectly square crop. Then I can move that around within the crop or I can change the size of the crop and then move it even further. So that is the cropping tool. Again, if I wanna go back to the crop options I can also click on Original. It's gonna take it back to the original aspect ratio and then I can crop it within that. But I want this to be square, so I'm gonna go to a Square aspect ratio. I'm going to move this around 'til I like that crop, and then I'm gonna hit Done. And that's gonna take me back into the main viewing area. And I can go onto the next image and start editing, or if I wanna keep editing this image just go back into the editor and then move onto either one of these filters. So if I click on the filter shows me a whole slew of filters that I could do. Much like the filters that you get inside of the actual Photo app as you're taking the pictures. They're right here. So I could use those. I'd rather actually work on the photo in the adjustment editor, which is right here. It just looks like a little nob. So I'm gonna click on that nob and this is where we can get really tricky. Inside of there there are three basic options. There's Light, there's Color, and there's Black and White. So if you click on this little drop-down triangle in the Light area you see all of the different options that you can play with inside of Light. Then you get the same in Color, you can do Saturation, Contrast, and Cast. Cast meaning the color cast. And then you can do Black and White. When you click on that you can see that you can change the Intensity of the black and white, the Neutrals, the Tones, and the Grain. So those are the options that you have when it comes to working on an image. So I can go into the Light section and I can choose Brilliance, Exposure, I can choose any of these to work on by just simply clicking on the line that I wanna work on, like for instance, Brilliance, and then I just slide to the right or to the left. And so as I slide to the left it becomes more brilliant, quote unquote, or it becomes less brilliant. Now if I want to move it back to the center as I drag it it will kind of pop into place, into the middle, if I wanna go back to normal. And then if I wanna go back to that list I simply click on this little list view here and that gives me the list. Now the other thing that you can do when you're looking right out of the gates, when you first open up your adjustment area, is if you click on Light it just gives you a general Light panel, which is a very interesting way to adjust your images. Rather than looking in that full list and trying to decide, do I need contrast? Do I need brightness? Et cetera. It kind of does it for you. It's just saying, we're gonna help you with this. You're gonna either brighten up your photo or you're gonna darken it, and we're gonna do all of the other adjustments for you. So I'm gonna click on this little slider and I'm gonna drag it up and I'm gonna drag it down and it's doing a whole host of other things. It's not just brightening it up and it's not just darkening it down, it's actually using a whole host of sliders. If I now click on the list view you can see all of the changes that it's made. It took the black point up, it took the Contrast up, it took the Highlights down, it took the Exposures down. It's doing all of that for you. And then what you can do is come in and say, well, I disagree with some of the things that it did, so now I can click on the Highlights and I can bring the Highlights further down or further up, depending on my preference. And you can then adjust from there. So it's kind of giving you a good starting point, but it's a little better starting point than just a magic wand that says, we're gonna do whatever we want with this photo. Okay, so then once I'm done with that I can go also to my color wheel. And the same thing is true with the Color. So I'm gonna slide it up or slide it down depending. And I kind of like it a little bit more muted. But look what it's done to the color. It brought the Saturation down and it left the Contrast and Cast exactly the same. So now if I wanna adjust the Contrast I can come in and play with the Contrast as well. And now let's go finally if we wanted it to be black and white we'd go under Black and White and you can either click on the Black and White itself and use the Black and White slider to do all of those adjustments, or you can click on the Black and White and go in specifically in and decide how much Grain do I want? I want a little bit of Grain. And I want the Tone to be a little bit brighter. And I want the Neutrals to change there. You can just see it happening over there. And then the Intensity is more or less the contrast of the photograph and so I'm going to make it a little bit more contrasty. Okay, so now that I've worked on all of those images, I like the way it looks, then I hit Close. And then once I'm done I just hit Done and I'm gonna go back into my photo viewer. So if I want to then go back and look at that photo one more time I can always go to this little red revert button. And if I click on it the photo will revert back to the original and it will be exactly the way it was when I took the photograph. So with that in mind then my suggestion is go look at a photo and start playing with it and don't be afraid of what you can do with it, because you can always revert back and start all over again. Now I mentioned to you that there's a little button down here that's called the more button. And if I click on it it opens up all of the other external editors that I may have on my phone, like Photoshop Express, or you might have VSCO or some other type of application on your phone. Before you go to other applications let's get you comfortable with the phone and the native applications that already exist when you buy your iPhone. So once you've edited and adjusted your images now you wanna share them. And of course, the easiest way to share them would be automatically to a shared album with all your friends and family. And we've already talked about making those. If you do that you don't have to email it or text it to somebody, because if they're attached to the shared album it will just automatically be delivered to them. So what we're gonna do is show you how to do that very quickly again. You simply, I wanna share this, you need to go over to your shared album and find the shared album that you wanna share your images to, click on that shared album. Once you're in there there's a little plus button at the bottom of all the photographs. Click on that plus button and then you need to go find that image. So the best way to do it is to go to the Albums and go into, ours is the CreativeLive album. And I'm gonna go down to the bottom and there's the plant that I wanna share. I click on that and I hit Done. And then I just hit Post. I can also send a message saying A plant for you and hit Post. And now that image has been added to a shared album, which is shared with my family. And so that's how we share immediately to people who are attached to our shared albums. However, there's also another option. When you're looking in an image if you wanna share, simply click on the bottom left hand corner, there's a little box with an arrow pointing up. If I click on that it's going to ask me how I want to share it. And pretty much any application I have on my phone can be used to share this image. I can share this to my Messages, to Mail, or any other application that happens to be on my phone that will accept a photograph. And so that's the easiest way to share your images to one person really quickly, but remember, the shared albums are a great way to share your images constantly with your family and friends. Now you don't have to photograph everything with your phone to use your phone as a photo editor. You can also shoot with a regular SLR type camera and just take the photo card, plug it into a card reader, and I'm gonna just plug it into my phone, and I can import directly from the card onto my phone, and I can work with them even if they're raw images. So doesn't necessarily have to be a JPG and I can be working on photos on the road on my iPhone.
Ratings and Reviews
FoToEdge
This was a great starting pointing for using the iPhone Photo App. Very good quality and easy to understand. I do hope that Jared Platt makes a new video with in-depth use of the upgraded 13.3 iPhone Photo App with the iPhone 11 Pro Max. So much has changed.
a Creativelive Student
I learn some new tips for sure. Thanks for sharing Jared and keep the good job.
Nikolaos
A basic guide to using the Photos application in your iPhone. Short, useful, to the point and cheap (especially when on sale!)
Student Work
Related Classes
Mobile Photography