Lessons
Class Introduction
01:51 2White Balance
08:07 3Mixed Lighting
04:06 4Color Contamination
12:33 5Camera Files & Settings
05:09 6Color Management
07:04 7Exposure
05:00 8Quality of Light
07:36Lesson Info
Direction of Light
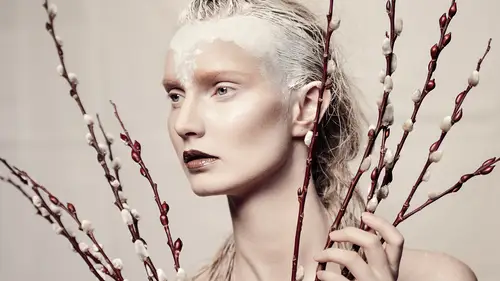
We talked about that direction of light, or we talked about that quality of light, picking hard versus soft. For portrait photographers, we usually go somewhere in the soft range. But then how it's showing the skin also depends on where you place that light. And so in the photo I showed of the girl where I said "It's really soft light," I had the light flat to her, right. I was shooting her like this. The light, the window is behind her, but the V flag is behind me. It's super flat. When you have flat light, it doesn't rake across the textures, or the wrinkles, or anything. It fills in underneath the wrinkles so you can't see them. And it fills in on the sides of the texture of the blemishes so you can't see it. So it's soft light and then flat. It looks beautiful, but no shape. So that's what you have to figure out the more you know about photography, is when you move the light off to the side, you create more shape to the face. You'll create more shape to the cheek bones and more scu...
lpting to the face, a little bit more dimension so that they look 3-D. But when you make them 3-D, you also make the blemishes and the wrinkles 3-D. So it's you gotta figure out what your balance is. So... If you wanna take a look. So for example, this girl. Photographing her straight on with a hard light. I'm gonna stick with the hard light in this one. And obviously I see her blemishes and her pores, but the light is flat. So the shadows, there aren't any; it's kinda flat on. But I move the light to the side, you see 'em more. 'Cause as I pull it to the side, it's raking across the skin; it gives depth to the pores and the blemishes. And then if I actually light her from behind, even with a soft light source, that's when I get the most depth, all of a sudden, even on the first shot. In this one, I am using a zoom reflector: really, really hard light. I can see 'em, but not so much. In this third one, I'm using a soft box, and I can see it so much more. But I said that a soft box doesn't show texture. Well, it's a combination. 'Cause the fact that it's lighting her from behind, is raking across the skin, giving a buncha texture, and it makes it visible to the camera. So it's position of light and the quality of light, those together. So the most forgiving, least texture, is gonna be flat on soft light source, but that's super boring, usually. The worst is gonna be hard light source raking across towards camera at an angle. It's interesting, but really unflattering. So you gotta figure out where in the universe between the two of those you wanna exist with your photography and your lighting. Also know that when I talk about direction, I don't just mean side to side, I also mean up and down. So if you take a look, as I raise the light up, it gives more dimension to the wrinkles and the bags under his eyes. But sometimes with models I raise that light way up 'cause it gives definition to the cheek bones and the jawline, and I like that. So... What's your balance? If you have somebody with a very round face, you don't wanna light them really low because it makes their face look as round as possible. Straight on and low, skin looks good, face looks round. Higher up and to the side narrows the face, shows the wrinkles and the textures. So these are all decisions you're always gonna have to be making.
Class Materials
Bonus Materials with Purchase
Ratings and Reviews
Amy Vaughn
The topic is too big to cover all the solutions in depth in such a short amount of time, but this seems like a great overview for beginners to understand the range of problems with making skin look good in photos. Lindsay does a great job of making her class topics easy to understand.
Frank Gutierrez
I just love Lindsay's work! It's so impressive; especially the sampling photos captured of the elderly gentleman. It brought all she taught throughout the video together seamlessly! I'm so going to watch this over and over again!
Danielle
Great primer on skin tones, lighting, and considerations for different types of skin. One of the few teachers that discusses dark skin tones!
Student Work
Related Classes
Glamour & Beauty