Lesson Info
6. Scaling Images for Export
Lessons
Lesson Info
Scaling Images for Export
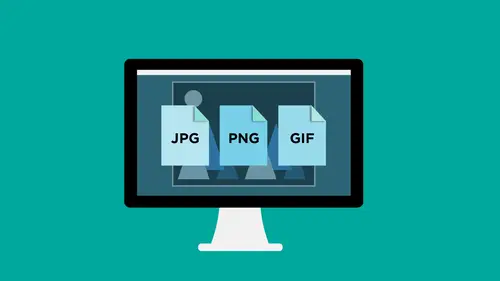
going through in saving these files as the right file format. Incredibly important to Dio, It's really simple and straightforward. The things you have to remember file types for which one you're going to be using is going to be for Web. Is it going to be for a print actual resolution? Is it gonna be low resolution image for the Web High resolution image for print? When you go into vector here and you're dealing with vector based files or you're going to use it just for print purposes, you can save directly from illustrator as an illustrator file or a pdf or if you're going to use it for the Web, you can always go, and you can always export this for the Web as a PNG in order to get it saved for the Web. A couple other things about a photograph Here's that you can understand how the scaling actually works when you go in and you have a photograph and I go under the image and I go under image size and I call up my photo. I'm gonna bring this back to my original photo here and start with my...
original that I've got to go under the image menu under mode RGB to go under image size and I'm gonna see my image right here. I want to show you what this looks like when you and larger file or you reduce a file how the file changes. If I go in to my image size here and I make this file much bigger, I'm gonna turn off the re samples. We can see how this looks. If I go in and I begin to make my file bigger and bigger and bigger and bigger you notice as my file gets bigger, my resolution goes down. Same amount of information. I'm stretching it over a larger area that is reducing the quality of the file just like that. As my file gets smaller, you can see that my resolution goes up so you can see that direct correlation. But I know a lot of people have a hard time trying to understand this. Just think of the air in the balloon as you, ADM. Or air to the balloon. It gets bigger, but it gets thinner as you reduce the air, the thin the wall of the balloon gets thicker and it gets smaller overall. So this is just in photo shop under image size here, and I've turned off the re sample and you can see bigger the file. Lower the resolution. Smaller The file, the higher the resolution So you understand how that works. The key to this is always have an image that's larger than you need. You can always reduce the amount of information in the image if you have a very low resolution image. If I take a low resolution image here and somebody has sent me a image, an image that was Web based and I opened up this image and they say, OK, I need to use this for print. I need to find out if they're sufficient amount of information to use for print. So if I go under my image menu, I look and it's RGB mode. I can always convert that to see m y que just by converting that right there. But I'm gonna go under image size here, and I see that this image right here is 2. by two inches at 300 pixels per inch. Okay, I need this at eight inches wide. Well, if I go in and I just go into photo shop and I just make this bigger. Here's what happens. I can't just make this larger without having some type of consequence, and this is very common. So I look at the resolution here and people get very worried because it's like, Oh, it's only two inches. I'm gonna make this eight inches wide So I simply go. We have to make this eight inches wide. Well, here's what's happened. It's taken that file and it's gone in, and it's made it much larger. Originally, it was about 1.37 megabytes. It's now 12 megabytes. How did that happen? Well, it faked it. It went in there. It stretched the image large, and it filled in a whole bunch of information when it stretched it large. It just looked around all those areas and it says, Okay, here's the pixels that are going to go in. What happens when you do that is you significantly degrade the image. When you start off with a small image and you go into photo shop and you make it bigger, there is no magic. You're still gonna end up with a poor quality file. You can always reduce files down, but it's very difficult to make a file larger and not degrade it significantly. Just because you can come in here in the photo shop and make it substantially larger doesn't give you a good file. When I do this and then I zoom in on it here. It may look halfway decent, but when you look at close here, you can see everything is very, very blurry and out of focus. And when you try to print this, you're gonna notice how poor of a quality that image actually is. So when you go into your enemy size here, we can always make it smaller. But if you go in and you drastically make this larger here by going into making bigger, this doesn't work well for you at all. If this is the only thing that you have and you don't have any other image to use, you have to make it bigger. I just want to let you know that the image quality is going to be significantly degraded. It's the same concept of going into your checkbook and just simply going in and adding money into the checkbook. without actually adding money into your account. It shows that you have more money here. I went in that gave it more information, said Okay, just make it more. But that doesn't is not going to be realistic. It's going to actually degrade the image significantly. You know you can do it. Just one warn people that by doing this there is no magic pill that this actually has. That just says, Wow, it can recover all this information. Once you have a bad image or a small image and you scale it up, you're going to significantly reduce the quality of the file. Always start big. You can always cut things shorter. You can never cut things bigger. So the saying goes. But that's basically what we have in terms of saving your files for Web or for print. Keeping in mind that this was just a very basic overview of how to do this, and hopefully this is the kind of thing that people can get in there and understand a whole lot better and get in and actually see how this works. Now we do have a much more advanced video out there on all different types of files for people who want to take this a step further. But this is just to get the basic understanding and the basic terminology. So when somebody sends you a file, you can talk to that point saying, Okay, I need a higher resolution file or I need something larger for print or I need better quality. Or it looks like you scale this up or if you are trying to send something to somebody and you have to ask the questions on what is going to be used for so very simple. Overall, hopefully this was very helpful. And check out the video on the file formats, which will take this to the next level. Keep in mind when you get this video, you will get this presentation at the beginning. So if you need that for reference, you can have that. And I hope this is a big help
Ratings and Reviews
Suzanne Strahan
Thank you! This class was very easy to understand. I never completely understood resizing. Thanks to this video, now I completely understand.