Lessons
Lesson Info
Class Introduction
welcome everyone. I'm Jason Hoppy, and today we are going to be covering the image trace feature in Adobe Illustrator CC. And if you've ever used image trace before, there's a lot of things that you could do with Image Trace. We're going to show you just about every aspect of image Trace today to show you all different types of files that we can use from hand sketches, two photographs and create photo realistic vector content. We're gonna start off with just the very basics of what we need to get into Illustrator in order for image trace toe work the right way. Now, illustrator will handle just about any image file you can throw at it. But the biggest thing is understanding the quality and the contrast that goes in to control what comes out in the end when we take a rast arised image and converted to vector shapes. So starting off, I'm gonna go into photo shop right now and I want to open up a new image that we have with our that I've set up here for our image. Trace and I want to show...
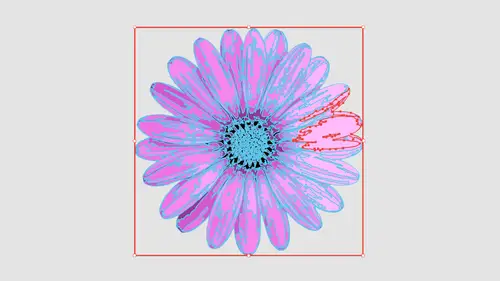
you the difference between the quality that you get when you input something as opposed to coming out. So going open up this photo shop file, I want to show you the difference of what the quality looks like and how we can go ahead and fix these things. Because whatever you put in put into you, the image trace feature is going to pick up all the attributes. So anything it's a little bit off, a little bit blurry or a contrast that isn't right. It's going to go ahead and adversely affect your outcome. So what? I had done this. I had set up a file and I've got my content in here. And these are some kind of embellishments that we have put in here lots of nice detail. And this is actually using a typeface that I've used. I've put this into photo shop, and so this is directly in Photoshop. Nice and crisp and clear. Now what happens sometimes they did this side by side so we can actually see how this works is. You may be taking a picture of something with your camera you're following. You may capture this, and it may be a little bit out of focus a little bit blurry, maybe a little bit less saturated than you would like. And I want to show you how this adversely effects the outcome specifically when you get into fine details. And here we've got kind of a softer look, a little bit out of focus, the details air there. I'm just gonna zoom out here and just have you look at these side by side and it really doesn't look that much different, But you're gonna see the difference on how this looks when we bring it into image Trace. We're going to revisit this thing in Photoshopped as we go along because I want to be able to show you what little corrections we can make in photo shop before we bring in the image that's gonna help us out. So an illustrator, I want to call up my image trace panel, which is gonna be under the window menu and choose image trace. Now, when I go in, may bring in a file into illustrator. You can do it in two different ways. You can simply just going to file open and click on the image that you'd like to bring in and opening up directly from there. or you could go into the file menu and choose place, and you can navigate toward to where that is and place the file. Either way doesn't matter as long as you have it opened up in Illustrator, your image trace panel is going to be blank until you select your image that you would like to trace with your selection tool. If you want to call up your image trace panel, we have it up here of the top of the control bar to and this is a little bit less informative than having the actual panel up. So in the image Trace. We've got lots of different sections here, and this could be kind of confusing as you go along. So we're gonna walk you through what we have. The upper portions here are just simple icons here for the defaults and the exact same set of defaults air here under the preset menu. And we have a whole bunch of listed default right here. So these buttons, all of this right here all the same and you go in and use any preset that you want. So a couple of presets as we go through here, depending on what you want out of your initial image. We're gonna go ahead and we're gonna choose a preset so high quality photo means gonna be high Res photo. You want lots of detail? Low rez photo. And here's the funny part. We're going talk about thes because the seem like, Oh, if I have a high quality photo, I'm gonna get a great vector rendering sure. Low quality. Okay, I'm not gonna get it is good. Not necessarily true. We're gonna talk about that. We can limit the number of colors in a file. We're going to show you all those, but we're gonna jump right to you. What's going to make a lot of sense for just some basic Leinart here? Black and white logo, sketch start silhouettes, Leinart and technical drawing. So we're going to start off with a black and white logo. And while this isn't a logo here, this is a really good place to start because what I have is black and white artwork. There are no shades of gray. I simply want to take whatever I see here and convert this to a vector shape. I'm gonna choose black and white logo and when I choose black and white logo, things were going to run through the entire process. I can tell you right now a file. You want to have a high enough resolution file coming in that is going to provide you great details. But don't go crazy on the resolution. If it's too big, photo shop will are illustrated. Will go ahead and tell you. Okay, I think this is really big. We're gonna get that warning that is going to tell you how to reduce the file size. So I want something big enough that it's going to work for me. Well, but I'm not going to ski on something like this and it's 600 pixels per inch right now, this is at 150 which may seem like a low rez file, but illustrator doesn't handle really big files very well, and everything that you do here is gonna take times. You're going to see a lot of progress. Bar is going on, and so there's gonna be this balance. We're going to find that balance in this video. So I've done my preset to black and white logo under the view menu. I want to see the tracing results. We've got several different results here. We have just looking at our source. Image outlines image with source All this other stuff tracing result is what I want to see. That means any time I make any adjustment, I'm going to see real time results on screen off what the final product is going to look like. These are all different ways that I can look at this I can look at it is outlines. This doesn't tell me anything outlines with the image source. Okay, this tells me, but nothing tells me what I'm really looking for other than doing the tracing results, and you can simply click on the eyeball, which allows you to go back and forth between your source image. When you hold down the eyeball and then let go, it goes into your preview of how this is going to trace. So this has already gone in and traced the image for me just by going in and choosing the preset. It's showing me the results of this. It hasn't actually performed the task and given me vector, but it's gone through and said, OK, here's what it's gonna look like, So I'm gonna go back in. I'm gonna show you. Just turn off this tracing. I'm just gonna hold the eyeball in the source image and you can see the right hand set of items is slightly blurry. Am I Go in and the traces that you'll see what happens. Let's zoom in here and take a look. You see the difference between this set of filigree right here and this how we've lost a little bit of this content and this is simply because the right hand content was just ever so slightly out of focus. This item right here it's got the little braided twist with lying completely lost the line. This is all with just a slightly out of focus image. The major portions here, where we have large areas of big detail, doesn't really affect him visually that much. But definitely the small lines of detail get lost very quickly, So the sharper you can get your image and the more focused and the more contrast you get definitely is going to help you with all the fine detail. Fine detail can get lost very, very, very quickly.
Ratings and Reviews
Hayden Brooker
Great overview of image trace, I had a basic understanding of how it works so I was looking for advanced explanations of how the different settings worked and best practices; which I definitely got! Great teacher and easy to listen to. Love how quick this was.
Karen
Fantastic! Learned new ways to use image trace I never even considered.
Student Work
Related Classes
Adobe Illustrator