Create Toned-Down Highlight Action
Lesson 5 from: Incorporating Actions into your Portraits WorkflowKristina Sherk
Create Toned-Down Highlight Action
Lesson 5 from: Incorporating Actions into your Portraits WorkflowKristina Sherk
Lessons
Lesson Info
Create Toned-Down Highlight Action
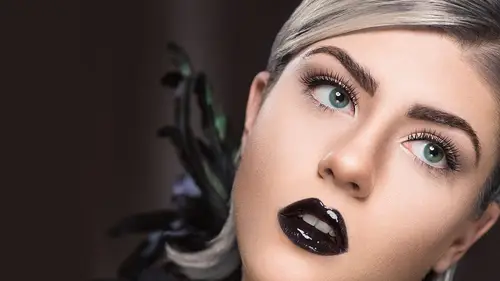
All right, so let's talk about one of my favorite commands in Photoshop, which is Select Color Range. I'm gonna talk about creating an action that's going to tone down highlights within your image. So you can see we've got this image here. And I kinda feel like her highlight areas are kind of hot. They're very bright. So I'd like to create an action that immediately just isolates those highlight tones and then brings them down. And I can do that through Photoshop completely, and I don't have to be the one that paints it in, which is really, really even more of a time-saving tip. All right, so what we're going to do is... Can I bring this up at all? Okay. Let's start by creating a New Action. And we'll call this Tone Down Highlights in our Default Actions. I've already shown you function keys and color, so I'm not gonna go there. Go ahead and hit Record. And then, now I have to pay attention, because if don't do this right, we're gonna end up with an action that doesn't work. All right,...
so the first thing I'm gonna do is create a hue saturation layer. And we'll call this Tone Down Highlights. Then I'm gonna change the Blend Mode to Multiply. Do you see how each one of these steps is being recorded here in our action? Then I'm gonna decrease the saturation to negative 20. Then I'm going to tell Photoshop where I'd like this effect to be visible and where I would like this effect to be hidden. So, how many of you guys think I'm gonna do a mask? You guys are so smart. Okay, so I'm not gonna do any painting freehand, right, because that will not end well with an action. So instead of that, I am going to go to Layer, Layer, Style, and Blending Options. Now if I pull this underlying layer arrow, can you see how the darkening effect is all of a sudden disappearing over the darker tones, all of a sudden disappearing over the middle tones? And then, oh, now it's only left... (students laugh) I know, it looks crazy, right? Now it's only left on the highlight tones. That's because this, this bar, here, this bar is basically taking the value, the brightness-darkness value of every pixel within this image, and it's giving it a spot on this line. Okay? So if it's a darker pixel, it's going to kind of live here. If it's a brighter pixel, it's gonna live up here. But each one of those pixels is represented on this line. So if I, you can see over here on the side. See over there on the side? As I drag this slider back and forth, the effect is being seen on some areas and not on others. But this looks like crap, because there's this big line there along where it's visible and where it isn't visible. You guys have probably seen this before. So how do I feather this line, okay? If you hold down Option or Alt and click on this arrow, all of a sudden your line blurs. Did you see that? You guys see that? So I can basically say, "I don't want this darkening effect "to be visible on any of the darker pixels "or any of the mid-tone pixels." And I want it to gradually be visible from these middle, lighter pixels to this lighter pixels. And then I want it to be fully visible from 182 to 255, all right? So that's kinda how this, this is like a really cool alternative to feathering a mask. All right, so because I'm doing this, I already know which values I want this to be at. So I want it to be 185 to 215 to 255. So this one's at 185. 181's fine to to 255, all right? So you can see that you're seeing it here a little bit. Yes, this looks real wonky at the moment. So let's go ahead and press OK. And then we're going to take the Opacity from 100% to 50%, okay? All right, so we have done all of that. So let's go ahead and stop the recording and then say a little prayer. We're gonna delete this, and then we are going to try and play our Tone Down Highlights action. Yeah! You see how quick that was? Just an immediate click. Okay, I see a little bit of a ridge. Do you guys still see that little bit of a ridge around the sides? All right, so it's not technically perfect, but we can just decrease the opacity a little bit more, and then that looks good. So with one step, with no freehand masking, because, remember, every image is gonna be different. If you have an image, and you wanna tone down highlights on this one, and then you have a second image which is horizontal, where the face is in a completely different area, it doesn't make any sense to darken these pixels on this area. Instead, you're telling Photoshop to be smart and look for the pixels which fall within the value that you want to be modified. If you're making a tone-down-highlights action, you're obviously wanting to modify the highlights. So if you can tell Photoshop to disregard all of the pixels that are medium gray all the way to black, 'cause you don't care about those in this specific action, this is gonna help out. All right, this is the way to do it. This is gonna help out. So let's say we've got another image, okay, where the highlights are in a completely different area, can this smart action work as well? Yes. It's a little heavy-handed, so just decreasing that opacity a little bit more totally helps, 'kay? So this is where that power's really, really gonna come in. At the end of this, you're just gonna be click, click, click, click, done. All my retouching is done. A quick note, if you are creating actions where the highlights, if you're working on different skin tones, if you have some models that have lighter skin and you have some models that have darker skin, the same way I have different skin-smoothing brushes for different skin tones in Lightroom, you would probably also wanna make a different action that is specific for darker skin tones for toning down those highlights. A good rule of thumb for me is coming into this Layer, Styles, Blend-if line and decreasing both of these values by 30, okay, and then creating a second action with those values as well. And then that'll give you a good range of highlights on darker skin, okay? So I have two of those. I have Tone Down Highlights, lighter skin, Tone Down Highlights, darker skin.