Lessons
Lesson Info
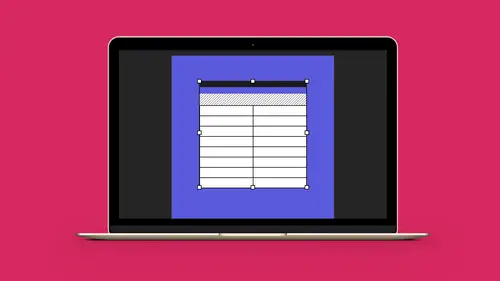
Add Paragraph & Character Syles
If I can apply paragraph and character styles to this because these are text containers, I wanna be able to go in and apply table styles and cell styles so that if I am doing these charts time and time again and I wanna have something that looks the same here. This row is gonna be filled, this is gonna have dividers, all that. I can do styles on my table. And those styles, if we go under Window, under Styles we have Cell Styles and Table Styles. So, just like we have paragraph and character styles there it is. So, what is a style for a table? Well, if we go in and we see the attributes here, if we go in and we select our table we can go in and create a new table style. And we can apply a couple things to this. And the Table Style allows us to go in and set up a stroke around our entire table. And we can watch and do this as we go. So, there it is. We can do our row strokes as well and apply our row strokes too, and create all this, do whatever we want to do. There it is and apply that.
So, then we have our border around the whole thing. If we would like to have row strokes, so we want Every Other Rows. We wanna have the rows be green. There it is. The next row is gonna be green as well. We click OK. And then when we look at this, go into Preview mode, all of my rows are green thick, thin, thick, thin because I went in and I actually created a table style out of that. Okay, simple stuff. Just like we do with paragraph and character styles. And so, name these something that makes sense. I always get after people who don't do this, so I have to do it myself so that I know what it is. Cause there's nothing worse than blah, blah, blah, blah, blah. So, that's going to be a table style. Basic, row strokes, column strokes, boarder around the table. A cell style goes a little bit further. So, if I have, if I select a row or a series of cells, I can go in and I can create a cell style. Very much like a character style where it's gonna be kind of specific. So, what's cool about a cell style is this. I can go in and it can be Text. So, I can say, when I get into the cell here I'm gonna make sure that it's got a little bit of buffer all the way around. So, it sets the buffer for the cell. And it's always gonna be aligned in the center. And that's how it's going to fit, right there. So, now I don't have to go into each one and say, okay, fit it to the top, the bottom. I just set my cell style right there. And I can do specific lines or strokes just on that cell. When I create a cell style it will override the table style if I say, put a bold stroke around this cell and I have my green strokes in my table, if I put a cell style, it overrides the table style in that area. So, that's something to think about as well. So, it's like, okay, there it is. Awesome. But here's one cool thing. I can create a cells style here that has a paragraph style nested in it. So, what would be cool with this is I could go in and say, hey, you know, I want when I select these cells here I want the bold lead in paragraph style to be selected as well. I don't have to, okay? I can just leave this blank and ignore it completely so that it doesn't go ahead and apply a style to it, which in some cases can be really annoying but in this case it's like, you know what, I'm just gonna dial this all in together. So, I click okay. So, now if I go in and I click on this, there's my cell style. If I click on this, I can apply my cell style right there. Cool! If I go in and I select this cell right here and apply this cell style, it will apply it as well. And one of the things I had was I have that make it bold. So, that's where the catch 22 comes in. Do you want to include a paragraph style with your cell style? You don't have to. You can ignore it so that it can just style the cell, but it could be one of those features that really helps you do more than one thing if that's what you wanted. So, kind of cool. So, table and cell styles can be kind of interesting. And I just want to back up really quick cause I wanna show you what happens. And we could not get this to work, and I had a friend confirm this. I'm gonna bring this chart in again. Going to go under File, Place, and I'm going to now apply my style to this by using a table style already applied. When I bring this in and I put it in here, You'll notice that it doesn't apply the table style. Even though I told it to. The worse part is is when you go in here and you try to do something with this. No matter what you do, it doesn't actually show up. So, that's the one bug that's in here and I wanna show you that cause it's really frustrating. And that bug is when you place this, whatever chart you do don't go in and don't apply a table style. Keep it as unformatted and then apply it when you get in. Cause nothing that you do will work. So, it's just a little bug. Hopefully, they fix it but I just wanna show you that. Cause you think, you know what? I'm doing this really good. I'm applying my styles. When I bring it in, it applies the style beforehand. No, it gets broken. So, there you go. Hopefully, they fix it. So, really quick way to go through and do this. But what happens when you have a really long table? This is all great for a table that just sits right here. But you may have a very long table that goes over multiple pages. So, if you have something like that, this could be a little bit more tricky. So, I have this class schedule that's gonna come in here unformatted table, there it is. I'm going to apply this to it. Gonna select everything. I'm gonna apply my table style to it. And it's going to go in. And it applies my table style. Awesome. It's a big table, so it goes way beyond the edges of everything that I've done. And it's very long too. In fact, it's too long. I can't even fit it on the page. I'm going to take all my content here. I'm gonna reduce it down in size so I can see this. And I'm gonna select all my content over the top and merge those cells together. Select my table again, let's get it all on the page here so we can hopefully fit it all in. And that's as small as I can go right there. So, you know what? I'm gonna change the orientation on this so we can see it. Great. Now, it gets to be a point where I can't jam anymore into the table. So, it won't let me reduce the size. And you see that the ID numbers here have been completely lost. So, I would have to go in and move these until I get all my content. I can go in, set all my settings right here. But all of these are too close to the edge. So, this is where I'd go in and I'd set up my cell style here, where I can set my cell style, apply this to everything, and that give my little bit of buffer zone. That kind of gets lost right there too. I've gotta keep everything in here. Great. But one of the problems is is that if this is a very long table, and I need to have this go over multiple pages. Or if I split this, I close this up, and then I draw another linked text container here on this page or another page, nobody knows what these headers are. And this is something that's really important. So, this goes to the next page. What are these in reference to? I don't wanna have to go in here. Which I could do if I really wanted to. And this is a really cool thing. I could go in and I could highlight a row or a column. And if I wanted to copy something, I could hold down my Option key and I could go and I could copy that row or column inside my existing table. I can't copy from one table to another, unfortunately. This is all one table. It's just simply flowed over two text containers. The problem with doing it this way is, of course, if I rejigger my text, now I've got this header sitting in here in the middle of nowhere. But not a problem. I can always grab it and I can always move it down some place. And I can just simply drag it to the next available location and put it in there. Now, this is clunky. This is not how I would normally do this. But I just want to show you how we can move things around. I could take this and I could move this from one column to another if I wanted to. The trick is when you get something when you merge all your cells, you can't go in and select and move these. That's the trick. But if I found that this number isn't in the right location and it's supposed to be here, I can grab that row or column and not include any merged cells, and just simply drag into position. Or drag it up here. And I can select this and it's like, oh, these two are supposed to be up here. There we go. Awesome. If I'd like to put in another one, I could always go in and hold down my Option key, click and drag, and it then provides an exact copy with everything in it right there. Super nice. I love it. But if you have merged cells, it won't let you go in and move it. I can move this one. No, it won't even let me. Cause these cells are all merged together. You know what? I'm just gonna get rid of this header right there and delete it. Awesome. Now, when I select them, now I can move them all over. It's gonna do that. So, putting this extra line in here and copying this, while I can copy it very easily is nice but this is an imperfect solution. So, what I wanna do is I want to go in and I want to create a header. And headers are nice because this is kind of like the cheater header where you actually reproduce it wherever you need it. Then when the type flows it's always in the wrong location. So, I'm going to get rid of this. And if you want to delete something right-click, Delete. Deleting a row is Command Delete. Deleting a column is going to be Shift Delete, right there. Those are those two shortcuts right there. I use them all the time. Command Delete gets rid of it. Okay. I'm gonna go back to my table, I'm gonna select the entire table. Gonna go under my Table, my Table Options, and I wanna create a header. So, where do I want the header to occur? Well, I want it to occur at the top. So, there first row at the top of what? Do I want it every text column? Which means every time I have a text container. Or do I want to do a per once per frame? Which, in this case, is gonna be the same thing. Or do I wanna it to happen every page? Well, I could do it every page if I have a chart that's gonna go over multiple pages and it's all gonna be linked together in one container. I'm just gonna put it in one text box and just have it flow. In this case, I'm gonna do it once per frame so that I have that. And you'll notice, when I set this up and I have my header here, it shows up right here. Now, there's no indication whatsoever in this table that this row is different from all the other rows, at all. The only difference is I went and I set it up and it gave me that buffer zone. So, I'm gonna select all the content from this row which is what I want to put into my header. And thankfully, I can simply just cut it out of here and I can select that row and paste it in because now that I have equal number of cells, I can copy and paste from equal number of cells to equal number of cells. I can then go in and I can set the color of this text to be something different. I can change the size of it as well. And that's my header, and that header will now occur every place where my text container is split. If I shore it up, the header stays exactly there. If I move it here, the header is there. If I move it to the next page, it's also going to be there as well. And I can easily go in and add a page here, and move this down. Make sure it's not facing pages. I can move this down, put it right here. And then that header shows up. The advantage to this is is that when I close this up, and it flows the copy down, that header occurs there so I never have to worry about, do I copy this? Do I put it in here? The type simply flows. That simple. And that's something that can be set up. In fact, and we create a table here, you can actually set that up there to begin with so that if you do wanna use this feature, you can always retrofit any table that you want. But you can also go in and add it to begin with. Footers are the exact same way. If you would like a footer at the bottom, it's the same thing as a header. The only difference is, it appears at the bottom. There's nothing special about it. Go in, Headers and Footers. I've got my headers and you can also do a footer as well. Not a problem. You can repeat the footer, you can repeat the header. Totally simple to go in and do.