Lessons
Lesson Info
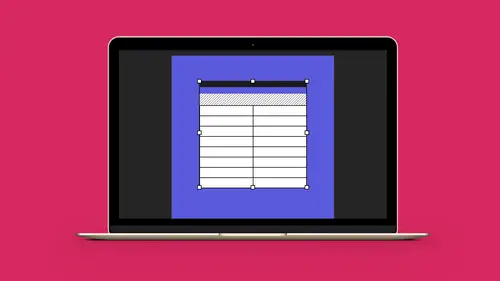
Create a Basic Table
A couple weird things about tables, if you've ever worked with InDesign and you have copy, which I'm sure you have, if you have a text container with copy in it, you know that when you shore up your text container, here, we get our overflow. As you change the size of the container, the type is gonna flow with it. Of course you knew that, but when you're dealing with a table, there's a couple weird things with it. One of them is that because this is in a text container, if you close up your text container, your table will also overflow, as well, because it's literally a series of text containers, here, all grouped together into a table format. So, if you open this up, you can open up your table and it will reflow. And, if you have a very long table, you can also close up your text container, click on the Overflow link or the overset text and draw another text container, either on this page or another page and you can see that your table will flow from one linked container to another. Th...
at's very nice to have, but here's the interesting thing: if you take and you close up the width of your text container, your table doesn't move with it. Okay, so you can have text and you can have your table sticking way out the side of your text container and it does not affect it at all, kind of weird, but that's just one of the things in InDesign that tables do. Jumping right in, I want to be able to take and put some content in my text container here, click on the Type tool and I can click on each cell in my table. A quick way to get around, just use your Tab key and it jumps from one to another. Now, what's tricky is that if you ever want to insert a tab into something in your cell, right here, that's a little bit trickier because I you use your Tab key, you're not actually making a tab, you're jumping from cell to cell to cell. So, that's kind of a little bit interesting, right there. If you ever try to do that, yeah, there it is. So, put tabs in there, hmm, doesn't work just by hitting the Tab key. Setting up your table, if you want to set in the rows or the columns, a border around, dividers, both horizontally and vertically, easy enough to do and this is all gonna be done with a toolbar or the Control bar. Now, one tricky thing with this is that when we have our cursor within any cell of our table, we are actually just inside a text container, so if we have content and we type it in here and we select our content, you'll notice that the Control bar is all of our text and paragraph formatting. If I want to get in and I want to actually edit the attributes of my table, I will need to select a cell, a row or a column or the entire table and I can do that in a couple different ways. If I right-click on what I'm doing, I'm gonna get everything that's associated with editing the text and I want to get into all of my Type or all of my Table-specific formatting controls and that only happens if I go in and I select an entire cell and then my Control bar will switch over to the Table formatting. How did I do that? We're gonna show you. If you select a row, a column or a cell, only then will you get all of the Table control features in your Control bar which can be frustrating, at times, because you want to do something and you may have the type selected in the cell, but that doesn't actually have anything to do with the attributes of the table itself; that's just the content of that cell. Select a row by clicking on the top of the row with your type cursor, or that's the column. Click on the row by going off to the left and touching the side of your table and clicking on that. If you want to select your entire table, go to the upper left-hand corner of the table, click on the upper left-hand corner and select the entire table. Once you do this, you can now go in and you can format the table and how things are going to occur in this table very easily. Starting off, we have our type, so if we have any text in these table cells, we can put in the size, the fonts, the leading, and the justification inside those cells. We can also go in and we can work with how, where this type is going to sit within the container. Is it going to be at the top of the cell, the middle, at the bottom or force-justified and can we turn this, flip it inside here, as well? We can control the number of rows and the number of columns by editing that; it just adds rows or columns to it. And then, we get to kind of the tricky part, right here, and the tricky part is going in and applying a style or a fill and/or stroke to our table. If we select the entire table and we would like to put a stroke on the table, when we select this, it's gonna go into default mode and this allows us to put an entire stroke around the table. We're not putting it around the text container, we're just putting it around the entire table. If we want to control the specific dividers, here, then what we have to do is go into our little window, right here. Anything that is highlighted in blue is going to be affected which means if I just want my entire border of the table to be affected, just my top, bottom, left, right little borders will be selected. If I would like all my dividers to also change when I have my borders around here, I need to go here and select all these little lines. Once I do, now I can see that these will all change at once. If I would like to change just my dividers, I will select just the dividers, they're highlighted in blue, and then only the dividers will change. This takes a little getting used to, 'cause especially on some machines, this is really small and it can be a little bit of an annoyance to get in there and try to select them and turn it on and turn it off and you think you have and you've clicked in the wrong place. You get the issue. So, going in here and setting the borders between the fill and the stroke as well as around here, it's messing with this little dialog box right there. One thing that's missing from up here is, and 'cause this toolbar is a little bit short, is the size of our rows and columns. I'm actually going to edit this right here and I'm going to get rid of my Table and Cell Style drop-down menu. I'm gonna click on the cheese grater, here, gonna customize the Control bar for my Table menu and I'm going to get rid of my Cell Styles, here, and it's going to call up these items. Now, if you have a laptop and a small screen, you will lose these because we will not have enough room for the Control bar. You can always edit the Control bar by going over to the far right side next to the shazam, under the gear. There's your cheese grater, click on it and you can customize your Control bar. You can also call up the table's floating panel at any time which is going to be your substitute for the Control bar which is nice because if you don't have a cell or a row or a column selected and you'd still like to change something, you can call up your Table panel and you will still be able to change it without going in and selecting everything. You can go in and you can just put your cursor inside here and change your content without your Control bar switching over. That's always an issue. You have to have something selected in the table in order for the Control bar to switch over to that, but your Table panel, you'll have it all the time.