Create Basic Shapes Using Pathfinder Panel
Lesson 15 from: Infographic Elements from Scratch in IllustratorJason Hoppe
Create Basic Shapes Using Pathfinder Panel
Lesson 15 from: Infographic Elements from Scratch in IllustratorJason Hoppe
Lesson Info
15. Create Basic Shapes Using Pathfinder Panel
Lessons
Class Introduction
06:47 2Basic Shapes Overview
05:55 3Start Creating Basic Shapes
13:36 4Edit Basic Shapes
07:58 5How to Use Corner Widgets
16:39 6Get Creative with Shapes
15:32 7Add Lines to Shapes
05:57 8Shapes with Offset Path
06:38Create Custom Lines
06:01 10Add Curves Into Shapes
21:49 11Curvature Tool
08:35 12Width Shape Tool
14:25 13How to Create a Dotted Line
06:00 14How to Segment a Circle
05:50 15Create Basic Shapes Using Pathfinder Panel
20:20 16Advanced Techniques in Pathfinder Panel
10:27 17How to Create a Slip Shadow
08:50 18Tips & Tricks for Chart Tools
12:34 19Combine Shapes Together
19:27 20Create Perspective in Shapes
11:34 21Combine Multiple Elements into One Graphic
23:17 22Create with Reflect & Shear Tool
07:26 23Create Implied Shading
17:02 24How to Make Graphics 3D
16:29 25Q & A
05:02Lesson Info
Create Basic Shapes Using Pathfinder Panel
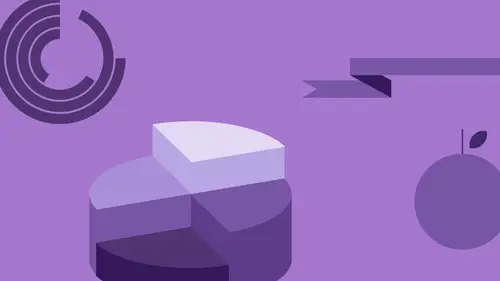
We are going to work with creating shapes using the Pathfinder Panel, which you're going to find under the Window menu, and here is our Pathfinder Panel. Now, the previous two sessions, we've just been working with normal shapes and just manipulating the shapes in order to get all of our infographics, or all of our icons here, which we've got a pretty good collection of right here. But we're gonna go and we're gonna jump into the actual building of the shapes here. And we have somebody here in the audience who'd like to add something. So I have a question. So I have a beauty business, and so I make soaps and just makeup products. So is there a way that we could possibly, maybe make something with lipstick or, in that Absolutely. Or make a graphic like that? Thank you. We can create absolutely anything. So we're gonna kind of, like throw that in there in this whole session. So we're gonna come up with some cool things there. Absolutely. So, using the basic shapes, and manipulati...
ng the shapes are wonderful, but at some point we need to begin to add the shapes together, take certain shapes, knock them out of each other, and this is where the Pathfinder is going to come in really handy. So, simple use of the Pathfinder, I'm going to start off with a circle. When I'm using the Pathfinder, I need two or more shapes in order for these to work. And I'm going to copy this circle so I have two shapes, one on top of another here, and in the Pathfinder, I've got my Shape Modes, which allow me to add the shapes together, or unite them. I've got my Minus Front, I have my Overlap, and then I have my Knockout, or my Exclude. These are, excuse me, the four Shape Modes that we have, so whenever we have two or more shapes, I can just take these objects and I can basically join them together. And, so, there is my shape. Well, what could we do with that shape here? Well, look-it folks, I think we just got ourselves a pretty awesome potato. Yes? Of course! There it is. That's a potato. I know! But that's like, really, that's a potato? It most certainly is, okay? So now we've just created a potato with two circles. What else can we do with two circles? Well, here's what we can do with two circles. I'm gonna go and I'm gonna take this, and, I'm gonna grab another circle here, copy this, and with these two objects here, I'm gonna use the Minus Front. Now the Minus Front means whatever you've last drawn, or if you've gone into your Object menu and Arranged your objects, whatever is the front-most object, that's gonna go away. So, Minus Front, I result in this shape. So what's ever in front goes away. Now, a unique feature with this is, if I have multiple shapes here, whatever is the foremost objects, if I have multiple objects, every single one that is in front of the back object, go away. So with three objects, the front-most object, the second front-most object, those are all going to go away, and I'm left with just one object in the back. So, it's a little bit tricky when you start to use the Pathfinder Mode, but keep that in mind that when you use Minus Front, every single object in front of the back object disappears. You only end up with one object. So I can go and I can give myself a little moon, right there. Which is pretty awesome. So, two shapes minus the front, there's my moon. Well, I'm gonna take those same two shapes here, and the next Mode I'm going to use is gonna be the Overlap. So, where these two overlap is what's going to be left. I have them overlapping. You can see that shape in there, and when I do the resulting overlap, those two objects, where they touch, come together. If I have multiple objects together and I have several like this, when I go and do this, and I do the Overlap, I'm only going to get where all the objects overlap. So, kind of interesting, and I have a little eyeball. Mmmmm, look at that! I also have a leaf as well. Ohhhhh, look at that! Wow. Awesome! Okay? So many things that I can do with these shapes. The last shape is going to be the Exclude overlap. And what this is going to do is I call this the donut effect. And there's two different things that I can have here. If I would like to go ahead and create a shape where I see my original shapes, but where they overlap disappears, this is the method that I'm going to use right here. And there's a known issue with the Pathfinder Panel. You'll see here, when I hover over these, I don't get the tool hint. Well, for some reason, the little tool hints are offset. So if I hover over this, it, like, says Merge. It isn't, cause this is actually Merge. So the tool hints are offset and it's been that way for a while. So that's the one thing that doesn't work correctly in here. It's a known issue. But there's my overlap. So the resulting overlap will knock out where everything's touching. Well, I call this the donut effect because I can take a shape, like so, and two shapes, and with the overlap I can then knock that out, which actually knocks it out to the background. Hence, the donut effect. Now, if those two shapes are overlapping like this, and I use that, then that's going to give me the negative space right there. But if they're inside each other, then they will literally punch a hole through the object. So, in case I want to do something like that, that's why I call it the donut effect, 'cause you can make a donut this way as well. Pretty cool. But all these shapes, all these Shape Modes here have to be shapes. And it isn't uncommon where people will go and they will take a path and have a path, and they would like to merge the path and the object together to form something. And so I'd like those to come together. Well, I can't because when I'm using my Shape Modes, that requires that I actually have closed shapes. A path that's open is not a closed shape. So if I merge these two together, I would like this to have this little handle coming out of it in that shape. Not gonna happen. Something really weird happens. And it's like, okay, so I get a moon with an outline. Yes! Because, you'll notice how this says Shape Modes? You can only use shapes. And this is not a shape. It's just simply a Path. So, how do I go and I merge these two together? Well, any time I have a Path, I can convert this to a Shape. I turn off my grid structure right here so we can see what's going on. And, under the View menu, I'm gonna go into Outline Mode, which is Command y. When I go into Outline Mode, I can see the actual shapes that are creating all of my objects. And in the Preview Mode here, I see that I have my moon and I have my little handle, but that handle in Preview Mode really is just a line. It isn't actually a shape. If I want this to be a shape so I can merge them together as shapes, I need to turn this into a shape. So any path that I have, I can turn that into an actual physical closed shape by selecting that Path, going under the Object menu, and choosing Expand. Expand will then take that Stroke, and it will give me a Fill and create an actual rectangle that looks just like that Stroke. Now when I go into Preview Mode, now I see that that is a closed shape. Add a closed shape and a closed shape together when I use my Pathfinder tool, are going to unite everything. How do I actually know what's going to win? Well, whatever is on top, whatever attributes or colors that are on there, if I go and I put a Stroke around this as well, like so, this is going to be the winning object. It's in front. When I use the Add feature, or all these other features, one that's in front, all the attributes get inherited right there. So that's how I can take a Path and turn it into a shape to make it work. Any time I want to use a shape and a line here, the Shape Modes will not function correctly. You'll get some weird object, or nothing will happen because a shape has to be a closed shape. I can't have an open Path. But, having an open path can allow us to do other things. So, I very easily could go in here and create all these different shapes. I mean, look, we've got and eyeball, we have a moon, we have an offset ring, we have a leaf, we have a potato. All like that, just by going in and creating these shapes. But I'd like to go and I would like to do a couple of other things with these objects. And so, I'm going to do a little bit more elaborate setup here. We did coffee mugs this morning. I'm gonna do another coffee mug right here. I'm gonna take my shape, and what I'd like to do is I'm wanna turn this into a coffee mug. So, using my Pathfinder Modes, I'm gonna just really keep this simple, and I'm gonna draw a box over the top here, and all I wanna do is, I just wanna cut off this oval right here. So, using the Shape Mode, I'm just putting a box over this, and this box is going to be what's a chop-off. So, I take that and I go to the Minus Front command. So whatever's in front disappears, and whatever's behind it goes with it. Awesome! I'm gonna do the same thing with the bottom of my cup, and I'm going to put a rectangle down here. I'm going to select both of them, and I'm gonna do Minus Front, no that was Add, do Minus Front, and there is my little coffee mug, right there. Now, I could go in and try to curve the corners and pull them in the same rate, but it's a whole lot easier to do this. So basically, whatever I put in front, I can essentially just get rid of. So, put an object in front, and away it goes. If I wanted to do something like this and I wanted to cut out to make kind of like a little hole in this, I could put an object here and then I could use the Minus Front and it just takes that right out. If I wanna do a little nibble on the leaf here, I could put some circles on there and it makes it look like the leaf has been eaten away. But there's other cases where I may be doing a page, and I would like to do that little page turnover on the corner, and I use these icons all the time. Like, all of this. This is exactly how I created all these icons for another class that I've done. Well, it's really easy to go create this little edge. I could do it very difficultly and try to go in and add points and then move the point and flip it over. Simple as can be. I'm gonna take my shape. I'm gonna take another rectangle here. I'm gonna turn this at 45 degree angle by holding down my Shift key. It's gonna put it at a perfect 45 degree angle. I'm gonna put it right there, and there's going to be my corner. I'm gonna turn my grid back on here so you can see. And I'm going to get that center, so that it matches right there at the edge. So you see the center of my box matches the edge. Now, if I select both of these, and I subtract the front, I lose that corner. So now I'd have to go in and draw another little corner here. And that's not what I want. I actually want this little corner piece as its own separate piece. So, what I'm gonna use is I'm gonna go to the Pathfinder Modes down here. And the Pathfinder Mode that I'm gonna use is gonna be the Divide feature. And the Divide feature opens up a whole new world of being able to separate things apart, but not actually delete anything. So if I select these two objects and I use the Divide function here, it's gonna go and every place that it overlaps, it cuts everything apart, but it leaves them as their own separate shapes. Now the key to this is, whenever you do this Divide function, it's always going to group everything together. So you need to go in under the Object menu and Ungroup this, or else it won't come apart. Once I Ungroup it, you can see I have now all of these separate shapes, which I don't need this piece right here, but I do need this piece, and that's what I wanted. So I'm gonna get rid of that extra shape. I'm gonna take this one, and I'm going to rotate it right around, and then I'm going to change the color, and I have my little corner piece. Yeah. Nice. I have my leaf, and with my leaf here, I would like to go and I would like to cut this in half to do a light green side and a dark green side. So, I can take my rectangle, and I could rotate this at a 45 degree angle. Put that so that it perfectly overlaps the leaf, select both of them, use the Divide function. We need to Ungroup it so that we can get rid of that, and now I have two separate pieces. Just think of this as cookie cutters. When you're cutting through the dough and then you pull the dough away that you don't want. Now, with this I could go in and I could change the color of the green to give me what looks like a kind of a split shadow on there. It could be kind of cool. So that's a really quick way to be able to go and do this. Now, the great thing with the Pathfinder Modes here, is that these are the modes that you can actually use in combination with your lines. So, if I wanted to cut this ring in half right here, I could actually go in and draw a line through this, like so, and I couldn't do any of my Shape Modes here because it requires two or more shapes to work. But I could go in and I could use my Divide function, not based on a shape and a shape, but also based on a shape and a line. Because, really, all this pays attention to is the actual stroke. So when I do the Divide function with that line over the top and then I Ungroup it, now I have two separate pieces, which could be kind of cool. Cause then I can take this one, right click on it, reflect it vertically, and can put that there, and, uh-oh, here I go, down the path of creating something cool. And I can take this one and I can put that over there, and I can take that one and put it over here, and, oh, yeah, that looks like a really great spot-logo starting to happen, doesn't it? Mm-hmm. How did that happen? I have no idea, folks. It just happens. So, that's how we can work with that. Pretty cool! I like that a lot. So, using the Pathfinder Modes here, super-helpful! We have several different Pathfinder Modes here. This is the Divide, and going through here, I can't really show you the tool hints because they don't register correctly. I don't use most of these other ones. Pretty much the Divide is the one that I'm gonna use, because it allows me to chop up everything that I need and then put all of the shapes together that I want to right here in the Pathfinder Mode. Now, here's something really interesting. I would like to go in and I would like to take my page right here, and I would love to chop this in half. What I'm gonna go here is I'm gonna do this. I'm gonna take my line and I'm gonna add a stroke to it, dark blue just for dramatic effect, and I wanna take this line and I would like to add an Effect to it, and that's going to be kind of like a wave. So Effect, Distort, Zigzag. I get my wave, make it smooth, and I kinda like that wave. There it is. Now, I'm gonna put this over here and I know that I can use my Shape and my Pathfinder Mode to go ahead and divide that. And I would like to divide my page kind of wavy here, so that I can have like a little wave going across here and make a light blue, dark blue. So I do exactly what I know to do. I select both of them, I use the Pathfinder Mode, and I get this. Wait a second. I had applied a waviness to that line here. Aha! Let's take a look in Preview Mode and actually see what our line looks like. There's our line in Preview Mode, but there's what we see on the screen. Well, because any Effect that we apply to any of our objects here, these are just effects. So we see the effect of that, but the original artwork itself is still a basic line. A line that I can go and bump up the stroke on, change the color, round the ends, and such, but it's still just a line that gives the effect of having a wave on it. Well, if I really want this to be a wave, well, I'm gonna need to turn it into a wave. So, I can go into the Object menu, and I would normally go to Expand. But now I get Expand Appearance. And this is super-confusing to a lot of people and I've heard kind of weird discussions about that. So, we're just gonna make this nice and easy for you so you know how this is. Under my blog right here, I have the whole method of What is Expand Appearance, Expand, Outline, everything else. It takes you through step-by-step, and clearly explains it so that you know exactly what this is. I'm just gonna give you a preview of this here. When I apply an effect to an object, this is a wavy line effect. It is actually a straight line with the effect. It looks like a wavy line; it isn't. If I want that wavy line to actually be a wavy line, then I go in and I expand the appearance. Taking this appearance of a wavy line, and actually turning it into a wavy line, okay? Now it's still a line. So if I try to merge these together with my Shape Mode, it wouldn't merge together if I wanted to add or subtract here, because one is a path, the other one is a shape. So if I were then gonna go under here, my Expand Appearance is gone because what was a straight line that looked wavy now actually is wavy because the appearance has now made it actually look like it appears. The Expand is when I take this path and I actually break it into a physical shape. But in this case, what I would like when I'm in Preview Mode, I want my page divided as a wave, so I actually need that wave to actually be how it appears. So I can select those two objects, use the Pathfinder Mode, and cut them apart. Now I have that wavy line. And now if I Ungroup this all, then I can take this, and I can now make this darker, and now I get that kind of wavy effect. So, I'm using Command y to jump back and forth in Preview Mode here, because when you start getting into more of building with icons here, the effect of things, including when we did our width-shape tool on these shapes, here's a perfect example. We used our little spiral and we did the width-shape tool. In Preview Mode, the line looks exactly like the shape was. But in Normal Mode here, when we're looking at it, it clearly makes this a whole lot wider. But it isn't. It is literally an effect or an appearance that appears that way, but actually isn't that way. If I want it to be that way, I need to go and expand the appearance so that the actual shape matches what it looks like. That's the difference. So, now this becomes a shape here. So I expand the appearance, and have that. So, kind of interesting to be able to do that. A little bit of fun.
Class Materials
Bonus Materials with Purchase
Ratings and Reviews
Patricia Green
This class is so much fun! I gobbled it up because I enjoyed every minute. It begins my journey into infographics, something I intend to put in my portfolio. Jason Hoppe is a great instructor who really knows his stuff. If you want to have fun with Illustrator, this is the class for you!
user-a27ddb
I bought the first version of the course of Infographics and I strongly recommend it to anyone who wants to learn how to use Illustrator. Exactly as he explains in the video, this is not a course just to learn how to make graphics. At the end of the course you will be able to develop just about anything in Illustrator. Really! All the knowledge I have today of this tool, started from this course of Infographics to which he refers. Not only the content is comprehensive, but Jason is a great teacher, explaining everything very, very simply. I'm looking forward to watching this update.
scuevas1023
Jason, you ROCK! I learned a lot of things during this class. Thank you for being such a great teacher and taking time to share your knowledge. Will continue to purchase your classes. Sandra
Student Work
Related Classes
Adobe Illustrator