Tele-extenders and Outdoor Photography
Lesson 7 from: Innovative Techniques for Outdoor PhotographyGeorge Lepp
Tele-extenders and Outdoor Photography
Lesson 7 from: Innovative Techniques for Outdoor PhotographyGeorge Lepp
Lesson Info
7. Tele-extenders and Outdoor Photography
Lessons
Class Overview
06:28 2Types of Panorama for Outdoor Photography
18:05 3Gigapan and Action Pano for Outdoor Photography
09:46 4Additional Lighting: Light Painting, Flash and Ambient
27:06 5Extended Depth of Field
17:00 6Macro Photography Techniques
05:47 7Tele-extenders and Outdoor Photography
33:54 8HDR as a Tool
06:02Time-lapse Outdoor Photography
13:10 10DSLR HD Video
09:09 11Cinemagraphs for Outdoor Photography
09:50 12Photographing Birds
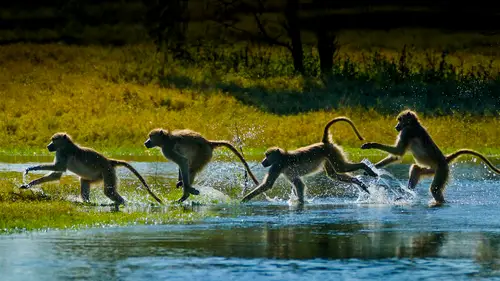
22:51 13Photographing Mammals
30:58 14Photographing Birds and Mammals Q & A
08:30 15Macro Photography and Flowers
28:37 16Photographing Butterflies
11:37 17Photographing Snowflakes
06:00 18Photographing Landscapes
07:25 19Photographing Lightning
05:22 20HDR Landscapes and Time Lapse
27:54 21Final Outdoor Photography Q&A
18:06Lesson Info
Tele-extenders and Outdoor Photography
We use tell extenders for our macro I've mentioned several times already in this first segment that I've put it on the one eighty macro and I put it on the one eighty macro it gives me a three hundred sixty millimeter telephoto lens that gives me a two x magnification that's pretty interesting lens and that's not something you would normally buy and the quality is really quite good and you could do this with any of your telephoto lenses and you could it isn't just cannon it's other companies that if you could get these two to match up certain tele converters will not fit certain lenses simply because they just don't make together there's an element that sticks out and it won't work, so keep that in mind that we can increase that so here's another one of the those examples of the one eighty macro with a two x tell extender on it it's three sixty with two x and I actually use that gig a pen that I talked about you don't have to have a gig japan to do this you can do this off the tripod b...
ut it gets you back away from the flower and you could start doing a series of images and then put them together in your panorama software this gives me the equivalent of a ninety five megapixel camera you can't even buy one you know the medium format cameras that have like sixty megapixels will cost you thirty forty thousand dollars, but by doing a series of images and putting them together in the computer you khun get that kind of quality make big prince sent him out to you know, one of these companies that makes big prints and put it on aluminum or whatever and you'd be amazed at how wonderful it looks on your walls, so I took three shots across three shots across three in another three and then another three and then I found out that the center image the center area the flower wasn't perfectly sharp, so I took a sixteenth picture just focused on the center and they put them all together so I have a slight bit of stacking here but mostly it's a panorama or a composite image and when you put it all together as we just saw, you could make huge wonderful fifty inch by fifty inch prints and put him on a wall and you won't get upset when people go up and put their noses right up to him looking to see count the pollen grains in the picture so we could take macro photography that ten x easily with there are other ways to get beyond this, but from what are talking here, we're going to take this this is the rig that I had in my hand before when I was talking about just the flashes so we have a two x converter we have a one to five x macron's we have a flash system and now we're going to start talking about the stack shot what this is is just a focusing rail that has a little motor on the back of it is called a step motor the step motor can be controlled with a box like this and all the cables that would go to it and we could ask it to go down to his small a movement as two microns that's really small I mean I can go toe thirty forty fifty x and make those kind of movements and still be within the range of the pictures so anything from the but the six inches that we have here down to two microns per shot and we control this I control this from an ipad and uh so I can actually see where I'm starting and where I'm ending and I get my focus the way I want it but we can do it through the camera itself we have the lcd on the back of it you have software that you can hook up to your laptop and you can actually see what the camera is seen but the main idea here is that this is a step motor that moves in very precise increments and as many increments as you tell it to do from elektronik ce that air within this little box so by computerizing everything here that little rig right there is about five hundred dollars but again it's one of those things that it will do so many wonderful macro types of things from one x all the way to I've been using it up to like twenty six times magnification and it's still getting me pretty good results again you've got a two x one to five x that gives you ten x you've got all the light you need uh a copy stand would be good because you want to do this kind of work here where five xs that leads all the way out and we can see all the individual scales on the butterfly wing we can see the structure of the wing and you would think well this can't be very thick so you shouldn't have to take very many pictures but something like this might still take ten fifteen twenty pictures because the hills and valleys of this when you start getting the five x is very, very minimal there is no depth of field of buybacks and the higher the magnification less from nothing I mean there's nothing from nothing so we take a lot of photographs here's a basic rig that we have a copy stand that is this area right here we have this stack shot which we have here the information on this is in those notes that that you were talking about earlier here's the camera the one extra five x I have a little microscope stand here no microscope on it, but just to stand, we'll talk about that here in a moment. Here is the controller for the sack shot itself and most of you, if you're a cannon person, you have free software that came with your camera. It's called the utility u s utility and plugs into your laptop, and you can now see what the camera sees didn't cost you a cent. You probably didn't even know you had it known icon has something very similar to it. It is a program that you have to purchase, but it is available so you all of a sudden your laptop becomes a viewer for the camera and there was no extra price for it at all, so I'm looking at the image I can focus the image I can even do some of the stacking by some of the controls there on here, I can change the f stop the shutter speed and everything else on on the camera without even touching the camera, and you really don't want to be touching the camera when you're this higher magnification because you will actually get movements so that's one way of doing this and you fire the camera by just hitting a button here on the laptop, putting your a mouse on that and clicking and these air examples and butterfly wings you can purchase butterfly wings there several companies I think I've got it listed in my in those notes as one of those companies and if it's not on there you can contact me or go to my website uh but they raise they find places that raised the butterflies none of these were taken from the wild these air all butterflies that have been raised on once they lay their eggs to make more butterflies than they pat they die and we get a chance to use them for subjects and they're not that expensive they're not really very it's not bad at all you know you can pay two three dollars for a really beautiful butterfly so these are microscope bases you can see that this one's been cut off right here has had a big this is a zeiss expensive microscope that some university had but when they were done with it went electronic microscopes they cut this off and they didn't think anybody would buy it but they put this is another one that was cut off and has an x y axis on here and everything on dh they put it out there for sale and we bottom you find these occasionally on ebay there are some other less expensive microscopes where you don't care about the most microscope part what you want is the movement up and down and you want the x y axis that goes here this could move this way and it could move this way and that's makes for panorama as in miniature stacking and this goes up and down in very very small movements and that could be your stacking as well instead of a stack shot you can have one of these and as long as you don't go to higher magnification this little rig right here will actually do it for you and this is how I started doing my stacking with butterfly wings this was actually done with one of those microscope bases and not with the stack shot and this is a five x and notice everything is sharp from this corner to this corner from they're too they're up in the top so that's the whole idea when you're shooting this kind of we're not looking for selective focus on something like this we're looking for a cz much information as we can get and we actually took this all the way out to nine x by using it and a two ex extent tell extender on here you can see that this little part here is that little area up there but to put a butterfly wing underneath us and five accident what you do is you travel around the butterfly wing looking for beautiful spots it's looking for landscapes within a butterfly wing it's really quite interesting so we can take this to the craziness so here's a very small little butterfly uh the butterfly itself might be, you know, might be right about that big with both wings opened up so he's small and that little box that you can see right there is the area that you're looking at here you have green scales and black scales and red scales and you have checkerboard scales and I've done in twelve images at six x two composite this so that you can see it and then occasionally occasionally I would bring it all the way up to twenty four x and we'd look at what this area looks like and you can see here that this area's pretty interesting as well that's this area here so there's so much that could be done with one little butterfly. Now I've taken that same butterfly and I want to show you why I would go to the craziness that we're going to show you here. This is just a section of the butterfly it's one photograph but it's been stacked and it's twelve images to keep it all info, folks, but it's still a single image. The one over here is fifteen different images in each one of them is stacked, and it took six hundred and eighty two images to do that uh, don't let anybody talk to you while you're doing that because you'll lose, you'll lose your place so that's the area we're going to blow up and take a look at look at the detail. This is what we're going to put this big image upon the wall I have, this is about thirty inches by fifty inches on a wall in my house, and you can walk up and you can count scales. So this is what this looks like when you took the one image and you're blowing it up this big even though it's stacked it's not going to give you that much information because we're blowing it up really big. This is what happens when you take fifteen shots and you stack each one of those fifteen shots and now we're taking just a section of that. And now you can see every single scale that's why I go to that much trouble. So that's where the stack shot comes in I just showed you this unit right here. This is like a focusing rail with us with a step motor on the back of it. A controller and it hooks into your camera. It actually fires the camera at every movement it moves. It takes a picture of moves that takes a picture once you tell it where to start and were to end. You step back and let it do its thing, and you're strobe fires each time the picture goes off. It's not quite as simple as that. And it also has that you can get a power pack for it is the necessity. So if you want to work with it out in the field, you actually can it's it's not easy to do this was done in a hotel room. This is an african violent and just a small section of it. At three times magnification becomes a whole another world. The granular structure of the african violet becomes an important part of the picture. This is a feather now the feather isn't really flat. You might think it feather is flat. But if you tried to take a picture of it with a single shot it's the the areas up here in the areas down there just aren't going to be sharp. But by stacking it even at one x and by opening up the lens to maybe f eight at one x instead of the f sixteen or f twenty two, each photograph is sharper because that's the sharpest area of the lens, which is another advantage of stacking, is you use the lens at its optimum for each one of those images. So here's a owl butterfly and we're going to take this little section here it's a big butterfly but we're going to take this little section this little box that you see right here and we're going to blow it up and you can see every single scale it took eighteen images to get everything in focus from the front to the back it's not a lot of images it and it's something that serene stacker or helicon focus or or or photo shop can handle very easily it's just a matter of if you have you can do this with little micro movements with the base that moves up and down but the stacks shot is what makes this so easy and kind of automates the whole thing and that's a ten x with I put it to ex teligent tell the extender on the underneath that one extra five x lens so my my dog went to puppy camp and a puppy camp you know there's other dogs there as well and uh the dog came home and I had to take it to the vet for some reason the vet comes out and has a little petri dish and there's these little tiny spots inside the p tradition and she says she says your dog has lice it's like bringing your kid home from kindergarten and got headlights or something like this you say not my dog I mean didn't get him here so anyway um I said wow can I have those? She thought I was completely off of my off my rocker but yeah, she collected a bunch of them often and at that point we eradicated the rest of them that were on the dog but I took these and I cut some hair off of the dog and I started to take pictures of them a ten x and when people call you a nit picker that's in it which is an egg case of a lice so somebody calls you nit picker that's what you're supposed to be picking but I was very fascinated by these leis I had to put him in the refrigerator to slow them down because they can't move during the time you're taking all these pictures that they move everything you know all bets are off s o I shot these a ten x on some hair I cut off of the dog. I put these into this little grouping like this I took it to the vet and she put it up on her wall so that her staff would know what these license plate and it took one over to puppy camp and put it on their wall this's what there's looks like and everybody was happy now the vet if she gets in some new critters or something she calls me up and says, hey, do you want these you know these pics or whatever these fleas or something that I've got off my dog and it's great because that's some of the really fun stuff the photograph so she did call me, and this was not on my dog. This was on somebody else is gone and it za spy knows here tick and it's called a spinal because of all these spines on it which keeps it locked into the animal, these air found mostly in texas and southern states and places like that, but at three acts it took twenty images because we had quite a bit of a distance to cover here to get everything sharp. So then I got a little different angle and it five x and it's even uglier it five x and it was three x, but it took seventy eight images, and of course it was really cold and it wasn't moving whatsoever. Andi, we got everything from the very front to the very back sharp, but I went on the internet and there were no images of this tick that were other than, you know, with a microscope with a little tiny slice of sharpness or whatever. So we have the first really good three d pictures of spy knows here takes whatever that's worth and they're at my agency, so if somebody ever needs the pictures, we have I want to point out that the stacking can actually be a very interesting technique for commercial photography and for if you're a person who likes coins or stamps or it doesn't have to be ticks and butterflies in that type of stuff stacking is a very viable technique for lots of different kinds of photography and could be very useful so I just took a few coins I think I had to borrow these from somebody anyway if you have a subject which is reflective, how do you get rid of those reflections? I worked for three years for the med school at uc davis in california and we would get specimens and they would be moist or they would have reflections and bugs have reflections and other things have reflections rocks have jewelry has reflections how do you get rid of those reflections? I also did paintings this whole thing started with his cross polarization with big paintings I had these huge paintings and people put a glaze over the oil paintings to seal him and it's shiny and when you try to photograph him there's no way to get rid of all of the reflections because it's not uneven surface so we cross polarized and the cross polarization is we have polarizing material on the light source flashes in this case on both of these and they're both going in the same direction when you buy a sheet of this what happens is that there's an arrow on it and that's the orientation of polarizing material, so you cut them out and put in the same way so that there oriented the same direction. You then put a polarizing filter on the lens and the way to find out when it is crossed. If you take two pairs of sunglasses, polarized sunglasses and you rotate him, they black out, you've probably seen this somewhere along the way, and what we do is we go into the bathroom, we look through the camera into your reflection in the mirror and you rotate that polarizing filter, and when the two filters over the flash, his black out, you are cross polarized, and you mark that on the top of the lens so that you, every time you do this, you don't have to go into the bathroom and check, you know, find a mirror to check it out. Whether it's going so you have to do is put these on your butt that market the top, and you are not cross polarized, you lose five stops of light when you cross polarized that going black doesn't mean it's really black, he just lose five stops the light, so what does it do for you? Well, here is a bunch of rocks at the petrified forest in arizona, and if you there's lots of color and so forth in here, but there's also a lot of reflections and stuff that's happening off of these these glossy rocks and this is a shot what it looks like once he will remove all the reflections so here's an example of without cross polarization and with cross polarization and I haven't changed anything I haven't changed of anything and photo shop it just brings out a different set of colors, and it removes all these little reflections that air hiding some of the features and so forth in here, so rock specimens especially could be very useful. How about a subject that has wet areas on it? And this is just a cut tomato and there's no way that you're going to get rid of these reflections without doing some kind of mitigation in this case it's cross polarization and you can see here that the specimen in this case of tomato all of those were gone now you can't get rid of if you have let's say, a bunch of crystals, you're going to have a few little highlights because if you didn't have any highlights, you wouldn't have any light at all. What is this is doing is removing all of the scattered like this coming from different directions except for one direction and you gotta have at least that one direction that's why you lose five stops the light so keep that cross polarization in the back of your mind, you're going to come across something sometime in the future that you're saying, how am I going to get rid of the reflections? I'm gonna shoot this diamond or I've got a show to this rock or I've got to shoot this wept critter, a salamander or something, but I can't put him under water. I gotta have him right here and he's got to stay wet. Across polarization is your answer, and those notes has the sources for the materials and so forth. Tell extenders we've been using the two x on that one extra five x to get ten x we could put it uncertain lenses, which were designed to use telling extenders the seventy, two hundred zoom lens was the lens that was designed to have one point four two x converters added to it the big lenses such as the five hundred, four hundred, three hundred, the eight hundred we're all designed to work with the extenders. Now the little zooms that air the kit lenses that come with your cameras, not a good idea to put extender on those, because if there are any problems within those lenses, it just magnifies the problems you are going to lose some quality with the extenders in my testing in years, years back, I lost about ten percent of the quality with one point four and maybe twenty percent of my quality with a two x, but the lenses were so good that you couldn't even see it and I've done shots here will show you examples here that with two two ex converters on his eight hundred millimeter lens, I'm still getting very good quality that could be the cover of a magazine that's thirty two hundred millimeters. So early on, when digital first came out, I was in tanzania, and with a couple of two colleagues who are professional photographers and they still were shooting film, and I had just picked up the the the sixty or sixty d whichever it was that cannon came up with it was six megapixels, and I had my five hundred millimeter lens. I put it to exxon it the the sensor was a one point six crop factor, so your angle of view with sixteen hundred millimeters? Well, they had their four hundred millimeter lenses, and that leopard was way the heck out there, and I took the pictures showed it to them on the back of the camera, and they looked at that, and then they got home. They went digital, that was that was the defining point at that point, that what we could do this, and I'm showing this picture, even though that was this very first aspect of digital photography I could still show that image and it still looks pretty good as long as I don't make a really big print so let's take this to the next level so this is an eight hundred millimeter lens I had this cannon was there with me at this this was at the winter wings festival at calama falls which they have every winter and we had the eight hundred there and I put it to ex converter on it and a one point four converter on there and this was on a one adios won the mark four which has a one point three magnification factor so the ending quality the ending millimeters was two thousand nine hundred twelve millimeters which was the angle of view I use the angle of view is a cz my factor here is to that's what we would be getting as we look at it on paper but the way to get a sharp image with something of this nature was one we used the live view on the back of the camera this is not for flying birds this is for something that's stationary sitting out there we have a silent mode. I'll show you that here in a moment which is one of this it's on the latest night cons but it's been in the canon cameras for a while we had a hood hman loop on the back of the lcd to magnify that and to get the light off of it because we're in the daytime and then we had a cable release, so we weren't touching the camera and we had a big solid tripod that gave us a sharp image at almost three thousand millimeters if you didn't do all of these things, your chances are very mill very small that you were going to get a good result, but by doing that we're getting images of three thousand millimeters that were very usable this is the back and this is a canon cameras this was a five d mark three found in different ways the only place that this is not available is on the earliest of rebel cameras as faras the canon cameras are concerned it's silent lv shoot mode one and then you click on that you get mowed one motive you want mode one and when you're done taking those pictures, go back to disable because it does slow down your camera a little bit when you're using a motor drive on wanting to get fast faster uh frame rate then you want to be disabled on this but for general worked like this mode one on silent lv shoot what it does is it takes the last little mirror that is working inside the camera that I mean the big mirror you've got that taken care of with live you then there's this one little tiny mirror in the in the bottom of it that it removes that and we'll only makes that into elektronik shutter instead of that going up and down, and so you have no vibration whatsoever. These are the secrets to getting sharp images with longer and longer lenses, so I've got this eight hundred millimeter lens I'm working on this project with bald eagles in the smith rock area, which is a state park, and oregon and there's a nest about two hundred feet out in a big, tall tree, and I'm on a cliff looking almost down into it, and the eagles are landing and trees around me occasionally and so forth. So this eagle you can see here that's eight hundred millimeters and he's not very big, not as big as I'd like him to be. So I put a one point four converter on that gives me eleven, one hundred twenty millimeters that's better I put a to exxon sixteen hundred millimeters, still not as much as I want, but it's pretty good. So here's that reference for that eight hundred millimeters now I've got a two x and a one point four I have friends with converters that go with me, and I use all of their equipment to so there's two thousand two hundred forty millimeters two two exes now we've got a full frame eagle and his way the heck out that's, how far he is out there that's thirty two hundred millimeters, and that's what I really wanted, and the two to excess I stuck the one point four on, because I had it, and here's even a somewhat of a three quarters view of of the bird that's four thousand four hundred eighty millimeters I stuck with a thirty, two hundred millimeters, as my for this, that I would go, because the quality level with that was good from the video that I was doing. And the stills that I was doing with that lens, when I really wanted to get in tight to the lens, to the nest. Here's, the bird in the nest, and I had my own lenses of five hundred when I didn't have the eight hundred, I had a five hundred, and I have to two x converters. So that's a thousand that's, two thousand millimeters, and that's, the bird in the nest. So when I I also have the two, the two to excess, and I also have a one point four. So I put those that's twenty eight hundred millimeters, it starts to add up very quickly, as you double and double and double each time, so that's twenty eight hundred millimeters. And that's, as good as I would be, the two two exes was the two thousand millimeters was the most. I would normally go with my five hundred. But we have to use all those techniques we just talked about and maybe even a few more. So then we got the eight hundred and we put the two two exes on here. Now we had the babies in the nest. And look at this. We can actually see what's going on and then ask maybe a little bit of cropping here in the computer on this but there's the adult this is at sixteen hundred millimeters with one two x on the eight hundred. So we can see the babies and what's going on a little bit different angle than I had before. But I was now able to do photography in that nest and come away with stuff that I was pretty happy with. And they included video as well. A stills I went back and forth between them. So this is a wealth of equipment you can see here. And this is the five hundred on your doing video with the one d mark four and then this is the eight hundred with two two exes. Notice this little twelve millimeter extension two between here now in the canon camera system, if you can't put two converters together, you have the siri's won the siri's too in the syria's three the siri's ones will not go together s so you have to use the twelve millimeter to the siri's too will go together. The siri's three now will not go together. So as you combine these twos ones and threes, if you have that little extension tube around, you can make things fit all the time night kinds a little different, you'll have to experiment on and see what converters be real careful there's pins inside these cameras and if you six something on and doesn't want to go don't really grinded on there because you may be flattening pins and it may cost you a lot of money in the end, that type of thing. So anyway, this is the kind of things and I'm on this cliff and that nest is out here. We'll show you here in a minute. What it looks like this is this is the eight hundred with two x another two x and the one point four okay would work it no that's the five hundred to two exits in one for I take that back that's twenty eight hundred millimeters. Well, here is the other, uh, thing that really made a big difference and I use this. I use this for some macro things, but this is called a cam ranger. I'm not here to to make extra money for other companies, but this stuff works and I think you need to know about it even if it has a company in the monitor. I'm more than willing to tell you about it. So this is ahh wifi system and this wifi system is hooked into the camera. It sees everything that the camera is seeing. It now broadcasts this to my ipad and now I'm not going to show you anything on here because I don't have anything. The cameramen there aren't as good as is it illegal? But I have every control I have, the shutter speeds, the iso's I have all of this is I can tap on here and focus the camera. I have all of these capabilities without touching the camera. I'm away from the camera and I'm focusing, I'm changing of all kinds of settings and everything here I can go from stills to movies, I can change the esso and move things up and down for video with son you were talking about the sun, the clouds coming over this happens all the time, and you have to change your exposure often on, and I could sit there and do that. And I can let it run I can just sit there in a long chair and watch and wait for things to happen I mean I'm there for hours and hours for days and days and days it took three months for these youngsters to go from eggs tio fledging and I was there pretty much for to see all of it happen you know, morning after morning so anyway the ipad the cam ranger were a great way of not touching anything and the other thing is that when you double tap this it makes it much bigger on the screen so the focus at eight hundred sixteen hundred millimeters the focusing is so critical that the reason people don't think they're getting sharp images when they put a converter on their big lenses because they're not focused properly and you had seen you think well in the viewfinder I'm in focus and you look at this and you blow it up and you were missing it you have to be on the eyeballs of the of the bird at two hundred feet and you can't see that in the view finder so this one became a very very important tool to what I was working with so you could see me working with it there now there's the nest I was gonna have a narrow but there is the nest right there if you look very carefully at this there's too little white spots in year it's a long ways away two hundred feet doesn't seem like far but it's a long ways out there that's just an estimate on how far away it sometime it seemed like it was much further than that. So this is what happens when you have thirty two hundred millimeters you all of a sudden you actually khun see the pictures you can see the critters what they're doing in there you khun document what they're what they're doing from day to day their development and a naff type stuff is unbelievable experience to witness this day after day and then be able to capture it and this is the crazy part ok, so I've got to my friends there and one of them has got a cannon gear williams got night cotton here my best friend has got the candid here. Of course not not really I actually have a very good friend that has night conway and that's okay, but you can see here there's an eight hundred millimeter lens there is a two x there's a two x there's a one another to x I think that's a one point four and as I put a seven d on there because it had a one point six crop factor, I did the math on it it was fourteen thousand three hundred thirty six millimeters I put two tripods on here to keep everything still and this is what the bird looks like, a thirty, two hundred millimeters, and this is what it looked like. A fourteen thousand three hundred thirty six. The hardest part was finding the bird on and then trying to put the focus on the bird. Once I found it, and that was tough. But the point of this was, this is the assed faras and go. I can't use this photograph, except to say, g, wiz, wow, look at what you can do if you wanted to. But thirty, two hundred millimeters was really quite quite useful.
Class Materials
Bonus Materials
Bonus Materials
Ratings and Reviews
R. Hetrick
Amazing class! I particularly loved the macro and how to correctly take panoramic photos sections. George was not only a great teacher but he was super funny too. Would be happy to take any of his future classes.
Berus
I watched the entire class, and found it to be a very negative experience - in contrast to all of my other experiences with Creative Live, which had been very good. The problem with this class was the instructor. Mr. Lepp, rather than giving us practical, useful information, and techniques for approaching the subject of Outdoor Photography, instead used his time to show off his seemingly endless array of incredibly expensive and cutting edge gadgetry. For the first half hour or so, Mr. Lepp seemed pleasant and interesting, but it quickly became apparent that this class was NOT about anything relating to the art of outdoor photography. Instead, it was basically a seminar highlighting exotic equipment for the 1%. I have well over $25,000 of photographic equipment, but the arena in which Mr. Lepp plays begins somewhere around the $100,000 mark, and then requires a staggering ongoing budget for chartering helicopters, hiring guides, and constant upgrades to remain on the bleeding edge of gadgetry and accessories. From his gyroscopic mounts to his 40" printer, Mr. Lepp has it ALL and continues to spend, spend, spend. I admire his deep pockets, but I would have appreciated some real insight and technique and useful knowledge on actually getting great shots. (And I must say... Mr. Lepp's work... did not impress me to the degree that other teachers on CreativeLive have.) I believe those giving positive reviews here were more or less wowed by the sheer magnitude of his extensive, well-funded travels and his off-handed way of revealing the endless contraptions and combinations of gear he uses. The passion here is clearly about the gadgetry, and NOT about finding an original and creative voice in the arena of outdoor photography.
user-f9ff5e
George really prepared a lot of information for his class. It is true, he does have a lot of expensive equipment and we may not be able to do some of the things he does with a smaller budget, but it is good incentive for us to plan for the future. He seemed to share new information constantly and stay focused and I was able to take a lot of notes. He talked about many kinds of equipment as well as software and websites he uses. I am pretty impressed that he is so up to date with recent technology. He especially loves macro/micro and stacking hundreds of images for minute focus on really large enlargements (for example, over 600 photos for one butterfly wing). That can get boring if you are not interested in doing that. I can take those tips and apply them to landscape photography though. I think it is more helpful for someone already doing outdoor photography and looking for new inspiration or new techniques as opposed to someone new to photography in general.