Types of Panorama for Outdoor Photography
Lesson 2 from: Innovative Techniques for Outdoor PhotographyGeorge Lepp
Types of Panorama for Outdoor Photography
Lesson 2 from: Innovative Techniques for Outdoor PhotographyGeorge Lepp
Lesson Info
2. Types of Panorama for Outdoor Photography
Lessons
Class Overview
06:28 2Types of Panorama for Outdoor Photography
18:05 3Gigapan and Action Pano for Outdoor Photography
09:46 4Additional Lighting: Light Painting, Flash and Ambient
27:06 5Extended Depth of Field
17:00 6Macro Photography Techniques
05:47 7Tele-extenders and Outdoor Photography
33:54 8HDR as a Tool
06:02Time-lapse Outdoor Photography
13:10 10DSLR HD Video
09:09 11Cinemagraphs for Outdoor Photography
09:50 12Photographing Birds
22:51 13Photographing Mammals
30:58 14Photographing Birds and Mammals Q & A
08:30 15Macro Photography and Flowers
28:37 16Photographing Butterflies
11:37 17Photographing Snowflakes
06:00 18Photographing Landscapes
07:25 19Photographing Lightning
05:22 20HDR Landscapes and Time Lapse
27:54 21Final Outdoor Photography Q&A
18:06Lesson Info
Types of Panorama for Outdoor Photography
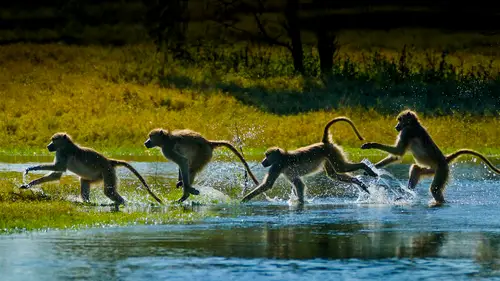
We're going to start with panorama is now when we talk about panorama is you think of maybe just this one a group of of images going across that we put together in one long picture but there's actually about eight or more I mean, you could probably come up with some other ideas. Types of panorama is we have composite panorama is combination panorama is handheld panoramas. Aerial panorama is macro panorama is multi hq camera panorama is we have the gig, a pen and something that I came up with a few years ago by accident, which is the actions action sequence panorama. So there are basic techniques. Almost all of the panorama is essentially have tohave these things that we're going to talk about here we have to set our exposure to manual as you take these pictures they have to match and if you leave it on automatic the camera wants to change. Is there darker area here, a lighter area there the camera wants to change that. So we want to be on manual we want exposed for the brightest area. ...
If we have a bright area and a dark harry within this panorama, if we don't expose for that brightest area when we get to it, all of a sudden it's burned out and we lose the whole thing we can always open up the shadows, but we can't fix a burned out area at all. We're going toe set the white balance to manual that can change slightly depending upon whether is a green area here in the red area here in the blue area here, the camera wants to change that we don't want it to change, we want to stay the same, we're gonna level the tripod, we're going to level the camera, we're going to overlap each one of these images by twenty to fifty percent and we're going to consider the composition and we'll talk about this as we look at the images, we want to have a beginning, interesting information in the middle and then some type of unending if it's possible it's not always possible, but otherwise we just have a long image or a tall image and, you know, we sort of wonder what's the point I mean it's big there are ways of leveling the tripod. I said that was one of the things we needed to do well, there's tools out there we could take by unlatch ing this we have ah, bubble level up here we can unlatch it quickly put that bubble in the middle, latch it back and we just leveled our tripod staff quick, otherwise you're doing one leg and then you doing another leg and you're doing another leg if you have a bubble on the tripod itself here's another one for bogan and gets our tripods you replace the center column, you loosen it here and you have a bubble level up here you immediately level it, lock it back down five seconds and you got it. So we also talked about leveling the camera and there are double access to access the a bubble levels that you can purchase that camera stores or online, but many of the cameras today have electronic levels in the last two cameras that I purchased have these seventy mark I'm a cannon a shooter that doesn't mean that everything we're going to talk about you you have to have cannon, but this is the back of one of the cameras and it's very nice in the viewfinder and on the back lcd weaken now level the camera very quickly, it's wonderful! I have a tendency to be off kilter quite often when I'm shooting pictures, so this is supposed to help us. So this is a composite panorama I'm on a road in northern patagonia and these guanacos a group of them very curious, they're looking at me, I could take it with a pretty much a normal type of lands I'm in a vehicle on a dirt road and if I take it with a let's, say one o five or something like that I'll have to crop the top in the bottom and the quality is not that great. What I would want to do is I had a one to four hundred I goto four hundred. I take a series of three shots very quickly knowing this is this pre visualization thing knowing that when I get back in another week or two, whatever I could put this together in the computer so I've got better quality, but I have to do it quickly. These guys move around a little bit. Fortunately, at this point they were watching us. What if you want to make a really big print, you wantto cover the wall with this draft almost the size of a draft? Well, you take one shot and you blow it up, and the quality is not going to be that good. So by taking a siri's of pictures and then putting them together, if you had one image that image, if it's a twenty one megapixel camera would give you a sixty three megabyte file by taking four of them and you're gonna have a lot of overlap in that type of thing here you end up with one hundred thirteen megabyte file that is equivalent of a thirty seven point six megapixel camera. You just bought yourself a camera that was four thousand dollars used the camera that maybe cost you a thousand dollars and you've now got the quality of a four thousand dollars camera and now you could make a bigger print we can take this a step further I have the five gs are the new cannon fifty megapixel camera so you can imagine what happens when I start making multiple images and rows of images the files become huge so you're out there and this is bosco del apache in new mexico and this is what's in front of you it's beautiful you've got the missed here you've got a bald eagle up in the tree got all these sandhill cranes across the sitting in the water and instead of again taking a wide angle shot and then cropping a top and bottom or not propping it all and you got all the sky and you got all of this water down below you take a series of five images knowing that by overlapping you can see there's a section here and there's a section they're they're the same this trees there this tree is there, this tree is there, you know that they're going to come together and if you have that practiced beforehand, you confidently go out there and immediately start doing panoramas there's a number of tools out there, I've got one of them sitting over here this is the really write stuff all you're doing is you're putting your camera in here by having by having this it stays in the same place now when you do a vertical panorama everything stays in line which is which is very nice now I've been doing it for years where I just kind of do it but then I've got a crop everything because there's no way that you're going to get it exactly right this way actually gives you everything to work perfectly there's a number of other tools out there to do your panorama but most of the time just by visually overlapping you can get a lot of this stuff done just by looking at it I wantto emphasize the fact that vertical and horizontal panorama is one of the things about vertical panoramas is that if you only have a small area of room on your wall and that's not a very big print and I want a big print but if you do a horizontal this is horizontal vertical panorama if you do a series of those and it's tall you have a picture this wide it could be four five feet tall and I have a number of them in my house to take up a small amount of room and they're beautiful whereas you know they're much more spectacular than just this little print that might have fit into that position so think of this is vertical as well as horizontal in this case we would take a siri's of horizontal images we would refocus every time we overlap this and what we end up with his sharpness here all the way through, and then when we get to infinity, we've changed it just enough each time to give us depth of field that we never would have gotten if we would have taken one single image so that's kind of one of the tricks we do for you, getting extra depth of field is to complete continuously, slightly refocus stop down quite a bit now there are lots of times when you don't even think about doing a panorama. I'm doing a milky way shot up in the sisters right behind bend where I live, and this is the back end of the sisters here, and I took it. I had a thirty five millimeter, one point four I stopped it down to one point eight, so I had a little bit more sharpness and the correct exposure there to get the milky way is thirty seconds and thirty two hundred s o so I took a siri's of images, and the milky way goes all the way up and actually is up above you. So why not do a panorama? By the time you're done? You're looking straight up into the sky, and the emmett image that I'm giving you here doesn't look like it's going straight up, but that's what's what you're actually capturing, so think of panorama and maybe a little different way. There are many times when they will actually work for you and give you something that you would not have normally gotten. We talk about combination. Panorama is this is mono lake there's a nest that here there's some, uh, people in kayaks in the picture. And I arrived at at the lake in the middle of the morning. And there was this fluffy clouds wasn't very exciting. So I decided to do it in a hdr, which it wasn't too take care of contrast. It was to try and change the color a little bit to give it a little bit different. Look instead of just every day. So there was twenty two images and I was working off the top of the tripod. Of course it's all leveled and I would overlap each one of them. I was pre careful is too, that they were about all the same. I did two rows, but each one of them is actually three images. There's sixty six images to make up this one print. So you can go crazy with this stuff and add to it. Now we have hdr. We have panorama as we have all of this going on at the same time. Don't make a mistake don't let anybody talk to you while you're doing this because you're going to forget what you're doing and you're gonna have to start all over again but digital has allowed us to do this so each one of these exposures that's your normal exposure that's your underexposed that's you're over exposed so I did that twenty one twenty one, twenty eleven and eleven twenty two times so we've got sixty six images here for that hdr so here's another combination panorama I I was at bouchard gardens which is up in victoria area and I wanted I wanted to have everything in focus in which you saw there was a little video of what was in front of me and I wanted the depth of field but I also wanted to have a panorama going across it so what I did was I stacked and we're going to talk about stacking as we go today but I took four separate images but each one of those is seventy eight images each to get the depth of field and then four images in order to get the panorama and when you combine all of that the combination of things you he started in stages here what you do is you put each one of these stacked images together first and then you come back once you have those as individual images now you then put the panorama together so you have to work in a no work flow, which is step by step by step and there's your finished result, I have everything sharp from here to there, and we've been able to open up the shadows a little bit, and, you know, somebody might look at this image and say, well, that's, what I saw that was nice, they don't understand all the work that you went through and the time that you spend in your computer and all the equipment that it takes to do something like this, but that's, just the way people look at images these days, we expect to be able to walk up to the wall, but our knows this close to it and see detail it used to be that you had to stay back a certain distance, it was certain size print, then you're expected to stay back a certain distance we have aerial panorama is in an aerial panorama is this is the standard of I'm in an airplane, small fixed wing airplane, airplane and little cessna and the windows open, if it all play, don't even waste your time if you're going to shoot through plexiglass, that scratched and everything, because you're gonna pay for this airplane and you're not going to get the images that you want, so with the window open, I'm very quick, they the pilot brings up the wing a little bit and I take a siri's of maybe five or six pictures very quickly, and I have I've moved a little bit, but it's not enough to make a difference and I could put together panorama is from the air and it's just as if I was sitting in one spot and doing a standard panorama on the ground. And you can see two different things that these air the sisters. This is my jefferson in the way in the background, these air, the sisters, this is broken top, and then this is not bachelor, which would been, which is the ski area now, here's. Another way of looking at it. This is as if we were a satellite, so we're flying along. We're now in an airplane were flying along along here and every five seconds I keep the camera point in the same direction and I take a picture another five seconds. I take a picture, and that five seconds meant that what I was seeing in the camera was overlapped by about fifty percent. And I did that all the way down until I got to mount bachelor to the end and the end result of what you see here is that every part of this photograph when you look at the photographs you're looking right at that area of the image as if you were across from it it's a little different and it's you know, when you look a tw uh your your maps on your computer's good uh google earth when you're looking down on these pictures everywhere, you look it's as if you were right there directly above it. Well, we're doing that same thing in that airplane and it's a little hard to put together, but it's obviously possible and you'll have to maybe use some other software's now, how do you use this for your own and not all of you are going to run up and get airplanes and that you know that they're not cheap so we can do this on the ground we can do aerial mapping on the ground this the house? This is a house I own some years ago and I had this landscaping done of the front in the landscape architect wanted tohave a good picture of it, I could have stayed in one spot shot down here, here, here, here and then way down there, but then those areas are distant, this areas close, that area is distant, so what we're going to do here is we're going to take a picture, move six feet, take a picture move six feet take a picture until you get all the way across that's a lot of pictures but they have to overlap by at least fifty percent on each one of these to get him to go together. So what you're essentially looking at is you're seeing the site you're looking down the driveway you're seeing the side of the house you're seeing the front of the house, you sing this part of the house and now you're looking down the next street so if you didn't know that this was done this way you would say ok that's that's pretty nice the architect was really happy with this but you know it's a kind of a mess when you get it done and you take out some of these other polls and things that are there and bring a little blue into the sky and everything but this is how you do aerial mapping on the ground so that technique that we would that google maps does is also something you can do if there's an area that you want to cover and it has a reason to have that it's just another technique is just another trick macro panorama is we could move the subject this is a peacock feather it's down underneath the camera the camera is on a copy stand looking straight down said it a couple of x magnification I take a picture and I have the subject where it can roll back and forth sort of so it can move I take a picture, move it, take a picture, move it, take a picture so from that standpoint, instead of just having one picture like this, we have a serious of pictures and it gives us a better idea of what the feather looked like. So it's it's another way of doing macron, we're going we're going toe use that to another degree when we start doing stacking and panorama is in macro and a little bit now we can move the camera what I've done here with this orchid I want to make a really big print so what I did is I took a one eighty macron I put it to extell extender behind it so I got further back and when I got further back I could shoot a series of shots without a lot of difference between the shots and I did it in three rows and when I got done and I notice that there's this there's a stick holding it up and all that kind of stuff and when you're done with it in the computer it all goes together everything is wonderfully sharp the amount of the size of the file makes a big print that you can walk right up to and see every single detail that is that is there so it's really quite nice now what if the action in front of you you're laughing you're laughing at me here in the sense that wow what the answer here is that you have friends with the same equipment that you do because you're going to need several of the same lens my friend was cannon in this case and they sent me several lenses and and I had several camera bodies that match so that was pretty fun but the point is that you have action going on in front of you and you want a panorama of it if you take a serious of shots it changes just in that time that you start here and end of their things have changed so flying birds be one thing waves going going across crossing so in some cases this was the seventy mark two and a seventy d which are both a pc sensors which are the one point six and night comes there would be a one point five sensor with the same lenses on them and in this case there were four hundred millimeters and by the time you taking the consideration for the size of the sensor that's six hundred forty millimeters that you're shooting with two cameras at a time the zahra two hundred millimeters and here's some of the examples I'm at a at the clam is wildlife refuges the birds were flying around and coming back and forth and I want all of it at one time I can shoot a single shot and crop it, and more so. Now, with fifty megapixels, we can probably get away with cropping a picture quite a bit. But this is how about two fifty megapixel cameras. You know, if you got another friend that has another fifty megapixel camera, but you could see how I could do a panorama and stop the action with the two hundred millimeter lenses and three of them. What we have here is a panorama, and the waves are all changing. This is newport bay area, down off the coast of oregon, and I saw this beautiful area all of these ways happening at the same time. But how do you capture that? You can't do syria's of single shots, because it's changing. So I put the three cameras together, and this is the end result again, friends with the same equipment as you.
Class Materials
Bonus Materials
Bonus Materials
Ratings and Reviews
Berus
I watched the entire class, and found it to be a very negative experience - in contrast to all of my other experiences with Creative Live, which had been very good. The problem with this class was the instructor. Mr. Lepp, rather than giving us practical, useful information, and techniques for approaching the subject of Outdoor Photography, instead used his time to show off his seemingly endless array of incredibly expensive and cutting edge gadgetry. For the first half hour or so, Mr. Lepp seemed pleasant and interesting, but it quickly became apparent that this class was NOT about anything relating to the art of outdoor photography. Instead, it was basically a seminar highlighting exotic equipment for the 1%. I have well over $25,000 of photographic equipment, but the arena in which Mr. Lepp plays begins somewhere around the $100,000 mark, and then requires a staggering ongoing budget for chartering helicopters, hiring guides, and constant upgrades to remain on the bleeding edge of gadgetry and accessories. From his gyroscopic mounts to his 40" printer, Mr. Lepp has it ALL and continues to spend, spend, spend. I admire his deep pockets, but I would have appreciated some real insight and technique and useful knowledge on actually getting great shots. (And I must say... Mr. Lepp's work... did not impress me to the degree that other teachers on CreativeLive have.) I believe those giving positive reviews here were more or less wowed by the sheer magnitude of his extensive, well-funded travels and his off-handed way of revealing the endless contraptions and combinations of gear he uses. The passion here is clearly about the gadgetry, and NOT about finding an original and creative voice in the arena of outdoor photography.
R. Hetrick
Amazing class! I particularly loved the macro and how to correctly take panoramic photos sections. George was not only a great teacher but he was super funny too. Would be happy to take any of his future classes.
user-f9ff5e
George really prepared a lot of information for his class. It is true, he does have a lot of expensive equipment and we may not be able to do some of the things he does with a smaller budget, but it is good incentive for us to plan for the future. He seemed to share new information constantly and stay focused and I was able to take a lot of notes. He talked about many kinds of equipment as well as software and websites he uses. I am pretty impressed that he is so up to date with recent technology. He especially loves macro/micro and stacking hundreds of images for minute focus on really large enlargements (for example, over 600 photos for one butterfly wing). That can get boring if you are not interested in doing that. I can take those tips and apply them to landscape photography though. I think it is more helpful for someone already doing outdoor photography and looking for new inspiration or new techniques as opposed to someone new to photography in general.