Lessons
Lesson Info
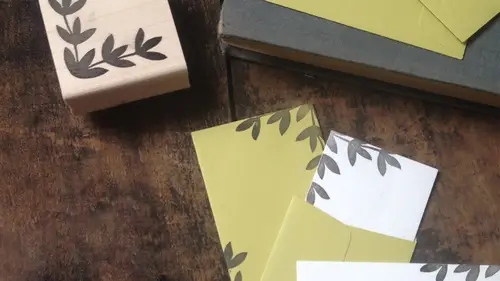
Carving Your Own Stamps
Should you slip on the transfer slips? Can you just wipe it off and start again? Wash it off, it's, just best to start over. You know you don't have to start over its sometimes you can flip it over. This is one of those designs where I could I could flip it over the rubber. It carves the same either way. Um, the graph it's. Not that easy to come off of the rubber completely. It's definitely smear, so you don't want to touch it, but to erase it backto like as if it was never there. Not really going to be that easy. One trick that I found is you can use a pigment in keypad. It's kind of got a stickiness to the pigment inc and that will help you like wife. The design right off the ink for some reason, helps wipe the graphite off. That brings up a good point because there's a lot of different rubbers out there that you can use for this one of your personal favorites. What's what's your recommendation, particularly for a beginner. For for beginning, for the different types of rubber over th...
e different types of rubber. Um, do you know, I think this carving rubber, this speedy carve is is awesome I mean that's what I used when I teach workshops to people and a lot of people have already you know used this linoleum and they they find right away that this is really user friendly and easy to start carving into but you know, the other thing is these materials are not super expensive it's not a big investment you can buy a small piece, bring it home see if it works if you don't like it, you know going get something else um so now that I got my designed transferred what I'm gonna do is I'm going to start with the number one you always start with the number one that's my outline tool that's again remember that's the smallest tool that I have and I'm going to start carving right along the outer edge of my design now the way that I'm holding my tool the way that you're going to want to hold your tool is a little bit different than how you would hold a pencil now if I'm holding a pencil sometimes people have two or three people fingers underneath their pencil and they hold um let a really steep angle um you don't want to do that with the carving tool because you're just going to gouge right into the rubber I found that if you could just have two fingers underneath the tool on dh hold it as flat as you can to the table that's the best way to carve a nice even depth down into the river because you don't want to be gouging down you're basically trying tio what I want is all this graph I this graphite designed to remain and all the pink areas to go down at an even death so it's a step process basically should you be applying to make sure you don't go to too deep you know, not too much I'm not really pressing that hard at all I'm kind of just you know I kind of set the blade in there and you'll notice my left hand also is kind of helping me guide my blade I'm not using you know I'm not trying to like bend my arm and some weird angle I'm not carving towards myself and I'm not lifting the stamp up and doing this you don't ever want tio leave it on the table and um and it's a step process so you know this doesn't have to be the first perfect the first time that you do it um you can refine and make it deeper as you go along you're moving the rubber rather than moving your hand yeah yeah I am especially for curves it makes it so much easier if I'm kind of just almost letting my my carving hand stay stationary and my left hand is really just helping kind of drive the rubber around um really helps with those curves and I'm carving away from the design as much as I can like right here in this leaf I need to kind of go in but I don't always want to be carving into my design because if by chance my hand slipped you know I'd slice that leaf right off so as much as you can try and carve away from the design so I pretty much got the outline done there so I don't know if we can get a good shot it's not super um deep just yet it's just an outline and is not perfect but I missed that little guy right there um the next step is I'm going to go to my number two so I'm now just going along the edge of the outline that I just carved I would say a little bit more pressure um and I'm widening and as well as deepening that outline now attorneys was asking in the chat room do you ever pinch your blades to get so you can vary the width? The talk was that really not a good idea? I don't um and their steel so I don't know I think you could even really do that. Um no, I mean, I think as far as I've my preference, every stamp that I've ever carved um is just with these tools these blades and I'm perfectly happy no complaints, I don't know um maybe maybe some manufacturer will come out with some exciting new blades and I'll have to try them out but I don't know I mean I guess if you're in tow well potentially was saying number one is the smallest and some people do want to even find a line was her perhaps using pliers and they could try and adjust it but maybe not a good idea you know I don't I don't really think it is yeah um it's far is getting a really fine line I mean even if the number one tool could carve a finer line, it might not even really print you know because once they got and it might just go solid on your paper anyway so there's my answer okay, now I'm hopping to the five and now that I have a nice um space in between the design and that carved line, I have pretty good confidence that I can go in head and go in there with the number five blade and just carve everything else away and again, you know, I'm not gouging in I'm just trying to kind of like set my blade in there and carve away and I can keep going over it to make it a little bit deeper if I not need tio um this is also one of those things as you're carving and you know you can see right now that it's not perfect um as it's as I'm finished with this number five tool I could probably go ahead and print my stamp um and if you want to do that like create a test print to see you can um what what will happen is that the the design will be there but then you also might have little bits of rubber around the design that print and that could just be kind of an aesthetic choice for you, you know, maybe you kind of like the fact that your hand your stamp looks a little bit more hand carved and had handcrafted and has those little bits of rubber I'm hanging on okay now, now that I've carved, you know, the main area away that I need to, I'm going to go ahead and trim a little bit more from my stamp here. You know, some people asked me how how close do you get to the design? You don't want to get right up next to it? I mean, maybe a quarter of an inch, an eighth of an inch I just personally don't don't really like a lot of scrap pieces of rubber to print so that's why I clean up these edges a cz best as I can now roberts officer very soft material and see these plays a very, very sharp if you are cutting and you just your hand goes a zit ruined can you start again? There's ever a way to correct mistakes yeah, you know, it kind of depends on how how bad the you know the mistake is if I I mean I've already made mistakes up here um and it's not the end of the world you know, if I carved into this little leaf right here and I made a little nick like that um can you guys see that hold that up right there? I'm just going to say that that leaf was smaller, you know and just go in there and try and kind of smooth that out nobody's ever going to know that this didn't look exactly like the template that you started with if it's really bad and you cut the whole leaf off or something um I don't know I say just try and work it into your design you know it's the's aren't store bought stamps is it's fine it's kind of the charm of it? Um so and of course, if it's not completely carved, you could flip it over. But if it's really if you carve down really far, you wouldn't want to flip it over you just probably start with a new piece, so at this point now that I've cut the edges off, um I have almost kind of like a lip that's uh raised see how it's kind of raised right there um, what I want to do so that that doesn't print I always bevel down my edges, so I'm going to just carve and create a nice bevel us is, like, reversed. I have to think of how to hold it so that you can see it. Uh, there we go. It just it doubles down, so I know that that won't print. I'm just gonna go ahead and clean up. He's, you guys getting excited to see how this prince is the anticipation killing you? Let me just ask a shipment of our students in the order. So is stamping some even done before? Or is this completely new to make my own tonight? Yeah, a little hard store it's a really, really fun and, you know, something it's funny, because sometimes people will well, I'll teach people how to do this, or they'll watch me do it. Um, and and then I just don't know how you could sit there and, you know, just do that and, like, it's kind of meditative, you really get into it. I mean, it's, just anything like knitting or, you know, cooking it's, just you set aside some time for it and my favorite time that to do it is early in the morning when you know the sun's coming up and it's kind of low and you know you've got like, really nice natural life by the way awesome light job and here you guys, this is really this is all I was really worried about the light because sometimes you know it's like overhead light can wash out um wash everything out and it's hard to see the shadows because you kind of do need to see the shadows to carve, so let me just reiterate what I'm doing right now I started with the one blade, then I moved to the two that I moved to the five how you finish your stamp is you just repeat those three steps and so I'm going back with the one and I'm just cleaning everything up and then I'm going to do the two again and then I'm going to do the five and then I'll be ready to print donna your question, I think yeah, sure regarding using your own images you said something about photography if you already use an image that you took is that, um, something you wouldn't do and photo shop and then just make it black and wave yeah, yeah, exactly you can use photo shop and I think there's ah ah feature on photo shop where you can turn ah photograph in I think you use like threshold or something or you post arise it s so you can really see the design translated into high contrast black and white or you know you can kind of do it by hand you can print out I mean, I've done that before where I just print out of an actual photocopy of a photograph and as I'm tracing it with my graphite pencil I kind of just decide, you know, do I want that to print? Do I not want to print you know, am I going to color it in or am I going to leave it solid so it's really fun especially with like faces and landscapes and things like that? Um it's it's a lot of fun and it becomes a whole new piece of artwork, you know, it's it's taken from a photograph, but then I kind of turned into something totally new, okay? So I'm kind of moving quickly here, you know, this is something that you'll figure out what you're comfortable with and how fast you want to move and things like that I start to get a little antsy because I'm like, I just want to see it brent but uh yeah, so now I don't know if you noticed that I quickly picked up my number two blade and I'm just kind of deepening anything that I feel like would still catch a bit of ink if I were to printed at this point and it looks like it's about done I'm just going to clean up the last little areas of I don't want anything I want everything that's carved away to pretty much be as smooth as possible I don't want any ripples or anything like that if those print that's fine but I'm trying to just kind of make it a smooth this possible another oh sorry go ahead take a quick question on these journeys was asking in the chat room teaser or use a magnifier when you're working on you can yeah if you had one of those like arm magna fires with a light on it I don't really like the light ones though because like I said it washes everything out you really can't see the shadows but definitely I mean use whatever is comfortable for you I don't know that you know I wear contacts but I'm sure at some point I'll have to start wearing sunglasses that will help me see better just do what I would do whatever is comfortable for you there's no um you know whatever works ok? So I'm pretty sure that this baby is going toe print pretty awesome so I'm just going to kind of clean that up with my fingers brush off a little bits of rubber I like to keep a little dust pan handy because he's this little these little bits of rubber end up everywhere, and you don't want that. Get into your ink pad and then print on to whatever you're printing. Ok, done.
Class Materials
bonus material with purchase
Ratings and Reviews
Erica Engdahl
I found this nugget of a course a really inspiring boost for me in my own stamp carving. Good information delivered in a calm and clear way by an engaging instructor. Worth the time and money!
Karen Ard
Super short class but had the info I needed to start! Thank you
Christina Althouse
Thank you Meaghan for the overview and demonstration for how to carve stamps. I am completely new to learning how to carve so this class was very helpful!