Set up your darkroom
Lesson 5 from: Intro to Screen PrintingErin Dollar
Set up your darkroom
Lesson 5 from: Intro to Screen PrintingErin Dollar
Lessons
Class Introduction
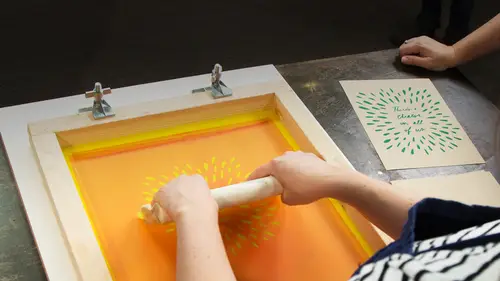
04:27 2Printing Process in Action
04:28 3Gather Materials & Setup Worktable
13:18 4Create Design with a Transparency
10:07 5Set up your darkroom
05:20 6Degrease your screen
07:26 7Coat the Screen with Emulsion
26:43 8Expose the Screen
09:13Lesson Info
Set up your darkroom
We've turned the green room here at CreativeLive into a makeshift darkroom. We tried to choose an area where we could really demonstrate the washout process, but this is really flexible based on what you have available in your home. I wanna just reiterate that this is absolutely a DIY process. You can do this is in almost any living situation. I've printed from my home studio for a really long time, and you can do this washout in a tub. It doesn't have to be this sort of bucket situation that we have going here, and any room that you want to set up for a darkroom is gonna work just fine. You can set up a closet, you can set up a bathroom, a bathroom is actually a really great area to do this because generally bathrooms tend to be somewhat light tight, or maybe they have a small window that you can cover with a black trash bag or something to block out that light just with a little bit of duct tape around the edge. You can seal up the bottom of doors so that light doesn't come in. And y...
ou will use these amazing photo-sensitive light bulbs that will keep your screens from not being exposed to regular, natural light. This is something that I include in that materials list that you get when you sign up for the class, so that you'll know where to purchase those. Setting up a proper darkroom is pretty complicated, but I'm actually gonna show you basically the most straight-forward way to do this from home. All this is really really easily achievable. So, we have a setup over here that we're gonna use to expose our screens. We're using just a little table lamp that we've put a UV light in. This is a UV light that's specifically for exposing silkscreen emulsion on screens, so you can find that on the materials list. If you don't have a light like this that can sort of hang over the surface of a table in the way that that one is, you can purchase a clamp light. This is something you can get at pretty much any hardware store or even some all-purpose sort of Home Depot places like that we'll have things like this. And this can get clamped onto a shelf if you have one, or maybe suspended from the ceiling. The idea here is that you would just screw in your UV bulb and suspend it about 12 inches from the surface of your screen that you're gonna be exposing. Today, we're gonna be using this little task lamp and that's gonna work perfectly for us. Some other things that you're gonna need in your darkroom, all of the chemicals that we're using today, the emulsion stripper that I showed you before. We're using some degreaser. This is gonna be something we're just about to jump into here, that'll clean our screen. These little scrub pads are a great thing to use just to get the surface of your screen clean. And then we have our photosensitive emulsion chemical. This is something that is on the materials list that you buy and then you would prepare at home. Essentially, emulsion is a, it almost feels like acrylic ink, or something kind of of that nature that we're going to mix in Diazo. This is the photosensitive chemical. I'm not gonna this on-camera because we have to have it ready to go ahead and coat our screens today. But essentially, you would fill this, the instructions for this particular kit are to fill this with a little bit of the distilled water that we used before. And then you kinda shake up the Diazo. The Diazo tends to be in a powdered form, so you shake it up and then you pour it into, you'll see when I open this up, this beautiful pink emulsion. It's really really a cool material and it's gonna make it so we can turn our blank screen that currently has nothing on it, you can see through that a little bit, turn that blank screen into a canvas that's gonna hold our artwork so that we print multiples of the design. So those are all the chemicals that we're gonna use. It's important to think about exposure to these chemicals. Almost everything that I include in the materials list is pretty safe to use, it's non-toxic, are things that are fine going down the drain. You don't really have to worry about the eco-friendly side. But I like to use some plain rubber gloves just to keep my hands clean as I'm working and to make sure I don't accidentally touch my face or do something like that while I have these chemicals handy. I have a couple of towels handy since we're working in a bathroom environment or in a sort of darkroom environment. You're gonna wanna have a towel just to keep things clean. You can also use the same sort of terry cloth towel to plug the light that might come in through the bottom of the door. Sometimes you can get that little sliver of light that could risk exposing these photosensitive chemicals to light. We don't wanna do that, we really wanna make sure we're just using these darkroom lights to make sure that this darkroom environment is gonna not accidentally expose any of these chemicals to light and process our screen before we're ready. Some other things that we're gonna need. I have a little wooden two by four block that's gonna aid in the process of coating our screen. I'll show exactly how that's gonna work in just a second. We have our scoop coater again, and this is an amazing tool and kind of the silk screen printer's like, I love that mine's literally gold, we treat these like gold, and I'll explain a little bit more of why. And just a little clean up ink card that we're gonna maybe use for a little bit of clean up.
Class Materials
Bonus Materials with Purchase
Free Downloads
Ratings and Reviews
Ariadny
Wow, that was a great course. Erin is clear, engaging and encouraging. I would loooove to see a follow up course with her that explores some of the more advanced silk screen printing techniques that she mentions in the last segment. Great job!
Marsha Law
Erin is such an outstanding instructor. She's just so confident with her topic and with her ability to communicate. This class helped me realize that I'm not ready yet to start screen printing, which in my opinion is just as important as recognizing when you are ready to try something.
Ana
Recently got my Creative Pass and I decided to explore the Creativelive library out of my usual fields of interest. Saw the title of the course and I said to myself - what is this? I literally had no idea about Screen Printing and that was actually the main reason I took the class. In just two hours I went from not having a clue to understanding the process and imagining me doing it :)) I'm not sure it will ever happen but I really enjoyed the class. Loved the style of teaching, very calm and confident, as well as the moderator's and students' questions which were filling up the gaps.
Student Work
Related Classes
Mixed Media Art