Lessons
Lesson Info
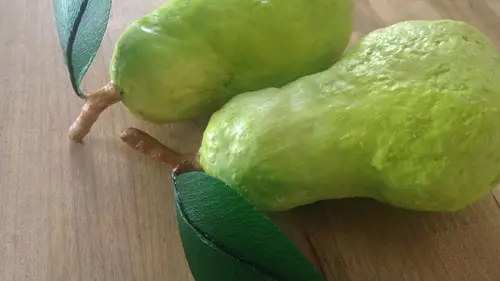
Paper Mache Fruit: Finishing
I'm going to come back to our paper mache a pair, I would say that he is about ninety percent, ninety seven percent dry if I had to, I was a betting man and I think it's perfectly fine if it's the tiniest bit damp before you dip it in again, it is a very similar process a zay had mentioned just keep an eye on the brush. I'm going to dip the end in here so that the last little bits of wax that were on it will melt down, but I'm simply going to plunge the pair down into the wax bath all the way in all the way out, kind of just hold it up a moment to let it drip off, and immediately you just get that satiny finish, which I think is so lovely, and it drives almost instantaneously. Um, again, you can dip these multiple times just in the few seconds this is completely dry. I love that all right? So let's, go ahead and I'm going to dip it just one more time when you're making your fruit, the bull that you're going to be melting your wax in has to be deep enough and there's a really great ques...
tion, we got lucky with the crock pot because it's a perfect shape for what we're working with. You can do it in a much more shallow pan you simply just need to employ sort of a rolling method and that's where your brush is going to come in really handy because you can kind of help the wax get up onto it and you can see if you get right up on top of some of my samples that I was not dipping these in a crock pot. I was doing it a much smaller sort of sauce pan at home, and so I was brushing on some of the ink and if you look really closely on some portions of these samples, you can see brush marks, but I honestly don't mind that I think it kind of looks charming, so all right, all of the excess wax is off and then I'm going to turn this guy upside down just came here for a moment. So now that we've done that madeleine of phyllis, if you want to come up with your pairs, well, go ahead. Yeah, one of those little the many warmers on we've bought a bigger one, it came for us and they do, but they're only around ten dollars they are saying I think this was it was under fifteen for sure on amazon, so they are very inexpensive and that is we did have a question earlier about whether or not it would be food safe because the cost is so low, maybe it's something you just want to set aside for having, you know, using for crafts, and in that way, you could just turn it off, allow the wax to set and hard in there, put the lid on to protect it from, you know, wax or from dust or anything and said it in your cabinet and revisited when you need it. So all right, so let's, we're going toe just dip to the ends of this in for a second to make sure that it's all melted and then whenever you'd like, yeah, it feels it feels like it's clumping up or forming, you know, some drips or bumps at the bottom that's really, what we use the brush for you do it honestly as many times as you'd like, I probably typically wouldn't go beyond three, but yeah, when they do once, okay, awesome. So if you feel like it's trying quickly enough, you just bring it back to your desk. Otherwise you're well to stick it in the in the front block. Does that ended up making it a little smooth around with her, like tio, I kind of like the wrong kid rough, excellent, beautiful, and you can just see it instantaneously satiny. Yeah, I think that makes it a little smoother and I like the way it does yeah, definitely it's a good point that phyllis brought up if you ladies want to come up having dipped it twice, it has built up a little bit more and it has kind of like smoothed out some of the the roughness of the surface that way originally saw in some of that paper machine chapman was asking if you ever needed to sand down the service that obviously you don't the wax is actually doing this moving for you. You know what you definitely can, though with the paper mache a pulpit takes some sandpaper to it and smooth down the surface that is only once it's completely dry if you were to attempt it, even at this early stage, it would just shred the paper mache a pope, but that is definitely ah very well known finishing technique and a lot of people to employ it beautiful what's the float it does want to float, yeah, it's that nearly hollow center that we've created perfects thank you, you're welcome and again, I do love this just because it is such a quick finishing process, and I really do think it adds something lovely to the exterior, so now once we've done this, what we want to do next is begin assembly and then we're going to cover our stem, and then we'll come back up and revisit the wax one more time in order to cover up the stem and make it all sort of uniformed finish. So I've got these heavy duty shears here, and I'm going to bring these around to share them, but you basically just want to pick the length of your stem. I typically tend to go right around an inch inch and a half on dh snip that off these guys, they're great! They're almost like these power shears that I got it, the crafting store, and I tend to use them a lot, even though they're not necessarily intended for wire. They cut it beautifully and you can see, like this thicker wire that we had intertwined together, it cut it very simply. So let me just hand those off to rachel and shall pass around. Now the first thing you want to dio once you have cut your step, I'm gonna bend mind a little bit is we're going to wrap our lief wire around the stem. So what I'm going to do is I'm gonna position my leaf just above the stem I'm probably going to leave maybe a quarter of an inch of stem between the leaf and the pair, and then we're going to wrap it around. My stem a couple of times it's going to extend up beyond where I cut it, but this is a thinner wire. You could just use your regular shears to snip that off. You can see what you've ended up with this sort of this spiral e, um shaped stem, but the belief is pretty secure on there, and what we're going to do next is we're going to take that strip of brown crepe paper that we cut, and we are going to just disguise all of the wires, both from the wires that we created our stem with and the wires from the stem of the leaf. So because this is a single color crepe paper, it doesn't necessarily matter which side you apply your glue to, but you do want to put a little bit on the end, and I would recommend for this variation dotting a little bit down at least a couple of inches it doesn't need to be completely covered, but we're going to be doing some odd angles with this one just to cover up all of the stem once you've got your glue on their typically, what I will do is I will start in this small portion between of the stem between the leaf and the base of the pair, and I'll just kind of begin to push it in there. Stretch it and wrap it around and I'll probably do twice between the leaf and the pair and then I'll start to wrap up then above the leaf around the stem and with this one you may actually find that you want to wrap it twice if it helps you get the look that you're wanting to achieve but I think the spiral nature of the stem that we created in combination with the crepe paper creates almost this gnarly would look which I kind of like now when you get up to the top rather than just snippet and glue it, we're going to dio a little technique where we're kind of kind of push it up a little bit push that paper over the top to kind of cover that nib and wrap it around it's a very imperfectly way of doing it but again, what we're replicating is some gnarly wood and perfection is not really the goal here, so I'm pressing it down I'm just continuing to wrap it, stretch it, pull it um and rapids much as you'd like if you want to wrap all the way to the end of the piece of crepe paper, you're more than welcome to if you feel like you have enough and you just want to stop snippet off and I'm in the end of my piece so I'm going tio just apply a little bit of glue and press it into place ladies, how are you feeling with the coverage? I know it's a little bit awkward because it's, not a straight line, doesn't feel like it's covering adequately. Okay, that is the nice thing about the crepe paper and the fact that does have those almost fabric like qualities it will bend in contour to almost any shape. All right, you can see I'm just kind of futzing with mine a little bit, pressing it in against the stem. Now, I am not happy with the color of the the brown as it is right now. Typically, I think if I were doing this and not dipping in wax, I would most likely go with a deeper maybe a chestnut color or something. But that's, the nice thing about adding the wax is you can see that it definitely deepens up that color a little bit, and it makes it at least to me, feel like it's a little bit more pro appropriate in the color palette with the pair in the leaf. So at this point, rather than plunging this back into the wax path, we're going to take a little bit more advantage of, um the brush here and again, I'm just sort of like dipping it in it's been sitting for just a few moments while we're working on the stem and it's hard and almost completely so I'm dipping a back in the hot wax, just allowing it to loosen up just a little bit, so I'm going to hold this horizontally over top of the wax bath and I'm just going to start to brush it on and it's really very quick process you do want to try and cover all of it because the wax does change the tone ality of the crepe paper color you want to make sure that you get everything covered otherwise it's going to end up looking a little bit blotchy. There we go super quick, so going to set that guy aside to dry and madeline phyllis, if you guys want to come up and get a little wax on the stems, it looks like hollywood. It looks like the sort of striations and barker something along those lines it's just funny how these materials can mimic natural materials. I love that excellent don't mind not a little chunky, I love it, though I kind of think that it's beautiful. Lastly, she's all the wax got a little chunky, but honestly, I don't mind that so much you can also because it is you can run your finger over it and kind of smooth that out a little bit in these early stages if it bothers you a lot you can take your toothpicks, scrape it off and we could go back and put a fresh coat on soup but honestly I think it looks great. Very nice I love it right phyllis trees is beautiful. I love it right get rachel and kathy appear perfect. Very nice and it is great that it drives so quickly alternates coatings that you could use for your paper mache a fruit would be more of a traditional shellac or a varnish. Oh, totally fine. He she had a little splash on a relief but I think it's all good it's it's gonna work I'm gonna cover this back up u s o alternate finishes for your finnish paper machine pieces if you don't want to do the wax, you could use a traditional shellac or varnish brush it on allow it to dry. It will obviously have a little bit different surface field to its the's. Definitely you can feel the way it's when you run your fingers over it's very silky and it's smooth the varnish will permeates the paper a little bit more but depending on whether you get a gloss or a satin that will dictate what type of finish you get on that so um possibilities there. Kind of endless with these guys. Honestly, when I was first talking with the producers about this particular segment, I had kind of envisioned us doing something of a topiary tree, and that was dreaming big and a little bit more involved than we had time for in the session. But this covers all of the exact same steps that we went through and really curious. If any of you at home have attempted. Thiss type of paper, pulp, mashaei, paper mache, a pulp method before get a little tongue tied there to create any sort of objects I know often you see in elementary schools, people will use the pulp method also for making mask, which is a very traditional thing to use it for.
Class Materials
bonus material with purchase
Ratings and Reviews
user-2d17c2
Must say that this was a very interesting class, well-structured, clear, real-time for much of it, and oddly soothing. Good voice from the instructor, good-humored class, and information that's transferrable to all sorts of fun projects. Don't stop once you've got the hang of it - can't wait to see what I'll make next. Recommended.
Student Work
Related Classes
Paper Craft Ideas