Lesson Info
4. Bringing in the New Background
Lessons
Introduction
00:59 2Lighting and Concept
02:07 3Cropping
02:38 4Bringing in the New Background
02:44 5Masking
32:02 6Creating Depth
07:27 7Painting Wet Rain on Costuming
28:45 8Creating Rain Drops
15:06Lesson Info
Bringing in the New Background
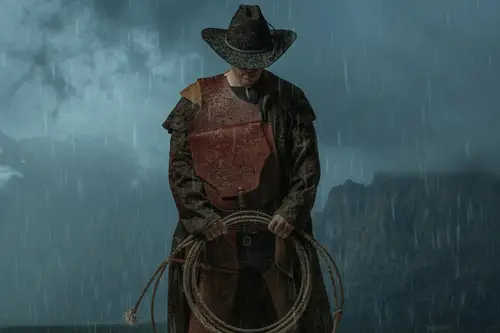
next up on our list, we're going to do a background replacement. So some people like to cut out the subject and put them on top of the background. I like to bring the background over. It's just an old habit. I've been doing it forever. Uh, so we're gonna go control or command A which is going to put these dance against around our image, our background image. This is an image that I shot in Nevada. Um, and in this, like, amazing storm. And I was like, This is going to be perfect for this background. So command a patroller command, see, and command shift V or control shift V on your keyboard. So that is a select all copy and paste. So most of us have been doing that for since the dawn of time. Next we're gonna do is transform this because this is a little bit bigger. So there's two things you can do here. Always keep in mind where the end result of your image is going to be. If this is gonna be on instagram, you can stretch the crap out of your images all day long, and it's probably gonn...
a be fine. If you're planning on printing your stuff really big, then I usually recommend not stretching the background too much. Although there's like printing technology is getting pretty narrowly good these days, but always be mindful that it does distort the pixels a little bit. But in this case here, I'm not planning on printing this guy too big. No billboards coming up. So control T or Command T. If you're a Mac user, we're just going to grab the corner here and pull this up. So depending which version of Photoshop you're running, if you want the ratio to stay the same, sometimes you have to hold shift on your keyboard. And you might be running a version of Photoshop where you don't have to hold shift to keep the defaults the same. So that is totally depend on which one you're running. So if you if you open this up and you just go control or command T and it does this and it doesn't hold any of your ratios, uh, then you're gonna have to hold t to keep it all the same. And then if it moves perfectly fine and you want to change the aspect ratio a little bit. Hold T. It's I don't know why they changed it. To be perfectly honest with you, I'm not really sure what happened there. Uh, yeah. So, command to your control. T we're gonna stretch this. Um, I like to stretch just a little bit beyond the image itself, because I like to make sure that I have made the mistake in the past where I was like, it's to the edge. And there was this little tiny line here on the right that I didn't notice until I printed the file. I felt awful. Um, so, yes, that's going to fit it to our background here. Um, the one thing I'm not sure about is this, like, horizontal line here, But I think I'm going to tackle that once I finished doing some masking
Class Materials
Bonus Materials with Purchase
Ratings and Reviews
Steve Vick
Great hands-on course. I love Renee's straight forward approach. This is the tool, this is what we are going doing with it and here's how to use it. For me it is the fastest and most practical way to learn. No fluff, no long-winded stories... just doing! In some of the other courses I viewed, I find myself skipping ahead waiting for them to get to the point. But this course has a great pace. I will certainly look for more from this teacher. Thank you.
Lukas Ujma
Greater, nice work! Semply and clever.
a Creativelive Student
I've been compositing for a few years, but masking a subject always presents its challenges. Renée gave a series of tips that were very helpful, including information about how to use the "burn" tool to enhance a mask. That's something I'd never done before. Can't wait to try it! The part of the lesson that explained how to make the subject look as though his clothes had been in the rain was also an eye-opener. The method is simple, but the results are outstanding. I had tried making my subjects look as though they had been rained on, but it never looked real. Now I know how to fix that!