Constellation Drawing
Lesson 6 from: Introduction to Figure Drawing: Essential Gesture & StructureAmy Wynne
Constellation Drawing
Lesson 6 from: Introduction to Figure Drawing: Essential Gesture & StructureAmy Wynne
Lesson Info
6. Constellation Drawing
Lessons
Lesson Info
Constellation Drawing
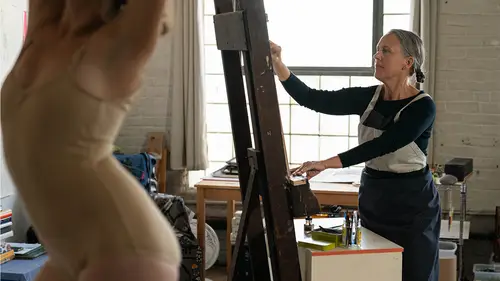
core gesture is an incredibly important part of the figure drawing process. Finding that energy. But another really important aspect which relates to the dynamics of the body is understanding and knowing where the joints are in space because that's really gonna help us establish a dynamic structure for the body. Looking at where one shoulder is as opposed to the other or where one knee is as opposed to the other in space. So in the this particular course we're going to be looking at where these points are in space. So in these diagrams which will be available to you in the resources for this class. These red dots on the figure, the shoulders, the elbows, the knees, the ankles, the toes. These red dots are the dots that we're going to be tracking in space with the next set of drawings we're gonna be doing which I like to call constellation drawings. So it's as if we're creating a constellation in the night sky of the stars, that would be the joints that would establish Sarah up in space...
. So in order to really show where those joints are beyond having these diagrams which you we will have for your reference, I'm gonna actually move over to the model stand and I'm going to highlight, literally highlight and name these joints with these dynamic fluorescent stickers and then Sarah's gonna have those stickers on her as she's modeling so we can track her in space. So first I'm gonna start high and move low. I'm gonna put a sticker on each shoulder joint and this one. Great. Um I know this might seem a little silly to be putting stickers on the model, but actually, even in graduate school, we did things like this and including actually like drawing on the model with permission, things like that. You know, people do that to help them um with with the drawing. So um and I'm gonna put, can you feel your hip points for me? Great. So I'm gonna put one on this hip point. Oh, I'm not gonna put hip point. Let's see if they will stay. Maybe maybe if they don't. That's ok. And then this hip point here, I'm just gonna press those in a little bit. Alright, and then I'm gonna go down to the knees, Are you ticklish? Okay, good. That would make me go wild if someone did that to me and then I'm gonna come down to the ankle joint here and here and maybe even come down to the just to track the toes. Why not? Great. And then coming up to the elbow joints on this side and we want to know side to side. You know where these points are in space and we can come down to the wrist and then the other side and then maybe just a little why not? Maybe that will if it doesn't stay no big deal. So now that we have Sarah's joints established in space with these bright stickers, they will serve as our guide in space. Just tracking them in relationship to each other. I really like using a basic ballpoint pen to do this because it really glides across the page. There's a sense of kind of slickness and what we're doing is we're tracking these constellation points were tracking these points on the page and then we're just gently connecting them to start to create a structure. Finding the asymmetry, finding where the joints, the access points in space are maybe even tweaking them towards being a little bit less symmetrical than they appear. Will again help our drawings have the sense of um energy and dynamism. So let's try some constellation drawings, tracking Sarah tracking these stickers in space and using a new tool, a ballpoint pen that most of you have probably in your homes um to give this a go. All right, let's give it a try. So Sarah's gonna take a pose. It's gonna be a little longer than the poses we've done. And I'm going to be just tracking the points right now. I'm gonna move from shoulder to shoulder. I'm just making little dots, like playing dot to dot. I'm going to go from the shoulder to the elbow to and then from the elbow to the wrist. I'm noticing it comes out a little further from the wrist to the finger and then I'm gonna come back to the wrist, over to the hip Point seeing this hip point here coming down to the opposite one, out to this knee again. I'm just sort of tracking these joints in space from the knee straight down to the ankle, out to the toe, right, and then coming across from this knee to the knee, across from it, right about here from that knee coming down to the ankle and then the toe. So I'm making this matrix, this this network of of dots that ultimately can be connected by light lines from this shoulder coming down to the inner elbow. I'm looking across from wrist and I can even take my pen and kind of like, oh, you know, the wrist on the left is a little lower than the wrist on the right. So I'm gonna make that dot here and then the dot for the finger there and then coming up, you know, to the head. We can just for now just make a gentle oval for that. And even maybe connect the sternum down to the region of the pelvis here. And this starts to create this drawing driven by relationships between the joint, shoulder to shoulder, elbow, to elbow, hip to hip, knee to knee, foot to foot. Let's try another configuration, another constellation for our night sky. Alright, so here again, I'm gonna start with the shoulder points. They're pretty even in this post. So I'm just shoulder point to shoulder point. I'm just playing really connect the dots from this shoulder out to this elbow point from the elbow, point down to the wrist and notice how I'm like, kind of lightly dragging the pen mark in between these points, because that sort of organically starts to go create the bone structure, What's happening beneath the skin, between the joints coming down from the wrist to the hip, from the hip to the knee, from the knee to the ankle, from the ankle to the toe, coming all the way down the body, and then coming down this side of the body from the shoulder to the inner elbow. And again, I'm looking across actually the inner elbow and the outer elbow are just about at the same height across in space. And then coming out to this wrist, point to that finger point coming down from the shoulder then to this hip, point out to the knee which is out a little further to the side, down to the ankle, and then out to the toe. And then again, we can just make a gentle oval for the head for now and then maybe just feel a little bit of what's going on in the spine. So, point to point dot to dot, Let's try another. Great, alright, so, in this one, I'm looking at the shoulders in space. This time, shoulder on the right is a little higher than the one on the left. So, I'm just gonna track that axis here a little bit, then coming down from this shoulder, point to the inner elbow to the wrist, I'm okay with the drawings overlapping each other coming out to this shoulder. And then I'm gonna just jump up to this wrist, point out to that elbow, noticing now that the elbow on the left is definitely higher than the elbow on the right. So thinking, oh, you know, that's higher than that, these points coming up and then coming down from this shoulder, we can come down, track down to this elbow, again, maybe to the outer hip to the knee. Just making these points in space down to the ankle, to the toe. And then from this hip to that hip out to this knee. And the beautiful thing that you can do to, if that's the knee point on the left is I can drop a plumb line which is a line that's perpendicular to the floor, almost like holding a piece of string. I could drop a string off of the elbow on the left and it actually hit the knee below it. So this sort of relationship between this elbow point and that knee, the knee is right under that elbow point. So again, that makes this sort of matrix the sort of map really of the body in space. So, I have all these points here and then I might sort of top it off with a simple oval for the head and again, sort of just play a little bit of whatever I might feel the spine is doing in between. So these constellation drawings are really an effort to map the body um in space and work in a way that has to do with tracking the structure as opposed to creating some kind of outer contour. I absolutely recommend trying this out. You could even work with skeleton images of skeletons and kind of look at where the joints are in space and play with that. But it's a really essential practice to know what the structure is doing, where the points are in relationship to each other and how to find the angles of the limbs as they connect between those points. So try constellation drawing. It's a quick practice. It's something you don't have to have stickers for. Um but certainly that's fun if you do. Um and I really know that this is going to create a really great dynamic structure to your drawings.
Class Materials
Bonus Materials with Purchase