Lessons
What is a Large Format Camera?
13:37 2Large Format Camera Types
07:42 3Basic Camera Elements
13:52 4Large Format Lenses
10:29 5Mounting Lenses
04:39 6Metering
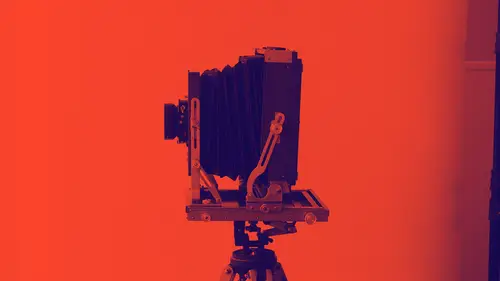
06:48 7Tripods
03:30 8Accessories
07:18Lesson Info
Accessories
You've got a camera, you've got a lens, you've got a tripod, so now we've got some accessories. This is the fun part of shopping, I think, but there's some things you absolutely need to have from the start. Let me just go ahead and take all of that magic stuff away. One of the first things you're gonna need is a dark cloth. So a dark cloth is the piece that goes over your head when you're behind the camera. So you're going to do this, goodbye, see you later, and then you're going to come back. What this does is, you need the element behind you to be dark enough so you're not getting reflection to come off, and you be able to clearly see the screen. So it's because of the reflective nature, and the amount of light that's coming in through the lens, you need a really dark environment to actually be able to see. So you're going to need a dark cloth. Now this one is pretty fancy. I have been out in the woods and have forgotten my dark cloths, and so I've actually had to use a t-shirt, I've...
had to use a coat, just anything to try to make it dark. This one is one I had custom made. I had a roommate who owed me a favor and had a sewing machine, so I went and bought, this is white Gore-Tex and black Gore-Tex, and she could do that. I couldn't sew a square. So she sewed that for me. So what I have now is a waterproof dark cloth. So if I'm standing out in the rain, which we have in the Pacific Northwest, this actually helps keep the camera dry and helps keep me dry. You will oftentimes see, in the corners here, you'll see people who'll put washers, or they'll put weights in the corner, and that helps the dark cloth stay down. I don't like to do that because if the wind picks up, and that whips around and hits the back of the camera, it can break the ground glass. Gina worries about getting hit in the head, but I've been hit in the head enough I don't worry about that. But yes, you'll see that weight, but I don't really like that in my own dark cloths. The other piece I like about this is it is hot. If you are in a humid, warm place, being under a dark cloth is hot and humid, and it can also cause the back of the ground glass to fog up. So that's one of the reasons I had the white put on there is it's more reflective, and it just makes it a little bit easier when I'm under there. You can buy commercial dark cloths, but really, just any kind of dark cloth that you can put around, an old curtain, a piece of fabric, you just want it to be as least see-through as possible. You're also going to need a focusing loupe. So a focusing loupe is gonna go on the ground glass that you're going to look through, and this is going to help make sure you have critical focus. They come in all sorts of shapes and sizes. The thing you want to avoid, if at all possible, is one like this that has a clear bottom. They're super cheap, they will work, but what they do is they let light come in from the edges, and it's a little bit harder to see the focus. So if you can get one that's solid dark, it's a little bit easier to focus with. The other piece is you don't want to get one more than about four or five power, at the most, because what happens then is the magnification becomes so strong, you're actually starting to focus on the imperfections in the glass, rather than the actual image, and you end up with an overly-focused image. I like to cheat, though, because I'm sort of in the easy, lazy department. So I got online and bought some very stylish glasses that make everything really out of focus. These are four power glasses, reading glasses. I don't use reading glasses, but they're the same strength as this, so I can kind of put them in here and then I can use them to actually check focus quickly. So this is just something, they were like $6.00. I got them at the drugstore. So this is a great way that I've found as a tip to go around the focusing glass. The other thing you're going to absolutely need is a cable release. These come in all sorts of shapes and sizes. It'll screw into the shutter so you can fire the actual shutter without touching the camera. The key thing to look for this is one: make sure you can plunge a bunch, really quickly without having it be a problem; and then the other one is, sometimes there'll be a lock on them, so you can plunge them down, and then you can lock them, and if you're doing a bulb setting, it keeps the plunger down and allows you to then use the bulb setting. So there it stays down, and then when you release that righty tighty, lefty loosey, there we go, it'll bring the plunger back up. Length-wise, it's not really critical that they be super long; somewhere between two and three inches. This just happened to be the length I bought the last time. I have one of these for each shutter, as well. So they just stay with the lens board, they stay with the lens, and they way I don't have to worry about losing one. They're relatively cheap in the grand scheme of things. But you definitely need one of these because any action where you're touching the camera is going to actually cause a vibration. So this little motion right here will, in fact, cause the camera to actually get enough vibration that it might cause the image to go out of focus. Couple other key things you may want: a small set of tools, Allen wrenches, some screwdrivers. Most of these cameras are old enough that they're basically just little tiny screw heads, so if something comes loose a small set of needlenose pliers and a small set of screwdrivers will get you fixed up. Allen wrenches, sometimes they have Allen points. A lens pen, so you can keep your lens clean. So I just like to use the little, just like I would for 35 millimeter. It has the little brush on one side, and the dust remover on the other, so I like to grab those. I go on ahead and use those as a tool, keep the lens clean if I'm out in the field. This little piece came with my camera, and it's just a little piece that does a flare guard. So basically attaches to the camera, and then into the hot shoe for the flash, and then this can be orientated actually deal with flare. I thought this was one of the dumbest things I'd ever seen, and I use this all the time to actually get rid of flare coming from overhead lights and things like that. You could easily engineer this, this came with the camera, the Ebony camera, but you could easily engineer one of these, so that kind of a nice little accessory as well. Three other things: if you're working in the studio and you're syncing, you're gonna need what's called a pc sync cable. So this will connect to your Pocket Wizard, it'll connect to any of your remote firing elements, and it basically has a little adapter here that's going to actually plug into there. You can also buy the tool, and it looks like a little metal thing here with little tip. What that does is it allows you to unbend the pc sync cable. So if you're going to get into this, and you're going to start doing studio work, one of these tools to fix your pc sync cable is a great thing to have, and they're like $2.00, $3.00 usually to find. But it'll keep you from having to replace cables over and over again, is the pin in there sometimes gets bent. You're gonna need a tape measure. Just a little pocket one. We're going to talk about why in a second. It has to do with figuring out bellows factors. And then finally, you're going to need some gaffer's tape. If, for some reason, your bellows gets damaged in the field, you can use gaffer's tape on the inside and outside and make something be light-tight.
Class Materials
Bonus Materials with Purchase
Ratings and Reviews
Donna
Daniel is an excellent teacher. His approach of teaching common mistakes and then explaining the proper way to do something is very helpful. The entire film series is excellent. I can't say I have a favorite over any of the others classes in the series. Each class covers great information. I learned photography back when digital didn't exist. Even after shooting film for so many years, I still learned some great tidbits from these classes. I highly recommend this series for anyone considering learning film or getting back into film.
Jennifer
Very detailed Large format Course. Learnt a lot. Great job Daniel. Would love see in the future an in depth course building on this but for studio portraits and camera movements for portraits in different situations explaining why. Happy i purchased this.
Art Majerus
Shooting medium format since the 70’s on Whidbey Isand. Recently bought a 4x5. This class helped me clarify all the little things needed to get going. Well presented. Thanks