Creating the Dye Vats
Lesson 2 from: Introduction to Shibori Indigo DyeingKaari Meng, French General
Creating the Dye Vats
Lesson 2 from: Introduction to Shibori Indigo DyeingKaari Meng, French General
Lessons
Introduction
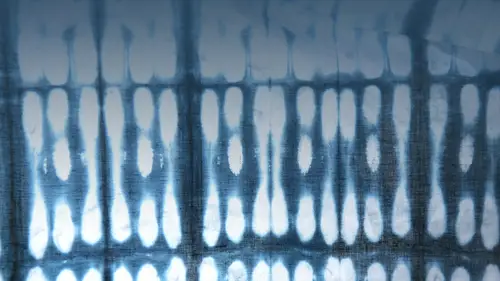
01:44 2Creating the Dye Vats
03:39 3Kumo Overview & Fabric Preparation
06:06 4Testing the Dye Vats
03:10 5Dipping & Rinsing the Cloth - Kumo
07:36 6Unwrapping the Cloth - Kumo
06:01 7Itajime Overview & Fabric Preparation
08:00 8Dipping & Rinsing the Cloth - Itajime
12:30Lesson Info
Creating the Dye Vats
A few things you want to keep in mind if you're working with any sort of natural dies, you want to make sure to cover your surface completely, and you want to make sure that the tools that you're working with wouldn't necessarily be used again in the kitchen. So any tools that you work with for your dive at should always be left separate and used on lee for your dive at. So I've got a three gallon bucket that I have filled with luke warm water, I've got my rubber gloves, I've got a stirring stick and then I've got the three elements that are going to make up the dive at so first we've got an indigo and I'm using what I call a teaching in to go, which is a sixty percent reduced in to go, and this will allow us to make the end ago that, and then to use it within the hour. I'm also going to be using a little bit of theocracy, and that will be the reducing agent and I'll be using some soda ash. The soda ash is used instead of a lie, which we don't want to use because that would be toxic in...
this vat, so with these three different elements, we'll be able to mix them in the water, then the vat will sit for approximately an hour. And after an hour we will test it on our fibers and make sure that it's ready to go okay, so to make up our indigo that I always wear rubber gloves because the indigo can get all over everything and anything so here's our lukewarm water we're going to go ahead and at the end ago and since I'm working on a three gallon approximate three gallon water vat our measurements will reflect this size so I'm adding five tablespoons I have been to go and I let that settle for a minute and then I'm going to go ahead and add four tablespoons of the theocracy and five tablespoons of the soda ash so once you've got your three elements into your bucket, you're going to take your stirring stick and you're going to slowly start stirring the sediment and try to get a good pace going here because really you want to mix all the elements so that they all dissolved in the water evenly and as you can see, I'm kind of circling right around the center and after I've got this motion going for a good minute I'm going to reverse the direction that I'm stirring and I'm going to drag this stick along the side of the bucket you've got to keep it all in there and as I reverse the stick you can see that this very small flower bloom has kind of formed in the center and this is what you want. You want the indigo flower bloom to start growing. And this will be collecting all the oxygen, taking it out of the that. So now that we've made are going to go that we're going to cover this and let it sit for about an hour.
Class Materials
Bonus with Purchase
Ratings and Reviews
user-458bc3
Kaari is such a great teacher! She outlines the basic process and steps in the indigo dye process, and encourages experimentation. I enjoyed hearing the traditional terminology, and learning more about how indigo dye interacts with different types of fabrics. Kaari provides lots of tips for adapting your process for different materials, so you always get a deep, rich blue dye. It really got me brainstorming: I started seeing all sorts of things around my house as potential resists for my dye projects! I love that indigo dye projects turn out different every time, and that this should be celebrated! As Kaari mentions, indigo dye projects have a wabi sabi aesthetic, and there really are no mistakes.
Gretchen
I came across this video a couple years ago and have been wanting to try it. The instructions and technique were very clear. We're going to include an eight year old in the project so it will be fun to see how creative she will get!
Annie Milligan
I found this class and this art form on a whim late at night and it has been such a fun project! I got the kit from French General and followed along with the videos and it couldn't have been easier. Everything is explained and demonstrated clearly and I can't wait to start the Intermediate class.
Student Work
Related Classes
Fabric Crafts