Demo: Rembrandt, Fill, Hair & Background Lights
Lesson 23 from: Introduction to Using Multiple FlashesMike Hagen
Demo: Rembrandt, Fill, Hair & Background Lights
Lesson 23 from: Introduction to Using Multiple FlashesMike Hagen
Lesson Info
23. Demo: Rembrandt, Fill, Hair & Background Lights
Lessons
Class Introduction
03:47 2Flash & Exposure Review
11:36 3Demo: Flashes Overview
11:54 4Demo: Manual Flash
12:16 5Triggering Methods Overview
15:39 6Demo: Mixing Brands of Triggers
17:45 7Demo: Defining Lights Overview
14:45 8What Modifier to Use with Multiple Flashes?
05:48Demo: Umbrellas
20:31 10Demo: Soft Boxes
12:57 11Demo: Octas
10:58 12Demo: Reflectors
05:47 13Demo: Beauty Dish
05:01 14Snoots & Grids Overview
04:15 15Demo: How to Setup Multiple Lights in the Studio
13:12 16Demo: Key & Hair/Rim Light Setup
04:59 17Demo: Key & Background Light Setup
07:53 18Demo: Clamshell Two Light Setup
14:39 19Demo: Key, Fill & Background Light Setup
17:42 20Demo: Side Lights & Background Light Setup
10:21 21Demo: Clamshell & Rim Light Setup
06:16 22Demo: Rembrandt, Fill & Hair Light Setup
07:13 23Demo: Rembrandt, Fill, Hair & Background Lights
20:40 24Demo: Clamshell, Rim, One Background Light
09:40 25Demo: How to Produce a Pure White Background
28:26 26Demo: Full-Length Portraits with Multiple Lights
07:28 27Demo: Still Life Example with Multiple Lights
10:22Lesson Info
Demo: Rembrandt, Fill, Hair & Background Lights
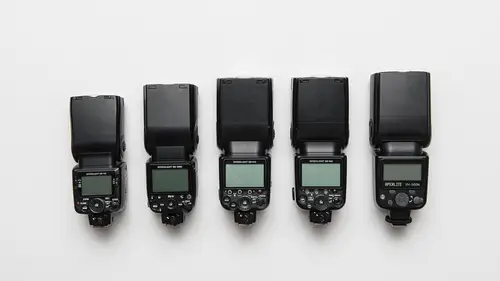
We're gonna go into a four and five light setup and what I'm gonna do is I'm gonna build a set, I'm basically gonna build two sets. One set is going to be, in fact I'll move to that slide, one set is going to be a Rembrandt look, so we'll do a Rembrandt with a fill-flash and then a hair light and then one background light. So we'll point that light at the background. Then we'll do basically the same thing but then I will add in two background lights and you'll see the difference that two lights makes in the overall photo. Then we'll try another scenario, a traditional clamshell lighting setup with a rim light and one background. And then we'll do a clamshell with a rim and two backgrounds lights. Cool? Cool. And we'll build it one-by-one so you guys can follow along. Pretty much all my settings are gonna be the same, they're gonna be F5, 6-ish, I'm gonna be ISO 400, I'm gonna be at 1/250th of a second and you already know kinda what the flash powers are gonna be, flash powers are gonna...
be around a 1/16th power, maybe down to a 1/32nd power. So those, all of those numbers that I just threw out there are gonna come second nature to you after you practice this a few days on your own. Let's get to it. Who wants to be our Rembrandt model? All right, we'll call you the Black Shirt Rembrandt. (laughing) And so for this one, yeah, we'll do that. Okay. All right, cool. The thing that made Rembrandt lighting special was that it was kinda of a window. He's used light from a window in his studios when he painted. So we're gonna simulate a window light and to that we need a really big light source. So for this I will use the big ole honkin' umbrella. The big, giant one, that I like using so much. And as I look at the scene I might actually end up having you point the other direction, we'll just see here. Actually yeah, let's have you rotate the chair 90, perfect. How's that? Perfect, love it. So there's this big ole umbrella. And these umbrella holders, actually they're angled and so if you put, this is a little minor detail, but if you put the umbrella in through the high side out and through the low side it makes arranging it a lot easier, over time. Okay, there we go. So this is going to be our key light and again, we're just simulating a big, giant window. It's a round window I guess, but this will work. It's just the softness that I really like and we will throw in this case, let's try the Aperlite, I haven't used this one today. So this one I bought off of, I think eBay or Amazon, I think I paid $40 for this one. And I've got it set for manual mode and then the power I'm gonna set the power to since that's the main light and a big umbrella, I'm gonna set that for 1/16th power. All right, turn on my wireless receiver here and I'll just do a quick test, make sure it fires and it does. It looks like my batteries are okay. Put that in here into the stand or into the lighting. Oh, and one other thing, this, I don't have a diffusion dome for this one so I'm just gonna pull out the diffusion panel, just to send the light out a little bit more into the giant umbrella. Put the little brass stud on there, put that in the light stand and I think we're good to go on that one. Okay, and just while I position this, just real briefly would you scoot forward a little bit? The chair? You, physically on the chair, yeah, just like that. Yeah, I kinda like that pose, are you comfortable with that pose? Okay. So there is our key light. Fill, let's use an Octa for the fill, just because we can and I'm gonna pull this thing pretty far away and I'm gonna set the power on this guy very low. Because from our previous experience it was a little bit too hot even at a 1/28th power. So it's still at 1/28th, and I've got the grid on the front of this because I don't want light spilling onto the backdrop, I want the light just to hit onto him. I don't want anything spilling over there from the fill. Okay, now we need to think about the hair light, so for the hair I'll just use this umbrella. You know what, I'm thinking the boom might be a little bit better for the hair light because then I can have the boom arm a little bit more offset. In fact I'll do it over this way just so you all can see it with all the cameras in the room. So this is called a C-stand and I've got a boom arm on the C-stand and you can see what that allows me to do is keep the stand way over here but then bring in the boom behind his head and positioning this, we'll go something about there. And C-stands are really durable and they don't sag, like after you set it it doesn't like go, brr, brr, brr, and sag down, we've seen that happen in a few of my different lights today. Oh, yeah, we'll grab another one over here. So for this one, this is my Nikon SB and we'll do this over here so you can see it. So this one I'm gonna set for manual power and since it is a rim light as we've done before we want that rim light to generally be a little bit brighter so we're gonna put this guy at 1/8th power. We'll start at 1/8th. Might end up going to 1/4, we'll see. And after all that hard work of setting up my boom arm I have to bring it back down. And if I recall this one was (laughing) this one was Too Tall Jones, it's all right, I might be able to fit it in there by reducing the head heighth a little bit and that's not the case, so I'm gonna use my friend, gaff tape. I was gonna have someone hold it, but nah, for this I'll use the gaff tape, hey. There's a box in there. Okay, thank you. So I did this other class for Creative Live called DIY Home Studio. We used a lot of gaff tape in that class. (crew laughing) For this case if I ended up buying a beauty dish or something like this, I would make sure that it fit perfectly before actually using it in a scenario like this, but today's a little bit of an experiment anyways. Okay, that's in there, I turned it on and I turned my little remote on and life is good, yep. And we fire it and it looks like it's working just fine. I'll raise it back up. I already a dropped a camera today, hopefully the flash doesn't fall. So there's three, let's start with those three. Let's take a picture and let's just see where we're at photographically. Okay, fire up the camera. And it is connected. Okay, here we go, one, two, (camera flashing) three. Let's see what that looks like. Oh, okay cool. It's looking pretty good. We want the Rembrandt effect, right? Well, we're not quite getting the Rembrandt effect and the reason why is because his face is turned a little bit away from the camera. So for the next one I'm just gonna leave everything where it's at but I'm just gonna have you bring your nose around a little bit more towards me. Yeah, right there, perfect. Now we've gotta start thinking about that background. What do we want to do with the background? Well let's make that background white, a little bit brighter, okay. So I'm just gonna get two flashes and not gonna really put a whole lot of modification on the flashes, I think I'll just shoot 'em straight and lets see what kind of coverage we get with those two background flashes. So I'm gonna pull this umbrella off, put that on the floor over here, and move this about like here, something like that. And I'm just approximating where it's gonna throw behind his head. Not exactly sure where it's gonna go, pull my wide diffusion panel out. I'm at 1/16th power, we'll leave it there. And then my last setting, my last one, is this stand, cool. So one, two, three, four, and my fifth flash is hiding somewhere. Does anyone see it? Oh, it's on my soft-box. Okay, and this one I'll also set up to be 1/16th power. Okay, and I'll take my diffusion dome off and I'll set this one to be almost the same with the diffusion panel out. I'll reduce the heighth a little bit so it's about the same heighth as that one. And we're at 1/16th, so I'll set that for 1/16th power. And let's see where we fall. So now that I've got two background lights, the goal is that background's gonna be evenly illuminated, equal from side-to-side. Okay, bring your nose towards me a little bit, too much, right there. Might have you turn it in a little more, there you go. (camera flashing) And I'm gonna reframe it, get that awesome necklace you have. Ah, cool, so this is what we might call a high-key Rembrandt, right with that background, nice and bright. So we've got a little bit of a shading there, shading effect on the side of his face. You know we shot earlier with that black backdrop, you know and I liked the look of the black backdrop. I'm not sure that the Rembrandt look in this scenario with your shirt works as well with a white backdrop, but at least you see kinda what that looks like. Notice the backdrop is white, it's pure white and in about, I think in two or three tutorials I'm gonna show you exactly how I do that. But for now just notice it is nice and bright. We have our rim light for his shoulders and you can barely see it on the top of his left shoulder or on the screen-right, you see that fold of his black shirt, you can kind of see the lighting coming off of that fold. I'm might actually do a little bit brighter there on that, on his hair light. Let's turn off one light 'cause I just realized what I was gonna do is I was gonna do one light, I'm sorry four lights and then five lights. So I'll turn off one of those two lights and let's just see what that looks like. Okay, so I turned off the left light. Shoot the same picture. Cool, one, two, three. (camera flashing) Ah, yeah, now that really shows how two lights for the background impact the scene, dramatically. We'll put these two up side-by-side. In my opinion it's, I don't think you can have a full studio without two back lights and you really need to have those two so you can even lighting across the board in the back. I'm not saying that the photo on the left is bad, sometimes we like to have that wash of brightness, from brighter to darker. But five lights gives you the ultimate in flexibility. We can also with this, because we have five lights we can mix and match how those lights are working for the background. You know we can do one high, one low, one colored, like one with a red gel and one with a blue gel, you can do all sorts of fun things with that backdrop. Okay, there's five lights with a Rembrandt light setup. Any questions? From you all, nope, we're good? Oh, question from Kenna? Yeah, I'm just going through, we did have a couple questions and I know you may have talked to this earlier, but could you again, explain why you don't use a light meter and maybe that gets even more complicated as you get up to four or five lights and versus doing the trial-and-error or using your experience? Yeah, it's a good question. I started out, I used a light meter all the time and maybe there's just a little bit of experience going on here. I tend not to use a light meter as much anymore because we have digital. When I started out I was using film and you really didn't know, you had know idea if your lighting was close or not close. So you had to use a handheld light meter. With digital these days and because I've been shooting so much I get a really good feel for overall exposure. You don't necessarily have to have a light meter. The important thing is you don't want to blow out any highlights, like that background. You don't want that background blinking at you. So a lot of times in my photography when I'm shooting on set I set my camera's feedback screen, LCD, I set it for the blinky's or the highlights screen that way I can see if anything's blown out. Like on the top of the person's head or their hair or their shoulders, so that's really what I'm doing. To answer the question more specifically, are light meters valuable? Oh yeah, they're valuable, in fact light meters make guessing the brightness like we've been doing today a thing of the past. You can literally hold a light meter up to the subject, click it and it'll say F8 and then on this side of the face it'll say, you know F2.8. And you're like oh, right there I see that's three stops of difference between those two. And then my background, oh that's at F11, so that's one stop brighter than F8. I'm just throwing these numbers out there kind of rapidly but a light meter will tell you right away, what your ratios are. Whereas what I'm doing today is just more, I would say more democratized. I think everybody can look at their photo on the back of their camera and go, yeah, that feels a little bit bright, so I'll darken it down. Yeah. Awesome, and one more question for a couple of people who may not have been with us from the beginning, could you tell us again, why ISO 400, especially when you're using that kind of 1/16th power, I know you seemed to have stayed with these throughout the whole day, so remind us again why? So a few answers to that question. Seven, nine years ago I would not have shot ISO with my digital cameras. I would have stayed at ISO 200 or even 100. Nowadays with our new cameras, the new Cannons, Nikons, Sonys, Fujis, you can shoot ISO 800, and still get creamy, smooth files. So I'm not afraid of ISO 400, that's my first answer. The second reason and maybe the more important reason is because ISO let's me keep my flashes at about a 1/16th power, so why a 1/16th? You all know this, I've got 1/8th, 1/ and full power above that. Well guess what happens when you start shooting at full power and half power? It takes a long time for those flashes to recharge. In other words, you take a picture and you have to wait three or four seconds for the flash to go back to full charge so you can take another picture. Working in the studio environment you want to get these fleeting moments, this little smile that just disappears so quickly so I'm often shooting pretty rapidly. Today I haven't been shooting rapidly because we have to wait for the stuff to download into the computer and we can talk about it. But typically I like my flashes to recycle (fingers snapping) quick. That's a 1/16th power, that's a 1/32nd power and that's what ISO 400 gives me. That's awesome, thank you for bringing that up because another question that had come in from Gailey Cowart was could you at some point talk about what control we might have over the recycle times and anything else to avoid overheating the unit? Okay, cool. I love your question because it allows me to talk about more toys, just real quick, I'm gonna make sure my camera's fastened down and it is. I'm gonna run over here, grab a toy and then I'll come back to the other side. Where is that thing? There it is. Okay. This one here. So this is an accessory battery pack, basically and it plugs into the front of your Nikon or Cannon or Sony camera. You have to just get the right connector here on the end and this basically allows you to put in six, double A batteries, in addition to the four that are in your speed light. So now you've got an equivalent of 10 batteries, the oomph and the power of 10 batteries recharging that flash and it cuts the recycle time in half or less. So the upside is, yeah you can just shoot and shoot and shoot, the downside is that you overheat your flashes and so one of the issues with the early Nikon flashes and maybe even the Cannon flashes is that they would overheat. In fact I had one gal who went to one of my workshops, years ago, she got this pack and it was a lithium powered battery pack and it could recycle her flash at full power at something like six frames per second. So she was photographing golfers and photographing their swing under studio lights. So she'd go, da, da, da, da, da, and she'd get done with the session and her flash would be fried and she'd send it back to Nikon for repair and Nikon would go, ah, I think you did something that you weren't supposed to do. So the downside is you can actually damage your flashes by recycling them too quickly. The higher-end Nikons and Cannons actually have an internal thermometer and it will shut down the flash, prevent the flash from working if it gets too hot. The newest Nikon flash, the SB actually has, it's not an internal fan, but it has internal ducting to cool it down and to let heat leave the interior of the flash. So hopefully that answers her question. Just real quick, Nikon and Cannon sell these. I forget the exact model number but I found this on Amazon for like $30, made by a company called Neewer, N-E-E-W-E-R and it's worked fine for me. I love Nikon products and I buy lots of Nikon stuff and I think Nikon is the best, but if you're looking to get into this relatively cheaply, (tapping case) you can't knock 30 bucks. And so far it hasn't broken anything that I've been using. (laughing) I could keep going on and on about this but I think that's enough for now. Cool, thank you.
Class Materials
Bonus Materials with RSVP
Bonus Materials with Purchase
Ratings and Reviews
Marty Walker
This is really a fantastic class and at an even fantastic-er price. Well worth the money, and is a great help. The instructor does a very good job explaining the methods, light shapers, and effects they create. One of my favorite videos!
Jeph DeLorme
Mike Hagen does a great job of presenting what could be a complicated process in a way that makes it easy to understand and implement. Not only does he make it easy to follow along, he presents alternative solutions that don't break the budget. I have viewed several instructors and various classes at Creative Live and this would definitely be one of my favorites. I have to say, this class would be a bargain at 10x the price!
Tim Stapenhurst
What can I say about this class? Mike is great- not only does he give a thorough break down of all the equipment one could need but he also includes wide variety of price options for those just getting started. Aside from his thorough knowledge of gear, Mike provides an excellent and easy to follow bread down of how to build up the light for your subject. His lesson plan is super easy to follow and very concise as he slowly builds up from using 2 lights to 5 lights. He also demonstrate what I think is a much needed trait in a photographer and that is being cool under pressure, dealing with issues and not getting rattled and simply going back to the basics. Creative Live Nailed it with this class
Student Work
Related Classes
Lighting