Lessons
Class Introduction
03:47 2Flash & Exposure Review
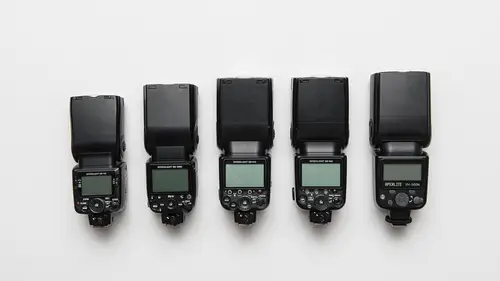
11:36 3Demo: Flashes Overview
11:54 4Demo: Manual Flash
12:16 5Triggering Methods Overview
15:39 6Demo: Mixing Brands of Triggers
17:45 7Demo: Defining Lights Overview
14:45 8What Modifier to Use with Multiple Flashes?
05:48Demo: Umbrellas
20:31 10Demo: Soft Boxes
12:57 11Demo: Octas
10:58 12Demo: Reflectors
05:47 13Demo: Beauty Dish
05:01 14Snoots & Grids Overview
04:15 15Demo: How to Setup Multiple Lights in the Studio
13:12 16Demo: Key & Hair/Rim Light Setup
04:59 17Demo: Key & Background Light Setup
07:53 18Demo: Clamshell Two Light Setup
14:39 19Demo: Key, Fill & Background Light Setup
17:42 20Demo: Side Lights & Background Light Setup
10:21 21Demo: Clamshell & Rim Light Setup
06:16 22Demo: Rembrandt, Fill & Hair Light Setup
07:13 23Demo: Rembrandt, Fill, Hair & Background Lights
20:40 24Demo: Clamshell, Rim, One Background Light
09:40 25Demo: How to Produce a Pure White Background
28:26 26Demo: Full-Length Portraits with Multiple Lights
07:28 27Demo: Still Life Example with Multiple Lights
10:22Lesson Info
Demo: Soft Boxes
Let's move on to the next one. To the next modifier which are soft boxes. As much as I like umbrellas, I really like soft boxes. Soft boxes are fantastic. They work really well. What soft boxes do for us is they allow us to have full control over the direction of the light, okay? I think of umbrellas more like light grenades, just (imitating explosion), light goes everywhere. So if you set up an umbrella... I'm gonna walk over this way. If you set up an umbrella near the background, that light's gonna spill all over the background. And it could impact your background lights. If you use gels or colors, it could wash those out. If the light coming from your umbrella is a different color, it can mess stuff up. So umbrellas are wonderful, but they have their limitations, and that is you can't really control the direction. Soft boxes, on the other hand, pull this guy out, soft boxes allow full control over where that light goes. So you can see most soft boxes have this lip on them, and what...
that does is prevents light from spilling out basically past this position. So see that, now that light's gonna go here. It isn't gonna go there. Soft boxes also you can shoot horizontally, you can shoot vertically, and one of the things that photographers like controlling is what does it look like in the eye. What does the catch light look like in that person's eye. Soft boxes produce this nice square catch light. Kind of you know that Disneyland, ah, feeling, it's wonderful. So, bigger is better. This is a Profoto soft box. It's a two foot by three foot, and again, bigger is better. I've got another soft box over there, it's about a one by two foot, and I think that's just too small. If you're gonna do a soft box, and you're gonna spend the money to get a soft box, get a two foot by three foot as your minimum size, okay? You all have done this. Everyone watching today has done this, You've gone online, and you're like, ooh, hey, there's a soft box and it's only $62 dollars! What a great price for this soft box, but it's only this big, you know. It's for like photographing action figures, your Star Wars or Star Trek action figures. So, if you're photographing people or dogs-sized objects, you really need something about that big. Let's see, what else do I need to say about soft boxes real quick? Of course, there's different brands. I buy Profoto, this is literally mine. CreativeLive has a bunch of Profoto gear, too. But why do a lot of pros use Profoto? Because it's top-notch. It's not gonna break down. I'm gonna own this thing for the next 20 years, and it's gonna work well. These higher end soft boxes have these heat vent flaps, so you can work with hot lights. You can work with cool lights. They're just eminently useful. Let's talk about the way that that's connected. This is called a speed light speed ring, okay? Speed ring, you'll hear that term speed ring. Well, the speed ring is this black piece in here, and that's what these metal stays go into, okay? And then speed ring, you know what, I actually don't know the lineage of the term speed ring. I'm gonna guess because it's speedy, and you can just change things around very quickly, horizontal to vertical. I think Profotos implemented this very well, but lots of other companies, like Westcot and Speedotron, there's lots of other companies that make great soft box products. But the key here, again, is the speed light connection. So I've got a little cold shoe, I can put my speed light right in there, and we're good to go. This system could also, I could take the soft box off, and I could also put it on my studio lights. So, as I buy gear, and as you guys buy gear, I want you to think about how can I use this with other types of lighting equipment as well. So this works with my studio and my little flashes. I think it's time to take a picture. Alright, can I take a picture of you? Cool. Alright, so grab a seat on the stool. Move this back. There we go. And I'm gonna pull my little SB 9 10 out. I still have the radio trigger on there, and I'm just gonna put that into the cold shoe. What I'm gonna talk about now goes back to a question someone from the internet had, and that is, what do we do with zoom? You know, how do we adjust the zoom on the flash? Well, I'm gonna put it in there without the diffusion dome first. And I'm gonna turn this towards your camera. And let's see if we can see the... In the studio audience we can see this. See how it's really not covering the upper area and the lower area, so I'm losing the effectiveness of the two foot by three foot surface area. So I'm gonna put this back on there to get more diffusion inside to spread the light out outside. And you'll have to trust me on that one. She didn't get to watch. Okay, there we go, and we should get more coverage now, and we sure do. It's significantly... I saw his face, he's like, ooh, yeah, that's a lot more. It matters. Now, one of the things about diffusing the light, you know, we were using umbrellas earlier, now we're using the soft boxes, is they do suck up a lot more energy from the flash, so maybe I was at an eighth power before, I may need to bump up at least one more stop here. We'll see what it turns out. I won't make any power settings, yet, but I'm just anticipating where I might need to go here for the next shot. You ready? Yep. Okay, she is ready. So, she is on the stool here, and I want, again, the flash to be a little bit above her nose, basically, a little bit above her head, and kind of pointed down to her, about like this. I'm gonna raise it up a little bit there. And what I do when I'm positioning this is I imagine a shaft just coming right out of the middle of this and trying to get that shaft to kind of hit the middle of her face. Sounds aggressive, doesn't it? But I want that whole surface area shining on her face, as opposed to that or this or pulled off to the side. I mean, we can do things like that. Sometimes it's important. Sometimes it looks good to do that. But, in general, you want the whole surface area of the diffuser to be pointed at the subject, okay. And close, notice how close it is? It kinda feels uncomfortable. In fact, as I'm looking at her, here's what I see her doing. She's like, what is this shining at me? It won't take her long and it will kind of disappear and fade away from her consciousness, but close counts when you're doing studio photography. It really does. Alright, let's check and make sure that we're connected, and we are. No changes, I'm still at ISO 400. I'm still at F 5 6. I'm still at one 250th of a second, and my flash is at 1/8 power minus 2/3. No changes. Here we go, one, two, three (camera shutter clicking). It fired, you're already in the computer. That's pretty good, nice. Look at the catch light in her eyes, just really nice, just such a beautiful... I love that look. I love that big catch light. I would say the photo overall is a little bit bright, though, so I've got two, well I've got a bunch of ways I can adjust this, but one way that I think the easiest way is just to reduce the power on the flash. But what I was gonna say is, I could also pull this back a little bit. I keep the power the same, but I can pull this back. Well, what happens when I pull it back? I lose a little bit of the nice, soft surface area. So I want to keep it close, and I'm just gonna reduce the power here. I'm gonna go down to, I'm gonna drop it about one full stop. So I'm down to 1/16 power, minus 2/3. Here we go, nice smile, that looked great. And we look at that image, super. Nice catch lights, just really nice feel on the overall scene. Some light, you can see, is still spilling over to the background, you know, so, it's a white backdrop, but it's turning out a little bit gray. And we're gonna talk about how close should the person be to that backdrop. So that's a soft box. We can also shoot with a smaller soft box. It will give a similar effect, but I think in the interest of time, I'm gonna move us on to the next modifier. Kim, anything from the internet land on soft boxes? Well, we did have a question from Elle Mu, who said, could I just pull out that diffusion panel on the flash head, and still get that spread of light in the soft box panel itself? Is it different than... Most of our soft boxes come with another diffusion panel, a second diffusion panel, and that panel goes inside, so we have the front diffusion panel here, and then a lot of them have a second diffusion panel inside, and they connect with these little clippies. That will also work, absolutely that will work. The downside to using that is that it does absorb more light. So, once you diffuse once, I often tell people, you don't often have to diffuse the diffusion. So if you put three diffusion points in there, that would not make sense. If you don't have that diffusion cap for the flash, then by all means, use the interior, the one that goes to the interior of the soft box. Super question. Just another quick question. Is there a limit to the size of soft box that you can use when you're just using speed lights? Do they have enough power for all sizes? Ah, love the question because I remember thinking through that question in my early photo career, like, oh, I don't have the money to spend on Profotos and all I've got are these little flashes. The answer is absolutely they have enough power to fill these giant diffusion sources. You know, I just showed you a six foot umbrella, and it works just fine. But to her point, his point, her point, I want to show you two products, okay? I'm gonna go grab it and I'll come right back here. These are very cool. So these are multiple flash attachments for umbrellas and soft boxes. This is a triple mount, and so what that does is it allows you to connect actually three flashes, you know, one, two, three, and then it goes down here. It actually screws on to the top of your light stand or whatever. So if you're little flash, you're finding it's a little bit underpowered, for example, let's say you're outside and you're trying to shoot on a sunny day and you're like, argh, I need more power, givin' her all she's got! Well, you'd use this and you can put three on there. There's another company out there that makes a four flash connector. This is made by a company called Photoflex, and it has a two flash connector, and then you can see here, you can actually put the umbrella through that little hole there on top. So you can get around the fact that these little flashes don't have a lot of power by ganging them together. And if you don't want to spend the money on this, there are two other great products that I recommend. Rubber bands and gaff tape. I use them all the time. I'll tape flashes together and just cram them into a light modifier, worked great.
Class Materials
Bonus Materials with RSVP
Bonus Materials with Purchase
Ratings and Reviews
Marty Walker
This is really a fantastic class and at an even fantastic-er price. Well worth the money, and is a great help. The instructor does a very good job explaining the methods, light shapers, and effects they create. One of my favorite videos!
Jeph DeLorme
Mike Hagen does a great job of presenting what could be a complicated process in a way that makes it easy to understand and implement. Not only does he make it easy to follow along, he presents alternative solutions that don't break the budget. I have viewed several instructors and various classes at Creative Live and this would definitely be one of my favorites. I have to say, this class would be a bargain at 10x the price!
Tim Stapenhurst
What can I say about this class? Mike is great- not only does he give a thorough break down of all the equipment one could need but he also includes wide variety of price options for those just getting started. Aside from his thorough knowledge of gear, Mike provides an excellent and easy to follow bread down of how to build up the light for your subject. His lesson plan is super easy to follow and very concise as he slowly builds up from using 2 lights to 5 lights. He also demonstrate what I think is a much needed trait in a photographer and that is being cool under pressure, dealing with issues and not getting rattled and simply going back to the basics. Creative Live Nailed it with this class
Student Work
Related Classes
Lighting